WebInspect
With the exponential increase in internet usage, companies around the world are now obsessed about having a web application of their own which would provide all the functionalities to their users with a single click. In this quest for providing the customers with single click solutions, all the sensitive data is shifted on to a server which is then accessed by a web application. In most of the scenarios, web applications have direct access to the backend database and thus control valuable data. With a simple well crafted malicious payload a hacker can now get all the information from database. So it's crucial that the web applications need to be secure enough to handle the attacks.

What should you learn next?
Securing Web applications
It's now apparent that securing web applications is essential for the companies to be in business. The real question is how it can be achieved. Below are some of the checks that are in place to ensure that security holes in the web application are identified:
- Threat Modeling deals with identifying threats, attacks, vulnerabilities, and countermeasures for your application in the design phase.
- Security Code Reviews come into picture at the end of development phase. The entire code is inspected to find vulnerabilities.
- Manual Penetration Testing is done after the application is deployed in some environment. The application is attacked and assessed for vulnerabilities.
- Automated Vulnerability Scanners are the tools which aid Penetration testers by identifying the vulnerabilities present.
WebInspect is one of the most widely used automated vulnerability scanners in the market today. It helps us to identify vulnerabilities present in the web application by taking necessary input from us. IBM Appscan Standard Edition, Acunetix Scanner, Burp scanner, Nikto are the other vulnerability scanners that are in place. For the rest of this article I will be focusing on using WebInspect to identify security vulnerabilities.
WebInspect
WebInspect is a web application security scanning tool offered by HP. It helps the security professionals to assess the potential security flaws in the web application. WebInspect is basically a dynamic black box testing tool which detects the vulnerabilities by actually performing the attack. After initiating the scan on a web application, there are assessment agents that work on different areas of the application. They report their results to security engine which evaluates the results. It uses Audit engines to attack the application and determine the vulnerabilities. At the end of the scan you can generate a report called 'Vulnerability Assessment Report' which would list the security issues in desired format. Using this report, client can fix the issues and then go for validation scanning to confirm the same. HP WebInspect is a commercial tool and you need license to scan a web site. With the trail version you will be permitted to scan only zero.webappsecurity.com (HP demo site). So WebInspect basically comes into picture when the application is hosted in some environment (test/QA/production). As with every other tool there are both advantages and disadvantages associated with using WebInspect.
Advantages:
- Saves time when dealing with large enterprise applications
- Simulates the attack, shows the results and presents you with a comprehensive view.
- It is not dependent on the underlying language.
Disadvantages:
- It's hard for any tool to find logical flaws, weak cryptographic storage, severity of the disclosed information etc.
- It has a list of payloads that it uses on every web application. It does not use any wisdom in generating payloads depending on the type of application.
- There could be false positives among the listed vulnerabilities.
Having said that, WebInspect scores high on many features and helps a great deal in providing scanning solutions.
Main features in WebInspect 9.10
WebInspect 9.10 is the latest version in use as of today. Below lines would throw an insight into various features that are available in WebInspect.
- Presents you with tree structure: By crawling the entire application WebInspect presents you with the hierarchical tree structure of the web application and lists all the available URLS.
- Customizable Views: While viewing the results of a scan WebInspect offers different views as per your requirement.
- Scanning Policies: WebInspect gives you the freedom to edit and customize the scanning policies to suit your requirements and thus offers great flexibility.
- Manual Hacking Control: With this option you can actually simulate an attack environment and see what's really going on during a particular attack.
- Report Generation: You can generate customizable reports by including desired sections and in desired format.
- Remediation: WebInspect would provide a summary and the necessary fixes required to fix the vulnerabilities detected during a particular scan.
- Web Services Scan: Web services usage is growing at a rapid pace. You can assess web service vulnerabilities by using WebInspect.
- Tools: There are lot many tools that come with WebInspect like web proxy, SQL Injector, web fuzzer, web macro recorder etc.
We will now move into the actual scanning part and will explore the tool and its features.
Installation part
Before you install WebInspect make sure that the system has at least 2 GB RAM and Microsoft SQL Server installed. After installation, the first time you start WebInspect it will open the 'License Wizard' and prompt you to activate by entering the license key. If you don't have one you can go for a 15 day trial period for which activation token will be sent to your mail after giving the details.
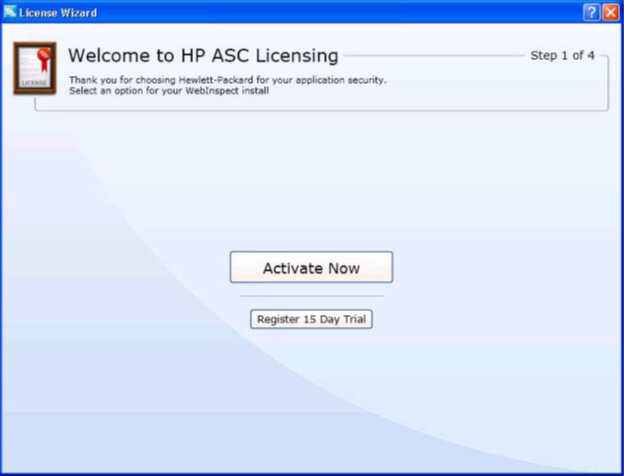
Figure 1
Depending on the scanning policy selected, WebInspect will try to attack the web application which can harm the server. It sends many HTTP requests which results in increased traffic. So make sure that you keep these things in mind and accordingly conduct the scan.
THE TWO "C+A"s:
Two things that WebInspect will do for you: Crawl + Audit
Two things that you need to do for WebInspect: Configure + Analyze.
Crawl: Crawling is the process by which WebInspect will build the tree structure of the entire website by traversing every possible link on that site.
Audit: Auditing is the process of performing attacks to assess the vulnerabilities.
Crawl + Audit = Scan
Configure: You need to tell the WebInspect what you need from it. If you do not want it to hit a particular functionality in your site you need to specify that before hand or if you are bothered to find out only about XSS & SQLi vulnerabilities you need to mention the same to WebInspect. So configuring is basically letting the WebInspect know what you want and what you do not want. This is especially done in the 'default scan settings' tab.
Analyze: Here you need to analyze the results presented by the WebInspect and eliminate the false positives.
Starting a scan
To begin a scan, start WebInspect and as shown below (Figure 2) Scan Wizard window opens and you can select the type of scan you want to conduct. So select Website scan. In the scan wizard, on the right hand side you can see the recently opened scans and the scans that are in schedule. You can also schedule a scan to begin at a particular time.
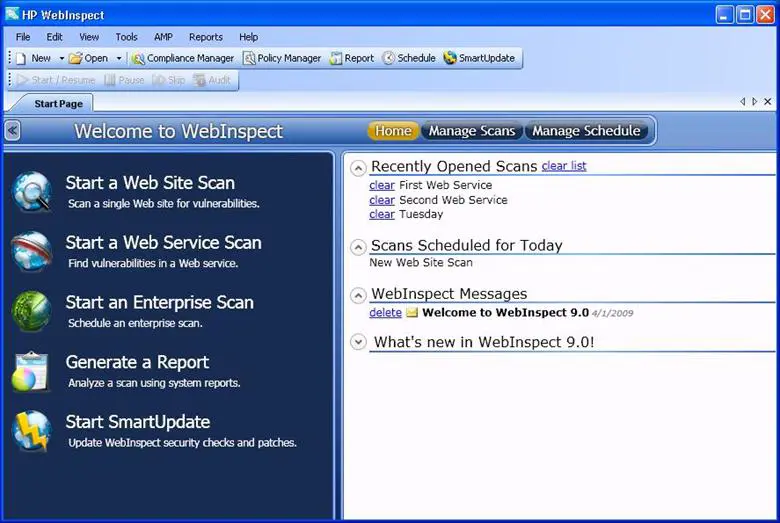
Figure 2
Upon selecting the website scan you will be taken to the below window (Figure 3) where you need to enter the scan name. Select 'crawl and audit button' and select the type of scan.
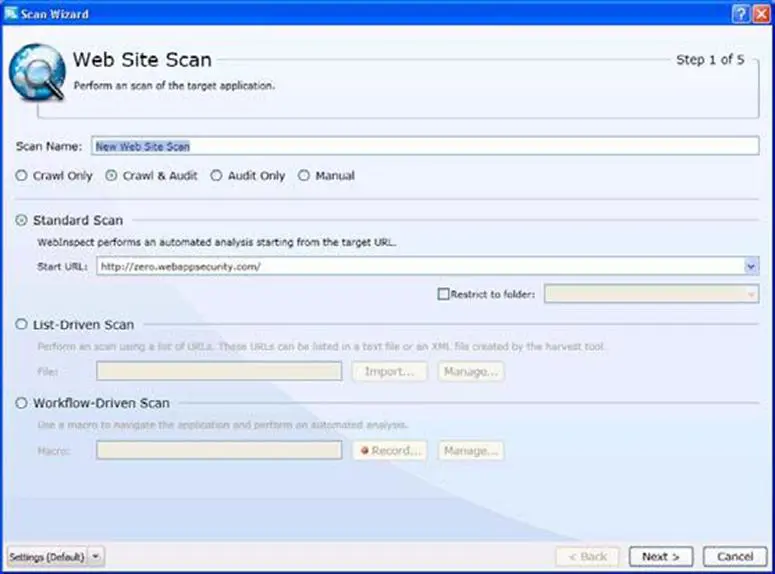
Figure 3
Standard scan: Used in most of the cases. It is standard way to start a scan.
List Driven scan: Allows you to specify the list of URL's that are to be scanned. Only those URLs will be scanned. The URL's can be specified in a text file.
Workflow Driven scan: This is used to scan only a part of your site not the entire site. The part that needs to be scanned can be specified by a workflow macro which we will be looking into soon.
Manual scan: Allows you to manually specify the links that are to be scanned by browsing through them in the step mode.
Below the standard scan you can see restrict to folder option which defines the scan coverage. This is very important as the scan coverage depends on the option that you select. The following are the options you can choose from the dropdown list:
- Directory only: If you select this option and specify a URL say www.example.com/Mysite/Myfolder/Mypage.aspx, then WebInspect will assess only Myfolder and not the directories present inside it.
- Directory and sub directories: WebInspect will not hit any folder that is higher in the directory tree.
- Directory and parent directory: WebInspect will not hit any folder that is lower in the directory tree.
In the bottom left hand side of scan wizard window (figure 3) there is a button 'Settings (Default)' which is the heart of the WebInspect. Using this we configure the scan and tell WebInspect what we want from it. Click on Settings (Default) and 'Default Settings' window (Figure 4) will open.
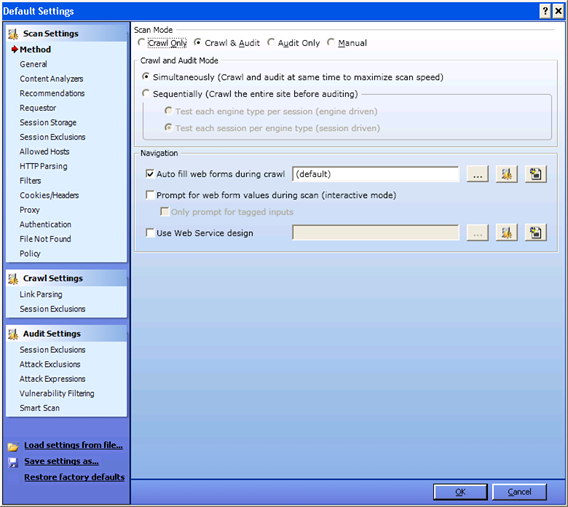
Figure 4
There are many options and they further have many choices among them. I will try to cover as many as possible and the left over ones are something which are easy to understand. Under default settings, as you can see on the left hand side of the above picture we have Scan settings, Crawl settings and Audit settings. It is very important to have strong hold on configuring these settings because the output of the scan depends on your input to WebInspect. Let us have a brief outlook on each of these settings.
Scan settings:
The options available under this define the way in which a scan is conducted by WebInspect. For instance you can exclude certain sections of your web application from being scanned by WebInspect. Similarly you can define many parameters which affect the scan performance and the output. All the options under this section will be covered in detail in the next post.
Crawl Settings:
As the name suggests, the parameters which control the way in which WebInspect crawls are mentioned under this. From figure 4 you can see that it includes link parsing and session exclusion.
Audit Settings:
The parameters here define the way in which auditing is performed by WebInspect. It deals with session exclusions, attack exclusions, attack expressions, vulnerability filtering, smart scan etc. Smart scan is a new feature that is introduced to find out the underlying server and accordingly send the attack vectors and payloads. So WebInspect will probe only for those particular vulnerabilities that the server is susceptible.
You can save the settings in a file and load the same for every scan if it suits your requirement. You can save different settings in different files and load the files when needed. Once you are done with the settings here, click on next and Authentication and Connectivity window appears (figure 5). Here the values are shown based on your input under proxy tab and authentication tab in Default Settings window.
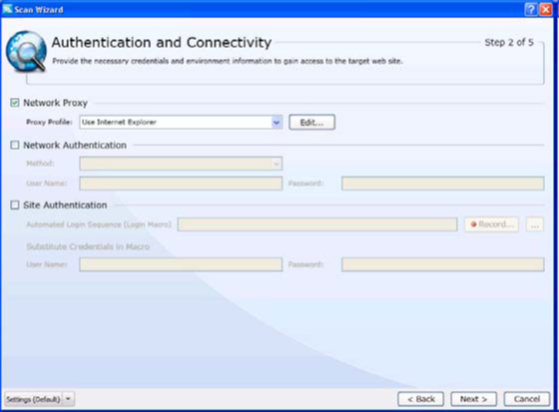
Figure 5
Move to the next window Coverage and thoroughness where the information about crawl coverage and audit depth will be shown based on your input under requester tab in default settings.
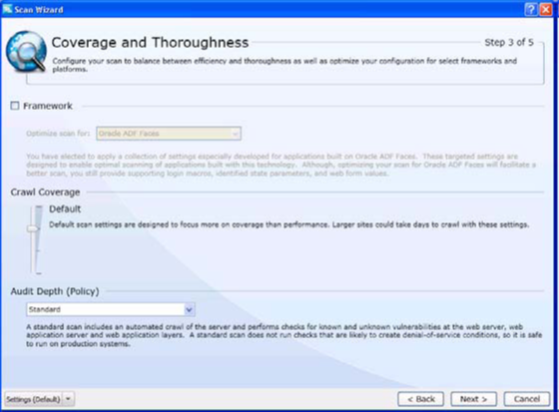
Figure 6
Click on next and detailed scan configuration window appears (figure 7). Under this profiler runs a quick examination of the target and if necessary it recommends you certain changes. You may or may not accept the recommendations.
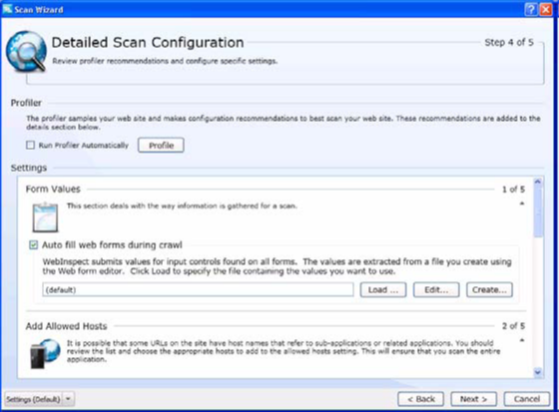
Figure 7
Move to the next window where you can find the 'scan' button (figure 8). Upon clicking the scan button, scan will initiate. The scan completion time depends on size of the application, policy selected and other factors.
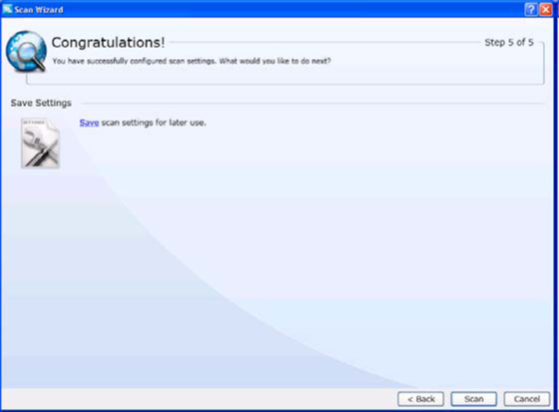
Figure 8

Get your guide to the top-paying certifications
With more than 448,000 U.S. cybersecurity job openings annually, get answers to all your cybersecurity salary questions with our free ebook!

Get your guide to the top-paying certifications
With more than 448,000 U.S. cybersecurity job openings annually, get answers to all your cybersecurity salary questions with our free ebook!
Once the scan gets completed, you need to analyze the results to eliminate the false positives and generate report for valid findings. It must be now clear that the 'Default scan settings' play crucial role in optimizing the results. Hence my next post which comes as a continuation to this article covers in depth details about Default scan settings, configuring and analyzing using WebInspect, generating the reports etc.


