The browser exploitation framework (BeEF) – Part 1
We can categorize the BeEF social engineering framework as shown in the picture below:

FREE role-guided training plans

FREE role-guided training plans
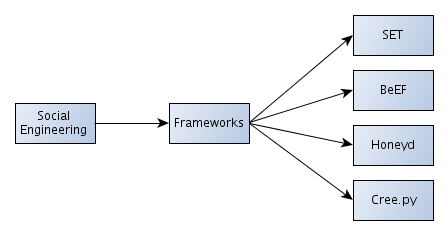
We can read more about the mentioned frameworks, namely: SET (Social Engineering Framework), BeEF, Honeyd and Cree.py, on the Infosec Institute website, where they are briefly described. .
We can use BeEF to host a malicious web site, which is then visited by the victim. The BeEF is used to send commands that will be executed on the web browser of the victim computer. The victim users will be added as zombies to the BeEF framework. When the attacker logs into to the BeEF server, he can then execute the modules against the specified victim user. An attacker can execute any module or write his own module, which enables him to execute an arbitrary command against the victim zombie.
Among all the actions that we can execute against the hooked target web browser are also the following actions: key logger, port scanner, browser exploitation tool, web proxy, etc.
BeEF
BeEF uses browser vulnerabilities to gain control of the target computer system. BeEF provides an API that we can use to write our own module to attack the target web browser. Therefore the BeEF provides the API that abstracts the complexity and makes possible the quick and effective creation of modules.
Installation
First, we must download and install the browser exploitation framework. We can do that by visiting the BeEF github webpage and execute the below commands.
To install the prerequisites, execute the below commands as root:
[bash]
# apt-get install ruby1.9.1 ruby1.9.1-dev libsqlite3-dev sqlite3 sqlite3-doc rubygems1.8
# gem install bundler
# export PATH='$PATH:/var/lib/gems/1.8/bin'
[/bash]
Execute the below commands as a normal user to satisfy the rest of the dependencies:
[bash]
# curl -L https://get.rvm.io | bash -s stable –ruby
# export PATH='$PATH:/usr/local/rvm/bin/'
# source /home/user/.rvm/scripts/rvm
# unset RUBYOPT && sudo env-update && gem -v
[/bash]
Download the BeEF framework:
[plain]
# git clone https://github.com/beefproject/beef.git
[/plain]
To install the BeEF framework, we must first run the bundle command, which should install all the missing dependencies.
[bash]
# cd beef/
# bundle install
[/bash]
A successful installation of all dependencies should look as below:
[bash]
# bundle install
Fetching gem metadata from http://rubygems.org/.......
Fetching gem metadata from http://rubygems.org/..
Installing addressable (2.2.8)
Installing ansi (1.4.3)
Installing daemons (1.1.9)
Installing data_objects (0.10.8)
Installing dm-core (1.2.0)
Installing dm-do-adapter (1.2.0)
Installing dm-migrations (1.2.0)
Installing do_sqlite3 (0.10.8) with native extensions
Installing dm-sqlite-adapter (1.2.0)
Installing eventmachine (0.12.10) with native extensions
Installing em-websocket (0.3.8)
Installing erubis (2.7.0)
Installing multipart-post (1.1.5)
Installing faraday (0.8.4)
Installing jsmin (1.0.1)
Installing json (1.7.5) with native extensions
Installing librex (0.0.68)
Installing msgpack (0.4.7) with native extensions
Installing msfrpc-client (1.0.1)
Installing multi_json (1.3.6)
Installing parseconfig (1.0.2)
Installing rack (1.4.1)
Installing rack-protection (1.2.0)
Installing simple_oauth (0.1.9)
Installing tilt (1.3.3)
Installing sinatra (1.3.2)
Installing term-ansicolor (1.0.7)
Installing thin (1.4.1) with native extensions
Installing twitter (3.6.0)
Using bundler (1.1.5)
Your bundle is complete! Use `bundle show [gemname]` to see where a bundled gem is installed.
[/bash]
Update the BeEF framework to the latest version:
[bash]
# ./update-beef
[/bash]
After all that the BeEF framework should start normally, like below:
[bash]
# ./beef
[ 9:13:42][*] Browser Exploitation Framework (BeEF)
[ 9:13:42] | Version 0.4.3.7-alpha
[ 9:13:42] | Website http://beefproject.com
[ 9:13:42] | Run 'beef -h' for basic help.
[ 9:13:42] |_ Run 'git pull' to update to the latest revision.
[ 9:13:45][*] BeEF is loading. Wait a few seconds...
[ 9:13:53][*] 8 extensions loaded:
[ 9:13:53] | Autoloader
[ 9:13:53] | Events
[ 9:13:53] | Proxy
[ 9:13:53] | Requester
[ 9:13:53] | Admin UI
[ 9:13:53] | Console
[ 9:13:53] | Demos
[ 9:13:53] |_ XSSRays
[ 9:13:53][*] 122 modules enabled.
[ 9:13:53][*] 2 network interfaces were detected.
[ 9:13:53][+] running on network interface: 127.0.0.1
[ 9:13:53] | Hook URL: http://127.0.0.1:3000/hook.js
[ 9:13:53] |_ UI URL: http://127.0.0.1:3000/ui/panel
[ 9:13:53][+] running on network interface: 10.1.1.176
[ 9:13:53] | Hook URL: http://10.1.1.2:3000/hook.js
[ 9:13:53] |_ UI URL: http://10.1.1.2:3000/ui/panel
[ 9:13:53][*] RESTful API key: 8f6d1d719227a0bc6b654e5682c2d73801d3cffc
[ 9:13:53][*] HTTP Proxy: http://127.0.0.1:6789
[ 9:13:53][*] BeEF server started (press control+c to stop)
[/bash]
We can see that BeEF is up and running correctly: it's running on all found network interfaces, so it is accessible from everywhere (not only localhost). From the BeEF output, we can see that the user interface panel is accessible on the URI: http://10.1.1.2:3000/ui/panel. If we visit this web page, we're automatically redirected to the web page: http://127.0.0.1:3000/ui/authentication, which looks like the picture below:
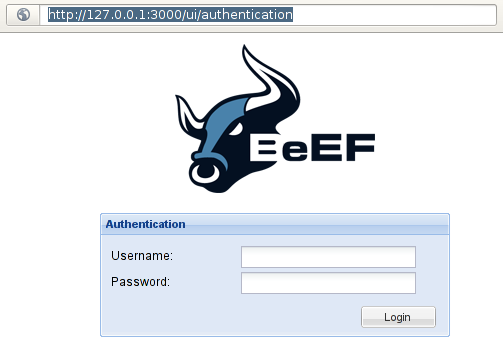
Great. We've successfully set-up the BeEF exploitation framework. The default username and password are beef:beef. When we've successfully authenticated, the below web page is presented to us:
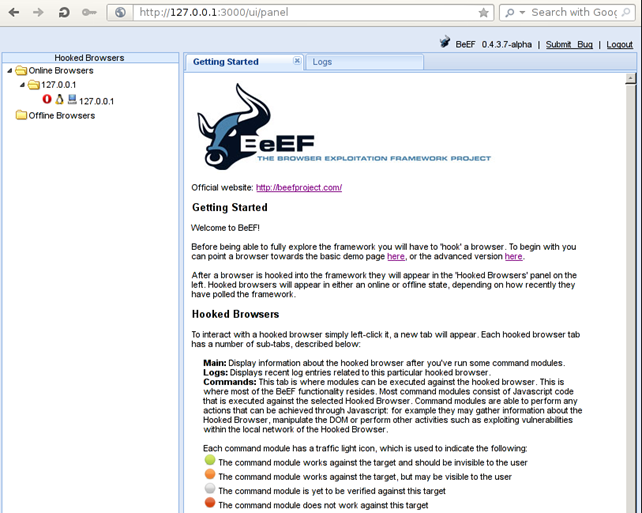
We can see that the web page first greets us and presents the basic information and getting started guide about BeEF. We should read the getting started guide carefully since it provides enough details to get started with using the BeEF framework.
Getting Started
There are two demo pages currently available in the BeEF framework and are presented below:
a. Basic Demo Page
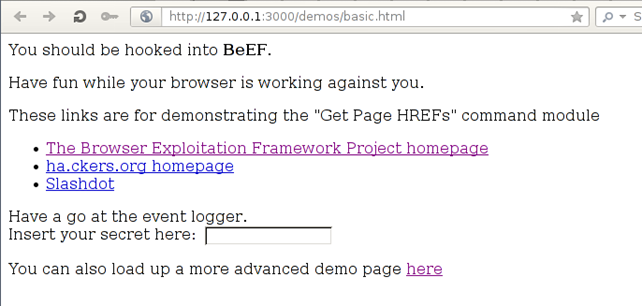
When the web page on the above picture loads, our web browser is already hooked into the BeEF framework and we can execute modules against it. The additional links and form are present for demonstration purposes of the various features of the BeEF framework, which we won't discuss here. All that is important is that upon visiting the above web page, the browser is automatically hooked into the BeEF framework.
b. Butcher Demo Page
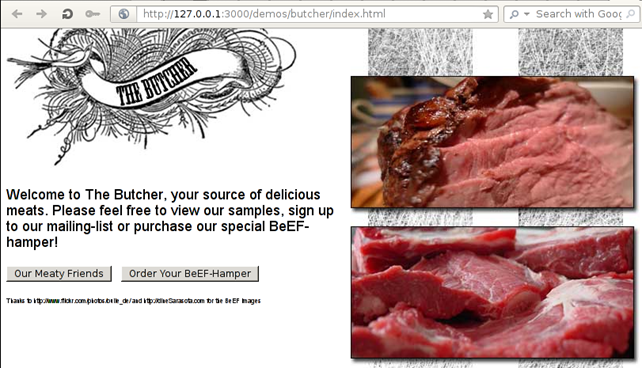
This examples also automatically hooks the web browser into the BeEF framework, so no additional steps are required. The additional elements on the web page are for demonstrating purposes only.
On the left side of the BeEF user interface panel, we can see "Online Browsers" and "Offline Browsers", which represent the hooked browsers, some of which are online and the others are offline; this depends on the polling activity of the victim web browser.
The getting started web page also states that we can communicate with the hooked browser by clicking on one of the browsers, upon which a new tab will appear and will look like the picture below:
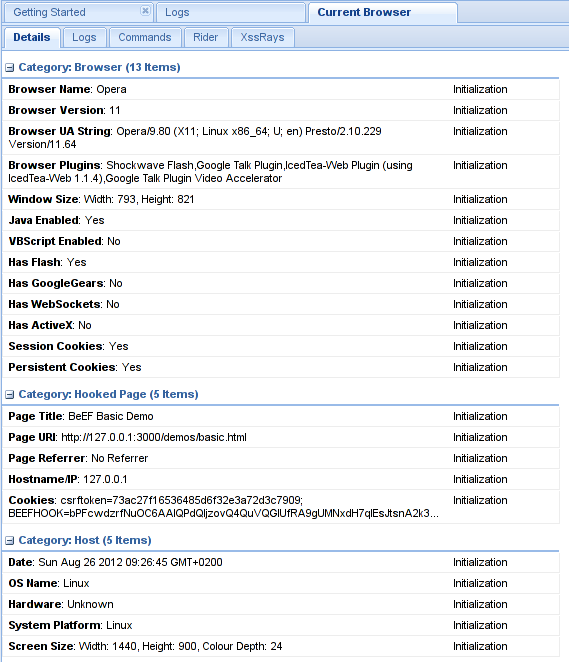
We can see that each new tab representing a browser has five new tabs – summarized after [1]:
- Details
Displays information about the hooked browser, which we can see in the picture above.
- Logs:
Displays log entries of current hooked browser. We can see this tab represented in the picture below:

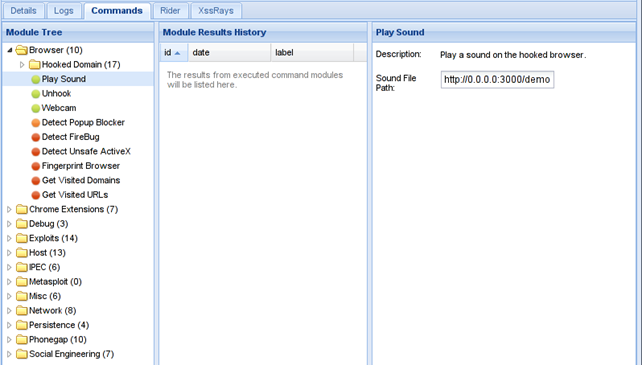
- Commands
Here we can execute modules against a web browser. Modules are able to execute any command that can be achieved through Javascript. Each of the modules has an icon represented with one of the colors listed below:
We can see this tab represented in the picture below. We have selected the "Browser – Hooked Domain – Play Sound" module.
- Rider
This tab allows us to submit arbitrary HTTP requests on behalf of the hooked browser.
- XssRays
This tab can be used to check if the page where the browser is hooked is vulnerable to XSS attack. If we right-click on the hooked browser, a menu opens giving us two options to choose from:
- Use as Proxy:
This option allows us to use the hooked browser as a proxy.
- Launch XssRays on Hooked Domain
This launches the XSS vulnerability discovery on the web page. The XssRays tab mentioned above does the same thing, but we can use it to change options as well.
Conclusion
In this part we've installed the prerequisites for BeEF framework and BeEF itself. Afterwards we connected to the BeEF framework in web browser and looked at the user interface and the options it allows us to use. We also discussed how the BeEF framework should be used and what it can do.
In the next part of the tutorial we'll look at the "Commands" tab of the user interface where all the modules are stored.

What should you learn next?


