IDA Pro: IDC, SDK and Remote Debugging Overview
In this article, we won't be going too deep into Ida scripting. Instead, we'll present what an IDC is and how it can be used to enhance the capabilities of Ida. We'll also present the basic structure of the IDC script, not the advanced usage. Then we'll name the shortcomings of IDC and present a better way to extend Ida with the use of Ida SDK, which is capable of providing much more power when writing an Ida extension. And lastly, we'll present remote debugging capabilities of Ida, so the article will be more about discussing what Ida has to offer and not just an in-depth overview of the topics.
Ida IDC
If you're reading this, I'm sure you know that Ida has a scripting language IDC that can be used to write our own little scripts and that it can be used to automate the things we do most often.
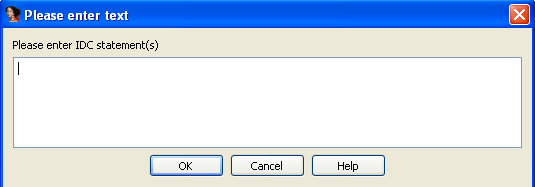
Before anything else, we must understand how we can interact with the Ida scripting engine. We can do that by choosing File – IDC Command, which opens a pop-up window where we must enter the command. We can see that window on the picture below:
The other option is by loading the Ida script via File - Script File. A pop-up window then asks us to choose the .idc script file from the file system that we wish to execute. We can see that on the picture below:
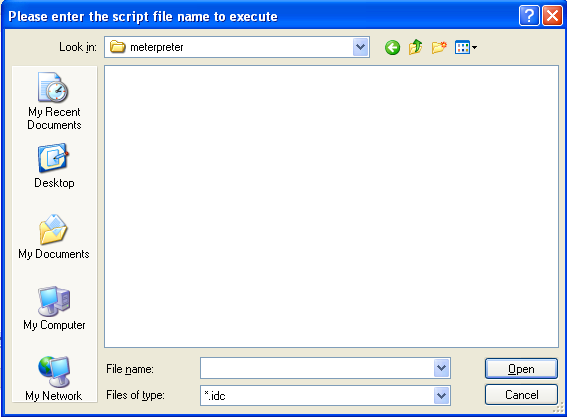
The command dialog is very useful when we want to test specific commands without creating a new file, but if we intend to write a full-blown plugin, it's better to create a file and execute it as a script rather than as a command.
However, there's another way to simply execute a one-line command which is very similar to the File – IDC Command option. We don't have to click on anything to bring up a pop-up window where we can enter the command; it's already present on the bottom of the Ida main window. It looks like the picture below:

In that input box, we can essentially write the same information as in the File – IDC Command or even in a standalone script. This is the easiest way to execute one command at a time, which can prove very useful and may also be the quickest way to do it. Actually, we can even execute multiple commands, which must be separated by semicolons.
IDC Language
The variables in the IDC language are one of the following data types:
- signed integers (there are no unsigned integers)
- strings
- floating point numbers
Also, there is no notion of global variables in IDC language; only local variables are supported. We also can't assign a value to the variable at the same time as we're declaring the variable. First, we must declare a variable and then assign its value. To declare a variable, we must use the following syntax:
[plain]
auto myaddr;
The keyword auto is used to declare the variable, which in this case has the name myaddr. The IDC language supports if statements, if-else statements, for loops, while loops, but not switch statements.
There is no printf function in IDC, but a Message function can be used instead, which supports the same format and arguments as the printf function.
In IDC, we can declare a function with the use of the static keyword, followed by the function name, followed by the parameters that the function accepts, which are separated by commas. When calling a function, every parameter is copied to the function, so IDC doesn't support references and pointers. We can also return a value from the function by using the return keyword; if the function doesn't return anything explicitly then, by default, it returns zero.
When creating a standalone script, we must always have the function main, which doesn't accept any arguments, and we must also include the idc.idc file like this:
[plain]
#include <idc.idc>
static main() {
}
[/plain]
The IDC language supports the same preprocessor directives as C programming language does, namely #include, #define, #ifdef, #else, #endif and #undef. IDC language also provides many functions which we can use to interact with the Ida database. We won't describe them all in detail here. All available functions and their descriptions can be found in the Ida Help menu, shown below:
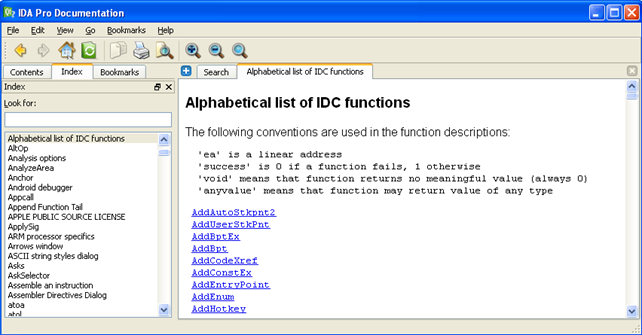
We can see that we selected the "Alphabetical list of IDC functions" on the index on the left and on the right is the list of all IDC functions.
Ida SDK
If you're reading this and, at the same time, you're wondering why you would want to use Ida SDK, you've come to the right place.
Imagine that you need some functionality that isn't already implemented in Ida, either by default or by any other plugins out there. In such cases, the first thing would be to turn to the IDC scripting language and try to write a script that can solve the problem we have. But after a while, you may realize that it's really awkward to try to do it with IDC because of its limitations, or maybe even because it's not possible in a reasonable amount of time.
If so, it's best to turn to Ida SDK, which is basically the same as IDC, but is much more powerful. The IDC is built on top of SDK, so by using SDK, we're bypassing the IDC and using the SDK directly, which gives us much more freedom and possibilities than we've ever had in the IDC.
Remote Debugging
With remote debugging features, we can always work from our main computer and then debug applications on various operating systems remotely. This is a big pro because it gives us access to a compromised machine while we work directly from our main system. In order to make remote debugging work, we need to set-up Ida Pro debugger client and server.
Remote Ida Pro Server
In order to connect to the Ida remote server with the Ida client, we first need to start the Ida server. To do that, we must run the following command on the operating system on which the process is to be debugged. We can launch one of the following executables on Windows, Linux and OSX:
# win32_remote.exe
# linux_server
# mac_server
There are also appropriate 64-bit executables that can be used to start a server like this:
# win64_remote64.exe
# linux_server64
# mac_server64
The only thing that's required to start debugging remotely is to start the Ida server on the operating system where we would be debugging the program. This means that we don't have to install the full version of Ida on the remote platform. After we start the remote Ida server, we then connect to the Ida server with the Ida client from an arbitrary operating system.
We can pass various options to the remote Ida server when starting it. On Linux, the linux_server is located under the dbgsrv/ folder in the Ida home directory. The remote Ida server has the following options:
# ./dbgsrv/linux_server -h
Ida Linux 32-bit remote debug server(ST) v1.15. Hex-Rays (c) 2004-2012
Error: usage: Ida_remote [switches]
-p... port number
-P... password
-v verbose
We can see that we can specify the port number to listen on, the password to disable unauthorized access and verbose output. I guess we want to specify the password, since we don't want anyone connecting to our remote Ida server. We can do that with the command below:
# ./dbgsrv/linux_server -Padmin123
Ida Linux 32-bit remote debug server(ST) v1.15. Hex-Rays (c) 2004-2012
Listening on port #23946...
We started the remote Ida server on default port 23946 and protected it with the password admin123.
Remote Ida Pro Client
After the remote Ida server is started, we can connect to it with an Ida client. We can do that by clicking on the Debugger menu, where we have the "Run" option. There are a couple of options we can choose from as seen on the picture below:
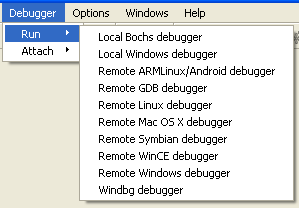
We can see a number of different available debuggers we can choose from. If we choose one of the local debuggers, we'll be debugging the executable locally, so no Ida remote server is required. But whenever we're trying to debug an executable remotely, we need to choose one of the remote debuggers. If we choose remote Linux debugger, the following dialog box will pop up:
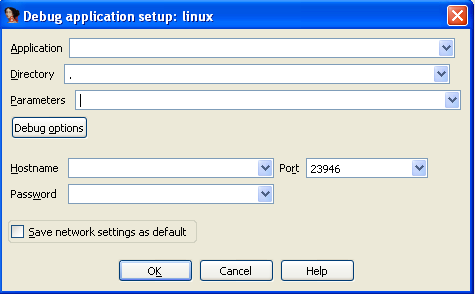
We can see that we can specify a number of options that we'll describe below. The first input field is the Application input field, where we need to input the absolute/relative path to the executable being debugged (on the remote filesystem). Usually, we would input the absolute path to the debugged executable, but we chose to enter only a partial path to the executable, which will be searched for in the current working directory.
The Directory input field specifies in which directory the executable will be launched. The Parameters input field specifies any command line parameters that will be passed to the program upon starting it. And lastly, we must also specify the Hostname, Port and Password input fields, which are there to connect to the remote Ida server. Specifying the Password is optional and is only required if we started the Ida remote server with the -P switch, which denotes that the Ida client must also specify the password upon connecting to the server.
Conclusion
If we find ourselves doing something repeatedly, stop! Instead, write an IDC script that can automate this for you. Imagine when you don't need to do specific actions manually anymore, but you can just press a certain shortcut that was assigned to your script and the script executes providing you with the information that you need. If the IDC isn't powerful enough, use SDK, which should provide everything we're ever going to need in order to write extensions in Ida.
We've also looked at remote debugging, which can be quite handy when we would like to connect to a remote instance of Ida server and start debugging on an arbitrary operating system right from our desktop machine without too much trouble.
References
[1] Chris Eagle, The IDA Pro Book: The unofficial guide to the world's most popular disassembler.


