Testing Hooks via the Windows Debugger – An Introduction to RevEngX
RevEngX
RevEngX is a freely available extension for the Debugging Tools for Windows. It offers several new commands to simplify the work of reverse engineering, code injection, hooking and other types of instrumentation that are useful when analyzing 3rd party software, malware, or developing commercial Windows applications that utilize code injection and hooking. This article will demonstrate how one might produce and test a hook on-the-fly using the debugger alone. In practice, it would be easier to code up hook functions in C++ in a DLL, inject the DLL using !loadlibrary (a RevEngX command), and then set hooks pointing to the injected code using any of a number of methods. The technique presented in this article is designed more for demonstrating the power of the tools being presented, and to introduce the reader to a new world of possibilities.
Prerequisites
It is expected that the reader is familiar with the basics of the Debugging Tools for Windows package. Windbg.exe will be used in the example, but ntsd.exe and cdb.exe may also be used if preferred. The reader should also be familiar with x86 assembly language and have some understanding of the techniques used to hook APIs on Windows. Obviously a basic understanding of Windows APIs is also necessary.
RevEngX is needed as well. It can be downloaded from http://www.revengx.com/. Obtain the most recent version and install RevEngX.dll in the winext directory for the matching bitness of the debugger. Newer versions of the Debugging Tools for Windows package install both the 32-bit and 64-bit versions of the tools. It is important to match of the RevEngX extension to the right bitness of the debugger, and to use the 32-bit version of windbg.exe for debugging 32-bit applications with RevEngX, and the 64-bit version for 64-bit applications. Many of the RevEngX command are bit-immune, but some are not, and it is always best to match your debugger to the bitness of the application being debugged, unless you are debugging or reversing WOW64 thunks, etc.
Note that while the example is using x86 assembly language, it could easily be done with x64 (amd64) assembly as well, given a bit of work rewriting the hook function mnemonics.
A Visual Example
This example will use a simple Import Address Table (IAT) hook. Such a hook employs no stealth – it is easily detectable using RevEngX or other tools that can locate hooks (such as GMER). A very stealthy hook can also be implemented using RevEngX and the debugger, but this is beyond the scope of this article.
In order to make the demonstration very visual as well as simple, we will hook the GDI function responsible for displaying text. Our hook function will reverse the strings being sent to ExtTextOutW before invoking the original function. You can choose any target you would like, but in the example below I will use the 32-bit version of Calculator (calc.exe). The visual result will be hard to miss.
Step 1: Launch Calculator (or your preferred target)
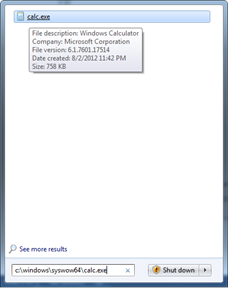
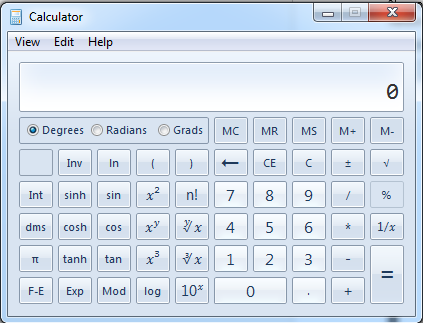
Step one is simple, launch calc.exe. If you are running on a 64-bit version of Windows, be sure to run the 32-bit version. To do this just run c:/windows/syswow64/calc.exe. It should look … well, very normal:
Step 2: Attach the Debugger
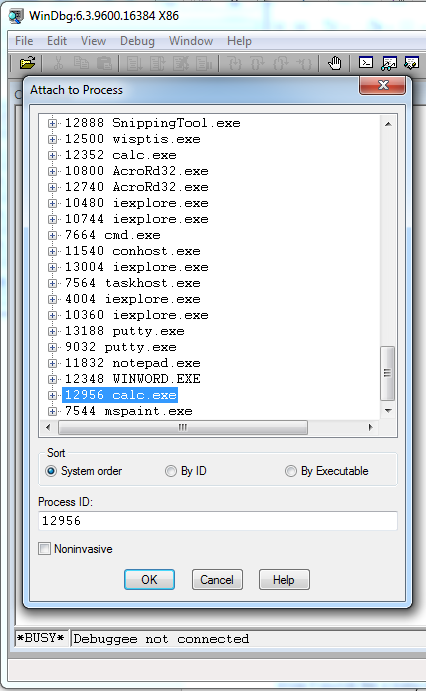
The second step is to start the debugger and attach it to the target application. There are numerous ways to do this, and it depends upon where your Debugging Tools for Windows are installed. For this example I'm going to assume you know how to start the debugger. Just use F6 and select calc.exe to attach the debugger. (Yes, I know it sounds like a baby-step, and it is, but that's just in case someone blew off that particular prerequisite.)
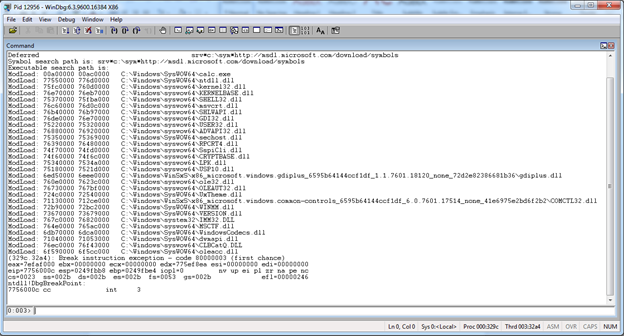
You should now be able to enter commands into the debugger, with it stopped in the debugger injected thread:
Step 3: Load RevEngX
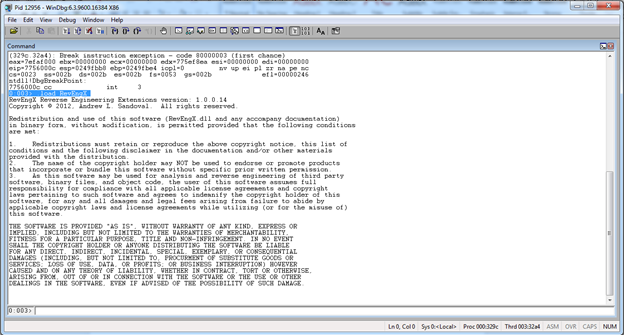
Okay, this is a baby step too if you are familiar with debugger extensions, but just in case… Just run: .load RevEngX as shown below.
To get a list of the currently supported commands available in RevEngX, enter !help:
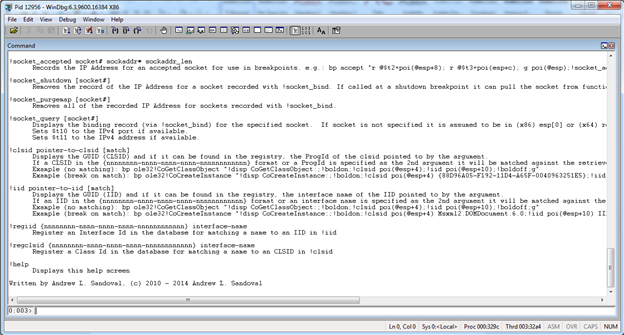
The list of commands is too long to display in a single screenshot, but you get the idea. There is a lot here and only a few commands will be used in this article. Many of the ones shown are helpers used in breakpoints for analyzing a target process or system (yes, some of them were even meant to be used from a kernel debugger.)
Step 4: Setup Memory for our Hook Function
To set up the memory for our hook function we could simple use .dvalloc (see the debugger's help for details). In this example, however, I'm going to use RevEngX's !callfn function to do the same thing. The difference is that .dvalloc will allocate memory from the debugger using VirtualAllocEx, supplying the handle to the target process. !callfn on the other hand will invoke VirtualAlloc in the target process. Either one will work, but when I originally wrote the commands it was for a lecture in which the target processes were already hooked and the students needed to discover how it was done. To simplify setting this up on 30 machines, the debugging commands were all designed to be copy-pasted into the debugger. !callfn conveniently tracks the return value from the call to VirtualAlloc for us, where we would otherwise have to copy-paste it, or re-type it from the output of .dvalloc.
Enter the first command as follows:
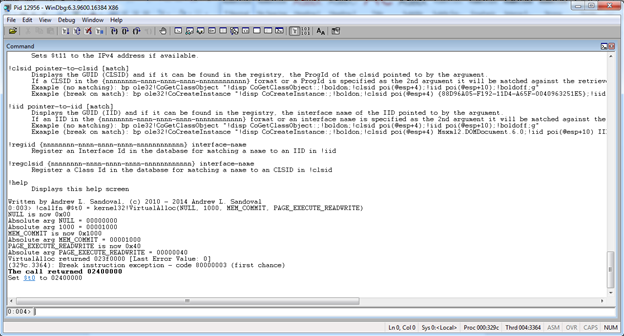
!callfn @$t0 = kernel32!VirtualAlloc(NULL, 1000, MEM_COMMIT, PAGE_EXECUTE_READWRITE)
This will cause RevEngX to build and inject the code needed to call VirtualAlloc with the parameters shown in the target process. It will also invoke the call and store the return value in the pseudo-register $t0. The debugger output should reassure you of this:
Step 5: Setup Synthetic Variables
Strictly speaking, you can get by without any synthetic variables, but you will see that when we assemble our hook function, having them is much easier! In fact, I'm surprised that I had to add this to my extension. It is such a powerful thing that it should be built-in to the debugger. To declare our variables, run the following commands (you can copy-paste them all at once):
!synmod HOOKTEST @$t0!synsym g_pfnExtTextOutWp2 @$t0
!synsym g_pfnwcsrev g_pfnExtTextOutWp2+4
!synsym g_pfnwcslen g_pfnExtTextOutWp2+8
!synsym g_pfnwcsncpy g_pfnExtTextOutWp2+c
!synsym HookExtTextOutW g_pfnExtTextOutWp2+20
By way of explanation, !synmod sets up a synthetic module. That means that the block of memory we allocated, and which is pointed to by $t0 will look like a DLL called HOOKTEST to the debugger.
Each !synsym command names a synthetic variable or "symbol" and associates an address with it. The variables created are as follows:
Step 6: Fill in our "variables"
The first 4 synthetic symbols setup in step 5 are all pointers to function pointers. We need them to hold the actual values of the target functions to which they point. Copy-paste or enter the following commands to fill them in:
ed g_pfnExtTextOutWp2 GDI32!ExtTextOutW+2ed g_pfnwcsrev msvcrt!_wcsrev
ed g_pfnwcslen msvcrt!wcslen
ed g_pfnwcsncpy msvcrt!wcsncpy
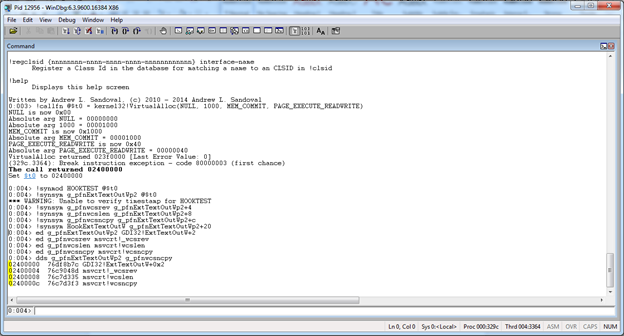
dds g_pfnExtTextOutWp2 g_pfnwcsncpy
This should be fairly self-explanatory. If not, look at the debugger's help for the ed command. The last command will display the result of what we just did. The output should look like that shown in the screenshot below where the highlight is found:
Step 7: Build the Hook Function
The hook function is fairly simple. If it were more complex we would want to write it in C or C++ (there are very good reasons to use C++ that you might not realize, such as those outlined in this article: https://resources.infosecinstitute.com/exceptions-in-injected-code/). In this example however, we are only going to reverse the input string – and only if it isn't too long for us to reasonably do so in simple assembly code.
For now, just copy-paste the assembly commands below. Be sure to hit enter one final time to get out of "Input>" mode.
a HookExtTextOutWpush ebp
mov ebp, esp
sub esp, 1000
push ebx
mov ebx, dword ptr [ebp+1C]
push esi
push edi
mov edi, dword ptr [ebp+20]
test ebx, ebx
je HookExtTextOutW+0x6c
test edi, edi
je HookExtTextOutW+0x6c
mov esi, edi
cmp edi, FFFFFFFF
jne HookExtTextOutW+0x2e
push ebx
call dword ptr [g_pfnwcslen]
pop ecx
mov esi, eax
cmp esi, 800
ja HookExtTextOutW+0x6c
push esi
lea eax, [ebp-1000]
push ebx
push eax
call dword ptr [g_pfnwcsncpy]
xor eax, eax
mov word ptr [ebp+esi*2-1000], ax
lea eax, [ebp-1000]
push eax
call dword ptr [g_pfnwcsrev]
add esp, 10
push dword ptr [ebp+24]
lea eax, [ebp-1000]
push edi
push eax
jmp HookExtTextOutW+0x71
push dword ptr [ebp+24]
push edi
push ebx
push dword ptr [ebp+18]
push dword ptr [ebp+14]
push dword ptr [ebp+10]
push dword ptr [ebp+C]
push dword ptr [ebp+8]
call dword ptr [g_pfnExtTextOutWp2]
pop edi
pop esi
pop ebx
leave
ret 20
When you are done, you should be back to a prompt that looks like this:
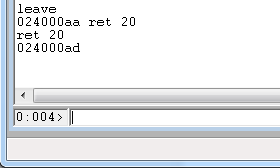
Now I will briefly explain the assembly. I'm not going to go into detail – you should see what I'm pointing out right away if you are comfortable with x86 assembly language. Feel free to skip to the next step if you already get it.
[plain]
0:004> uf HookExtTextOutW
HOOKTEST!HookExtTextOutW:
02400020 55 push ebp
02400021 8bec mov ebp,esp
02400023 81ec00100000 sub esp,1000h
02400029 53 push ebx
0240002a 8b5d1c mov ebx,dword ptr [ebp+1Ch]
0240002d 56 push esi
0240002e 57 push edi
0240002f 8b7d20 mov edi,dword ptr [ebp+20h]
02400032 85db test ebx,ebx
02400034 7456 je HOOKTEST!HookExtTextOutW+0x6c (0240008c)
This first section starts with a normal prologue. The stack is setup to reserve 0x1000 bytes of space. That is so that we have a good sized buffer in which to hold our reversed copy of the input string.
You will recall that the prototype for ExtTextOutW is as follows:
[plain]
BOOL ExtTextOut(
_In_ HDC hdc,
_In_ int X,
_In_ int Y,
_In_ UINT fuOptions,
_In_ const RECT *lprc,
_In_ LPCTSTR lpString,
_In_ UINT cbCount,
_In_ const INT *lpDx
);
After our prologue code runs, ebp is used to access the input parameters. This means that [ebp+1Ch] points to the input string. This pointer is copied into ebx. After preserving registers on the stack, edi will hold the cbCount (length) of the string from [ebp+20h]. Finally, the test and je check for a nullptr input string. When the input string is NULL we simply call the original function with the original parameters and return its return value. The three instructions at HOOKTEST!HookExtTextOutW+0x6c: are used just for this purpose.
The next block of disassembly shows us doing exactly the same thing if the string length is 0:
[plain]
HOOKTEST!HookExtTextOutW+0x16:
02400036 85ff test edi,edi
02400038 7452 je HOOKTEST!HookExtTextOutW+0x6c (0240008c)
At this point we should have a valid input string and either a length or -1 indicating that the string is null terminated. The next block of code looks for the -1, and if found it calls wcslen to get the length of the string:
[plain]
HOOKTEST!HookExtTextOutW+0x1a:
0240003a 8bf7 mov esi,edi
0240003c 81ffffffffff cmp edi,0FFFFFFFFh
HOOKTEST!HookExtTextOutW+0x24:
02400044 53 push ebx
02400045 ff1508004002 call dword ptr [HOOKTEST!g_pfnwcslen (02400008)]
0240004b 59 pop ecx
0240004c 8bf0 mov esi,eax
In either case, the length of the string is stored in esi. If the value is not -1 to start with, that happens at 0240003a, otherwise esi is updated at 0240004c with wcslen results.
Next one more test is made to see if the string is longer than 0x800 bytes. 0x800 times 2 for wide characters is 0x1000. That is all we can handle. If the string is longer the original function is invoked without reversing the string:
[plain]
HOOKTEST!HookExtTextOutW+0x2e:
0240004e 81fe00080000 cmp esi,800h
02400054 7736 ja HOOKTEST!HookExtTextOutW+0x6c (0240008c)
The next block of code copies the original string to our stack buffer, and then reverses it by calling _wcsrev:
[plain]
HOOKTEST!HookExtTextOutW+0x36:
02400056 56 push esi
02400057 8d8500f0ffff lea eax,[ebp-1000h]
0240005d 53 push ebx
0240005e 50 push eax
0240005f ff150c004002 call dword ptr [HOOKTEST!g_pfnwcsncpy (0240000c)]
02400065 31c0 xor eax,eax
02400067 6689847500f0ffff mov word ptr [ebp+esi*2-1000h],ax
0240006f 8d8500f0ffff lea eax,[ebp-1000h]
02400075 50 push eax
02400076 ff1504004002 call dword ptr [HOOKTEST!g_pfnwcsrev (02400004)]
0240007c 83c410 add esp,10h
0240007f ff7524 push dword ptr [ebp+24h]
02400082 8d8500f0ffff lea eax,[ebp-1000h]
02400088 57 push edi
02400089 50 push eax
0240008a eb05 jmp HOOKTEST!HookExtTextOutW+0x71 (02400091)
You will notice that there is also some code in there to ensure NULL termination prior to calling _wcsrev. This is needed because while ExtTextOutW doesn't require a null terminated string, _wcsrev does. Also, of all of the functions invoked, only _wcsrev is cdecl, requiring its parameters to be cleaned from the stack at 0240007c.
Starting at 02400088, the pointer to our reversed string and its length (length first) are pushed to the stack to setup the last two arguments of the call to the real ExtTextOutW function. The jmp at 0240008a is used to jump over our code that pushes the original string and original length values when they do not meet our criteria in the tests prior to the copy and reverse:
[plain]
HOOKTEST!HookExtTextOutW+0x6c:
0240008c ff7524 push dword ptr [ebp+24h]
0240008f 57 push edi
02400090 53 push ebx
The final block of code pushes the remaining original arguments on to the stack and invokes the original ExtTextOutW function.
[plain]
HOOKTEST!HookExtTextOutW+0x71:
02400091 ff7518 push dword ptr [ebp+18h]
02400094 ff7514 push dword ptr [ebp+14h]
02400097 ff7510 push dword ptr [ebp+10h]
0240009a ff750c push dword ptr [ebp+0Ch]
0240009d ff7508 push dword ptr [ebp+8]
024000a0 ff1500004002 call dword ptr [HOOKTEST!g_pfnExtTextOutWp2 (02400000)]
024000a6 5f pop edi
024000a7 5e pop esi
024000a8 5b pop ebx
024000a9 c9 leave
024000aa c22000 ret 20h
Starting at 024000a6 the epilogue code cleans up our stack and returns the results of ExtTextOutW to the caller. That is it. It is fairly simple. (Did you see a bug?) And, it is short enough to be easily tested in the debugger.
Step 8: Setting the Hook
RevEngX offers the !iatentry command to allow viewing IAT (Import Address Table) entries. The same command may also be used to setup an IAT hook. Before we set a hook, run the !iatentry command to see where ExtTextOutW is invoked via import table in this process. Enter !iatentry ExtTextOutW. The output should look something like this:
[plain]
0:004> !iatentry ExtTextOutW
Symbol Address: GDI32!ExtTextOutW (76df8b7a)
Module Name: GDI32
Image Name: C:/Windows/syswow64/GDI32.dll
Loaded Image Name: C:/Windows/syswow64/GDI32.dll
IAT_ADDR ACTUAL SYMBOL IMPORTER
724d0544 GDI32!ExtTextOutW (76df8b7a) GDI32!ExtTextOutW C:WindowsSysWOW64UxTheme.dll
7113115c GDI32!ExtTextOutW (76df8b7a) GDI32!ExtTextOutW C:WindowsWinSxSx86_microsoft.windows.common-controls_6595b64144ccf1df_6.0.7601.17514_none_41e6975e2bd6f2b2COMCTL32.dll
6ed51168 GDI32!ExtTextOutW (76df8b7a) GDI32!ExtTextOutW C:WindowsWinSxSx86_microsoft.windows.gdiplus_6595b64144ccf1df_1.1.7601.18120_none_72d2e82386681b36gdiplus.dll
767d0254 GDI32!ExtTextOutW (76df8b7a) GDI32!ExtTextOutW C:Windowssystem32IMM32.DLL
75341078 GDI32!ExtTextOutW (76df8b7a) GDI32!ExtTextOutW C:Windowssyswow64LPK.dll
764e14a8 GDI32!ExtTextOutW (76df8b7a) GDI32!ExtTextOutW C:Windowssyswow64MSCTF.dll
75372158 GDI32!ExtTextOutW (76df8b7a) GDI32!ExtTextOutW C:Windowssyswow64SHELL32.dll
76b4123c GDI32!ExtTextOutW (76df8b7a) GDI32!ExtTextOutW C:Windowssyswow64SHLWAPI.dll
75230258 GDI32!ExtTextOutW (76df8b7a) GDI32!ExtTextOutW C:Windowssyswow64USER32.dll
75181004 GDI32!ExtTextOutW (76df8b7a) GDI32!ExtTextOutW C:Windowssyswow64USP10.dll
From this you can see that several DLLS call gdi32!ExtTextOutW through their import tables. Calc.exe itself does not, but other DLL's it uses for displaying strings are listed.
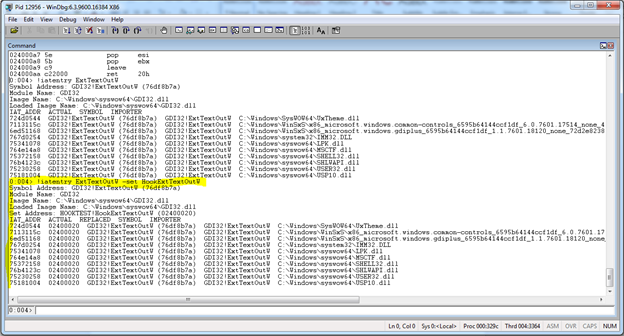
We can now set an IAT hook on all of those imports using: !iatentry ExtTextOutW -set HookExtTextOutW. The output should look similar to what is in the screenshot below:
Step 9: Detach the Debugger and let the application run…
We are now ready to let this rip. You could simply enter 'g' at the prompt and let it run in the debugger. I recommend that for the first time. Once you are confident you have it right you can simply enter .detach to detach the debugger from the process and let it run.
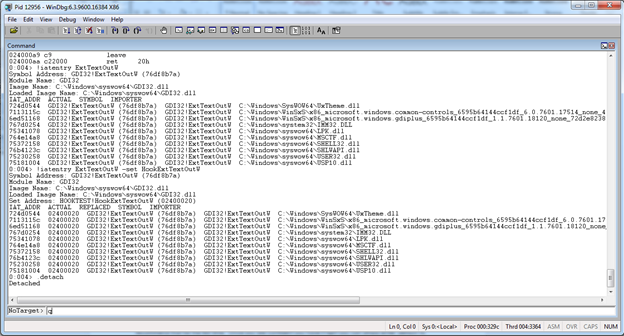
From there you can 'q'uit or exit the debugger. Your running copy of Calculator should now have visual evidence of your hook as shown below:
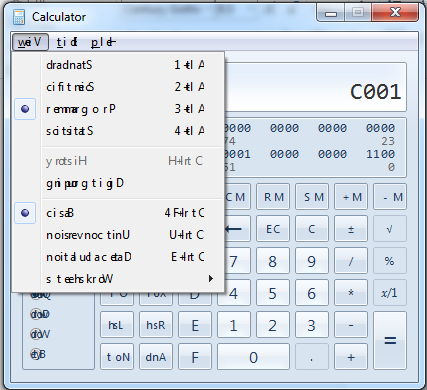
You will notice that things don't just reverse automatically. They have to be redrawn. Running the mouse over the buttons is all it takes in calc to get them to redraw. Menus are drawn when pulled down and so they are reversed.
The spacing is off. That is because of the kerning ExtTextOutW does behind the scenes. We really mess it up when we reverse the string – at least in some cases.
Where to go next…
Besides giving you a new practical joke to pull on a co-worker, this article demonstrates a few of the most powerful commands available to you through the debugger while using RevEngX. Probably the most powerful command, and the one I am most proud of, is the !callfn command. It will let you invoke any function in the target process, and it has access to a database of thousands of definitions that match those in the Windows SDK header files, to allow for a more natural looking call. You can use other commands such as !define to add new definitions to the database if you find that one you use often is missing. You can change definitions that might be wrong for your version of Windows. Database entries are persistent, and the database can be copied to new machines as needed. (Search for RevEngX.db in your home directory.)
In addition to calling functions, there are many other commands available in RevEngX that will make your life as an Engineer, Reverse Engineer, or researcher easier! And there is more to come in future versions of RevEngX! One that I've started, but not had time to finish is a hex editor window that will allow you to define structure definitions based on regions of memory in the target process. The Hex Editor is done, I just need to finish up the new !dt command and some of the UI work for displaying structural elements with their respective data. This should be a powerful addition to the debugger for reverse engineers.
Whatever the cause, just have fun and be responsible! Remember that no matter how clever you think you are, someone can always figure out what you did! As an example, when I reattach the debugger to our hooked calc.exe, and run RevEngX's !iathooks command (see also !eathooks), I can quickly spot our hooks:
[plain]
0:004> !iathooks
IAT_ADDR EXPECTED ACTUAL SYMBOL IMPORTER
724d0544 76df8b7a 02400020 GDI32.dll!ExtTextOutW C:WindowsSysWOW64UxTheme.dll
7113115c 76df8b7a 02400020 GDI32.dll!ExtTextOutW C:WindowsWinSxSx86_microsoft.windows.common-controls_6595b64144ccf1df_6.0.7601.17514_none_41e6975e2bd6f2b2COMCTL32.dll
6ed51168 76df8b7a 02400020 GDI32.dll!ExtTextOutW C:WindowsWinSxSx86_microsoft.windows.gdiplus_6595b64144ccf1df_1.1.7601.18120_none_72d2e82386681b36gdiplus.dll
767d0254 76df8b7a 02400020 GDI32.dll!ExtTextOutW C:Windowssystem32IMM32.DLL
75341078 76df8b7a 02400020 GDI32.dll!ExtTextOutW C:Windowssyswow64LPK.dll
764e14a8 76df8b7a 02400020 GDI32.dll!ExtTextOutW C:Windowssyswow64MSCTF.dll
75372158 76df8b7a 02400020 GDI32.dll!ExtTextOutW C:Windowssyswow64SHELL32.dll
76b4123c 76df8b7a 02400020 GDI32.dll!ExtTextOutW C:Windowssyswow64SHLWAPI.dll
75230258 76df8b7a 02400020 GDI32.dll!ExtTextOutW C:Windowssyswow64USER32.dll
75181004 76df8b7a 02400020 GDI32.dll!ExtTextOutW C:Windowssyswow64USP10.dll
(Note that quick isn't really accurate. Without any extra parameters !iathooks has to search *every* IAT entry to see if it has been hooked. Most processes have a lot of DLLs with a lot of entries, so be patient!)

Become a certified reverse engineer!
My hope is that this tool is an aid to the honest and the good, and that it simply will not appeal to those with ill intent!


