Compiling the Windows Kernel Driver
Introduction
In the previous article, I've written and described a kernel mode driver, but I haven't actually done anything with it. There's something missing in that picture: it's the loading of the kernel mode driver into the kernel and then writing the app.exe to actually sent an IRP request to the driver to execute some action.
Transferring Data between User-Mode and Kernel Driver
When using the kernel driver, we surely must transfer some data from user mode to the kernel driver, so the driver can perform its functions. We've seen the kernel driver communicate with the I/O Manager through the IRP requests, which is also used to send and receive data to and from the kernel driver.
Let's take a look at the write function in the of the example program from [1]. In the DriverEntry function, we specified that the USE_WRITE_FUNCTION constant is being used as the write function that will be called when handling IRP_MJ_WRITE requests.
[cpp]
pDriverObject->MajorFunction[IRP_MJ_WRITE] = USE_WRITE_FUNCTION;
The USE_WRITE_FUNCTION is actually a constant defined in the example header file and is defined as follows:
[cpp]
#ifdef __USE_DIRECT__
#define USE_WRITE_FUNCTION Example_WriteDirectIO
#ifdef __USE_BUFFERED__
#define USE_WRITE_FUNCTION Example_WriteBufferedIO
#ifndef IO_TYPE
#define USE_WRITE_FUNCTION Example_WriteNeither
#endif
This means that depending on some other constants being set, we're setting the USE_WRITE_FUNCTION to one of the following values: Example_WriteDirectIO, Example_WriteBufferedIO or Example_WriteNeither. Therefore, the write IRP request is being sent to one of those functions. Here, we're assuming that the write request is sent to the Example_WriteDirectIO function and we'll take a closer look at its code. The code of that function can be seen below (taken from the example at [1]):
[cpp]
/**********************************************************************
*
* Example_WriteDirectIO
*
* This is called when a write is issued on the device handle (WriteFile/WriteFileEx)
*
* This version uses Direct I/O
*
**********************************************************************/
NTSTATUS Example_WriteDirectIO(PDEVICE_OBJECT DeviceObject, PIRP Irp)
{
NTSTATUS NtStatus = STATUS_SUCCESS;
PIO_STACK_LOCATION pIoStackIrp = NULL;
DbgPrint("Example_WriteDirectIO Called rn");
/*
* Each time the IRP is passed down the driver stack a new stack location is added
* specifying certain parameters for the IRP to the driver.
*/
if(pIoStackIrp)
{
if(pWriteDataBuffer)
{
/*
* We need to verify that the string is NULL terminated. Bad things can happen
* if we access memory not valid while in the Kernel.
*/
if(Example_IsStringTerminated(pWriteDataBuffer, pIoStackIrp->Parameters.Write.Length))
{
DbgPrint(pWriteDataBuffer);
}
}
return NtStatus;
}
From the comments of the function, we can immediately see that the function is being called whenever a user application calls the WriteFile function on a device handle. All of the functions that are passed to the MajorFunction array must use this format, where the FunctionName should be replaced by the name of the function we want to use (it can be anything we want):
[plain]
NTSTATUS FunctionName(PDEVICE_OBJECT DeviceObject, PIRP Irp) { … }
The parameters to the function are always the same. The first parameter is a PDEVICE_OBJECT structure, while the second parameter is the actual IRP request. Now we'll break down the function to see what it actually does.
At first, we're declaring some variables as seen below. The NtStatus variable is being returned when the function ends to let the caller know whether the function was successful or unsuccessful.
[cpp]
NTSTATUS NtStatus = STATUS_SUCCESS;
PIO_STACK_LOCATION pIoStackIrp = NULL;
PCHAR pWriteDataBuffer;
Next, we're printing some debug message to the debugger log with DbgPrint function. Then, we're using the IoGetCurrentIrpStackLocation function to return a pointer to the caller's I/O stack location in the IRP request [2].
[cpp]
pIoStackIrp = IoGetCurrentIrpStackLocation(Irp);
After that, we're using the MmGetSystemAddressForMdlSafe function to get a virtual address to the buffer that the MDL describes. Let's take a look at it's syntax:

The MDL parameter is a pointer to a buffer whose corresponding virtual address is to be mapped, while the Priority parameter specifies the priority.
[cpp]
pWriteDataBuffer = MmGetSystemAddressForMdlSafe(Irp->MdlAddress, NormalPagePriority);
We've passing the MdlAddress parameter of the IRP data structure as the first parameter to the MmGetSystemAddressForMdlSafe function. Let's take a look at [4] for a definition of that field, which can be seen on the picture below. The purpose of this call is to get a virtual address from where we can read memory of the user application; we're mapping the physical pages used the user application into system memory, so we can access it.

At the end of the function we're checking whether the string is NULL terminated, as it should be. We're passing the virtual address and the length of the buffer to the Example_IsStringTerminated function, which checks whether the string is NULL terminated or not.
[cpp]
if(Example_IsStringTerminated(pWriteDataBuffer, pIoStackIrp->Parameters.Write.Length))
{
DbgPrint(pWriteDataBuffer);
}
We just saw how we can access user mode memory from a kernel module with just a pointer to the buffer and without actually copying any buffer from user mode to kernel mode, and then back from kernel mode to user mode. If we're using the above approach, we must be aware that the user application can't use the memory while the IRP request is executing, because we can run into synchronization problems. This is why the memory is locked for the user application, while the IRP function is using that piece of memory.
Compiling the Kernel Module with NMake
When we extract the contents of the example accessible at [1], there will also be a makefile present in the driver directory. This immediately makes us think that we can use a program like nmake.exe to compile the kernel driver. Let's present why this isn't the best solution that we can choose to actually build the kernel driver.
Let's see what happens if we enter the "Windows XP x86 Checked Build Environment" and issue the nmake command in the console. The nmake command will try to use the provided makefile. The picture below presents the output of trying to build the kernel driver with nmake command:

We can immediately see that there were some errors during the compilation and that the driver wasn't able to compile successfully. There are two fatal errors, each for its own source file, saying that the wdm.h header file could not be found.
[plain]
fatal error C1083: Cannot open include file: 'wdm.h': No such file or directory
fatal error C1083: Cannot open include file: 'wdm.h': No such file or directory
Generating Code...
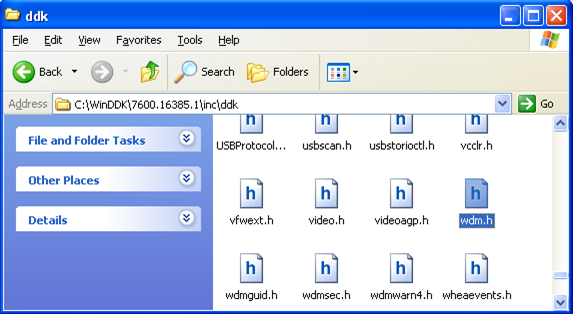
The wdm.h file is an important file of the WDK installation and is accessible in the C:WinDDK7600.16385.1incddk directory as we can see below:

Notice the file wdm.h present in that directory? This can mean only one thing: the makefile doesn't correctly specify the include directories where the nmake command is supposed to look for the header files. And because this is the case, the makefile probably doesn't correctly specify the additional library directories that should also be included for the nmake command to find all the dependencies that it needs in order to successfully build the kernel driver. If we open the makefile accessible at C:examplemakefile, we can notice that something weird is going on. Let's present the makefile:
[plain]
TARGET = example
ASM = ml
CPP = cl
RSC = rc.exe
F90 = df.exe
MTL = midl.exe
OBJDIR = .obji386
ASM_PROJ=/coff /c /Fo$(OBJDIR)
CPP_PROJ=/nologo /MD /W3 /Oxs /Gz /Zi
/I "........inc"
/I "NTDDKinc"
/D "WIN32" /D "_WINDOWS"
LIB32= link.exe
LIB32_FLAGS = /LIBPATH:........lib /LIBPATH:NTDDKlibfrei386 /DEBUG /PDB:$(TARGETDIR)SYMBOLS$(TARGET).PDB -entry:DriverEntry /SUBSYSTEM:NATIVE /nologo $(LIBS) /out:$(TARGETDIR)$(TARGET).sys
OBJS =
$(OBJDIR)entry.obj
LIBS =
wdm.lib
# This is a comment
$(TARGETDIR)$(TARGET): $(OBJDIR) $(TARGETDIR) $(OBJS) $(RESFILE)
$(LIB32) $(LIB32_FLAGS) $(OBJS) $(LIBS) $(RESFILE)
{.}.c{$(OBJDIR)}.obj::
$(CPP) $(CPP_PROJ) $>
{.}.cpp{$(OBJDIR)}.obj::
$(CPP) $(CPP_PROJ) $>
{.}.asm{$(OBJDIR)}.obj::
$(ASM) $(ASM_PROJ) $>
{.}.rc{$(OBJDIR)}.res::
$(RSC) $(RES_PROJ) $>
$(OBJDIR):
if not exist "$(OBJDIR)/$(NULL)" mkdir "$(OBJDIR)"
$(TARGETDIR):
if not exist "$(TARGETDIR)/$(NULL)" mkdir "$(TARGETDIR)"
CLEAN:
-@erase /S /Q $(OBJDIR)
We're currently located in the C:example directory and yet the makefile is using a lot of .. to go to the parent directory. More specifically, the TARGETDIR should specify where the build driver or program should be placed. The value in the TARGETDIR is ........bin; the whole path that will be created is thus the following: C:example........bin. Clearly, this is not the correct path and we should change it accordingly. There are a lot of other things wrong with the makefile and it would take forever to change it into a usable form.
Rather than that, we'll be used a different technique to actually compile the driver, which can be seen below.
Compiling the Kernel Module with Build
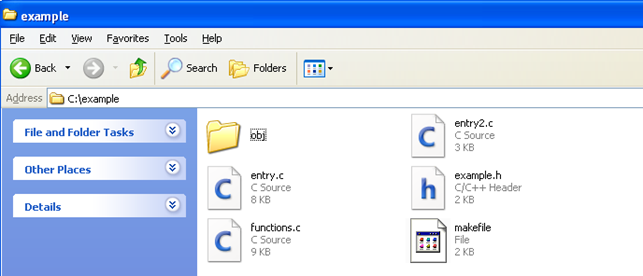
If you have extracted the example from [1], then you will notice that each of the directories has a makefile can be used to build the included programs. The picture below shows all the files in the example directory, which holds the source code of the kernel driver.

We've mentioned that we won't use the makefile, because it's just not the best solution out there. Rather, we'll use the build.exe command to compile the driver. For build.exe to work, we must first delete the makefile and create another file named sources, and put the following contents in it:

The name of the file is just 'sources' and there is no extension, such as sources.txt; this is very important, because if we don't follow this simple rule, the build.exe command won't be able to find the file and use its configuration variables.
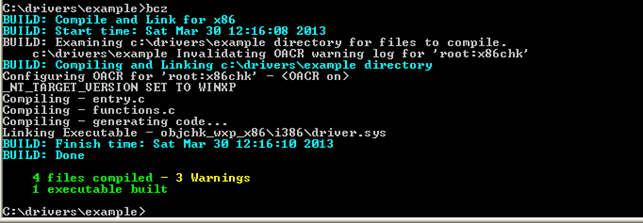
The variables in the sources file specify the driver name driver, which is an arbitrary name that we would like to use. The type should be set to DRIVER, because we want to build a normal .sys driver. The SOURCES variable specifies all the .c source files, while the HEADERS variable specifies all the header source files. The UMTYPE specifies it's a console project and the UMENTRY specifies that the entry main function of the driver is named DriverEntry. After that, we can start the x86 Checked Build Environment and simply run the build command. A better command is the bcz command, which is the same as the build command except that it prints messages in color, so errors and warnings are easily distinguishable from the other text. The picture below presents the successful compilation of the driver:

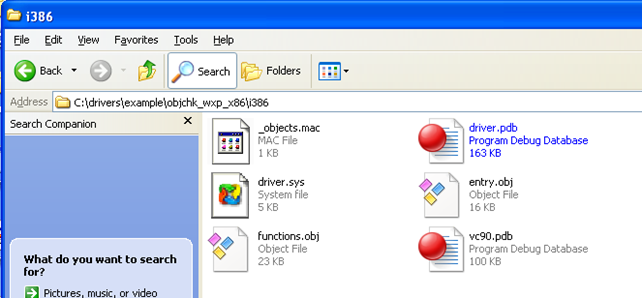
After that, a new directory objchk_wxp_x86i386 will be created in the current working directory, which will hold all of the files presented on the picture below:

One of the files is also the driver.sys, which is our driver. We've just successfully compiled our code into the .sys driver that we need.
Conclusion
We've looked at an example of how to transfer data from user to kernel mode. This is needed to provide API functionality to our kernel driver, so we can interact with it. What good is a driver if we can't use its features? We explained why we didn't use the nmake command to build the kernel driver and used the build command to do it. For the build command to work, we had to create an additional file named sources and put specific variables in it. Then we compiled the driver into driver.sys, which is actually the driver that we're looking for. But so far, we just compiled the driver and didn't actually loaded it into the kernel. The driver needs to be loaded into the kernel if we would like to use its features. This is what we'll take a look at in the next tutorial.
References:
[1] Driver Development Part 1: Introduction to Drivers, accessible at http://www.codeproject.com/Articles/9504/Driver-Development-Part-1-Introduction-to-Drivers.
[2] IoGetCurrentIrpStackLocation routine, accessible at http://msdn.microsoft.com/en-us/library/windows/hardware/ff549174(v=vs.85).aspx.
[3] MmGetSystemAddressForMdlSafe macro, accessible at http://msdn.microsoft.com/en-us/library/windows/hardware/ff554559(v=vs.85).aspx.
[4] IRP, accessible at http://msdn.microsoft.com/en-us/library/windows/hardware/ff550694(v=vs.85).aspx.
[5] OpenSCManager function, accessible at http://msdn.microsoft.com/en-us/library/windows/desktop/ms684323(v=vs.85).aspx.
[6] CreateService function, accessible at http://msdn.microsoft.com/en-us/library/windows/desktop/ms682450(v=vs.85).aspx.
[7] OpenService function, accessible at http://msdn.microsoft.com/en-us/library/windows/desktop/ms684330(v=vs.85).aspx.
[8] StartService function, accessible at http://msdn.microsoft.com/en-us/library/windows/desktop/ms686321(v=vs.85).aspx.
[9] Service Control Manager, accessible at http://en.wikipedia.org/wiki/Service_Control_Manager.
[10] Creating Export Drivers, accessible at http://msdn.microsoft.com/en-us/library/windows/hardware/ff542891(v=vs.85).aspx.


