CEWLKID: 1 VulnHub CTF walkthrough, part 1
Information shared in this article is intended for educational purposes only. Infosec and the author are not responsible for nefarious actions associated with the information shared in this article.
Together we will solve a Capture the Flag (CTF) challenge posted on the VulnHub website by author “iamv1nc3nt.” As per the description given by the author, this is the intermediate boot2root CTF. The name of the CTF is a hint, as are the details. The goal is to get root access to the machine and read the flag. You can read my previous articles for more CTF challenges. You should have some knowledge of Linux commands and have the ability to run some basic pentesting tools. Here is a downloadable URL for this CTF: https://download.vulnhub.com/cewlkid/CewlKid.zip.
You can download the machine and run it on VirtualBox. The torrent downloadable URL is also available for this VM and has been added in the reference section of this article.
For those who are not aware of the site, VulnHub is a well-known website for security researchers providing users with a way to learn and practice their hacking skills through a series of challenges in a safe and legal environment. You can download vulnerable machines from this website and try to exploit them. There are a lot of other challenging CTF exercises available on vulnhub.com and I highly suggest attempting them, as it is a good way to sharpen your skills and learn new techniques in a safe environment.
Please Note: I have used Oracle VirtualBox to run the downloaded machine. I am using Kali Linux as an attacker machine for solving this CTF. The techniques used are solely for educational purposes, and I am not responsible if the listed techniques are used against any other targets.

What should you learn next?
These are the steps to solve this CTF:
- Getting the target machine IP Address by running Netdiscover utility
- Scanning open ports by using the Nmap scanner
- Enumerating HTTP service with DIRB
- Enumerating HTTP port 8080
- Logging into the application and identifying vulnerabilities
The walkthrough
Step one
After running the downloaded virtual machine in the VitualBox, the machine will automatically be assigned an IP address from the network DHCP and will be visible on the login screen. The target machine IP address can be seen in the following screenshot:
Command used: << netdiscover >>
In the above screenshot, we can see we have the IP addresses of all the devices connected to our router, but due to security reasons, we have removed the MAC address of my personal connected devices. The VirtualMachine IP address we will be working on throughout this challenge is 192.168.1.14 (the target machine IP address). We will be using 192.168.1.17 as the attacker IP address.
Note: The target machine IP address may be different in your case, as it is being assigned by the network DHCP directly.
Step two
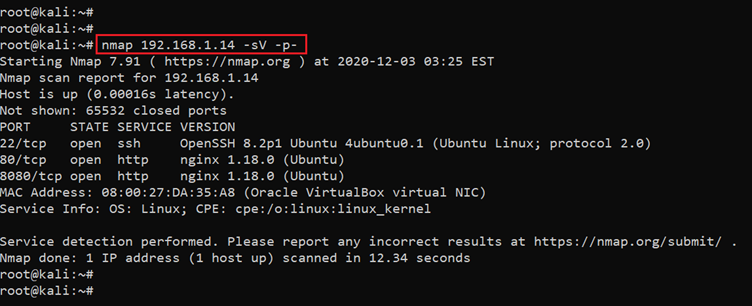
After getting the target machine's IP address, the next step is port scanning to find the open ports and services available on the machine. We will use the Nmap tool for this, as it works effectively and is by default available on Kali Linux. The results can be seen below:
Command used: << nmap 192.168.1.14 -sV -p- >>
The Nmap output shows two ports on the target machine that have been identified as open. In the Nmap command, we used the "-sV" switch for version enumeration. We also used the "-p-" option for a full port scan which tells Nmap to conduct the scan on all the 65,535 ports on the target machine. By default, Nmap scans will include only known 1,024 ports. It is especially important to conduct a full port scan during pentest or while solving the CTF for maximum results.
However, in our case, we have found only three ports, among which the first is being used for SSH and the second and third are being used for HTTP. So, in the next step, we will start with the HTTP port 80.
Step three
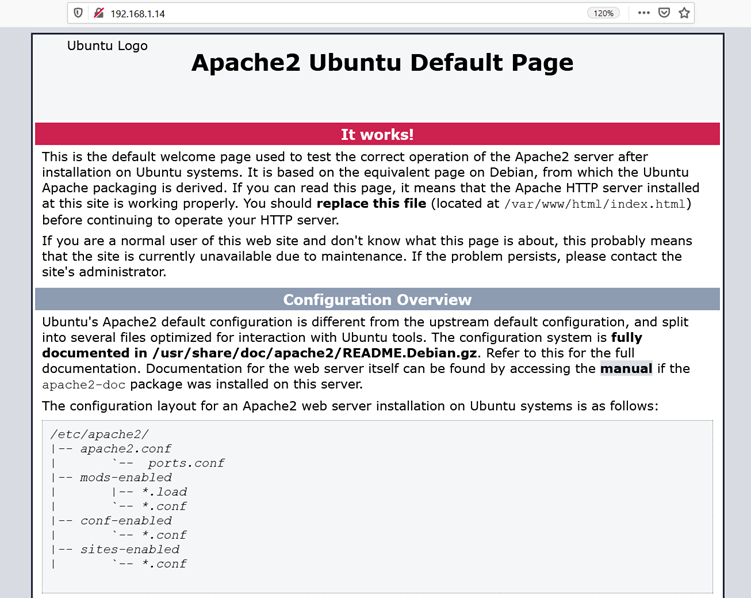
We opened the target machine's IP address on the browser to see the web application. It can be seen in the following screenshot:
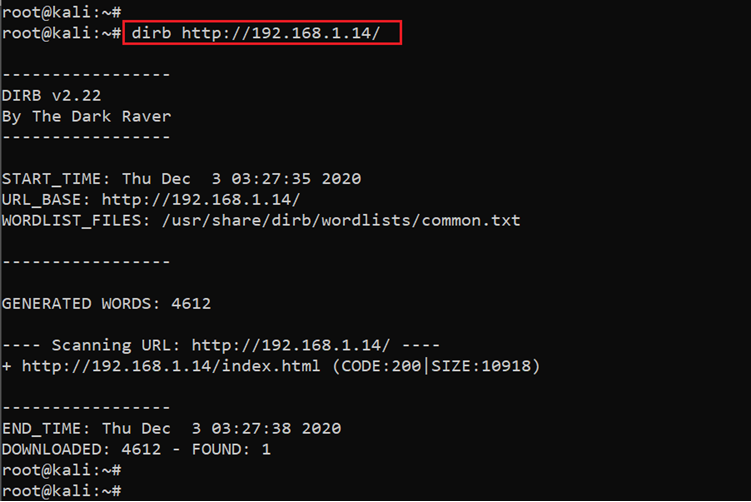
As we can see above, no web application was found on this port and all we got was the default Apache web page. Let us enumerate it further to find out the web application. For this, we used DIRB utility to identify any hidden directories and files on the target machine. The results can be seen in the following screenshot.
Command used: << dirb http://192.168.1.14 >>
As can be seen above, the DIRB scan has been completed; however, it could not provide us any useful results. So, we ran DirBuster and Gobuster tools as well to enumerate the hidden files and directories but did not get any good information. In the next step, we will enumerate another HTTP port that was identified during the port scan.
Step four
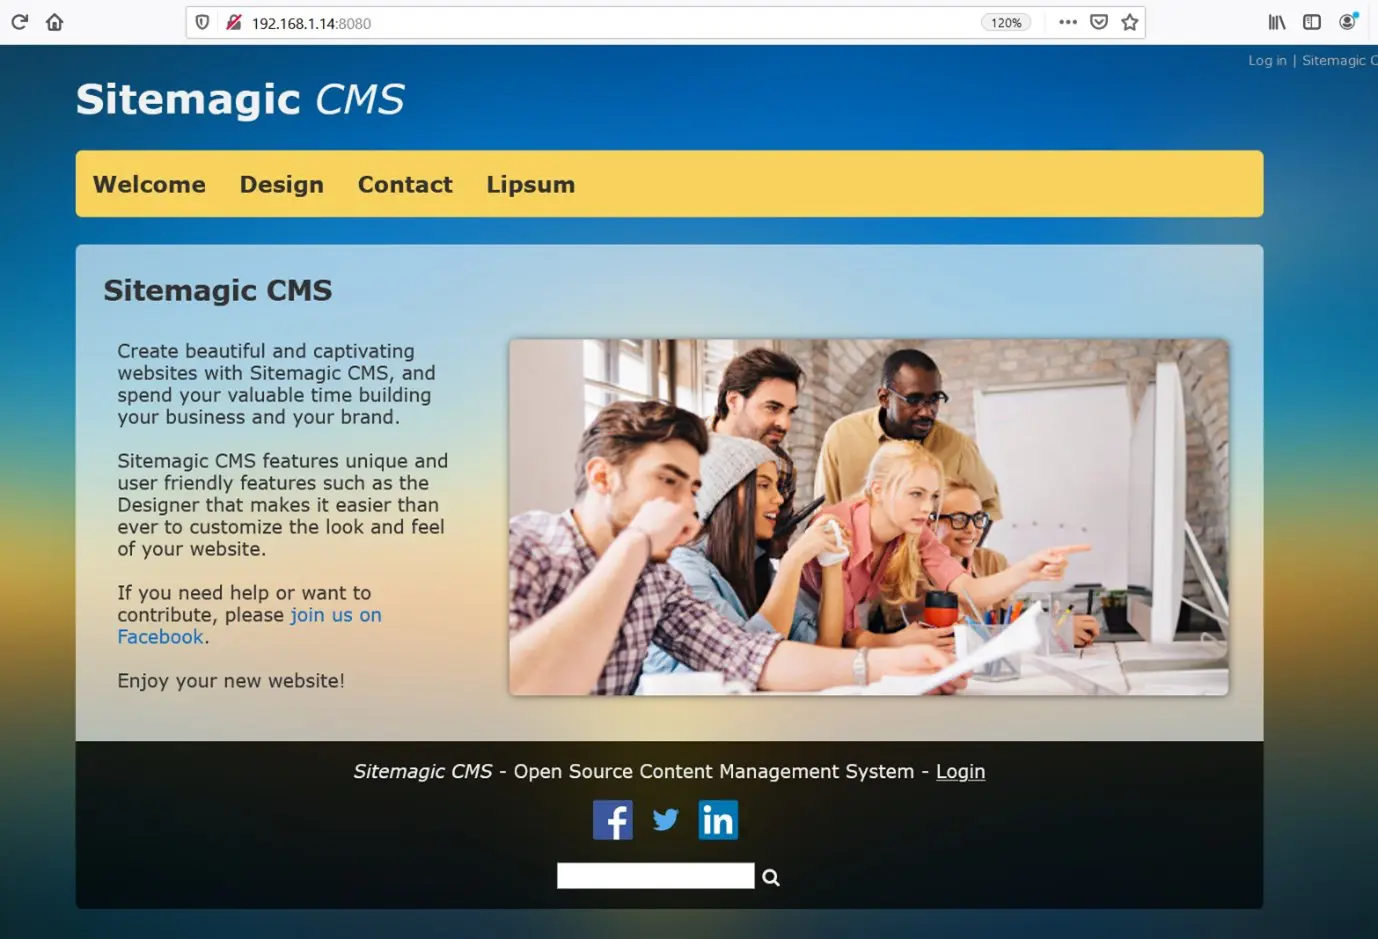
We already know from step two there is another HTTP open port available on the target machine. So, without wasting more time, let’s open it in the browser, which can be seen in the following screenshot:
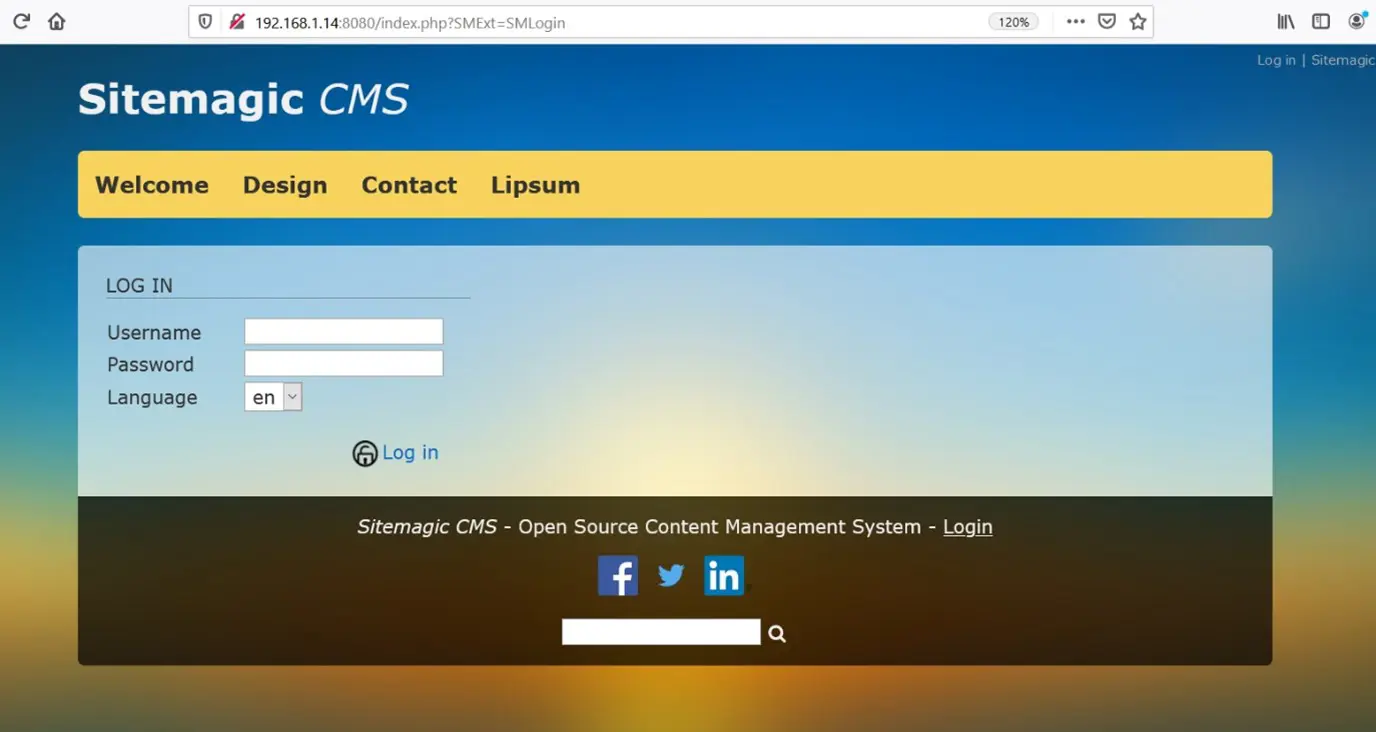
We can see a nice website opened on the browser. This website has a lot of functionalities to explore for vulnerabilities in the system. We'll spend some time understanding the website. We come to know that it appears to have been developed by using a CMS with a login panel. Open the login page and explore the possible weaknesses in the system. You can see this in the following screenshot:
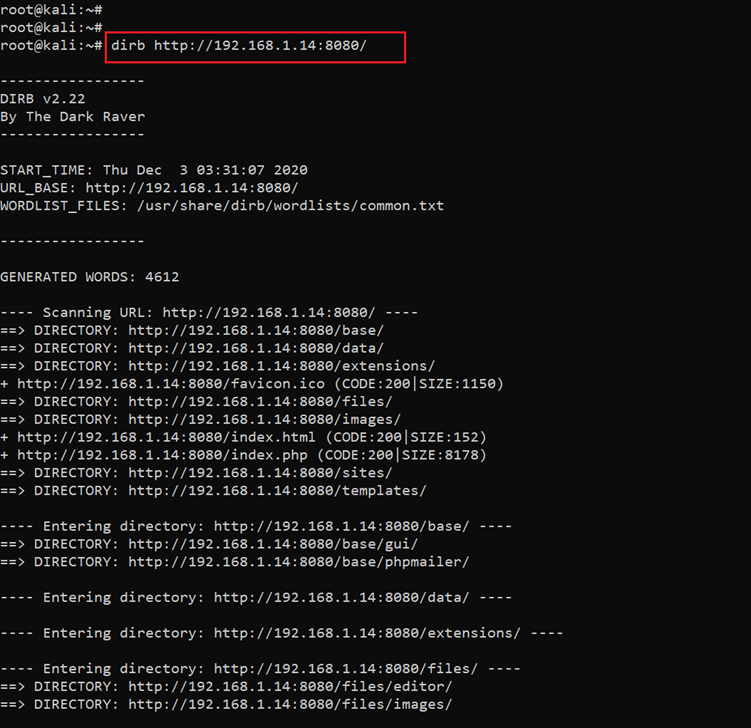
Initially, we tried several known default usernames and passwords, but they did not work. We tested the login page for any SQL injection or authentication bypass on the login page, but it did not succeed either. We tested the complete website to identify other vulnerabilities, but we could not find anything useful. We again decided to run automated tools to identify hidden files and directories which can be seen in the following screenshot:
Command used: << dirb http://192.168.1.14:8000/ >>
In the above screenshot, we can see the DIRB tool has generated a large output. We analyzed each identified file and directory one by one but nothing of much interest could be found. After, we used DirBuster and Gobuster, which generated the same results.
Step five: Generating dictionary and brute force on the login page
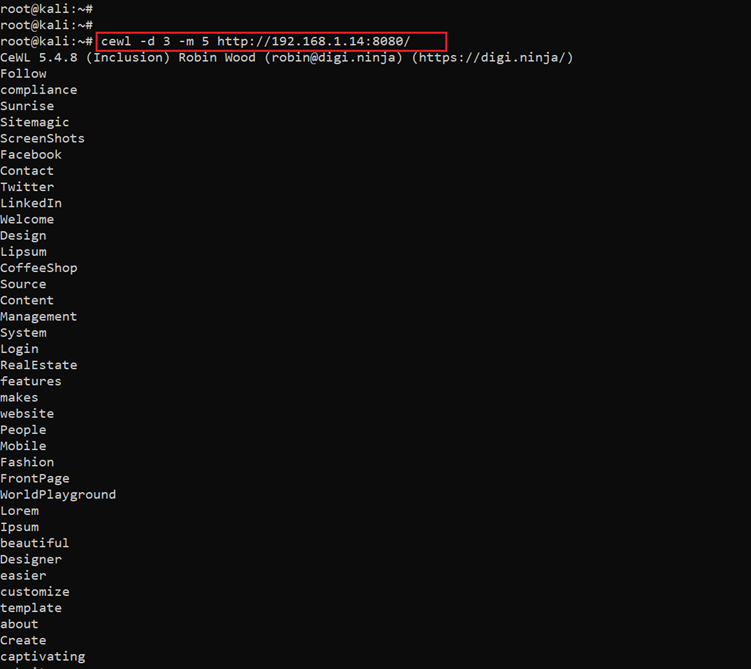
Since we did not identify anything during the enumeration and we know from the previous step there is a login page on the website, we know there is a possibility of brute force. Also, the author said the name of the CTF is a hint, so we prepared our system for running a successful brute force attack. We used a utility called CeWL (CeWL is a utility which is available in Kali Linux by default; it spiders a given URL to a specified depth and returns a list of words which can further be used for various attacks such as password cracking). CeWL will generate a unique dictionary for the website, and then we will use this dictionary to brute force into the login page. The command used to generate the dictionary can be seen below:
Command used: << cewl -d 3 -m 5 http://192.168.1.14:8000 >>
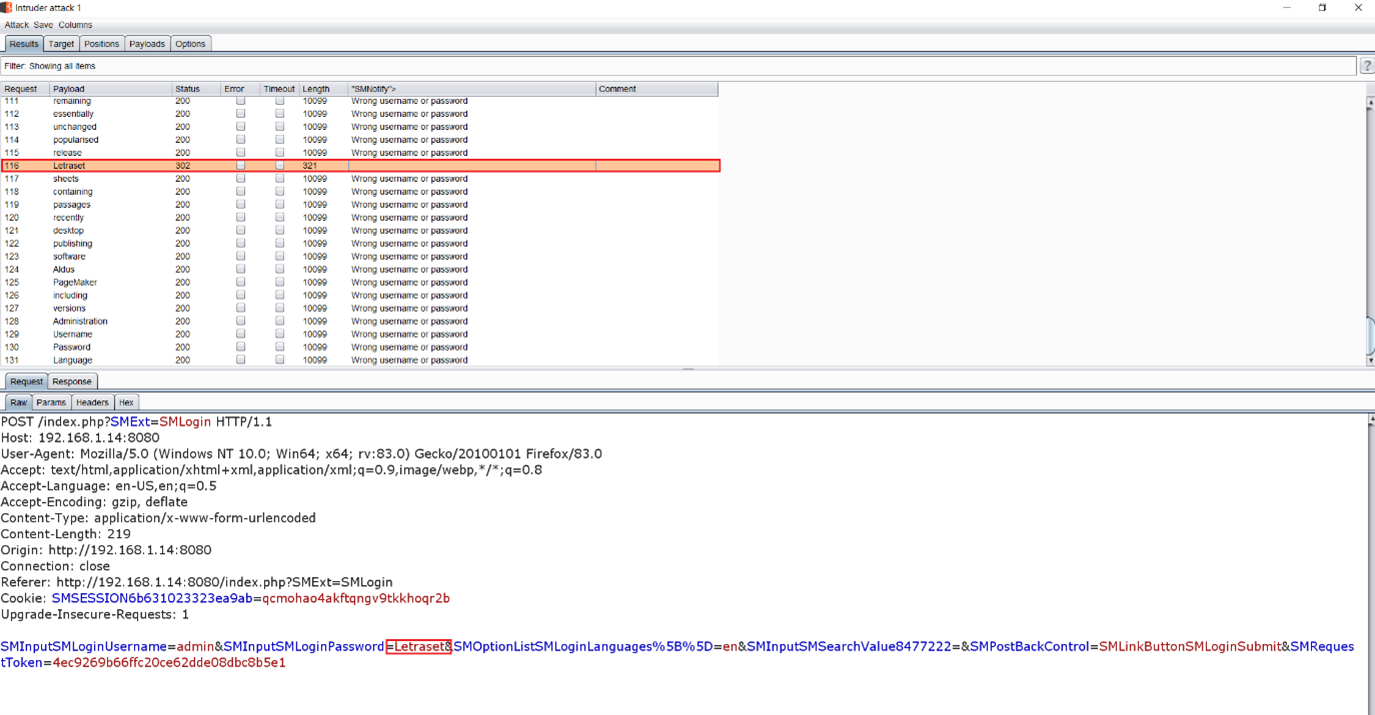
As can be seen above, we ran the CeWL utility on the website, generating the list of words, which can be seen as an output of the command. Now that we have the word list, let’s try using it for a default user admin. There are multiple tools available for a brute force attack; however, we will be using Burp Suite for it. Now, let us configure the Burp Suite proxy into the browser and capture the login request, and after that, forward that to Intruder. Intruder is a module of Burp Suite where we have configured the word list and launched the brute force attack, which can be seen in the screenshot given below:
As can be seen in the highlighted area of the above screenshot, we have found a valid password. In the next step, we will log in to the application with the identified credentials and check for more vulnerabilities.
Step six
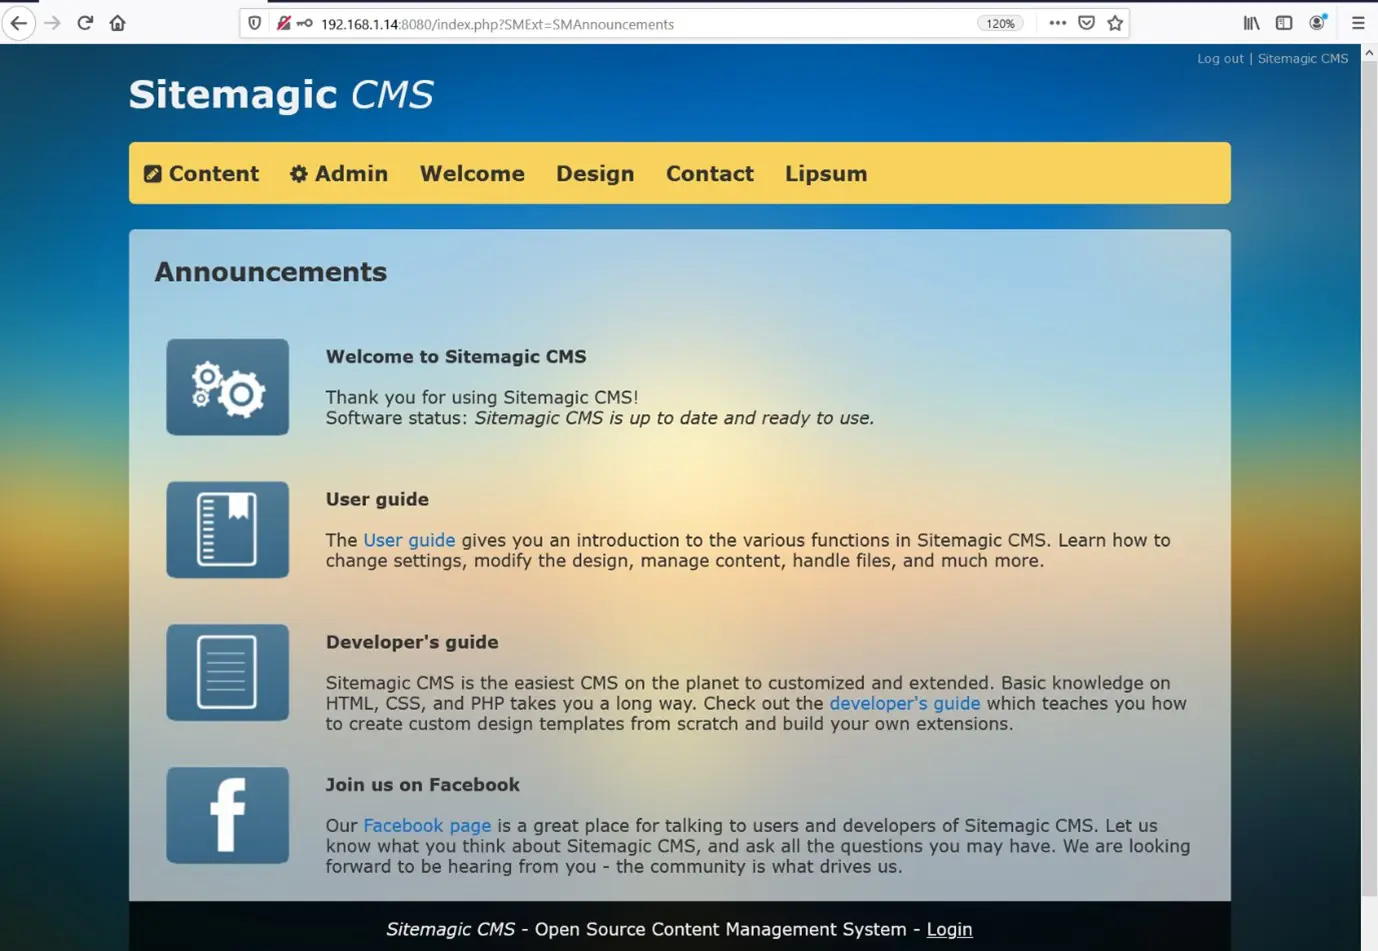
We have the username and password of the web application, which is running on port 80880. So, let’s log in to the application, which can be seen in the following screenshot:
Username: admin
Password: Letraset
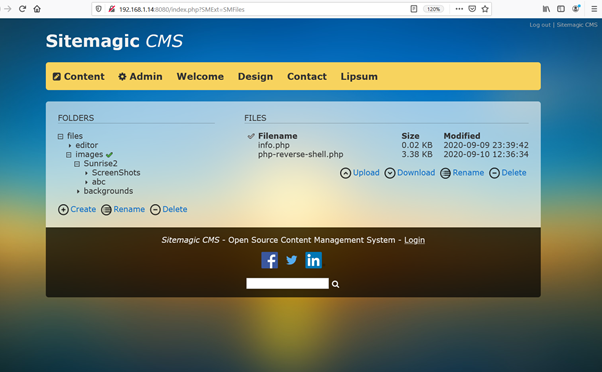
The admin dashboard offers a lot of features to explore. We started looking into each functionality to find an exploitable vulnerability that could allow access to the target machine. During this process, we found lots of vulnerabilities, but those are not enough for getting shell access. So, we spend some more time and find a file upload functionality, which can be understood by the following screenshot:
So far, we enumerated the running application, and by doing the brute force, we can access the admin section of the website where we have found the file upload functionality.

What should you learn next?
In the next part of this CTF, we will use this functionality to upload a file on the target application and will use it for taking the reverse shell.
Until then, I encourage you to try to finish this CTF. There are enough hints given in the above steps to do so.
Sources
- CEWLKID: 1, VulnHub
- CEWLKID: 1 (zip) , VulnHub
- CEWLKID: 1 (torrent) , VulnHub
- CeWL, Kali Tools


