SecurityIQ, AwareEd, and PhishSim User’s Manual, Pt. 5: PhishSim - Phishing Simulator
Objectives
Once you have completed this section, you will be able to:
- Identify the core components of PhishSim Campaigns and how they work together
- Preview educational modules which can be used in PhishSim campaigns
- View, create, and modify Data Entry Templates
- View, create, and edit Education Pages
- View, create, and modify Email Templates
- View, create, and modify Batteries
- Create and manage PhishSim Campaigns
- Install and use the PhishSim plugin to report PhishSim emails
- View and manage the PhishSim Quarantine
- Create and run PhishSim reports
Overview
PhishSim is a phishing training and simulation tool that provides realistic phishing tests, custom phishing email templates, and automatic education for members of your organization.
Using existing templates, a PhishSim campaign can be created and launched in just a few minutes. While we will be covering topics such as creating custom Data Entry Templates and Email Templates, SecurityIQ provides many pre-configured templates that can be used immediately. We will cover these topics for the benefit of those who wish to create or modify content.
PhishSim Core Components
There are four primary components that come together to form a PhishSim campaign. Before we explore each in-depth, we will briefly explain what each is and how they fit into a campaign.
Education
When a learner demonstrates a risky behavior (i.e. clicking the link in a Phishing email), PhishSim has the ability to turn that risky action into a teachable moment through the presentation of different types of training material. PhishSim education can be delivered using our interactive video tutorials as well as static content web pages that can be used to quickly convey information.
Data Entry Templates
In a data entry attack, a phishing victim enters data into a legitimate looking but ultimately malicious website. The SecurityIQ Data entry Templates are mockups of login forms and websites that can be displayed to a learner and ask them to enter data of some kind.
Email Templates
Emails sent to learners are based off of templates within SecurityIQ. These templates define how the email will look, who the email appears to come from, and details regard the type of attack the email is intended to simulate.
Battery
A battery is simply a collection of multiple email templates that you can send to learners during a PhishSim campaign.
Campaigns
A campaign is a collection of batteries that are assigned to be delivered to one or more groups of learners over a defined amount of time.
Quarantine
When a learner identifies a possible malicious or phishing email in their email client, the SecurityIQ PhishSim plugin for Outlook, Outlook 365, and Gmail allows the user to quickly flag and report the email to system administrators. The quarantine area is where the administrator can review and manage these submissions.
Whitelisting
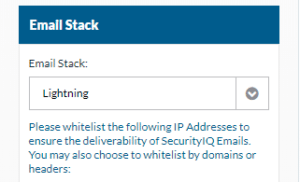
 IMPORTANT – In order to ensure that PhishSim emails are successfully delivered to your servers, you must whitelist the following IP address ranges and domains within your server and any other filtering software.
For a list of the of the IP addresses and Domains please visit your Account Settings page under the Email Stack within SecurityIQ.
Note:
Emails can come from multiple domains. The list of domains is dependent on the domains that are chosen while creating PhishSim campaigns
Whitelisting Instructions for Clients and Servers
Whitelisting is a critical step in ensuring the delivery of SecurityIQ email to your users, especially those enrolled in PhishSim campaigns.
If you are using a system which is not listed below, please send an email to customer-support@infosecinstitute.com containing the client or email server/gateway name, version, and its primary website. We will work to keep this list updated based on customer feedback.
EMAIL CLIENTS
Listed below are the steps needed manage whitelists and approved senders for a number of different email clients.
Gmail
- Open an email from the sender that you want to whitelist.
- Click on the little down-pointing-triangle-arrow next to “reply.”
- Click Add [user@to-be-added.com] to contacts list to finish.
Microsoft Outlook 2003
- Open the email message from the sender you want to add to your address book.
- Right-click Click here to download images in the gray bar at the top of the message.
- Click Add Sender to Senders Safe List to finish.
Microsoft Outlook 2007
- Right-click on the email you received (in the list of emails).
- Click Junk E-mail.
- Click Add Sender to Safe Senders List to finish.
Microsoft Outlook 2010
- Click the Home tab.
- Click Junk.
- Click Junk E-mail Options.
- Click Safe Senders.
- Click Add.
- Enter [user@to-be-added.com] and additional information if you wish.
- Click OK to finish.
Microsoft Outlook 2013
- Click the Home tab.
- Click Junk.
- Click Junk E-mail Options.
- Click Safe Senders.
- Click Add.
- Enter [user@to-be-added.com] and additional information if you wish.
- Click OK to finish.
iOS Devices – iPad, iPhone, iPod Touch (needs screenshot?)
- On any message, tap the sender and add to either a new contact or an existing contact:
Android Devices – Samsung, Google Nexus, others (needs screenshot?)
- In the default email client, touch the picture of the sender.
- Click OK to add to contacts.
AOL Mail
- Click Contacts in the right toolbar.
- Click Add Contact.
- Enter [user@to-be-added.com] and additional information if you wish.
- Click Add Contact button in the popup to finish.
Comcast
- Click Preferences from the menu.
- Click Restrict Incoming Email.
- Click Yes to Enable Email Controls.
- Click Allow email from addresses listed below.
- Enter [user@to-be-added.com] you want to whitelist.
- Click Add.
- Click Update to finish.
Earthlink
- Click Address Book.
- Click Add Contact.
- Save user@to-be-added.com as a contact.
- Click save.
Apple Mail
- Click [user@to-be-added.com] in the header of the message you’re viewing.
- Click Add to finish.
NetZero
- Click the Address Book tab on the top menu bar.
- Click Contacts.
- Click Add Contact.
- Enter [user@to-be-added.com] and additional information if you wish.
- Click Save to finish.
Yahoo! Mail
- Open the email message from the sender you want to add to your address book.
- Click Add to contacts next to [user@to-be-added.com].
- On the Add Contact popup, add additional information if needed.
- Click Save to finish.
Windows Live Hotmail
- Open an email from the sender that you want to whitelist.
- Click Add to contacts next to [user@to-be-added.com] to finish.
Mac Mail
- Click Address Book .
- Click File.
- Click New Card.
- Enter [user@to-be-added.com] and additional information if you wish. .
- Click Edit to finish
Mozilla Thunderbird for PC
- Click Address Book.
- Make sure Personal Address Book is highlighted.
- Click New Card. This will launch a New Card window that has 3 tabs: Contact, Address & Other.
- Under Contact, enter [user@to-be-added.com] and additional information if you wish.
- Click OK to finish.
Mozilla Thunderbird for Mac
- Click Address Book.
- Make sure Personal Address Book is highlighted.
- Click New Card. This will launch a New Card window that has 3 tabs: Contact, Address & Other.
- Under Contact, enter [user@to-be-added.com] and additional information if you wish.
- Click OK to finish
EMAIL SERVERS
The following links reference instructions on managing whitelist rules and settings for a number of different email servers and gateways.
- Google Apps/Gmail
- Microsoft Exchange
- 2007 - http://exchangepedia.com/2007/01/exchange-2007-content-filter-the-whitelist-is-here.html
- 2010 - https://technet.microsoft.com/en-us/library/bb125225(v=exchg.141).aspx
- 2013
- By Sending Domain Or User - https://technet.microsoft.com/en-us/library/dn198251(v=exchg.150).aspx
- IP Addresses - https://technet.microsoft.com/en-us/library/bb123554(v=exchg.150).aspx
- Microsoft Office 365 - https://support.microsoft.com/en-us/kb/2545137
- Rackspace Email
EMAIL GATEWAYS
- Cisco Email Security Appliance
- Clearswift SECURE Email Gateway
- Fortinet FortiMail
- McAfee SaaS Email and Web Security
- Sophos Email Appliance
- Symantec Messaging Gateway and Symantec Email Security.cloud
- Trend Micro InterScan Messaging Security
- Websense Email Security Gateway
Education
When a learner demonstrates a risky behavior (i.e. clicking the link in a Phishing email), PhishSim has the ability to turn that risky action into a teachable moment through the presentation of different types of training material. PhishSim education can be delivered using our interactive video tutorials as well as static content web pages that can be used to quickly convey information.
The education that your learners receive is selected when creating or editing your email template. The Default Education can be changed in your SecurityIQ Account Settings. Your SecurityIQ platform comes built in with numerous Educations. Take note of the interactive modules:
- Phishing
- Ransomware
- Spear Phishing
- Suspicious Hosts
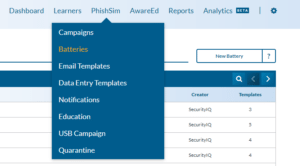
To get started navigate to Education under PhishSim in your SecurityIQ platform. From here you can browse Educations provided with your Security platform. You can also create, clone and delete educations. You can search for Educations using the search icon. You can also navigate the list using the arrow icons.
Previewing an Education
- Hover over the education you wish to preview and click the preview icon.

Education Editor
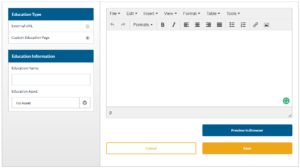
- Click the New Education button
- Select External URL or Custom Education Page.
- Name your Education.
- If you selected External URL, enter the desired URL and click the Save button.
- If you selected Custom Education Page, edit your Education using the built-in editor. Notice that under tools you can select the Source code tool. This tool will allow you to edit existing or paste new HTML.
- You can customize your Education using variables. Variables will pull the related data from your SecurityIQ platform on a per learner basis. For example, if you use the {{learner_first}} variable, the Education will be customized with the first name of the learner it was sent to. For further: https://securityiq.infosecinstitute.com/Documentation/phishedLandingPage
- Select any built-in assets that you wish to include in your custom education. Note: If you choose an education asset you must use the variable {{education_asset}}. This variable also controls where the asset is located within your education page.
- You can preview your Education by clicking the Preview in Browser button.
- When done click the Save button. The newly created education will be in your education list.
Cloning an Existing Education
- Hover over the Education that you wish to clone and click the clone icon. This will bring you to the Education Editor. After you make your edits and save the education will be found in your Education list.

Data Entry Templates
A data entry attack prompts a learner to enter and submit data into a form. If a learner did this with a real phishing attempt they could give away their credentials or other confidential information. Your SecurityIQ platform includes built-in Data Entry Templates. You can also edit existing or create your own data entry templates.
No information captured by a data entry template is collected by your SecurityIQ platform.
To start navigate to Data Entry Templates under PhishSim.
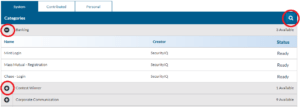
Notice the three tabs System, Contributed, and Personal. System Templates are templates creating by Infosec Institute and included with your SecurityIQ platform. Contributed are templates that other SecurityIQ customers have created and chosen to share. Personal templates are templates that you have created within the platform.
Under each of the above tabs, the templates are divided into categories you can expand or contract a category by clicking the + or - icon.
You can also search for templates by clicking the search icon.
Previewing a Data Entry Template
- Hover over the email template you would like to preview and click the preview icon. The preview will open a new browser tab.

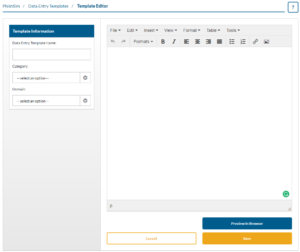
Creating a Data Entry Template
- Click the New Template button.
- Name the template.
- Select a Domain. You can add custom domains in the Phishy Domains section of your platform.
- You can customize your data entry template using variables. Variables will pull the related data from your SecurityIQ platform on a per learner basis. For example, if you use the {{learner_first}} variable, every template will be customized with the first name of the learner it was sent to. For further: https://securityiq.infosecinstitute.com/Documentation/dataEntrySites
- For a data entry template to work it will need a form and a form submit element.
- You preview by clicking the Preview in Browser button.
- When done click the Save button. You will find your saved template under the personal tab.
Cloning an Existing Data Entry Template
- Hover over the Data Entry Template that you would like to clone and click the clone icon. This will bring you to the Data Entry Template Editor. After you make your edits and save the template it will be found under your Personal tab.

Email Templates
Email templates are the emails that are sent out to your learners during PhishSim campaigns. There are many system and contribute templates for you to choose from. You can also create custom templates.
To start navigate to Email Templates under PhishSim.
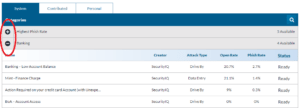
Notice the three tabs System, Contributed, and Personal. System Templates are templates creating by Infosec Institute and included with your SecurityIQ platform. Contributed are templates that other SecurityIQ customers have created and chosen to share. Personal templates are templates that you have created within the platform.
Under each of the above tabs, the templates are divided into categories you can expand or contract a category by clicking the + or - icon.
You can also search for templates by clicking the search icon.
Attack Types
Drive By – The purpose of a drive-by attack is simply to get a learner to click on a link contained in the email. Once they have done this, they will be directed to a web page which contains the training content you have defined in the template.
Attachment – When an attachment attack is conducted, PhishSim will include a file attachment with the email. When a learner opens the attachment, a macro is executed within the document which notifies the SecurityIQ platform that the user has opened the file. You can choose from three different file types to include in the email and also provide a name for the attachment. When providing the name, you do not need to include the file extension. This will automatically be added when the email is sent, based on the type of file being included. The three file types which can currently be attached are Microsoft Word, Excel, and PowerPoint.
Data Entry – Many breaches that occur are the result of a data entry attack in which a user is taken to a web page designed to look like a legitimate site such as Google. The user is then prompted to enter a username, password, or other information. In a real-world scenario, this data would be collected and used to gain access to the user’s account. In PhishSim, we present the learner with a fake login page and then simply register whether or not they entered any data in the form and submitted it. None of the entered data is collected or stored.
When the Data Entry attack type is selected, an additional configuration field is displayed in which you can select the Data Entry Page to be displayed when the learner clicks the link in their email.
Previewing an Email Template
- Hover over the email template you would like to preview and click the preview icon. The preview will open a new browser tab.

Creating an Email Template
 IMPORTANT – If an Email Template is created from external source code, SecurityIQ will automatically sanitize any links that may be included in the source code and redirect them back to a PhishSim landing page. This ensures that emails received by learners will not direct them to a malicious site.
- Click the New Template button.
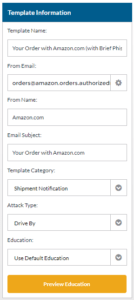
- Name the template.
- Select the From Email by clicking the gear icon. You can add custom domains in the Phishy Domains section of your platform.
- Enter a From Name.
- Enter an Email Subject.
- Select the Category that best fits your template.
- Select the type of attack your template will use.
- Select the education your learners will receive after getting phished. After selecting the education you can preview it by clicking the Preview Education button.
- Edit your email using the built-in editor. Notice that under tools you can select the Source code tool. This tool will allow you to edit existing or paste new HTML. This can be useful to copy emails that you have seen in the wild. Any links in your HTML source code will automatically be sanitized and redirected back to a SecurityIQ landing page.
- You can customize your email body, from name and subject using variables. Variables will pull the related data from your SecurityIQ platform on a per learner basis. For example, if you use the {{learner_first}} variable, every email will be customized with the first name of the learner it was sent to. Notice that the {{footer}} variable is required. For further: https://securityiq.infosecinstitute.com/Documentation/phishingTemplates
- You can preview the template by clicking the Preview in Browser or Email Preview to Me button. Note that the while previewing the email footer will show even if it is suppressed in your SecurityIQ Settings. If you selected to suppress the footer it will be suppressed during a PhishSim campaign.
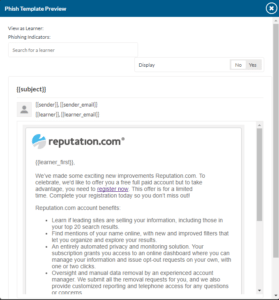
Creating a Template with Phish Indicators
Phish Indicators are another way to educate your learners after they have been phished. A phished learner will see the email they received overlaid with indicators. These indicators can be used to point out things that your learners should watch for to avoid phishing.
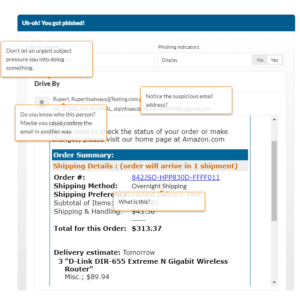
- Create a new Education for the Phish Indicators.
- Under the PhishSim menu navigate to Education and click the New Education button.
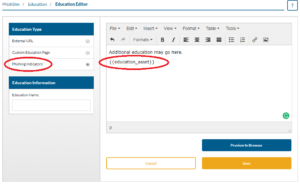
- On the left-hand side select the “Phishing Indicators” Option.

- The “{{education_asset}}” variable will display the email template and indicators that you will create in later steps.
- Add any additional education that you want to be displayed with your Indicators.
- If you already have templates with Indicators you can preview how the education will work by clicking the Preview in Browser button.
- Once satisfied with the education name it and click the Save button.
- Navigate back to the Email Templates section of your SecurityIQ platform.
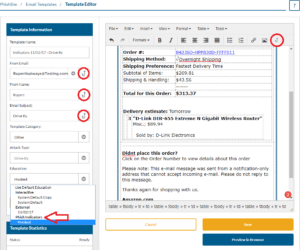
- Select the template that you want to add Indicators to and click the edit icon. Alternatively, you can create a new template.
- Notice the hooks circled in the below image. By clicking these hooks you can add an indicator. The hooks next to the from email, from name and email subject allow you to add an indicator to these fields.
- You can add indicators to the email body by highlighted the area you want to add an indicator and pressing the hook in the editor's menu.
- Select the Phish Indicators education that you made in the previous steps.
- Preview the template to confirm that the template and indicators are correct.
- Save the template.
- The Indicators will be displayed to a learner as an education after they have been phished.
Cloning an Existing Email Template
- Hover over the Email Template that you would like to clone and click the clone icon. This will bring you to the Email Template Editor. After you make your edits and save the template it will be found under your Personal tab.
Batteries
Batteries are collections of email templates that are used to charge your PhishSim campaign. There are several default batteries included with your SecurityIQ platform. To view and create new templates navigate to Batteries under Phishsim.
Notice that you can navigate the Batteries list by using the arrow icons. You can also search for batteries by clicking the search icon.
Previewing Default Batteries
- Hover over the battery that you want to preview and click the preview icon.
- From here you can see the templates in the campaign. You can preview the templates by clicking the preview icon next to the template that you wish to preview.

Creating a New Battery
- Click the New Battery button.

- Specifically name your Battery.
- Click the Add Templates button.
- Select the templates that you would like to add.
- Notice the three tabs System, Contributed, and Personal. System Templates are templates creating by Infosec Institute and included. Contributed are templates that other SecurityIQ customers have created and chosen to share. Personal templates are templates that you have created within the platform.
- There is also a drop-down menu that organizes templates into categories and search bar to help you find templates quickly.
Cloning Batteries
You do have the ability to clone an existing battery within SecurityIQ, this will allow you to add and remove templates in the cloned battery and change the name of the battery if needed.
- Hover over the battery that you wish to clone.
- Click the Clone icon
 Editing Batteries
Note: You can not edit the default batteries included with our SecurityIQ platform.
- Hover over the battery you wish to edit and click the edit icon. You will now be able to add or remove templates and rename it.

Deleting Batteries
- Hover over the battery that you wish to delete and click the delete icon.
- Click the Delete button.

Phishy Domains
Phishy Domains allows you to pick custom domains and subdomains for your phishing emails and educational landing pages. You provide your custom domain to SecurityIQ through the Phishy Domains feature. SecurityIQ will then automatically check if the domain is available. If available, SecurityIQ will automatically register it and email when it is ready to use.
The Basics
- To get started, navigate to the Phishy Domains section of your SecurityIQ platform.
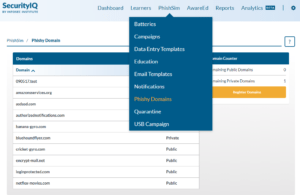
- Here you will see a list of domains. When a domain is configured as “Public” all SecurityIQ customers can use it. A domain listed as “Private” can only be used by you.
- Hovering your mouse over a domain will make the setting icon appear.
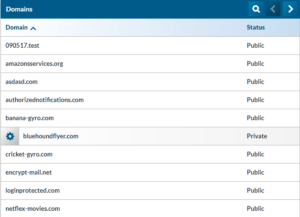
To add a subdomain click the icon and follow the prompts. After adding a subdomain the SecurityIQ team will have to approve before it is available to use.
Registering a Custom Domain
- On the right side of the screen, you will notice the Domain Counter and Register Domain Button. The domain counter displays how many custom domains you have available to register.
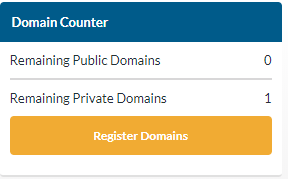
- To register a custom domain click the Register Domains Button.
- Enter the custom domain you wish to register and click the Check Domain button.
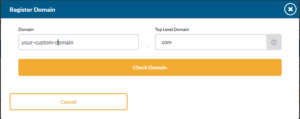
- If your domain is available you will be prompted to register it. Before registering it select if you want the domain to be public (available to all SecurityIQ customers) or private (available only to you).
- Click the register button. When your domain is ready you will receive an email from SecurityIQ letting you know.
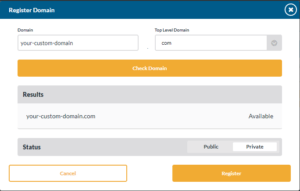
- When your custom domain is approved you will be able to select when creating PhishSim email and data entry templates.
PhishSim Campaigns
PhishSim Campaigns are where you schedule the phishing emails sent from SecurityIQ. You can control who receives the emails, the specific emails that are sent and how the campaign will behave. You can also save draft campaigns for use at a later time.
- Navigate to the Campaigns under PhishSim in your SecurityIQ platform.
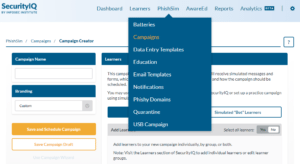
- Click New Campaign.
- Name your campaign.
- At anytime after naming your campaign you can save a draft. Your progress will be saved and the campaign will be saved on your campaign page under the Draft Campaign section.
- Select our branding.
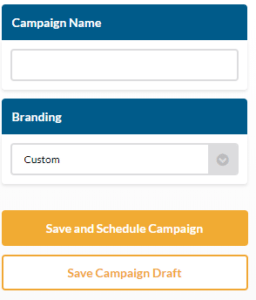
- Select Real Learners.
- Selecting a Practice With Learner “Bots” will allow you to run a simulated campaign. This can help you test other features such as Reporting and Analytics.
- Select the groups and individual learners you want in your campaign.
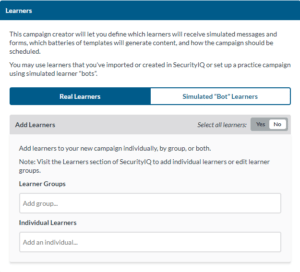
- Select the Batteries or template categories you want to be included in your campaign.
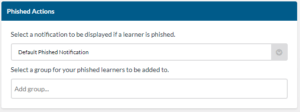
- Select the notification you want your learners to receive after being phished.
- Optionally, select a group you would like to add phished learners too.
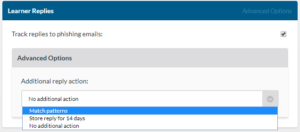
- Your SecurityIQ platform can track when learner replies to simulated phishing messages. If you click the advanced tab you can also have the platform look for a predefined string in the reply. You can also define your custom string. If you wish you can have your SecurityIQ platform save the replies for up to 14 days.
- After the campaign is started you can check the campaign details to see if a learner replied. Click the Email Status for more details.

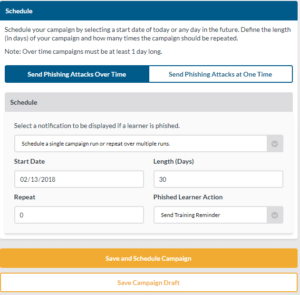
- Select Send Phishing Attacks Over Time or Send Phishing Attacks at One Time.
Send Phishing Attacks Over Time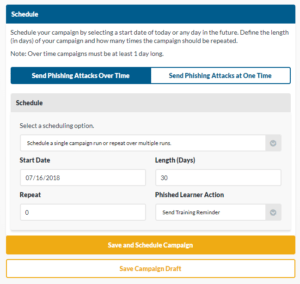
- You may set the campaign to repeat weekly, monthly or quarterly.
- Select the date you want our campaign to start.
- Select the length of days you want your campaign to run.
- Note: The emails in the batteries selected in your previous step will be sent randomly to learners. If you select a condensed time frame the emails will be sent rapidly and close together.
- Select how many times you want the campaign to repeat.
- Note: Selecting 0 will run the campaign 1 time.
- Select if you want your learners to receive a training reminder.
- Click Save And Schedule Campaign to run the campaign or Save Draft Campaign to save it as a draft.
Send Phishing Attacks at One Time
This option will send out the emails in your selected batteries to all the selected learners at one time.
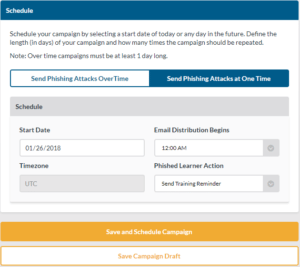
- Select the date you want the emails to send.
- Note: Selecting a date in the past will send the emails immediately.
- Select the time you want the emails to send.
- Note: This time is based on your time, not your learners if you happen to be in different time zones.
- Select if you want your learners to receive a training reminder.
Navigation your Campaigns
The PhishSim Campaign section of your SecurityIQ platform will list all running, stopped, and saved draft campaigns. completed campaigns. By hovering your mouse over a campaign you can see options for cloning, stopping and deleting campaigns. You can also add/remove learners and see campaign details.

Cloning a Campaign
- Hover over the campaign that you would like to clone with your mouse.
- Click the Clone icon.
- The cloned campaign will appear in your campaign list. Click the Start icon and select how you want the cloned campaign to be scheduled.
- Click the Start button.

Stopping a Campaign
- Hover over the campaign you want to stop with your mouse and click the stop icon.
- This stops the current and any future runs of this campaign.
- To restart the campaign hover over it and click the start icon.

Deleting a Campaign
Deleting a campaign will also delete all the data associated with this campaign.
- Hover over the campaign you wish to delete and click the delete icon.
- Click the Yes button.
 IMPORTANT – Deleting a campaign will also delete all associated history for the campaign and its associated learners. If you wish to retain data and results from a campaign, you must run a report for the campaign and export the information prior to deleting it from the system. You cannot undo a deletion, so be sure to export any needed information before doing so.

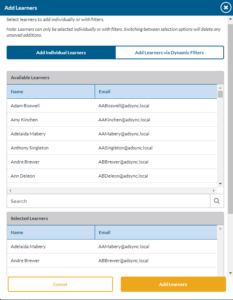
Adding/Removing Individual Learners to a Campaign

- Hover over the campaign that you wish to add learners to or remove learners from and click the Add Learner or Remover Learner icon.
- Select Individual Learners.
- Select learners in the Available Learners list by clicking them. They can be removed from the Selected learners list by clicking.
- You can search for learners using the search tool at the bottom of the Available Learners list and Selected Learners list.
- After you have made your selection click the Add Learners or Remove Learners button.
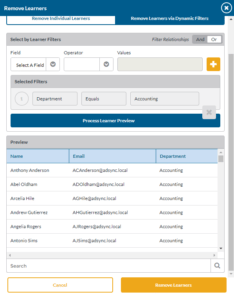
Adding/Removing Learners to a Campaign using Dynamic Filters

- Hover over the campaign that you wish to add learners to or remove learners from and click the Add Learner or Remover Learner icon.
- Select Add or Remove Learners via Dynamic Filters.
- Select the Filter Relationship. This relationship controls how multiple filters work together. Selecting “And” means that all filters selected will have to be true before a learner is selected. Selecting “Or” means that if any of the filters are true the learner will show in the preview.
- Next, add at least one filter by filling out the fields and clicking the plus button.
- More than one filter can be selected.
- For example, if you selected the Field “Phished Count”, the Operator “Greater than or Equal to” and the Value ‘1’, only learners that have been phished at least one time will show in the preview.
- Click the Process Learner Preview button and confirm the results.
- After you have made your selection click the Add Learners or Remove Learners button.
Getting Campaign Details
In the Campaign Details, you will find information about a specific Campaign’s runs. You can also find details on a specific run.

- Hover over the campaign that you wish to see the details about. Click the details icon. You will find some basic information about your campaign runs.
- From here, you can hover over a specific run and click the chart icon. You will find information about how your email templates and learners are performing within your run.

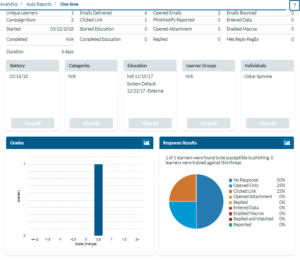
Generating Automatic Reports
By clicking on the campaign status you can generate an automatic report for any specific campaign. After creating the report you can return to it later. It will be found under the Analytics, Auto Reports section of SecurityIQ.

PhishSim Plugin and Quarantine
PhishNotify Installation
The PhishNotify plugin is a powerful tool to help keep your organization safe from malicious emails. The plugin allows users to seamlessly report suspicious emails to your system administrators.
You can find the installation media and license key for the PhishNotify plugin, in your SecurityIQ account settings.
System Requirements
- Windows 7 or newer with Outlook 32 bit, 64 bit or Outlook 365, Gmail (accessed through the Chrome web browser)
- .NET version 4.5.2 or newer
- Open Port 443 TCP (SSL/HTTPS) workstations so the plugin can communicate with our servers
- Administrative rights to install software on the workstation
Plugin Behavior
It’s a good Idea to configure the plugin before installation. The following settings are found in your SecurityIQ setting under “Messages and Behavior”.
- Upload Email Contents: Enabling this will send the email to our servers for inspection by your team.
- Upload Email Attachments: Enabling this will send related attachments to your SecurityIQ Quarantine.
- Email Actions: After a user reports an email automatically mark as spam, move to trash or do nothing.
- Message When Learner: Change the messages a user receives after reporting an email.
- If you make changes make sure to click the Save button on the botom of your SecurityIQ Account Settings page.
Accessing the PhishNotify plugin and Licence Key
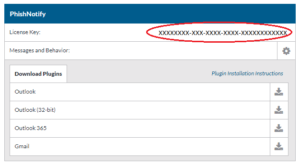
- Click on the gear icon to access your SecurityIQ Account Settings page.

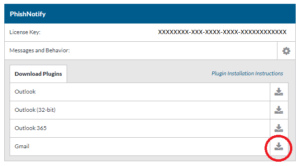
- Take note of your license key and download the plugin you wish to install.
Registry Edits for Outlook Plugin
In certain situations, Outlook may disable the PhishNotify plugin. Making the below windows registry edits can prevent Outlook from doing this.
For more about editing Windows registry keys visit: https://support.microsoft.com/en-us/help/136393/how-to-modify-the-windows-registry
[HKEY_CURRENT_USERSoftwarePoliciesMicrosoftOffice15.0OutlookResiliencyAddinList]
"SecurityIQPhishNotify" = "1"
[HKEY_CURRENT_USERSoftwarePoliciesMicrosoftOffice16.0OutlookResiliencyAddinList]
"SecurityIQPhishNotify" = "1"
Basic Installation for Outlook
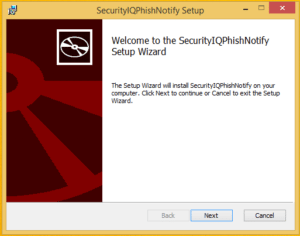
- Run the installer:
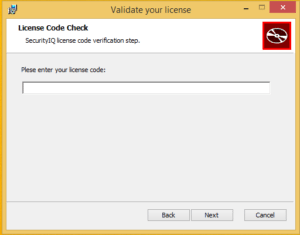
- Enter your License Key:
- Restart Outlook and check the ribbon for the PhishNotify plugin:

Command Line Installation Outlook
Run the following as administrator.
The plugin can be installed using the msiexec.exe installer. This in combination with Group Policy will help with a company wide deployment.
msiexec /quiet /i PhishNotify.msi LICENSE_CODE=aaaa-aaaaa-aaaaa-aaaa
Uninstall
The plugin can be uninstalled using the original installation media or the msiexec.exe installer.
msiexec /x PhishNotify.msi
Group Policy installation
- Start by deploying to one workstation within your organization.
- Create a shared folder on your server (read only for Domain Computers), for example C:deploy shared to serverdeploy
- Copy PhishNotify.msi into this directory
- Make sure the domain computers have access to the shared folder
- Create a batch file called phishnotify.bat in the shared folder with the following 3 lines of code:
copy serverdeployPhishNotify.msi C:
msiexec /quiet /i C:PhishNotify.msi LICENSE_CODE=aaaa-aaaaa-aaaaa-aaaa
del C:PhishNotify.msi
Create your GPO
- Open the Group Policy Management Console, create a new GPO under Computer Configuration > Startup Script.
- Click the Add button.
- Place the full path to the phishNotify.bat in the script name field. E.g. serverdeployphishNotify.bat
- Click OK, and close Group Policy Management Console.
- Refresh group policy on the client by running gpupdate /force from the command prompt.
- Verify the installation by opening Outlook and finding the PhishNotify plugin in the ribbon.
Group Policy Uninstall
To uninstall follow the same process of creating a GPO. Change your batch file for removal.
msiexec /quiet /x C:PhishNotify.msi LICENSE_CODE=aaaa-aaaaa-aaaaa-aaaa
Office 365 Installation
- Extract the plugin to the directory of your choice.
- Follow the official Microsoft documentation found here: https://support.office.com/en-us/article/Deploy-Office-add-ins-in-the-Office-365-admin-center-737e8c86-be63-44d7-bf02-492fa7cd9c3f
Google Chrome Basic Installation
This plugin is designed to work Chrome while using the Gmail web interface.
- In your SecurityIQ Account Settings page click Install via Google App Store.
- Next, click add the Add To Chrome button.

- Nex, Click Add Extension.
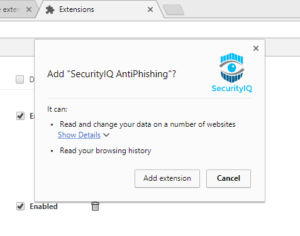
- Next, enter your license key and click Check License.
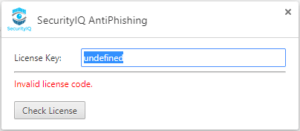
- You should now see the PhishNotify plugin in the upper right-hand side of your Chrome window.

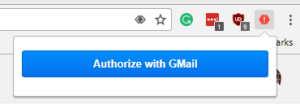
- In the Chrome Browser navigate to the Gmail account that you wish to use the plugin with. Select an email to view. The PhishNotify icon should now be red. Click the icon. Then click Authorize with Gmail. Finally, allow the plugin access so that emails can be reported. The PhishNotify plugin is now ready to use.
Installing the PhishNotify Plugin Through the Google Dashboard
The following instructions will allow you to use the Google dashboard to install the PhishNotify plugin across your organization's Google Domain. The plugin is designed to work with Chrome while accessing Gmail.
Step 1: Publishing the app
- Download the PhishNotify Gmail Plugin from your SecurityIQ Accounts Setting page.
- Sign into the Chrome Web Store to publish the plugin. https://chrome.google.com/webstore/developer/dashboard
- Click on the Add new item button and browse to select the PhishNotify.zip file.
- Once the upload completes, scroll down and select the category and language for the plugin.
- Select Private and Everyone at (your domain), then click Publish changes. This process can take up to 60 minutes before the plugin is ready.

Step 2: Force-install the app
- Sign into your Google Admin console
- From the Admin console dashboard, click on Device management > Chrome management > User settings
- Select the appropriate organization.
- Scroll down to Force-installed Apps and Extensions and click Manage force-installed apps.
- Select Domain Apps, click Add, then click Save.

- Finally, at the bottom of the Admin Console, click Save.
Quarantine
The Quarantine section of your SecurityIQ platform works in conjunction with the PhishNotify plugin. When a learner reports a suspicious email not associated with your SecurityIQ platform it is placed in your quarantine. The email and associated attachments will be kept in our quarantine for 14 days.
Note: Your PhishNotify plugin can be configured in your Account Settings.
Viewing Quarantined Emails
- Navigate to the Quarantine Section of your SecurityIQ platform under PhishSim. Here you will find a list of quarantined emails.
Previewing a Quarantined Email
- Hover your mouse over the email you wish to preview. Click the Preview icon.

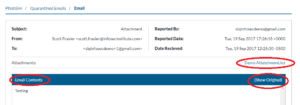
- From here you can view the email, view the email source code or download associated attachments.
- Attachments can be downloaded by clicking on the attachment.
- The source code can be viewed by clicking Show Original
- The contents of the email can be viewed in the Email Contents section.
Deleting Quarantined Emails
- Hover your mouse over the email you would like to delete. Click the Delete icon.

Reports
Reporting is the way you can get data about your PhishSim and AwareED campaigns. Reports provides you with the ability to get an overview of how your learners are performing. Summary reports include a visualization tool. All reports can be downloaded as a CSV file or automatically emailed out weekly.
There are four types of reports:
- AwareED Campaign Summary: Reports the percentage of learners that started and completed your AwareED course.
- PhishSim Campaign Summary: Reports the percentage of learners that avoided, opened, phished, completed a training and opened a file in a selected PhishSim Campaigns.
- AwareED Campaign Run Status: Provides a list of learners in selected AwareED Campaigns and learner’s status in the course.
- PhishSim Campaign Run Status: Provides a list of PhishSim Campaign events along with associated dates and learners.
To get started navigate to Reports.

Creating a New Summary Report
- Click the New Report button.
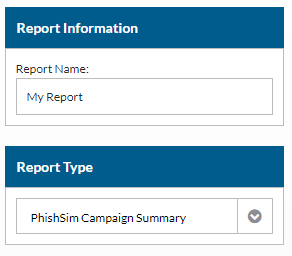
- Name your Report
- Select Report Type (AwareED Campaign Summary or PhishSim Campaign Summary).
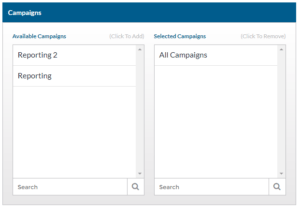
- Select the campaigns you want to be included.
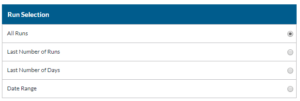
- Select which Campaign Runs you want to be included.
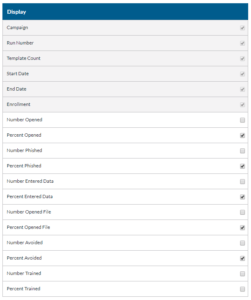
- Select if you want data displayed in number or percentage format.
- You can test the report by clicking the Test in Browser button.
- You can send a test email by clicking the Send Test Email button.
- If you wish this report to be emailed once a week check the checkbox and select whom you would like to receive the report.

- Click the Save Report button.
[caption id="attachment_37993" align="aligncenter" width="550"]
 Example Summary Report[/caption]
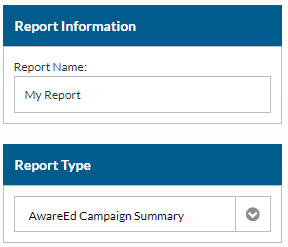
Creating a New Run Status Report
- Click the New Report button.
- Name your Report
- Select Report Type (AwareED Campaign Run Status or PhishSim Campaign Run Status).
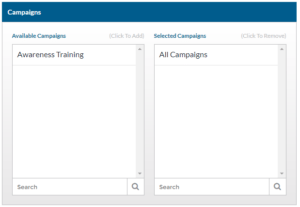
- Select the campaigns you want to be included.
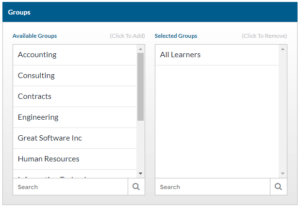
- Select the Learner Groups you want to be included.
- Select which Campaign Runs you want to be included.

- Select your Status Filters.

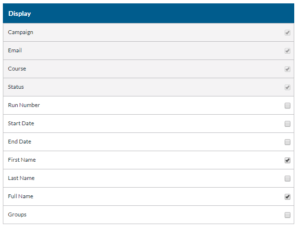
- Display the information you want to be displayed.
- You can test the report by clicking the Test in Browser button.
- You can send a test email by clicking the Send Test Email button.
- If you wish this report to be emailed once a week check the checkbox and select whom you would like to receive the report.

- Click the Save Report button.
[caption id="attachment_37996" align="aligncenter" width="550"]
 Example Run Status Report[/caption]
Viewing a Report

- Hover your mouse over the report you wish to view and click the details icon.
- Notice that while viewing the report you have the option to download the data as a CSV file.
Cloning a Report

- Hover your mouse over the report you wish to view and click the clone icon.
- Make any changes to the report and click the Save button.
Editing A Report

- Hover your mouse over the report you wish to view and click the edit icon.
- Make any changes to the report and click the Save button.
Deleting a Report

- Hover your mouse over the report you wish to view and click the
See Infosec IQ in action

