SecurityIQ, AwareEd, and PhishSim User's Manual, Pt. 4: Learners & Groups
Learners & Groups
Table of Contents:
Phishing simulations & training
- Overview
- Licensing
- Creating Users
- Managing Individual Learners
- Importing Multiple Users
- Managing Groups
- Active Directory Synchronizer
Objectives
Once you have completed this section, you will be able to:
- Understand how learners are counted in SecurityIQ
- Create a single learner manually
- Create multiple learners by importing a CSV file
- Create groups
- Assign learners to a group
- Delete a group
- Understand how groups are used in SecurityIQ
Overview
As you learned in the Planning section, groups will be a key part of effectively and efficiently delivering security awareness training and simulated phishing attacks to your learners, as well as reporting on their progress. In this section, you will learn how to create learners manually or by importing a large number of them via a CSV file and assigning those learners to the appropriate groups.
Licensing
Before we begin creating learners, it will be helpful to review how SecurityIQ handles licensing. When you subscribe to SecurityIQ, you are purchasing “seats” within the system. Much as with a physical classroom that may have 20 seats that are occupied by students at any given time, students will come and go throughout the year. When a new student arrives to take the place of one who left, you don’t purchase a new seat, you simply re-assign the seat of the student who left. In the same way, when a learner leaves your organization and a new one takes their place, you do not need to purchase an additional seat, you will simply delete the old learner from the system and add the new one.

Creating Users
There are two quick and easy methods for enrolling learners in SecurityIQ. If you only need to add one or two learners, you can create them manually. In certain situations, however, such as enrolling a large number of learners during the setup process or as part of seasonal hiring, it is more convenient to enroll multiple learners at once, which can be done by importing a comma separated (CSV) file. We will cover both methods.
The only information needed to create a SecurityIQ learner is the first and last name and the email address. No passwords are required in order for learners to use SecurityIQ. It is possible to provide additional information for a user, which can be used to customize the learning experience, and we will explore those options in the Importing Users section.
Managing Individual Learners
The individuals section of your SecurityIQ platform can be found under Learners. Here you can add, edit and delete individual learners. You can also access and individual learners timeline.
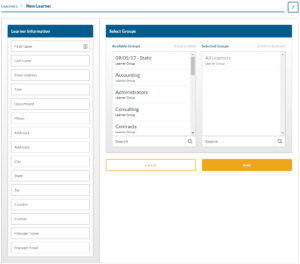
Adding an individual User
- Click on the New Learner button.

- Add the learners information.
- Optionally, select the group/s that you want the user to be part of.
- Click the Save Button
Find a Specific User
- You can find an individual by navigating the list using the left or right arrows.

- You can search for a user by clicking on the search icon and entering information pertaining to an individual learner.

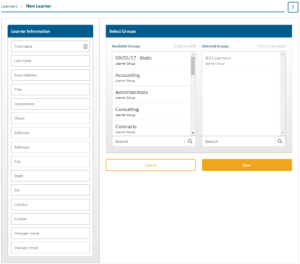
Edit an Existing User
- Find the learner you wish to edit in your Learners list.
- Hover over the learner and click the edit icon.

- Edit or add learner information.
- Add or remove the learner from group/s.
- Click Save.
Deactivating an Individual Learner
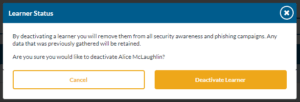
By deactivating a learner you will remove them from all PhishSim and AwareEd campaigns. The learners data will be retained in your SecurityIQ platform. The learner will still count against your learner total count.
- Find the learner you wish to edit in your Learners list.
- Hover over the learner and click the deactivate icon.

- Click the Deactivate Learner Button.
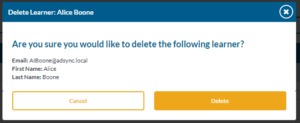
Delete an Individual Learner
Deleting a learner will delete all the learner’s associated data within your SecurityIQ platform. This data will not be recoverable once deleted so if you are required to keep this data export it before deleting a learner.
- Find the learner you wish to edit in your Learners list.
- Hover over the learner and click the delete icon.

- Click the Delete button.

Accessing a Learner’s Timeline
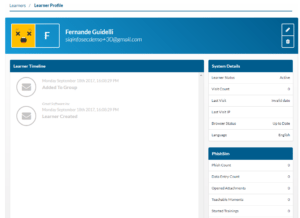
A learners timeline will display information about a learner's behavior within the platform. For example, the timeline will contain an event when a learner opens a phishing email, completes and AwareEd course and many more. You will also find information regarding the learner’s System Details, PhishSim activity, and AwareEd activity.

- Find the learner you wish to edit in your Learners list.
- Hover over the learner and click the timeline icon.
- From here you can see information specific to a learner. This includes a timeline of events and a learner grade.
Note: The way in which learners are graded is configurable in your account settings.
Deactivate or Activate Learners
By deactivating a learner you will remove them from all PhishSim and AwareEd campaigns. The learners data will be retained in your SecurityIQ platform. The learner will still count against your learner total count. You can select multiple users to activate or deactivate by navigating to the Deactivate/Activate section of your SecurityIQ platform under Learners.
Deleting learners is a permanent and non-reversible action. Once a learner is deleted any and all data associated with that learner is also deleted
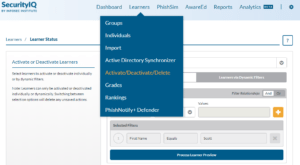
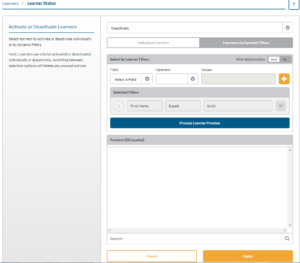
Activate, Deactivate Delete Learners via Individual Selection
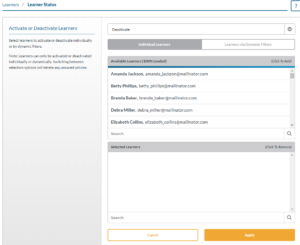
- Select if you want to activate, deactivate or delete learners.
- Select Individual Learners.
- Select learners in the Available Learners list by clicking them. They can be removed from the Selected learners list by clicking.
- You can search for learners using the search tool at the bottom of the Available Learners list and Selected Learners list.
- After you have made your selection click the Apply button.
Activate, Deactivate or Delete Learners via Dynamic Filters
- Select if you want to activate, deactivate or delete learners.
- Select Learners via Dynamic Filters.
- Select the Filter Relationship. This relationship controls how multiple filters work together. Selecting “And” means that all filters selected will have to be true before a learner is deactivated. Selecting “Or” means that if any of the filters is true the learner will show in the preview.
- Next, add at least one filter by filling out the fields and clicking the plus button.
- More than one filter can be selected.
- For example, if you selected the Field “Phished Count”, the Operator “Greater than or Equal to” and the Value ‘1’, only learners that have been phished at least one time will show in the preview.
- Click the Process Learner Preview button and confirm the results.
- Click the Apply Button.
Importing Multiple Users
You can import new learners or update existing learners utilizing a CSV file.
- Click on Import under Learners.
- Click the Download Sample CSV File button.
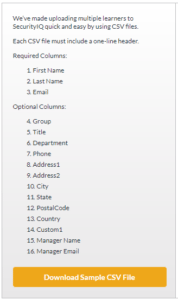
- Enter the relevant information in the CSV file. Do not modify the headers in any way. First Name, Last Name, and Email are required. The other columns are optional. It is recommended that you fill out as many columns as possible because this information can be made use of throughout the platform.
- Next, select how the upload will handle groups.
- Group Listed in CSV - This option will use the group listed in the CSV file. If no group is listed the learner will not be added to any group.
- Existing Group - This option will give you the opportunity to select an existing group to add uploaded learners too.
- New Group - This option will allow you to create a new group that uploaded learners will be added to

- Next, select how you want existing learners treated during your upload.
- Update Learners - This option will overwrite existing learners information with the information in the CSV while adding new learners.
- Ignore Learners - Will ignore existing learners while adding new learners.

- Choose your CSV File

- Click Preview Upload.
- Confirm that the information displayed in the preview is correct and click Upload Learners.

Managing Groups
These instructions will explain the different types of groups within the platform and how groups can be used. The SecurityIQ platform has two types of groups, static and dynamic.
Static groups are groups that once created do not change. You can add and remove learners from the group but you cannot automate adding and removing based on information stored within the SecurityIQ platform.
When importing learners via CSV or Active Directory Synchronizer the group specified will be created as a static group if it does not already exist. If the group already exist the learner will be added to that group.
Creating Static Groups
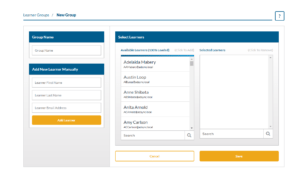
- Go to the Groups section of your SecurityQ platform.
- Select New Learner Group then select Static.

- Next name the Group
- You can create a new learner and add it the learner to the group by filling out the required fields and clicking Add Learner.
- Select learners from the available learners list by clicking on a learner. Once clicked the learner will be added to the selected learners list. The learner can be removed from the selected learners list by clicking the learner again.
- Click the Save button when finished.
Creating Dynamic Groups
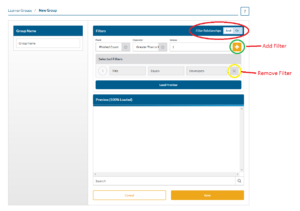
- Go to the Groups section of your SecurityQ platform.
- Select New Learner Group then select Dynamic.

- Next, name the group.
- Next add at least one filter by filling out the fields and clicking the plus button.
- Filters can be removed by clicking the X button under Selected Filters.
- More than one filter can be selected.
- If filtered information changes learners will be added and removed based on the group's filters.
- For example, if you selected the Field “Phished Count”, the Operator “Greater than or Equal to” and the Value ‘1’, only learners that have been phished at least one time would appear in the group. As more learners get phished they would automatically be added to this group.
- Select the Filter Relationship. This relationship controls how multiple filters work together. Selecting “And” means that all filters selected will have to be true before a learner is added to the group. Selecting “Or” means that if any of the filters is true the learner will be added to the group.
- When done click the Save button.
Group List
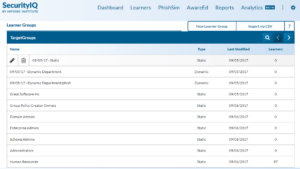
- The groups you created can be found in the TargetGroups list found in the Groups section of your SecurityIQ platform.
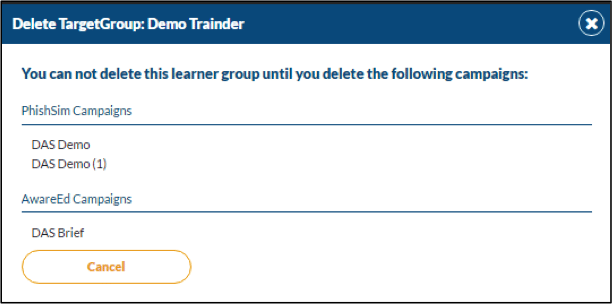
- By hovering over a group in the list you can edit or delete the group.

Active Directory Synchronizer
These instructions will guide you through using the SecurityIQ Active Directory Synchronizer to automatically import your learners into your SecurityIQ account.
System Requirements
- Requires Windows 7 SP1 or Higher or Windows Server 2008 R2 or Higher.
- PowerShell 4.0 or higher
Downloading the Active Directory Utility:
- Navigate and login to your SecurityIQ account.
- Click on Active Directory Synchronizer under Learners.
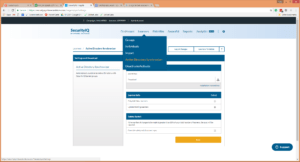
- Click the download link.
- Take note of your secret key.

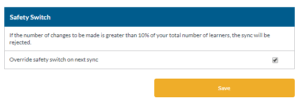
5. If this is your first sync or you are making significant changes remember to override the safety switch and click Save.
6. Extract the downloaded ActiveDirectorySynchronizer to the folder that you wish the utility to reside.

Using the Active Directory Utility with a GUI:
- Navigate to the extracted ActiveDirectorySynchronizer directory.
- Double click the GUI-AD-Import.exe file and run it.
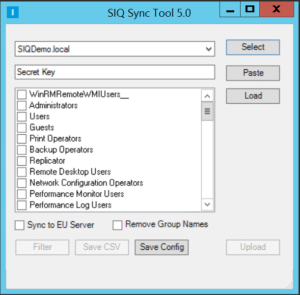
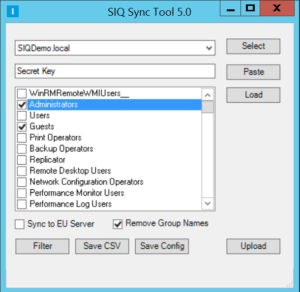
- The first box will have a list of your Active Directory Forest. Select your desired domain and click the Select button.
- Copy your Secret Key and click the Paste button.
- Select any group(s) of users that you would like to import into SecurityIQ.
- The “Save config” will save the current configuration of the tool. You must save a configuration file if you wish to setup the synchronization as a scheduled task. Before saving the configuration file make sure the tool is configured in the way you want to work in future runs. This includes the remove groups and EU server options.
- Exclude Groups checkbox will prevent the tool from uploading your Active Directory group names to your SecurityIQ platform. It is recommend that you check the option to remove groups to limit unwanted groups imported into SecurityIQ.
- European Union users please check the “Sync to EU Server” checkbox.
- By default, the tool selects all accounts in your selected Active Directory Forest. To filter learners out click the filter button. Here you will be able to create a list of excluded users. The users selected in this step will not be uploaded.
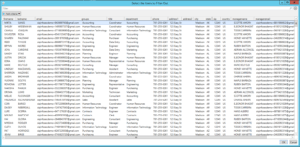
- Notice that in the upper right corner you can filter users out of the list. Remember, you are creating an exclusions list so people filtered from this view will be uploaded.
- Select users by clicking on their name. Select multiple users by ctrl or shift-clicking. Select all pressing ctrl + a.
- After you have selected the desired users click the OK button. A file will be created called “Exclusions.csv”. This file will contain the users you just selected. These users will not be uploaded to your SecurityIQ platform on your current and future syncs.
- Clicking the Save CSV button will save a file that has the users that would be currently uploaded to SecurityIQ.
- When ready click the Upload button to sync your users to your SecurityIQ platform.
Using the Active Directory Utility with Windows Task Scheduler:
Before using the scheduler run the Active Directory Utility as described above and make sure to select the Save Config button.
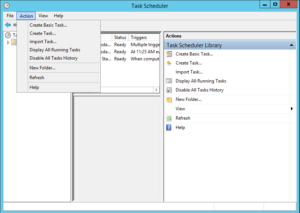
- Open Microsoft’s Task Scheduler Service and Create a Basic Task.
- Name your task and click Next.
- Configure your trigger and click Next.
- Select “Start a program” and click Next.
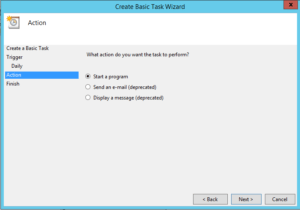
- Browse to select the Scheduled-AD-Import.ps1 file.
- Click Next.
- Click Finish
Deleting Learners:
You can delete learners using the Active Directory Utility and SecurityIQ.
- Select Update existing learners and override the safety switch. Click Save.
- Remove or disable the learners you want to delete in your active directory and run the Active Directory Utility.
- Navigate to Learners to Delete in the Active Directory Synchronizer section of SecurityIQ account.
- Confirm that the learners that you expect are flagged for deletion. From here you can delete specific learners or delete all learners.
[caption id="attachment_42262" align="aligncenter" width="505"]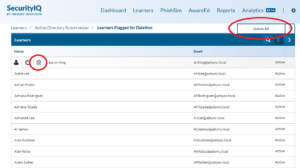 [/caption]
Change Log
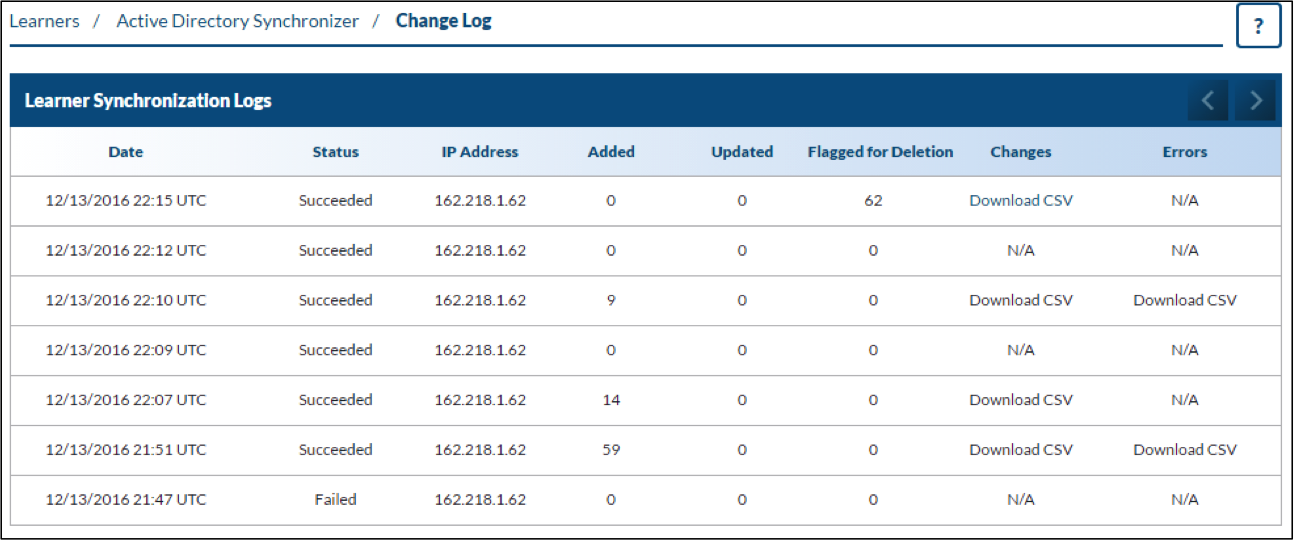
The Active Directory Synchronizer Change Log page displays an overview of synchronization activity between the ADS utility and SecurityIQ. If any changes were made during the synchronization, a “Download CSV” link will be available under the Changes and Errors columns. This document will provide a detailed report of any changes that took place during the sync.
Grades
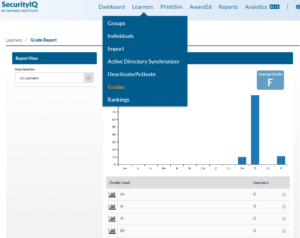
Grades are a quick way to understand the risk associated with your learners behavior in the platform. You can access grades in different ways throughout the platform. Under the Learners menu there is a quick way to view grades and generate analytical reports based on grading.
Once in the Grades section of your SecurityIQ platform, you will see an overview of all your learner’s grades. From here you can create groups and reports related to learner’s grades.
Narrowing the Scope of the Grade Report
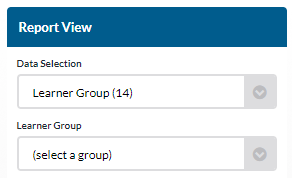
- On the left side of the platform, there is a drop-down menu labeled “Data Selection”. From this drop-down, you can select “Learner Department” or “Learner Groups”.
- Next, select the specific group or department that you want grades displayed for.

Generating a CSV Report of Learner Grades
- Select the scope of the report using the “Data Selection” drop-down menus. You can also generate a report for all learners by selecting “All Learners” in the “Data Selection” drop-down menu.
- Scroll down to the bottom of the screen and click the Generate CSV button.

Creating Groups from Grades Date
- Select “All Learners” in the “Data Selection” drop-down menu.
- Select at least one grade level check box to create a group from.

- Click the Create Grade Level Group button.

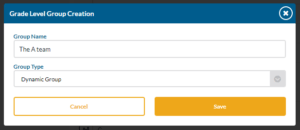
- Name the group.
- Select the group type.
- Click the Save button.
Creating a Dynamic Report from Grades
- Select the scope of your report by using the data selection menu.
- Next, to letter grade of your choice click the details icon.
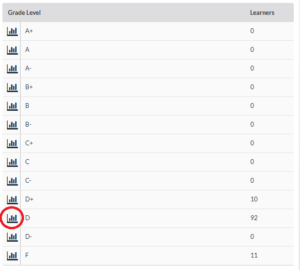
- With the report generated you can scroll down to save or print the report.

- After the Report is saved you can download a CSV file of the report.

- After the report is saved you can find, edit, and view the report under the Analytics section of your SecurityIQ platform.
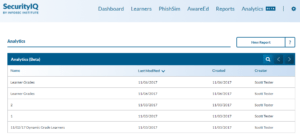
Rankings
The Rankings feature can be found under the Learners menu in your SecurityIQ platform. Rankings enables you to get a score and grade for specific Groups, Departments or Managers. This data can be used to help identify weak points in your organization's security posture or to gamify good security practices.
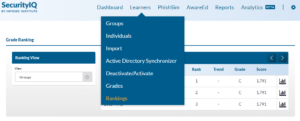

Selecting Ranking View
- On the left side of the platform select or view in the “View” drop down menu.
- “Groups” Displays the grades and scores of all the learner’s combined in the associated group.
- “Departments” Displays the grades and scores of all the learner’s combined in the associated department.
- “Managers” Displays the grades and scores of all the learner’s combined managed by the associated manager.
Creating Analytics Reports from Rankings Information
- Select the view that you want to generate the report from.
- Click the details icon on the right.
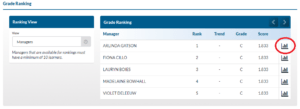
- With the report generated you can scroll down to save or print the report.

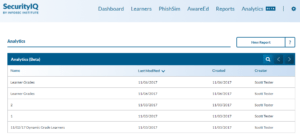
- After the Report is saved you can download a CSV file of the report.

- After the report is saved you can find, edit, and view the report under the Analytics section of your SecurityIQ platform.
PhishNotify+ Defender
This feature works with clients using the the Microsoft Outlook desktop client and the PhishNotify plugin. For more information about the plugin visit:
/securityiq-awareed-and-phishsim-users-manual-pt-5-phishsim-phishing-simulator/#Plugin-Behavior
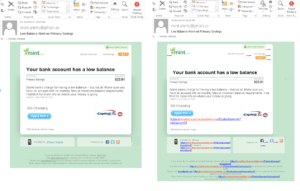
PhishDefender works by dynamically linking security awareness learner data to real-time email communications. Program managers can set criteria in PhishDefender to activate stronger security settings on high-risk learner email accounts. Learners that match the set criteria will experience:
- Restricted links: Links are stripped and disabled from all email body text; HTML link text is copied and placed into the body of the email without hyperlinks.
- Link indicators: Root linking domains are highlighted in red for extra emphasis on link destinations.
- Advanced protections: Within Outlook’s admin settings, program managers control whether a link can be CTRL clicked, or not clicked at all. For more visit: https://support.office.com/en-us/article/Turn-on-or-off-links-in-email-messages-2D79B907-93B6-4774-82E6-1F0385CF20F8
Selecting Learners to Receive PhishDefender’s Advanced Protections

Get six free posters
Reinforce cybersecurity best practices with six eye-catching posters found in our free poster kit from our award-winning series, Work Bytes.
- Install the latest version of the PhishNotify plugin.
- Navigate to PhishNotify+ Defender section of your platform.
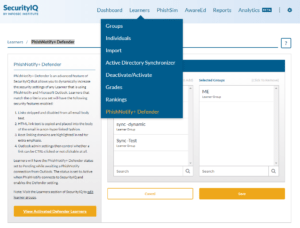
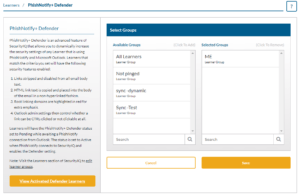
- Next, select the groups that you wish to receive the add PhishDefender’s Advanced Protections. Notice that you can select dynamic groups. This allow you to configure a group that will be selected based on specific behavior, events or more.
- After selecting your Groups click Save.
Viewing Activated Defender Learners
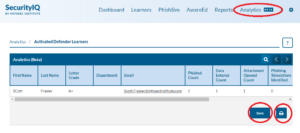
- Click the View Activated Defender Learners button. You will be presented with an Analytics report. This report list all Activated Defender Learner along with some other information.
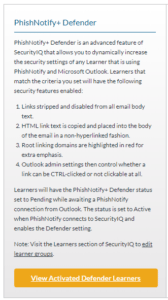
- Form the report you can save or print by clicking the appropriate icon. Once saved the report will be in the Analytics section of your SecurityIQ platform.
