Snort Lab: Custom SCADA Protocol IDS Signatures
In this lab, you are going to learn how to create custom Snort signatures for the Modbus/TCP protocol.
First, let's take some time to examine the Modbus TCP Target system.
Start the Modbus TCP PLC Target VM. This target simulates a specific brand of PLC. You can log into the device with credentials provided at the beginning of this guide. Once at the prompt, enter ifconfig and note the IP address of the VM:
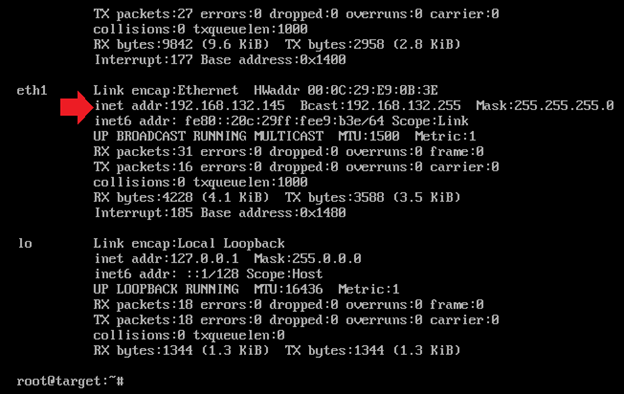
Go to your Kali Linux VM, open a terminal shell and run an Nmap scan against the Modbus TCP PLC Target VM. You will want to use the following command to enumerate all open ports on the PLC:
nmap –sT –sU –sV –O –p1-65535 –n –vv 192.168.x.x
This scan will take a long time. Remember, we said earlier that UDP scans take longer? And we are scanning a lot of ports!
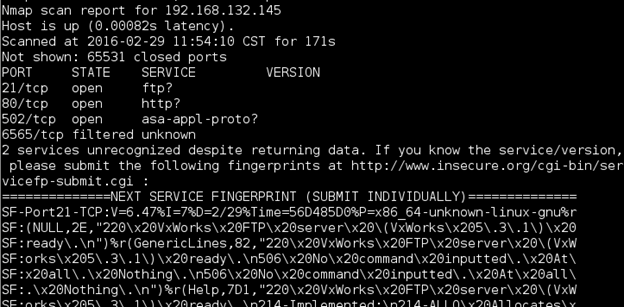
Besides the expected Modbus and other related services, what else do you find on this PLC (hint, use Google to find out what VxWorks is if you don't already know)?

What should you learn next?
Next, let's make sure we can connect to PLC using an HMI. We will use the ModScan32 HMI tool to connect to the PLC. On your Windows Server 2012 R2 VM, go to the C:Tempinstallsmodscan32 directory. Run the ModScan32.exe program.

Ignore the 64-bit warning message. You will need to register the ModScan32 program with the following key:
infosec
student
34554564533L5454
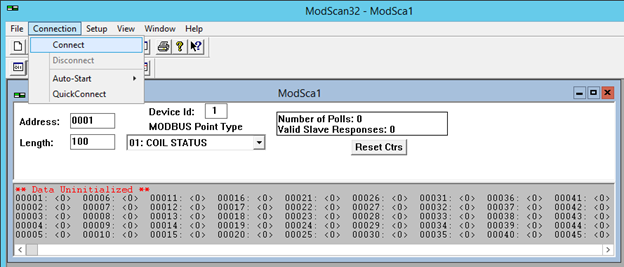
Once ModScan main window is open, select Connection->Connect from the menu on top.
You will be presented with a connection window. Configure it as shown in the following screenshot (be sure to choose the IP address of your Modbus PLC Target VM):
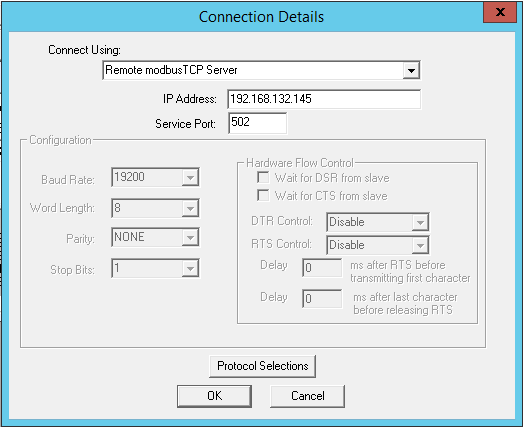
Click the OK button to connect. The ModScan32 program should now begin to poll the PLC. Scroll through the various MODBUS Point Types to see what values are read from the PLC:

This tool is now reading from the various values. Take note that NO authentication is required to access the registers on the PLC!
Select 01: COIL STATUS, and double-click on the first register, 00001: <1>. This will allow us to issue a request to write a value to the PLC:
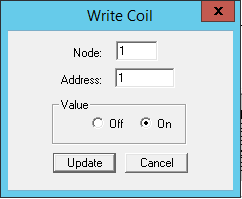
Change the value from On to Off, or from Off to On, depending on its original setting. Try to repeat the same process for other registers, and now allow the ModScan32 program to poll the device. Have your changes been accepted by the PLC? Notice that you can write values to the PLC without any authentication!
As you can see, this PLC is highly insecure. Let's implement an Intrusion Detection System to monitor it.
Start the Network Security Toolkit VM. Login with credentials provided at the beginning of this guide. There is no "login" button on this interface, so you will need simply to press the Enter key after you have put your password in properly to log into the system.
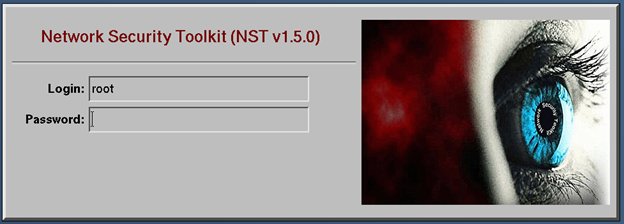
It will take about 1-2 minutes the first time you log into the system.
When you have logged in, a Firefox window will open asking for you to authenticate to it. The credentials are the same as for the VM. Click on the NST WUI Index button to start the NST interface.

Now, open a terminal window. You can open one by right-clicking on the desktop and selecting the following menu options as shown below:
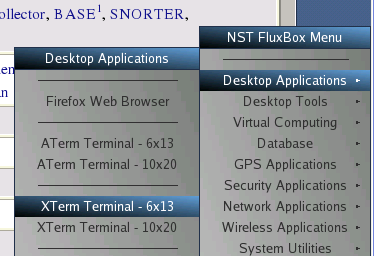
This Virtual Machine has been pre-configured with the Snort IDS, as well as some Modbus/TCP security rules. Use the more command to view the current rules in the /var/nst/snort/rules/modbus_tcp_3.rules file.
more /var/nst/snort/rules/modbus_tcp_3.rules
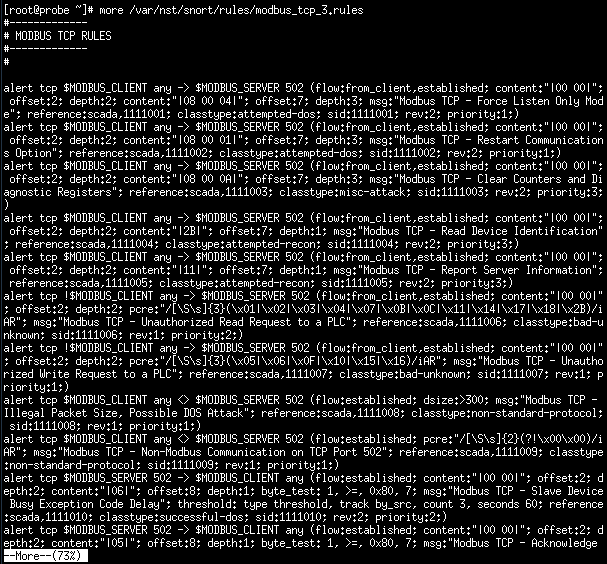
Hit Enter to reveal the rest of the file line-by-line. We are going to concentrate on two specific rules:
alert tcp !$MODBUS_CLIENT any -> $MODBUS_SERVER 502 (flow:from_client,established; content:"|00 00|"; offset:2; depth:2; pcre:"/[Ss]{3}(x01|x02|x03|x04|x07|x0B|x0C|x11|x14|x17|x18|x2B)/iAR"; msg:"Modbus TCP - Unauthorized Read Request to a PLC"; reference:scada,1111006; classtype:bad-unknown; sid:1111006; rev:1; priority:2;)
alert tcp !$MODBUS_CLIENT any -> $MODBUS_SERVER 502 (flow:from_client,established; content:"|00 00|"; offset:2; depth:2; pcre:"/[Ss]{3}(x05|x06|x0F|x10|x15|x16)/iAR"; msg:"Modbus TCP - Unauthorized Write Request to a PLC"; reference:scada,1111007; classtype:bad-unknown; sid:1111007; rev:1; priority:1;)
Analyze these two rules. Notice that the snort signature first looks for the pattern of two binary nulls in the packet (the content:"|00 00|"; part of the signature). This signifies that it is proper Modbus/TCP protocol communication. Now, check out the following rule:
alert tcp $MODBUS_CLIENT any <> $MODBUS_SERVER 502 (flow:established; pcre:"/[Ss]{2}(?!x00x00)/iAR"; msg:"Modbus TCP - Non-Modbus Communication on TCP Port 502"; reference:scada,1111009; classtype:non-standard-protocol; sid:1111009; rev:1; priority:1;)
This rule is essentially used to detect the inverse of a proper Modbus/TCP protocol communication stream. Any stream that is on port 502 that does not begin with the two nulls (00 00) is considered "not Modbus communication" and therefore anomalous.
Let's generate some non-modbus traffic and see what the results are. First, we must enable the Snort IDS. Do so by scrolling down on the NST WUI Web Interface to the Security section and then Intrusion Detection. Click on the Snort link as shown:

You will now need to scroll down to Manage Snort Processes. If the entry under PID says "Dirty," click the Clean button next to it. Then scroll further down and click on the Start button next to the mysqld and snortd Service sections as shown (click Exit on the following screen to return to this dialog):
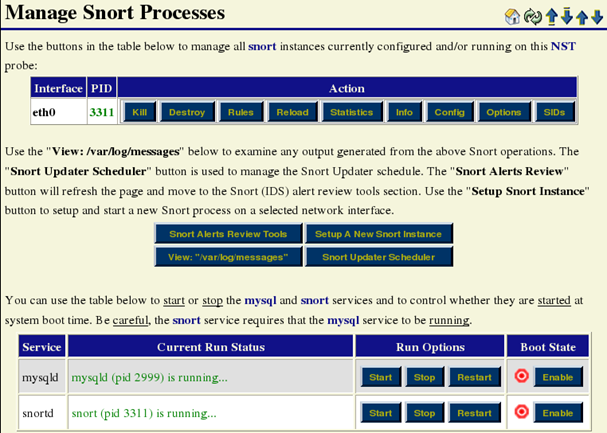
Now, scroll up to the Snort (IDS) Alerts Review Tools, and click on BASE:

This is the interface for the snort alerts. Let's create some alerts using Nmap. Go back to your Kali Linux terminal and run an Nmap scan again (we will just scan port 502 of our Modbus PLC Target VM):
nmap –sT –sV –p 502 192.168.x.x
Now, return to the BASE Snort reporting tool, and scroll down to the Unique Alerts: X, where X is the number of unique alerts discovered by snort. Click on the appropriate number of unique alerts, (in the following screenshot, the number is 9, yours may be different):
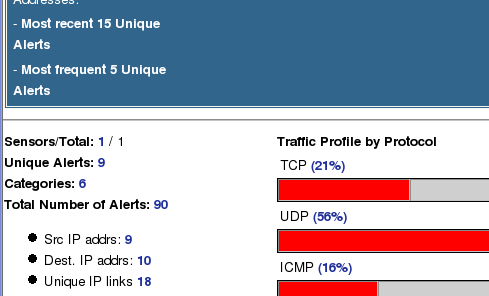
On the following page, find the "Modbus TCP - Non-Modbus Communication on TCP Port 502" class of alerts and click on the number in the <Total #> column (again, you may see a different number than the one in the image).

These are created by Nmap during the services scan (the –sV flag). Click on the value in the ID column for the first alert (in the below screenshot, the ID value is #0-(1-3697)):

This will show you the actual packet that caused the alert to be created:
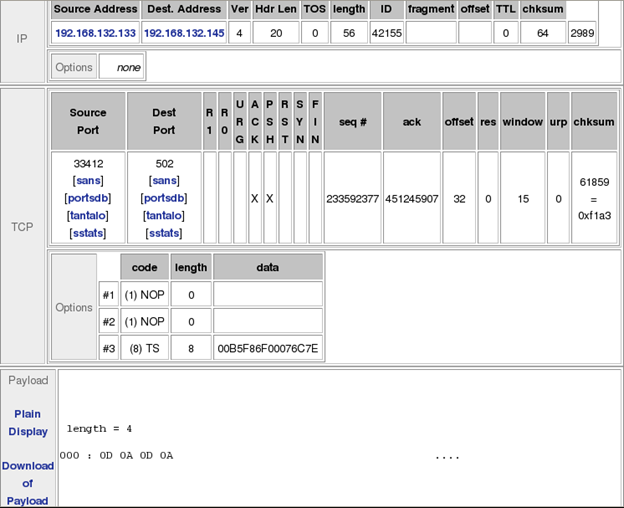
Click the Next button several times to look at some of the generated alerts. What do you notice about the payload portion of these packets?
Reference the rule being triggered (Modbus TCP - Non-Modbus Communication on TCP Port 502) Why does this generate the alert?
You should also notice another Modbus related alert, Modbus TCP - Incorrect Packet Length, Possible DOS Attack. Let's take a look at the Snort rule for this alert:
alert tcp $MODBUS_CLIENT any <> $MODBUS_SERVER 502 (flow:established; dsize:>300; msg:"Modbus TCP - Illegal Packet Size, Possible DOS Attack"; reference:scada,1111008; classtype:non-standard-protocol; sid:1111008; rev:1; priority:1;)
Notice that the dsize variable is the only packet-level checking this rule is performing. It is looking for any packets over 300 bytes in length. Modbus packets cannot be larger than 300 bytes, so use what you learned in this step to investigate the payload for these packets.
Next, let's use the Snort IDS to detect read requests from the Modscan32 program being sent to the Modbus PLC Target VM. The rule to detect read requests is as follows:
alert tcp !$MODBUS_CLIENT any -> $MODBUS_SERVER 502 (flow:from_client,established; content:"|00 00|"; offset:2; depth:2; pcre:"/[Ss]{3}(x01|x02|x03|x04|x07|x0B|x0C|x11|x14|x17|x18|x2B)/iAR"; msg:"Modbus TCP - Unauthorized Read Request to a PLC"; reference:scada,1111006; classtype:bad-unknown; sid:1111006; rev:1; priority:2;)
Go back to the Modscan32 tool we have running on our Windows Server 2012 R2 VM. If you still have it connected to the Modbus PC Target, go to Connection->Disconnect, and the n Connect again. Let it make about 30 requests; it should take no longer than 30 seconds (look at the Number of Polls value).
Now, return to the BASE program in the NST VM, and view alerts related to the Modbus TCP - Unauthorized Read Request to a PLC signature.

You should see many alerts, all with a payload similar to the following:

Compare the payloads of the various packets to the alert rule. You should see that they match.
Next, let's use the Snort IDS to detect write requests from the Modscan32 program being sent to the Modbus PLC Target VM. The rule to detect write requests is as follows:
alert tcp !$MODBUS_CLIENT any -> $MODBUS_SERVER 502 (flow:from_client,established; content:"|00 00|"; offset:2; depth:2; pcre:"/[Ss]{3}(x05|x06|x0F|x10|x15|x16)/iAR"; msg:"Modbus TCP - Unauthorized Write Request to a PLC"; reference:scada,1111007; classtype:bad-unknown; sid:1111007; rev:1; priority:1;)
Go back to the ModScan32 program. Make sure that 01: COIL STATUS is selected, and double-click on the first register, 00001: <1>. This will allow us to issue a request to write a value to the PLC:
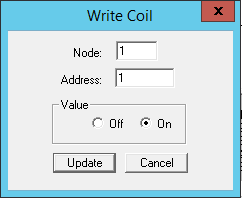
Change the value from On to Off, or from Off to On, depending on its original setting. Try to repeat the same process for other registers, and now allow the ModScan32 program to poll the device. Now, return to the BASE program in the NST VM, and view alerts related to the Modbus TCP - Unauthorized Write Request to a PLC signature.

Compare the payloads of the signatures for when you set the value of a register to null verses when you set it to non-null. How does the Snort signature match for both cases?

What should you learn next?

