SecurityIQ, AwareEd, and PhishSim User’s Manual, Pt. 7: Account Settings

Objectives
Once you have completed this section, you will be able to:
- Apply custom branding to your SecurityIQ portal
- Set the default education asset used in PhishSim Templates
- Add custom domains to be used for sending PhishSim notifications
- Enable the suppression of footers in PhishSim emails (Enterprise version only)
- Customize PhishNotify Plugin messages
- Select the default domain used for sending AwareEd learner notifications
- Add additional administrators to your SecurityIQ portal
- Download email logs
Overview
The account settings of your SecurityIQ platform allow you to control multiple areas of your platform.
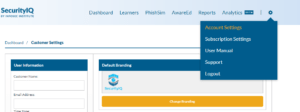
To get started navigate to Account Settings under the Gear icon.
Updating User Information
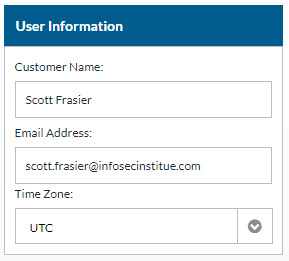
This section allows you to change your customer name and email. You can also set the timezone of your choosing.
Branding
You can change the branding that appears in AwareAD Module, AwareED Notification, Mandatory Policy, And PhishSim Landing pages. You can change the branding to your organization's branding.

Requirements:
- File must be JPG or PNG.
- File must be no smaller than 420x420 or larger than 1280x1280.
Adding branding:
- Click the Change Branding Button.
- Name your branding.
- Choose a background color.
- Choose your desired logo from file.
- If you wish you can preview your branding.
- Click the Add Branding Option button.

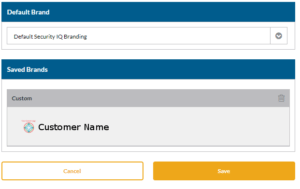
Change the Branding:
- Select the branding you desire from the drop-down menu.
- Click the Save button.
Delete Saved Branding:
- In your Saved Brands, you will see your saved brandings.
- Click the delete icon next to the branding you wish to delete.
PhishSim Settings
The PhishSim setting allows you to change the default education, add your organization's domain, and add a fast click threshold.
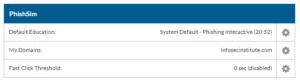
Change the Default Education:
The default education is the educational asset that a learner will see after they have been phished in a PhishSim campaign. When creating /editing PhishSim templates you can select the education your learner receives. By default, Default Education is selected.
- Click the gear icon next to Default Education.
- Select the Education that you wish to be the default and click the Save button.
Add your Organization's Domain
It is good practice to add the domain/s that your SecurityIQ platform will be sending emails to. This is also where you can suppress the footer.
- Click the gear icon next to My Domains.
- Enter the domain/s that you wish to add.
- If you would like to suppress the footer check the checkbox.
- The footer is text at the bottom of a simulated phishing email. The text indicates that the email is a simulation and comes from SecurityIQ.
- Click the Save button.
Enable Fast Click Threshold
If you set a Fast Click Threshold to a number between 1 and 10 we will not mark a Learner's phishing email as Phished if it was triggered within that many seconds of being sent. Use zero (the default) to disable this feature.
- Click the Gear icon next to Fast Click Threshold.
- Set a value between 1 and 10.
- Click the Save button.
PhishNotify Plugin Settings
For complete instructions please see the Official PhishNotfy Instruction.
AwareEd Settings
You can change the domain that AwareED notification are sent from.
- Click the Gear icon next to Send Notifications from.
- Add your desired domain.
- Click the Save button.

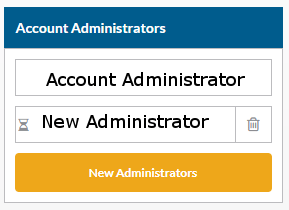
Add Additional Administrators
This section allows you to add or remove SecurityIQ administrators.
- To add an administrator click the New Administrator button
- Enter the email for the administrator you wish to add. Have the new administrator check their email and follow the instructions.
- You can delete administrators click the delete icon next to their names.
Report Recipients
Adding a Report Recipient will allow you to send Reports and Analytics to emails that you have specified. After adding a Report Recipient their email will be available to send automated weekly reports when you create Reports or Analytics.
- To add a Report Recipient click the New Recipient button.
- Enter the recipient's email and click the Add button.
- You can delete a recipient by clicking the delete icon next to their email.

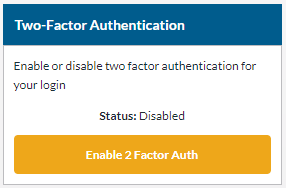
Two-Factor Authentication
You can enable two-factor authentication to further secure your SecurityIQ platform. You can do this through SMS messages or the Authy application. Fore more on the Authy application visit: https://authy.com/.
- Click the Enable 2 Factor Auth button.
- Confirm your SecurityIQ password.
- Read the details and click the Continue button.
- Enter your phone number and click Continue button.
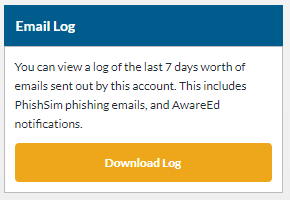
Download Email Logs
You can download a log of all emails sent from your SecurityIQ platform in the last seven days.
- Click the Download Log button a CSV download will start.
Learner Grading
Learner grades enable you to get a quick overview of the performance learners. You can sort learners into groups or make Analytic reports based on learner grades. You can control how learners are graded.
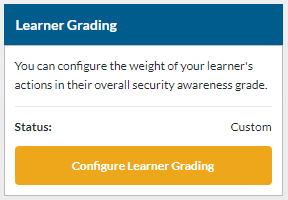
- Click the Configure Learner Grading button.
- Adjust the sliders for the learner events you wish to adjust. Adjusting it towards the negative will make the action decrease the learner’s grade. Adjusting towards the positive will make the action increase the learner’s grade.

- If you would like to revert back to default values click the Revert to Default button.
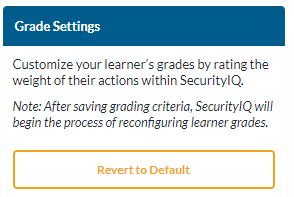
- Save any changes by clicking the Save button.
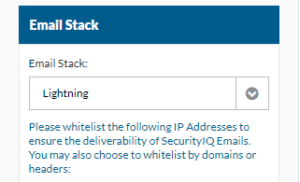
Email Stack
This section of account settings will go over the email stack that is currently being used to send PhishSim/AwareEd emails. Here you will be able to find a list of all: IP addresses, domains and email headers to whitelist within all of your firewalls, security appliances, and any spam filters. Please note that if you select a different option from the drop down and save, that SecurityIQ will then use the displayed IP addresses, domains and email headers for all future emails. If proper whitelisting has not been accomplished, it is possible that the delivery of emails may not be successful.
Supplementary
Email Template Variables
Variable Description Subject Email Body
http://phish.io (or any URL) in a hyperlink All URLs used in hyperlinks (i.e., in an “<a href=’...’>” clause) will automatically be replaced by a “phish.io” link that allows the system to track your learners’ clicks and present them with a specific landing pages. (Some paid tiers of service allow you to customize these landing pages further.) Hyperlinks are only supported in the BODY of a message. No Yes
{{footer}} Provides a block of text that explains that this email is not spam, that it is a service of our system and that you specifically requested the test. Also provided in the text are links to report this message as phishing, unsubscribe and “report as spam”. This block of text looks similar to other legal “boilerplate” often appended to email messages by corporate email servers and usually ignored by end users. However, it is REQUIRED on all messages, both to keep our system legal, and to give eagle-eyed recipients a way to positively tell the system that they recognized your phishing message and were not fooled. This variable is only supported in the BODY of a message. No Yes
{{learner}} Provides the first and last name of the learner with a space in between the names. Example: “John Smith”. Note: this value may be blank if this value was not configured. This variable is supported in all message fields. Yes Yes
{{learner_first}} Provides the first and last name of the learner. Example: “John”. Note: this value may be blank if this value was not configured. This variable is supported in all message fields. Yes Yes
{{learner_last}} Provides the first and last name of the learner. Example: “Smith”. Note: this value may be blank if this value was not configured. This variable is supported in all message fields. Yes Yes
{{learner_email}} Provides the email address of the learner. Example: “jsmith@email.com”. This variable is supported in all message fields. Yes Yes
{{learner_title}} Provides the title of the learner. This variable is supported in all message fields. Yes Yes
{{learner_department}} Provides the department of the learner. This variable is supported in all message fields. Yes Yes
{{learner_phone}} Provides the phone number of the learner. This variable is supported in all message fields. Yes Yes
{{learner_address1}} Provides the address of the learner. This variable is supported in all message fields. Yes Yes
{{learner_address2}} Provides the address of the learner. This variable is supported in all message fields. Yes Yes
{{learner_city}} Provides the city of the learner. This variable is supported in all message fields. Yes Yes
{{learner_state}} Provides the state of the learner. This variable is supported in all message fields. Yes Yes
{{learner_zip}} Provides the zip code of the learner. This variable is supported in all message fields. Yes Yes
{{learner_country}} Provides the country of the learner. This variable is supported in all message fields. Yes Yes
{{learner_custom}} Provides the custom field of the learner. This variable is supported in all message fields. Yes Yes
{{customer}} Provides the name of your account (not the learner). Yes Yes
{{customer_email}} Provides the email associated with your account (not the learner). Yes Yes
PhishSim Education Template Variables
Variable Description
{{campaign}} Provides the name of the campaign. Example: “Customer Reps Training”.
{{learner}} Provides the first and last name of the learner with a space in between the names. Example: “John Smith”. Note: this value may be blank if this value was not configured. This variable is supported in all message fields.
{{learner_first}} Provides the first and last name of the learner. Example: “John”. Note: this value may be blank if this value was not configured. This variable is supported in all message fields.
{{learner_last}} Provides the first and last name of the learner. Example: “Smith”. Note: this value may be blank if this value was not configured. This variable is supported in all message fields.
{{learner_email}} Provides the email address of the learner. Example: “jsmith@email.com”. This variable is supported in all message fields.
{{learner_title}} Provides the title of the learner. This variable is supported in all message fields.
{{learner_department}} Provides the department of the learner. This variable is supported in all message fields.
{{learner_phone}} Provides the phone number of the learner. This variable is supported in all message fields.
{{learner_address1}} Provides the address of the learner. This variable is supported in all message fields.
{{learner_address2}} Provides the address of the learner. This variable is supported in all message fields.
{{learner_city}} Provides the city of the learner. This variable is supported in all message fields.
{{learner_state}} Provides the state of the learner. This variable is supported in all message fields.
{{learner_zip}} Provides the zip code of the learner. This variable is supported in all message fields.
{{learner_country}} Provides the country of the learner. This variable is supported in all message fields.
{{learner_custom}} Provides the custom field of the learner. This variable is supported in all message fields.
{{customer}} Provides the name of your account (not the learner).
{{customer_email}} Provides the email associated with your account (not the learner).
{{education_asset}} Provides an Education Asset. Place the variable in your custom content then select an Education Asset for the variable.
Training Notification Variables
The following variables may be used in AwareEd notification messages.
Variable Description Subject Email Body
{{training_link}} Provides a link to a page where the learner may take his/her training and view his/her progress against the entire course. This variable is REQUIRED in Enrollment and Reminder notifications. Note that links are uniquely generated for each learner and cannot be shared between learners. No Yes
{{days_since_start}} Provides the number of days since the campaign started. Example: “13”. No Yes
{{days_until_end}} Provides the number of days until the campaign ends. Example: “10”. No Yes
{{campaign}} Provides the name of the campaign. Example: “Customer Reps Training”. No Yes
{{course}} Provides the name of the course associated with the campaign. Example: “Popular Modules” No Yes
{{module_count}} Provides the number of modules in the course associated with the campaign. Example: “4” No Yes
{{learner}} Provides the first and last name of the learner with a space in between the names. Example: “John Smith”. Note: this value may be blank if this value was not configured. This variable is supported in all message fields. Yes
{{learner_first}} Provides the first and last name of the learner. Example: “John”. Note: this value may be blank if this value was not configured. This variable is supported in all message fields. Yes
{{learner_last}} Provides the first and last name of the learner. Example: “Smith”. Note: this value may be blank if this value was not configured. This variable is supported in all message fields. Yes
{{learner_email}} Provides the email address of the learner. Example: “jsmith@email.com”. This variable is supported in all message fields. Yes
{{learner_title}} Provides the title of the learner. This variable is supported in all message fields. Yes
{{learner_department}} Provides the department of the learner. This variable is supported in all message fields. Yes
{{learner_phone}} Provides the phone number of the learner. This variable is supported in all message fields. Yes
{{learner_address1}} Provides the address of the learner. This variable is supported in all message fields. Yes
{{learner_address2}} Provides the address of the learner. This variable is supported in all message fields. Yes
{{learner_city}} Provides the city of the learner. This variable is supported in all message fields. Yes
{{learner_state}} Provides the state of the learner. This variable is supported in all message fields. Yes
{{learner_zip}} Provides the zip code of the learner. This variable is supported in all message fields. Yes
{{learner_country}} Provides the country of the learner. This variable is supported in all message fields. Yes
{{learner_custom}} Provides the custom field of the learner. This variable is supported in all message fields. Yes
{{customer}} Provides the name of your account (not the learner). Yes
{{customer_email}} Provides the email associated with your account (not the learner). Yes
Sample Enrollment Email
Hello {{learner}} ({{learner_email}}),
You have been enrolled in computer-based Security Awareness Training!
To access your training, please follow this link: {{training_link}} Note that NO username and password is required. The course you are taking is called “{{course}}”, is being directed at “{{campaign}}”, and includes {{module_count}} interactive training modules. You have {{days_until_end}} to complete your training and you will be reminded to complete it every few days. For the best possible experience, you should plan on taking your training at a computer with audio, but closed captions are also provided if audio is not an option.
Thank you!
Sample Reminder to Start Notification
Hello {{learner}} ({{learner_email}}),
It’s time to start your computer-based Security Awareness Training! To begin your training, follow this link: {{training_link}}
(You have {{days_until_end}} to complete your training. For the best possible experience, you should plan on taking your training at a computer with audio, but closed captions are also provided if audio is not an option.)
Sample Reminder to Finish
Hello {{learner}} ({{learner_email}}),
This is just a reminder to complete your computer-based Security Awareness Training! To complete your training, follow this link: {{training_link}}
(You have {{days_until_end}} to complete your training. For the best possible experience, you should plan on taking your training at a computer with audio, but closed captions are also provided if audio is not an option.)
Sample Completion Notification
Congratulations {{learner}} ({{learner_email}})!
You have successfully completed your computer-based Security Awareness Training!
For your information, it took you {{days_since_start}} to complete all {{module_count}} modules in the “{{course}}” training course.
Please save or print a copy of this email for your records.
Learn Network Forensics

Learn SCADA Security Fundamentals
Get hands-on experience around ICS and their environments, devices, regulatory standards and more. What you'll learn:- Access controls
- Common cyber threats
- Process control networks
- ICS protocol features
- And more
In this series
- SecurityIQ, AwareEd, and PhishSim User’s Manual, Pt. 7: Account Settings
- CompTIA CySA+ Salary: What to expect in 2025
- How to become a cybercrime investigator
- CEH version comparison: V12 to V13 evolution guide
- SecurityX (CASP+) certification: Overview and career path [2025 update]
- Network+ certification: Overview and career path [2025 update]
- ISC2 CSSLP certification overview: What you need to know
- ISC2 CGRC: Overview & career path
- CRISC certification: Overview & career path [updated 2021]
- PMP certification: Overview and career path [updated 2021]
- ISACA CDPSE certification: Overview of the new ISACA privacy certification
- CGEIT certification: Overview and career path [updated 2021]
- What is a cyber range?
- Microsoft azure certification: Overview And career path
- CEH salary guide: What Certified Ethical Hackers really earn
- Average SecurityX (CASP+) salary [2025 update]
- CompTIA Network+ certification — A 2025 salary analysis
- CompTIA CySA+ exam (CSO-003): Your guide
- CCSP salary: How much can you make as a cloud security professional?
- Average Security+ salary (2025): Your guide to a prosperous cybersecurity career
- Average CGRC (Certified in Governance, Risk and Compliance) salary
- CRISC Frequently Asked Questions (FAQ) [updated 2022]
- Average CSSLP Salary in 2021
- ISACA CDPSE exam details and process
- How To Become CGEIT Certified – Certification Requirements [updated 2021]
- How to pick the best cyber range for your cybersecurity training needs and budget
- CEH exam eligibility: Application process & requirements guide
- SecurityX (CASP+) frequently asked questions (FAQ) [2025 update]
- CISSP domains overview: Your complete preparation guide
- CCSP exam and CBK changes in August 2024
- Comprehensive guide to CompTIA Security+ domains (2025)
- Average CRISC Salary [2023 update]
- CGRC certification job titles and career outlook
- ISC2 CSSLP exam details and process
- ISACA CDPSE certification exam: Overview of domains
- An Introduction to the PMP: Exam Details and Process [updated 2021]
- CGEIT certification exam: overview of domains [Updated 2021]
- 10 Success Tips: How to Pass Your Certified Ethical Hacker (CEH) Exam
- Network+: Exam details and process [2025 update]
- SecurityX (CASP+): Exam details and process [2025 update]
- How to become CCSP certified: Certification requirements
- Certified in Risk & Information Systems Control (CRISC) Exam Overview [updated 2022]
- ISC2 CGRC exam details and process
- Best CSSLP study resources and training materials
- ISACA CDPSE domain 1: Privacy governance
- 10 Tips for PMP Certification Exam Success [updated 2021]
- CGEIT certification exam details and process [updated 2021]
- Certified Ethical Hacker (CEH) study guides & resources [updated 2025]
- CompTIA SecurityX resources: Videos, books, tests and more!
- How to get the CompTIA Network+ certification: Requirements and step-by-step instructions [2025 update]
- CySA+ exam objectives: The 4 domains that will be covered
- Reduce security events
- Reinforce cyber secure behaviors
- Strengthen cybersecurity culture at your organization

CompTIA CySA+
Discover the latest salary trends for CompTIA CySA+ certified professionals in 2024. Learn what factors influence your earning potential in the cybersecurity field.


Cybercrime investigator
Cybercrime has hit record levels, with an expected $7 trillion USD to be made from cybercriminal activity by 2021. Investigating these sorts of crimes can be

EC-Council CEH
CEH v13 is the world's first AI-powered ethical hacking certification. Discover what's new, how it compares to v12/v11 and why it's a career game-changer.

CompTIA SecurityX
Explore the expert-level CompTIA SecurityX certification, what to expect on the exam, the career benefits and more.