Wireshark: An open-source forensic tool
"Today we are at a defining moment in the evolution and growth of the Internet. Large-scale data breaches, uncertainties about the use of our data, cybercrime, surveillance and other online threats are eroding users' trust…"
As networks have become more complex, hackers across the globe are launching attacks such as identity/information theft and machine hijacking. These threats affect not only the users of the systems but the administrators and the forensic investigators themselves.
It is necessary to know their origination point to prevent these network-related attacks. Packets traversing across networks, when seized, unveil their true signature This enables system administrators to take ownership and restore systems from damages caused by attackers.
Network attacks can be identified explicitly by analyzing the incoming and outgoing traffic because unusual behavior comes from suspicious patterns of packets.2 A network troubleshooting software and protocol analyzer would help us identify such anomalies.
This article reviews Wireshark, a free and open-source packet analyzer used to capture, analyze and filter packets. This allows a systems administrator to unveil any potential attacks.
The Wireshark tool
Capturing data
Wireshark, formerly known as "ethereal," can be downloaded from https://www.wireshark.org/#download
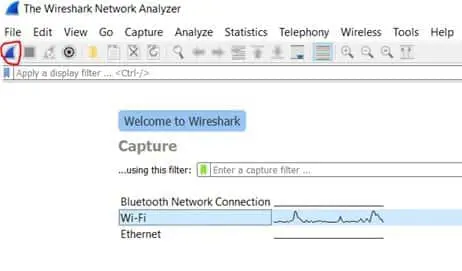
To start capturing data, the application is launched, and an interface is selected as shown below:
Figure 1 – Selecting an Interface for Capture
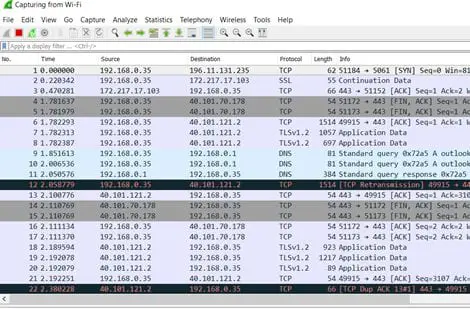
Immediately after the "start capturing" button (as circled in red above) is selected, the packets are displayed in real-time. This is demonstrated in the illustration below:
Figure 2 – Starting a Capture
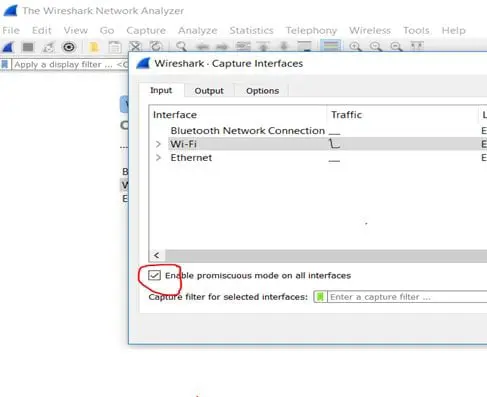
The promiscuous mode, enabled by default, allows all other packets on the same network to be displayed.
Verifying that the promiscuous mode has been selected:
The promiscuous mode can be verified as follows:
- Select Capture
- Select Options
- Select Input tab
- Enable the checkbox as circled in red below:
Figure 3 – Enabling Promiscuous mode
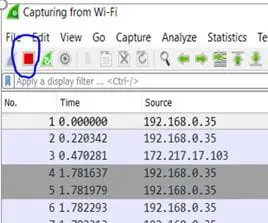
The red stop button (as circled in blue below) may be selected at any time when the capturing needs to be stopped:
Figure 4 – Stopping a Capture
The capture window
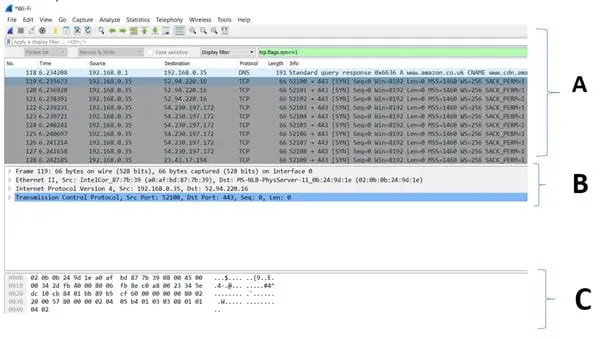
Figure 5 – The Capture Window Pane
The capture window is shown above in figure 6. It consists of 3 different panes, which are as follows:
A: The packet list pane – This displays all the packets in the current capture file.
B: The packet detail panel – This shows the current packet selected in the "Packet List" pane with more details.
C: The packet bytes panel – This shows the data of the current packet, which is selected in the "Packet List" pane. It is displayed in a hexadecimal file format.
Analyzing packet contents
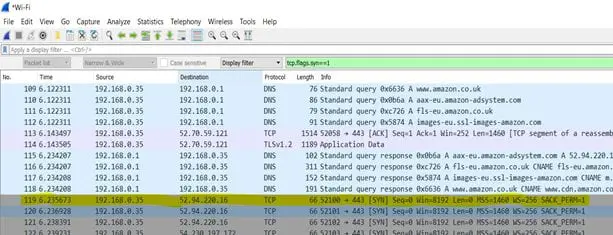
Figure 6 – Analyzing Captured Packets Contents
A new capture is started at this stage, and the web traffic is generated toward amazon.co.uk. After this, the capture is then stopped.
In Figure 5 above, the trace number (119) shows the first synchronization (SYN) packet sent. It has an IP of 192.108.0.35, and the Amazon server has an IP of 52.94.220.16.
The first synchronization determines the start of a TCP 3-way handshake between a client and a server.
Color codes in the "captured packets" pane – What they mean
One useful feature of Wireshark is its packet colorization scheme. Wireshark can be set up to highlight (in color) specific packets. This allows for the easy identification of packets at first glance. This is illustrated in the screenshots below:
Light Purple – TCP Traffic
Figure 7 – TCP Traffic
Light Blue – UDP Traffic
Figure 8 – UDP Traffic
Black – Packet with Errors
Figure 9 – Packets with Errors
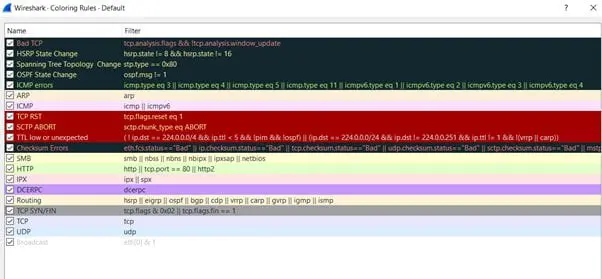
The specific meaning behind each color can be viewed by selecting the "View" menu item and then selecting "Coloring rules," as shown below. Any further enhancements or modifications of the coloring rules can be done from this menu option.
Figure 10 – Coloring Rules
Filtering packets
The Wireshark tool can also be used to filter for the following:
- Specific mac addresses;
- IP addresses;
- IP addresses with conditional TCP ports.
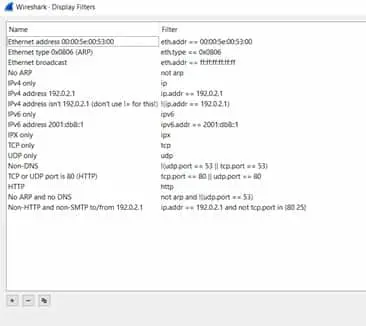
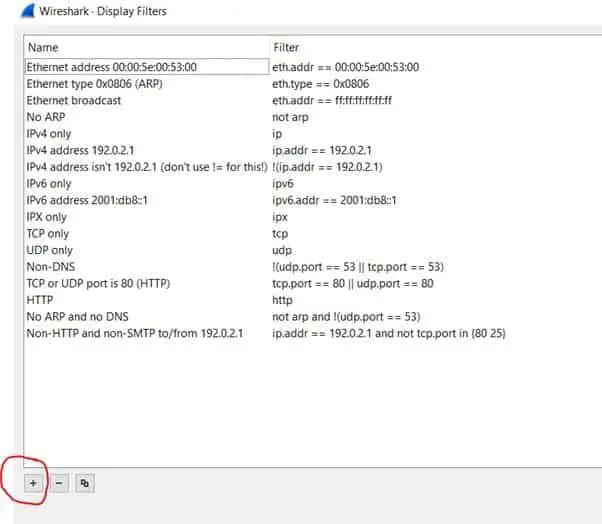
There are 17 pre-defined filters in Wireshark that can be located in the "Analyze" menu, and from there, selecting the "Display Filters" as illustrated below:
Figure 11 – Filtering Packets
Additional filters can be created by selecting the "+" sign (as circled in red below):
Conclusions
The features of capturing, analyzing and filtering packets, as reviewed in this article, reveal how crucial Wireshark is to network forensics. The need for packet analysis is raised because current methods used by most systems administrators only detect network attacks.
It must be noted that Wireshark is not a network intrusion detection system. Its primary purpose is to unveil a broad range of security threats through packet analysis.
Sources


