Portable Malware Lab for Beginners

With the ever increasing cases of malware, many of the youngsters are switching over to analyzing malwares and its various aspects. A simple search in Google will give you information on how to use various tools, but for a newbie, the issue where to begin rather than grasping the information.
There are various other issues related to hardware resources, prevention from getting infected and most importantly, time.
In order to save time and hard work, many will rely on ready-to-use solutions which come in form of a Virtual Machine or an ISO. And no two solutions are alike, they carry different tools and in order to analyze, everyone ends up downloading multiple environments and maintaining those environments.
We fail to realize that most of these environments are built on Linux and most of the tools available for malware analysis are freely available. Instead of downloading multiple ISO images or VM machines, why not build your system?
That way, you will not only learn to maintain your environment but you will also know about the various tools which are available and their usage. The only issue which will trouble you are the constant updates which are required for the tools which are evolving.
Whenever a new anti-malware research environment lands on Internet, all you need to know is what new tools have been provided and deploy the same in your own environment.
In these series of articles, I will be providing you with the installation of commonly used tools which can be found on various Anti-Malware environments but never in the same environment.
Many of you may have limited access to hardware resources and to make the matters worse, some of you may have to fight a hard battle to get hold of the resources. Through this article, you will be able to utilize the available resources in an optimum manner and also overcome certain technical difficulties related to Virtual Systems.
The first thing that a malware researcher requires is a Virtual Machine and cuckoo. Deploying cuckoo on your host machine would essentially mean that in case your system crashes, you have to re-install cuckoo, it is but understood that you would have taken a backup of your VM disks. In such a scenario, the only available option is to deploy a VM and within this VM, deploy cuckoo and other tools.
However, cuckoo too requires a VM to execute the binaries and it is a known fact that with the available solutions (ie. VirtualBox and VMWare), one cannot have nested VMs, except in cases of XEN and ESXI.
For more information visit: https://forums.virtualbox.org/viewtopic.php?f=1&t=20589
We are looking at a scenario similar to this

As it is already known, having been discussed umpteen times, VirtualBox VM within another VirtualBox is not technically feasible. However, there is way out. QEMU, which allows hardware virtualization, within a VirtualBox VM will function without any glitches.
Follow the below mentioned steps to deploy QEMU and along with this installation, we are also installing packages related with cuckoo, yara and ssdeep. However, some of the packages required will be dealt with during their individual deployment.
Please Note: this is a time-consuming and one-time process; however, once your basic setup is through then for the rest of your future, you need to simply update your Guest OS or packages and add newer tools.
Step 1
Choose your Host OS, in this case it is MS Windows.
A: Install Virtual Box on the Host OS
B: Create a Virtual Machine using VirtualBox, which includes a Shared Folder, additional empty VDI disk of 10G and deploy UBuntu 12.4


C: Upon completion of the installation of UBuntu 12.4, install Virtual Box Guest Additions. With this you will be able to access the "Shared Folder", using root credentials.
In order to over come this, you will have to do the following
[plain]
$ sudo su –
# apt-get install gnome-system-tools
By default, Users and Groups is not installed on UBuntu 12.4 and in order to access the shared-folder through a non-root user, this is necessary. VirtualBox creates a "vboxsf" group and in order for a non-root user to access the /media/sf_SharedFolder, it would be necessary for us to add the users to this group. The only reason for carrying out this activity is that we will be creating our VM disks and would be storing them on the Host machine, in order to make our Malware-Lab portable.

Once you have modified the group settings, you will have to logout and re-login for the changes to take effect.
Start "disk management" from within the Guest UBuntu OS and ensure that the additional empty VDI disk is mounted on to the Guest UBuntu OS. The purpose of this disk is to hold the qcow2 files and other essential files, which otherwise cannot be accessed from the SharedFolder by libvirt-bin.
Note for future use:
1: The mount point of the empty VDI disk in this case it is /media/VMs
2: The mount point of the SharedFolder (D:SharedFolder) in this case is /media/sf_VMs
STEP 2
Now that we have our basic setup ready, we move ahead with the installation of QEMU, libvirt-bin and some network / pcap related tools viz. wireshark, tcpdump and ngrep.
[plain]
# apt-get install qemu qemulator qemu-kvm-extras qemu-launcher libvirt-bin virt-manager qemu-kvm ubuntu-vm-builder bridge-utils
# apt-get install build-essential
# apt-get install git-core
# apt-get install tcpdump ngrep wireshark
# setcap cap_net_raw,cap_net_admin=eip /usr/sbin/tcpdump
In order to test that the settings have been deployed correctly:
[plain]
# getcap /usr/sbin/tcpdump
Output: /usr/sbin/tcpdump = cap_net_admin,cap_net_raw+eip
# apt-get install python
# apt-get install python-pip
# apt-get install python-sqlalchemy
# apt-get install python-dpkt python-jinja2 python-magic python-libvirt python-bottle python-pefile
# apt-get install libxml2-dev libxml2-utils
# apt-get install libdevmapper-dev libdevmapper
# apt-get install samba samba-common
# apt-get install python-glade2
# apt-get install system-config-samba
# apt-get install build-essential python-dev
# pip install setuptools
# pip install dpkt
# pip install jinja2
# pip install bottle
# pip install pefile
# pip install pymongo
# pip install argparse
Now that qemu and libvirt-bin has been successfully installed, we can move ahead with the installation of windows. However, before installing windows we need to ensure that the Nested Guest OS will have access to the SharedFolder and also ensure that Bridged Networking is enabled on UBuntu Guest OS.
In order to achieve this we must first create a shared directory and modify the smb.conf.
Edit /etc/samba/smb.conf and add the following.
[plain]
[tools]
path = /media/VMs/share
writeable = yes
browseable = yes
guest ok = yes
create mask = 0755
[/plain]
[plain]
# mkdir -p /media/VMs/share
# chown nobody.nogroup /media/VMs/share
# restart smbd
# restart nmbd
For further assistance / information follow the method described in this article:
https://help.ubuntu.com/12.04/serverguide/samba-fileserver.html
Now that SAMBA has been installed and configured, we move ahead with the bridge. This is essential as we need to simplify the entire process of IP addressing schema and access to the Nested Guest OS via cuckoo.
Modify /etc/network/interfaces to look like this:
[plain]
# cat /etc/network/interfaces
auto lo
iface lo inet loopback
auto eth0
iface eth0 inet manual
auto br0
iface br0 inet dhcp
bridge_ports eth0
bridge_stp off
bridge_fd 0
bridge_maxwait 0
# /etc/init.d/networking restart
To verify the bridge name and other details
[plain]
# ifconfig
br0 Link encap:Ethernet HWaddr 08:00:27:50:bc:4c
inetaddr:10.0.2.15 Bcast:10.0.2.255 Mask:255.255.255.0
inet6 addr: fe80::a00:27ff:fe50:bc4c/64 Scope:Link
UP BROADCAST RUNNING MULTICAST MTU:1500 Metric:1
RX packets:3002 errors:0 dropped:0 overruns:0 frame:0
TX packets:2440 errors:0 dropped:0 overruns:0 carrier:0
collisions:0 txqueuelen:0
RX bytes:2432890 (2.4 MB) TX bytes:184696 (184.6 KB)
eth0 Link encap:Ethernet HWaddr 08:00:27:50:bc:4c
inet6 addr: fe80::a00:27ff:fe50:bc4c/64 Scope:Link
UP BROADCAST RUNNING MULTICAST MTU:1500 Metric:1
RX packets:2990 errors:0 dropped:0 overruns:0 frame:0
TX packets:2520 errors:0 dropped:0 overruns:0 carrier:0
collisions:0 txqueuelen:1000
RX bytes:2482309 (2.4 MB) TX bytes:206506 (206.5 KB)
Now that Bridge and Samba has been setup we now proceed with the download of virtio drivers and saving the ISO in /media/VMs
The driver files can be downloaded from here:
http://www.linux-kvm.org/page/WindowsGuestDrivers/Download_Drivers#Windows_VirtIO_Drivers
http://alt.fedoraproject.org/pub/alt/virtio-win/latest/images/bin/virtio-win-0.1-52.iso
Now that our basic setup has been accomplished, we now move ahead with windows installation
Installing Windows : Method 1: Using VirtualBox
1: From within the Host OS using VirtualBox, create a virtual system which uses .vdi as the harddisk and then proceed with the installation of the windows
2: Upon completion of the installation, copy the .vdi file into the shared folder, which is currently being shared between your Host OS and Linux Guest OS
3: Since our task is to convert from VDI to QCow2 and both these formats are compressed formats, we will have to first convert VDI to RAW format.
NOTE: RAW Format is uncompressed hence ensure beforehand that you have requisite disk-space available.
[plain]
C:> vboxmanage clonehd --format RAW D:SharedFolderwindows.vdi D:SharedFolderwindows.img
3: Login into your Guest OS and issue the convert command to convert the RAW disk to QCow2 image. We will be reading from the SharedFolder and saving the output in the empty VDI mount point which was created earlier.
[plain]
#qemu-img convert t -f raw /media/sf_VMs/windows.img -O qcow2 /media/VMs/windows.qcow2
Installing Windows : Method 2: Using QEmu
1: From within the Guest Linux OS, follow the below mentioned steps
2: Ensure that the Windows ISO is copied into the shared folder
[plain]
# qemu-img create -O qcow2 /media/VMs/windows.qcow2 8G
# qemu -boot d -cdrom /media/sf_VMs/winxp.iso -hda /media/VMs/windows.qcow2 -m 1024
Irrespective of the method used to install MS Windows, we now test it
[plain]
# qemu -hda /media/VMs/windows.qcow2 -m 1024
Press: CTRL+ALT+SHIFT+2 to get "monitor"
Adding The Nested Guest OS: Using Virsh
1: From within the Guest Linux OS follow the below mentioned steps
2: Ensure that the Windows ISO is copied into the shared folder ie. /media/sf_VMs/ or D:SharedFolder
From the UBuntu 12.4 Guest OS
[plain]
$ sudo su –
# virt-manager

Click on Details and then select Storage Pool and then click on small "Green" + sign to add a new storage pool.


Creation of the VM
Step 1

Step 2 : Click on browse and select the storage pool "VM" and then select the qcow2 image.

Step 3

Step 4

Note: We are using NAT, as the default drivers will be made available, once the Nested VM configuration is created we modify the network settings and attach the virtio drivers ISO to the Nested VM
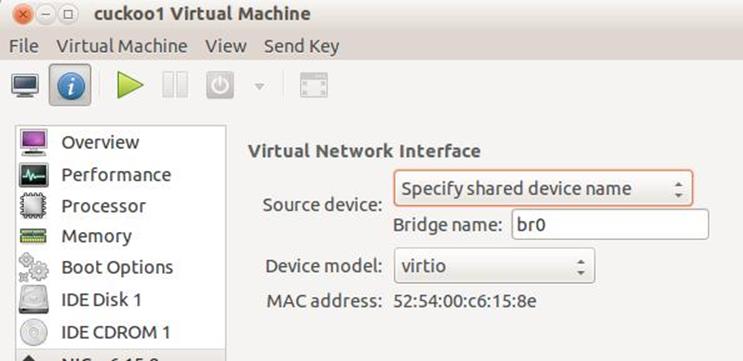
Once this Nested Guest VM has been created modify the configuration by clicking on the VM and selecting "Open". You will be presented with the Configuration of the Nested VM by clicking on "View" and then "Details"
Mount the virtio ISO which had previously downloaded:

Modify the Network Settings to point to the bridged interface.
[plain]
# virsh list –all
Id Name State
----------------------------------
# virsh start cuckoo1
# virsh list –all
After starting the Nested Windows Guest OS for the first time, the system will ask you for interface drivers and you can select these drivers from the mounted CD-ROM. Once all the drivers have been installed, we map the SAMBA Share and make it a permanent Network Drive within the Nested Windows Guest OS.
Since we will be using this Nested Windows Guest OS with cuckoo, we will have to deploy a cuckoo agent on to the nested OS. This is an XMLRPC agent.
[plain]
# git clone git://github.com/cuckoobox/cuckoo.git
# cp /path/to/cuckoo/agent/agent.py /media/VMs/share/agent.pyw
# wget <a href="http://www.python.org/ftp/python/2.7.4/python-2.7.4.msi">http://www.python.org/ftp/python/2.7.4/python-2.7.4.msi</a>
# cp /path/to/python-2.7.4.msi /media/VMs/share/python.msi
From within the Nested Windows Guest OS, install python and then execute agent.pyw
After this point, we move ahead with the creation of snapshots.
Before creating a snapshot, we need to create a snapshot xml file. Note that only these two fields can be modified by the user, the rest of the information will be filled by Libvirt.
[plain]
# cat /media/sf_VMs/snap1.xml
<domainsnapshot>
<name>snap1-cuckoo1</name>
<description>Live Cuckoo</description>
# virsh snapshot-create cuckoo1 /media/sf_VMs/snap1.xml
Domain snapshot snap1-cuckoo1 created from '/media/sf_VMs/snap1.xml'
Command to stop the VM
[plain]
# virsh destroy cuckoo1
Command to verify the snapshots
[plain]
Method 1:
# virsh snapshot-list cuckoo1
Name Creation Time State
------------------------------------------------------------
Method 2:
# qemu-system-x86_64 -hda /path/to/VM.qcow2 -m 1024
NOTE: click in the QEMU window and then press CTRL + ALT + 2 to view the monitor
(qemu) stop
(qemu) info snapshots

In case you find multiple snapshots and you want to delete the snapshot
[plain]
(qemu) delvm ID_NO
Close the QEMU Window to stop the VM.
Note: For some reason when you want to delete the snapshot using virsh
[plain]
# virsh snapshot-delete cuckoo1 snap1-cuckoo1
Note: Only the information pertaining to the snapshot is deleted. In order to delete the snapshot from the qcow2 image file, you will have to use QEMU monitor and delvm command, as shown in Method 2.
At the end of this exercise, we have successfully deployed a nested VM now we move ahead with the installation of the tools required for our Malware Lab.
Malware Lab tools
Now we move ahead with the installations of YARA, ssdeep and cuckoo.
[plain]
# apt-get install ssdeep
# apt-get install python-pyrex python-all python-all-dev # required for pyssdeep installation
# apt-get install subversion libapr1 libaprutil1 libdb4.8 libsvn1
# apt-get install libfuzzy-dev libfuzzy2
# svn checkout http://pyssdeep.googlecode.com/svn/trunk/ pyssdeep
# cd pyssdeep
# python setup.py build
# yara http://pinowudi.blogspot.in/2010/09/installing-yara-on-ubuntu-1004.html
# apt-get install libpcre3 libpcre3-dev
# apt-get install python-dev
# wget http://yara-project.googlecode.com/files/yara-1.7.tar.gz
# wget http://yara-project.googlecode.com/files/yara-python-1.7.tar.gz
Untar and configure YARA.
# tar xvfz yara-1.7.tar.gz
# cd yara-1.7
# ./configure
If there are no errors, make the executables.
[plain]
# make
# make check
# sudo make install
Now add python support…
[plain]
# cd ..
# tar xvfz yara-python-1.7.tar.gz
# cd yara-python-1.7
# python setup.py build
# sudo python setup.py install
You should now be able to call YARA from a shell prompt.
[plain]
# yara
usage: yara [OPTION]... [RULEFILE]... FILE
options:
Now we proceed with the installation of cuckoo
Note: before taking the snapshot, we have already got cuckoo but for the sake of continuity, we re-issue the command
[plain]
# git clone git://github.com/cuckoobox/cuckoo.git
# adduser cuckoo
# useradd -G vboxusers cuckoo
# useradd -G libvirtd cuckoo
Alternatively, you may use "Users and Groups" to add the user "cuckoo" to vboxusers and libvirtd groups. The next step would be to modify cuckoo.conf and change the machine_manage to "kvm"
[plain]
# cat /path/to/cuckoo/conf/cuckoo.conf
[cuckoo]
version_check = on
delete_original = off
machine_manager = kvm
memory_dump = off
Modify the cuckoo/conf/kvm.conf to correspond to the settings of our Guest OS and Nested Guest OS.
[plain]
# cat /path/to/cuckoo/conf/kvm.conf
[kvm]
[cuckoo1]
label = cuckoo1
platform = windows
ip = 10.0.2.16 # This is the IP address of the Nested Windows Guest OS
Now we start up cuckoo and cuckoo's web-interface.
[plain]
# python cuckoo.py
Cuckoo Sandbox 0.5
www.cuckoosandbox.org
Checking for updates...
Good! You have the latest version available.
2013-04-12 15:31:48,937 [lib.cuckoo.core.scheduler] INFO: Using "kvm" machine manager
2013-04-12 15:31:49,422 [lib.cuckoo.core.scheduler] INFO: Loaded 1 machine/s
2013-04-12 15:31:49,425 [lib.cuckoo.core.scheduler] INFO: Waiting for analysis tasks...
Start a new Console
[plain]
# python /path/to/cuckoo/utils/web.py
Bottle server starting up (using WSGIRefServer())...
Listening on http://0.0.0.0:8080/
Hit Ctrl-C to quit.
Normally, when everything has been setup properly you will find that cuckoo is waiting for the samples, however you may find some issues related to the packages. Check out the commonly found errors and how to resolve them.
[plain]
# wget https://pypi.python.org/packages/source/s/setuptools/setuptools-0.6c11.tar.gz#md5=7df2a529a074f613b509fb44feefe74e
#tar -zxf setuptools-0.6c11.tar.gz
#cd setuptools-0.6c11
wget http://downloads.sourceforge.net/project/sqlalchemy/sqlalchemy/0.7.9/SQLAlchemy-0.7.9.tar.gz
tar -zxf SQLAlchemy-0.7.9.tar.gz
cd SQLAlchemy-0.7.9/
wget https://pypi.python.org/packages/source/b/bottle/bottle-0.11.6.tar.gz
tar -zxf bottle-0.11.6.tar.gz
cd bottle-0.11.6
wget https://github.com/defnull/bottle/raw/master/bottle.py and copy bottle.py [path_to_cuckoo]/cuckoo/utils
wget https://pypi.python.org/packages/source/J/Jinja2/Jinja2-2.6.tar.gz
tar -zxf Jinja2-2.6.tar.gz
sudo python setup.py install
At the end of this exercise, we have setup our portable malware-lab with cuckoo and nested VM.
In the next article we will add few more requisite reversing tools in order to complete our Malware Lab.
References:
https://forums.virtualbox.org/viewtopic.php?f=1&t=20589
http://wiki.qemu.org/Main_Page
https://help.ubuntu.com/12.04/serverguide/network-configuration.html
https://help.ubuntu.com/12.04/serverguide/samba-fileserver.html
http://kashyapc.wordpress.com/2011/10/04/snapshotting-with-libvirt-for-qcow2-images/

CompTIA CySA+
Discover the latest salary trends for CompTIA CySA+ certified professionals in 2024. Learn what factors influence your earning potential in the cybersecurity field.

Cybercrime investigator
Cybercrime has hit record levels, with an expected $7 trillion USD to be made from cybercriminal activity by 2021. Investigating these sorts of crimes can be

EC-Council CEH
CEH v13 is the world's first AI-powered ethical hacking certification. Discover what's new, how it compares to v12/v11 and why it's a career game-changer.

CompTIA SecurityX
Explore the expert-level CompTIA SecurityX certification, what to expect on the exam, the career benefits and more.
