Investigating the Crime Scene, Part 1: A Brief Introduction to Computer Forensics and Autopsy

Recommended reading
- http://www.thestudymaterial.com/presentation-seminar/computer-presentation/239-computer-forensics-presentation.html?showall=1
-
First Responder's Guide to Computer Forensics – CERT (search for it on Google)
Introduction
Sometimes out of curiosity you might happen to hack a government computer, and as the adrenaline is working, you forget to erase some of the traces you've done while making the breach. In short, you are doomed…except if you have a plan B…but never mind…you are doomed.
The next step that the government will take is disaster control, if you had done something devastating, and also forensic procedures on the crime scene. Just so you know, hacking a computer is illegal, it doesn't matter if it is a government computer or some random person's computer, it is still illegal. Hacking with permission is known as penetration testing, where both sides define the rules and the target that should be hacked. So if you want to "play" with forensics, just install and make a virtual environment where you can try the tools for forensics and also perform a penetration testing, or hack without violating any rule or law.
This article is just a short guide, so if you want to learn about forensics you cannot do it with reading a short article, it is always better to take a course, read some books or do some researching by yourself. There are thousands of tools and procedures that are implemented differently in every company and country, so in this article I just want to show a simple introduction to forensics and how to use Autopsy for performing the investigation.
The rules, the crime and what will be examined
So what will be the rules for this article? I will have a straight forward scenario, and it will not be complex at all. I will be using one machine for the attacker and one machine for the victim.
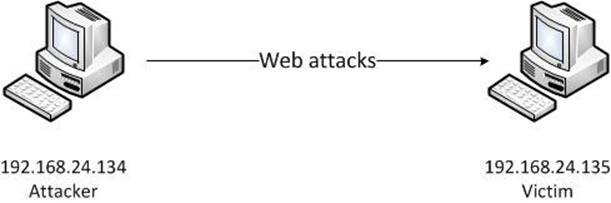
Figure 1. Attack me… I dare you
I will not reveal the whole scenario now, because I want to present the basics first about forensics like: what is all about, why forensics exists, et al.
Through the basics – ohhh……..not again!
With the advancing of technology, people advanced also with their knowledge and skills. Sometimes it happens that people are not using their intelligence only for making everyone feel good, sometimes they make bad things like hacking stuff that is not theirs, in short words… they want to "own" stuff, and have control of certain things. With that kind of action they give not just headaches to others, but back pain also.

They want to corrupt, steal, and tamper data for fun or for some purpose. Those kinds of actions are results of many reasons like….hate, propaganda, ego, selfishness, money, etc…enough of this, let's explain some stuff.
So what is a HDD?
In this article I will describe a scenario for performing a forensics analysis on a Hard Disk, so I will explain this type of memory only. HDD stands for Hard Disk Drive, and like every device this also has unique architecture and purpose. HDD is magnetic data storage device that is used for storing and retrieving information in digital form.
The best description for what is HDD and also more informative is:
http://www.youtube.com/watch?v=kdmLvl1n82U
What is computer forensic investigation about?

While reading for some time about forensics, I concluded that it is an act of collecting evidence with a procedure that must preserve the state of the evidence. That means when collecting the evidence, the state of the evidence must not be changed at all….remember that: not at all. If you fail to preserve the state of the evidence you will be in trouble, because there might be and will be someone else who expects evidence or someone who will recheck the case.
Collection of evidence "in action" on a certain computer first begins with defining the state of the computer like, is it turned off or on. This will help in deciding the next two steps, like if it is turned on there is information that might be stored in RAM (Random Access Memory), and if we turn it off we might lose some information. And if it is turned off, the question is, should we start with duplicating the disk?
There are many facts, first of all, we don't have any information of what happened, like if you have a company that runs a web server, and someday it might happen that your server is hacked. If your company has very sensitive information then you ask yourself is it worth it to chase the guy that hacked your computer (sometimes it might happen that your computer is hacked by your employees) and spending money for a forensic investigation.
The laws for computer forensics will not be described since I am not from the US, though mostly the books and the papers that I have read describe the forensic analyses and procedures used in the US, so if you want to read more about it:
In this article as I mention, I will start with analyzing an HDD, and for that scenario I will make the following steps:
- Making a note about the components of the computer (like serial number, manufacturer, etc.)
- If the state of the machine is active, proceed with capturing and cloning of the memory. If it is not active, start with cloning process of the HDD.
- The next step is to save the image files to a sterile HDD, which will help with preserving the state of the evidence (in this scenario I used my external HDD, formatted in a state that I can't recover anything from it at all)
- Setting up the tools that will be used
- Reconstructing the crime scene
- Defining evidences (if found) and making a documentation about them
- Seeking the best evidence (something might be used for solving the case)
-
The next steps are connected with the law (which I will not explain) procedures about suing, and capturing the criminal etc..
Introduction to Autopsy Forensic Browser
I think that it is better to stop with the theory before I write a whole boring book, let's get to the action. First thing I will describe will be the process of obtaining and cloning the hard disk.
Mount a live Back Track disk to avoid direct access to the hard disk and to avoid any writing to it at all. Start Back Track and in the terminal write "fdisk –l" which will enable to you to list all the partitions and hard disks that are currently available. That is displayed in figure 2.
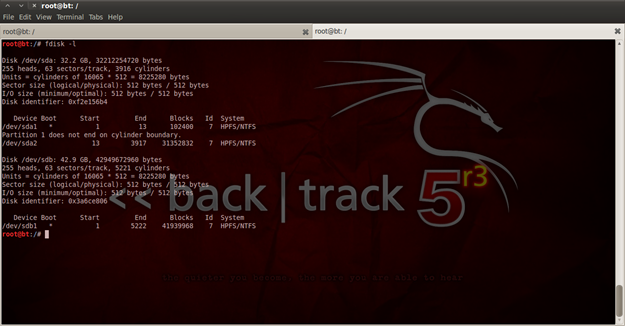
Figure 2. List of storage devices
Now we can see that "/dev/sdb" is my external hard disk, and "/dev/sda" is my hard disk, but because I made the scenario, I know that I don't have anything in the second partition, so I will clone only the first partition (/dev/sda2).
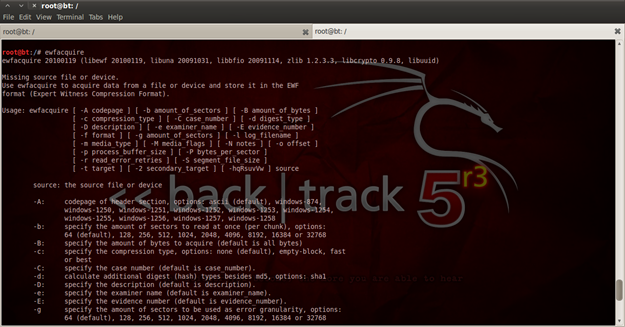
Figure 3. Usage of ewfacquire
Now type "ewfacquire /dev/sda2/" and with that you must enter some information about the whole case. Here is what I have entered (displayed in figure 4):
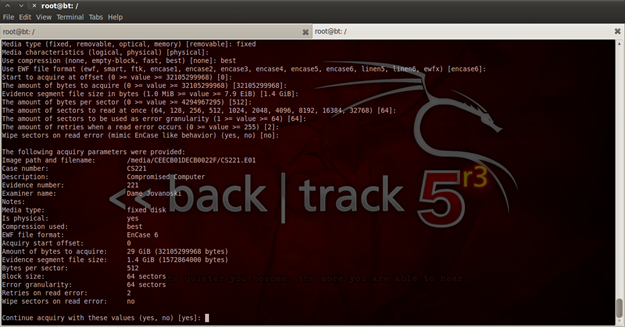
Figure 4. Cloning a disk partition
The next step is to wait for the process of cloning to finish; the time of cloning depends of the size of the partition or the hard disk (you know it makes sense).
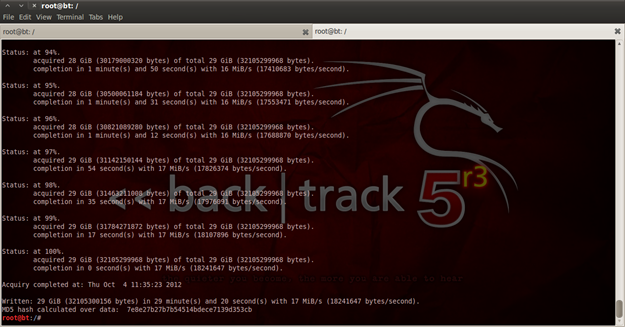
Figure 5. I have waited so long that I fell asleep
So now we have the partition in files which numbers may differ because of the size of the partition/disk. I move the files to my external hard disk. The result of it is displayed on figure 6.
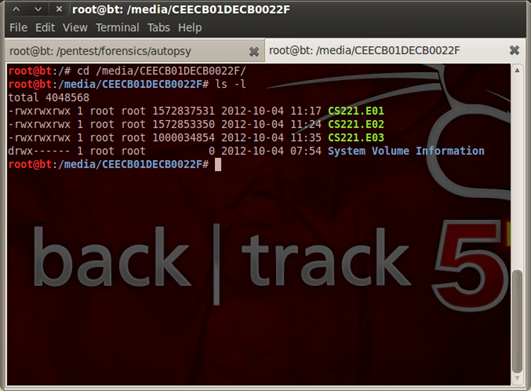
Figure 6. Cloned partition
The next thing to do is configure Autopsy for the investigation. Just so you know, Autopsy is a graphical interface to The Sleuth Kit, which is a collection of tools. They could be used in different OS platforms like Windows and Linux. With the starting of Autopsy (as you can see from figure 7), you need to configure it by entering the directory which will contain the information about the evidence you will collect.
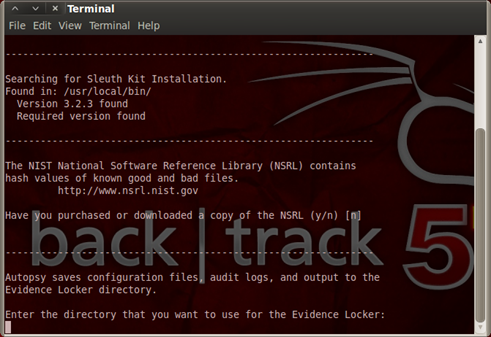
Figure 7. Configuring Autopsy
After entering the directory, open the link that points to "localhost", and open the user interface of Autopsy.
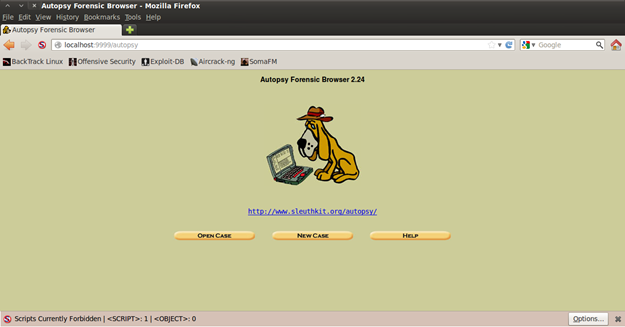
Figure 8. How Autopsy looks
As you can see, we have three options to choose from: Open Case (that is if you previously have created one), New Case (that is if you want to open a new case), and Help (I will not explain what is this for). In order to create a new case, click that New Case button and something as displayed in figure 9 will appear.

Figure 9. Creating a new case
So when you create a new case, you need to enter Case Name, that is like a serial number of the case (you need it as an ID for the current case), then the description about the case (you insert here any clue or information you have about the case) and the last is inserting the name/s of the investigator. In our scenario I pretend to have no idea what has happened at all.
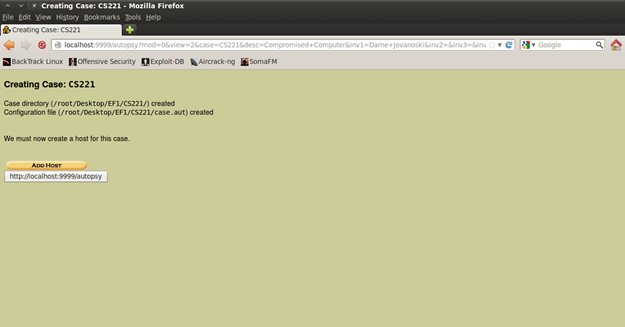
Figure 10. Case created
The next thing to do is add the Host (computer) that will be investigated. The Host Name is the name of the computer that is going to be investigated, next is the description and notes about the computer (I entered here the device description and also what is examined).
About time zone and the rest of the fields, we do not have any information about the device we are examining, so we leave these fields (just to know time zone is for the files you examine, sometimes it might happen you have a case from a different time zone, the same is with the time skew where you adjust manually how many seconds the computer was out of synchronization, path of alert hash database is an optional database of hash for files that are marked as bad).

Figure 11. Adding the host
When you create the case and add the host you will see a menu of options (figure 12), where you need to add the images from the cloned hard disk for analyzing.
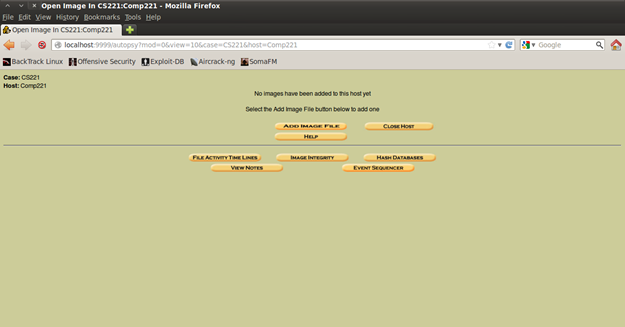
Figure 12. The case
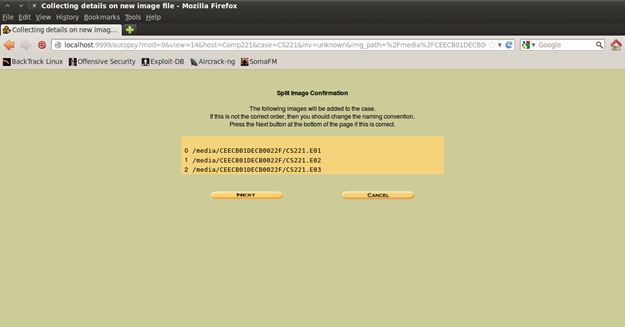
Figure 13. Adding the images
Add the images with "CS221.*" and define the type of image. The choice depends on what kind of image you have created (is it a partition image or disk image). In my scenario I have create a partition image (volume image).
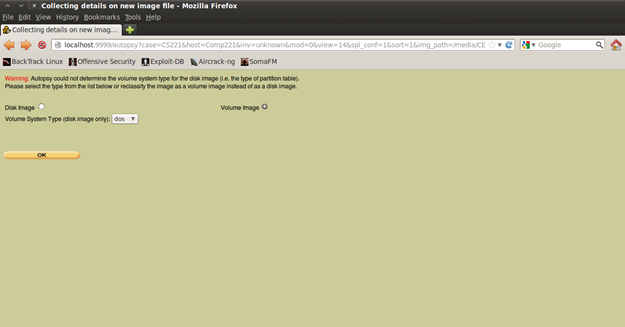
Figure 14. Defining the type of image
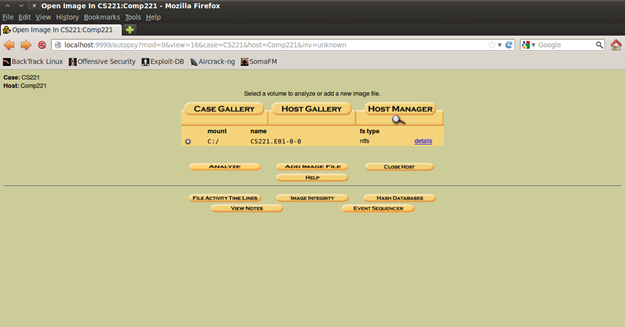
Figure 15. Last step…case set for investigation
This is the last step of this article, wait until the next part where I will describe the features that follow when adding the images and the details of the investigation.
Conclusion
As I said, this is not the only way of solving a crime. There are thousands of tools you can use to find more and more clues that will help you in solving the case and capturing the villain. This is may not be the best article you have read about forensics, but I must adjust it for everyone to understand and to explain that forensics is very important part of our digital society.
Today there are a lot of people that might be a threat for your business, and if you are a serious competitor it's not bad to have an incident response team who also has the skills of a forensic investigator, because someday they might save your head…..I am just kidding, but I want to tell you that not always will your computers and company be 100% protected, so if plan B fails, always have plan C for just in case, you never know when you are going to use it.
References

CompTIA CySA+
Discover the latest salary trends for CompTIA CySA+ certified professionals in 2024. Learn what factors influence your earning potential in the cybersecurity field.

Cybercrime investigator
Cybercrime has hit record levels, with an expected $7 trillion USD to be made from cybercriminal activity by 2021. Investigating these sorts of crimes can be

EC-Council CEH
CEH v13 is the world's first AI-powered ethical hacking certification. Discover what's new, how it compares to v12/v11 and why it's a career game-changer.

CompTIA SecurityX
Explore the expert-level CompTIA SecurityX certification, what to expect on the exam, the career benefits and more.
