Web Services Penetration Testing, Part 2: An Automated Approach With SoapUI Pro

In the previous article, we discussed how the sudden increase in the use of web services makes it an important attack vector. Also, we covered different components of web services, different elements of WSDL, their uses, where to start, and how to perform penetration testing.

11 courses, 8+ hours of training
In this article we will be focusing more on automated tools available for web service penetration testing.
Tools
Tools play a very important role in any type of penetration test. But unfortunately, the availability of tools to test web services is limited, compared to web applications. The majority of web service testing tools are built for quality assurance and not for security testing. The approach used to conduct web service testing are mostly from developer's perspective, and precautions are taken such as XML firewalls, to reduce the risk false positives of web service based attacks.
Due to that, a pen tester has to face a lot of problems while conducting web service penetration testing. But there are still certain tools which help to automate web service penetration testing, and we will go through each of them in this article.
The first tool we're going to use specializes in web services. As I think most of you now have guessed, it's SoapUI by SMARTBEAR (http://www.soapui.org).
SoapUI is the only popular tool available to test for soap vulnerabilities. But to automate the test, we need to use SoapUI Pro. SoapUI comes in two versions. The first is SoapUI (open source), the second is SoapUI Pro (the commercial version). There is a huge difference between these two tools. The main advantage of SoapUI Pro over SoapUI is that it's able to automate a security test. SMARTBEAR also provides a fourteen day free evaluation of SoapUI Pro.
SoapUI Pro
We will test the web services behind http://www.testfire.net/bank/ws.asmx?WSDL by using SoapUI Pro. To automate a test, first we need to open our SoapUI Pro tool. Then click on Files, New SoapUI Project. It will open a window as shown below.
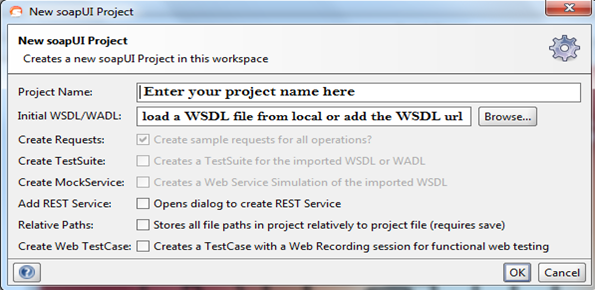
Img1: New SoapUI Project window
In this case, we're testing the web services of testfire. I will use testfire as the project name, and I will use a WSDL URL for testing. As you can see, the Create Requests option is enabled by default under New SoapUI project. That allows SoapUI Pro to extract all the functions and their requests individually from WSDL.
We can start a test with the default settings, but as we're focusing on automated testing, its better to enable Create TestSuite.
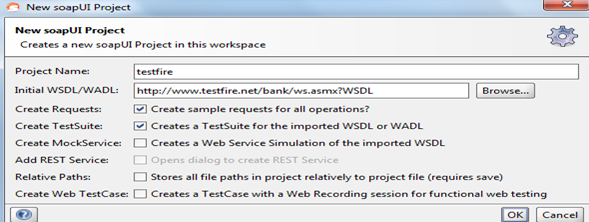
Img2: New soapUI project window with selected options
After that, click on OK to load all the definitions from WSDL. After loading the definitions, a new Generate TestSuite pop-up window will appear. That's because we've enabled the Create TestSuite option.
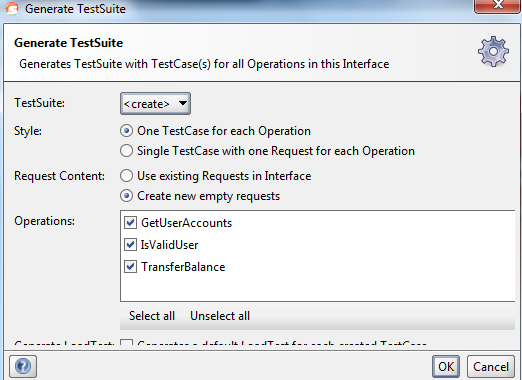
Img3: Generate TestSuite Window
If you want to play with the options, do so. But, let's leave it just like that and click on OK. When you will click on OK, you'll be prompted by another window to enter name of the test suite.
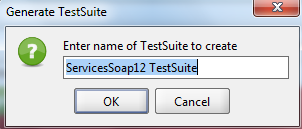
Img4: Enter name for TestSuitewindowE
Give it a name, and click on OK. These two Generate TestSuite steps will continue according to the number of services present in WSDL. In our case, two services are present in WSDL. The first is "Services soap." The second is "Services soap12." After completing the process, you're ready to start security testing.
SoapUI Pro also shows you your test suite properties.
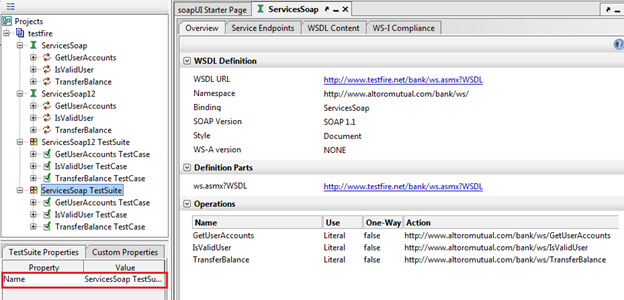
Img5: soapUI Pro window
It also allows you to add a property in the property list, as shown below.

Img6: Add property window
SoapUI Pro allows us to see properties in each level, whether it's for test suite or any operation test case, or request level.
Now, before we automate the security test, we must understand the request we are going to use for this. Let's say we'll test the ServiceSoapTestsuite service and in there we are interested testing GetUserAccountsTestCase. Click on GetUserAccountsTestCase. You will find test steps, load tests, and security tests.
Click on test steps to find the request used. Then, click on that request to open it in the request editor.
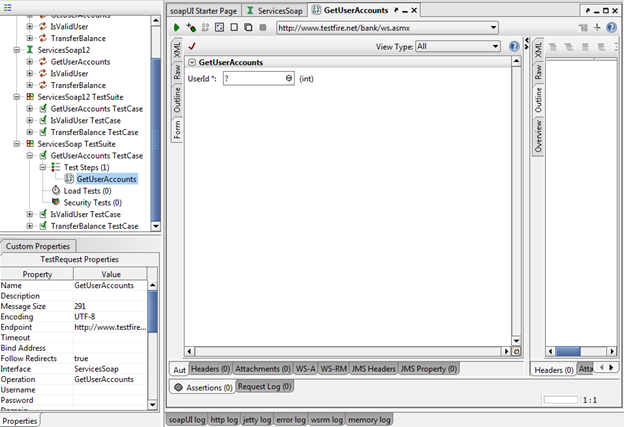
Img7: Form View of request editor
As you can see above, by clicking on the GetUserAccounts request, it opens in a request editor. By default it opens in form view. SoapUI Pro allows us to see a request in four different views; XML, raw, outline and form.
We can change the view any time, by clicking on any of the four tabs present in the top left corner of the request editor. Along with that, SoapUI Pro also shows the request property in the bottom-left corner of the window.
You can use any view you want for testing, but for better understanding, we will go for the xml view. By clicking on the XML view, you will get the XML of the GetUserAccounts request.
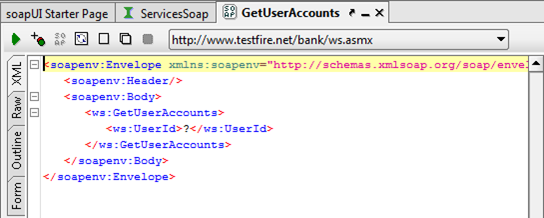
Img8: Xml view of request editor window
So, as we discussed in our previous article in the "SimpleObject Access Protocol (SOAP)" section, the entire SOAP message is packed in a SOAP envelope which contains a SOAP header and a SOAP body. The most important thing, from a security tester's point of view, is the value of the "UserId" parameter.
So to test the request, we must provide a value with the required data type in place of the "?" symbol. Generally, we must fuzz this parameter with different types of values of the required data type, to check the result. Also, we can look at other data type values to check the proper implementation of input validation. That's usually done in manual testing. We'll focus on that in the next part of the article.
It's simple to find the required data type of a parameter. You can find required data type information from the form view.
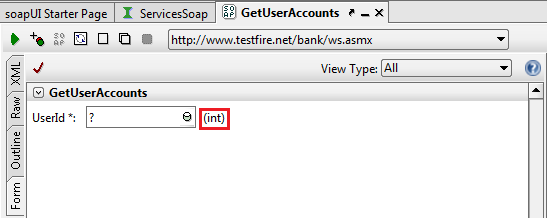
Img9: Form view
Enter any integer value in the XML view to replace the "?" symbol. Click on the green arrow mark on the top left corner of the request editor window to submit a request to the specified endpoint URL. You'll find a response in the next window.

Img10: Xml view
The XML response in the response window doesn't contain an error message. That means we executed the GetUserAccounts request properly.
Automation of a Security Test
To automate a security test, first we need to create a new security test. To create a new security test, right click on security test, under the Services Soap Testsuite. Click on new security test and a new window will open.
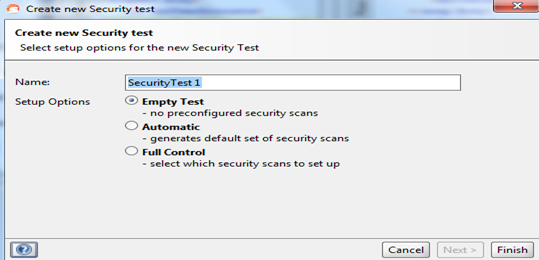
Img11: Create new Security test window
The new window comes with a name option. Type in any name you want. Under this setup, the three options are Empty Test (add a test with no preconfigurations), automatic (generates default set of security scans) and Full control (to customize your test options.)
As we want to automate the security test, we can choose any option between automatic and full control. When choosing the automatic option, it will test for each and every vulnerability present in its checklist. Its checklist contains nine types of security scans.
- Boundary scan
- Cross site scripting
- Fuzzing scan
- Invalid Types
- Malformed XML
- Malicious Attachment
- SQL Injection
- XML Bomb
- Xpath Injection
Usually, if you're doing black box testing, and you don't know the function of a web services request, then it's better to choose the automatic option and run all the scans blindly. But if you're doing grey box testing, or you have an understanding of the function used, then it's better to opt for full control to customize your test, which will save a lot of time.
Here, I'll use the full control option to demonstrate how to choose options and why you should. Click on the full control option, and click on next. A new window will open.
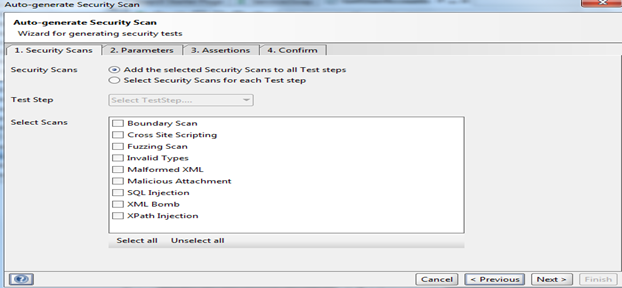
Img12: Security scans tab
You'll see two options. Choose the first one to select the same scan, or the second for different security scans for each test step. Use the default for the first option. In select scans, you can select the scans you think the request might vulnerable to. You can select all of them, but it'll be very time consuming. So select only SQL Injection, and click on next. You'll go to the parameters tab.
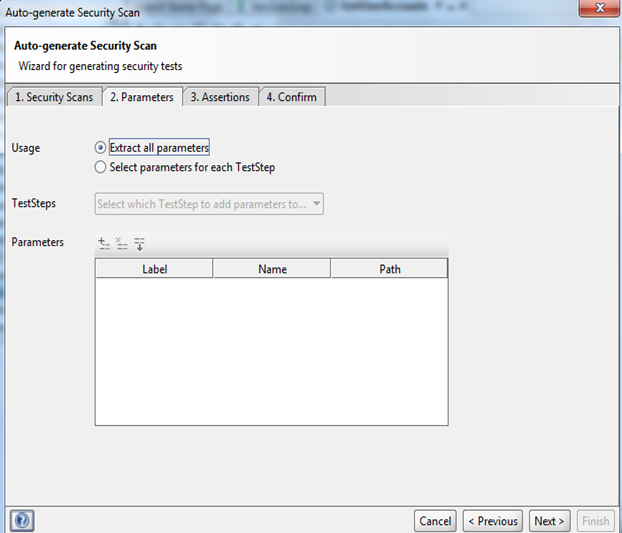
Img13: Parameters tab
By default, SoapUI Pro will extract all the parameters. You can extract parameters by selecting the second option and choosing them from the TestSteps dropdown window.

Img14: Parameters options
SoapUI Pro also allows you to add any parameter, and remove any parameter from the list. Click on next to open the Assertions tab.
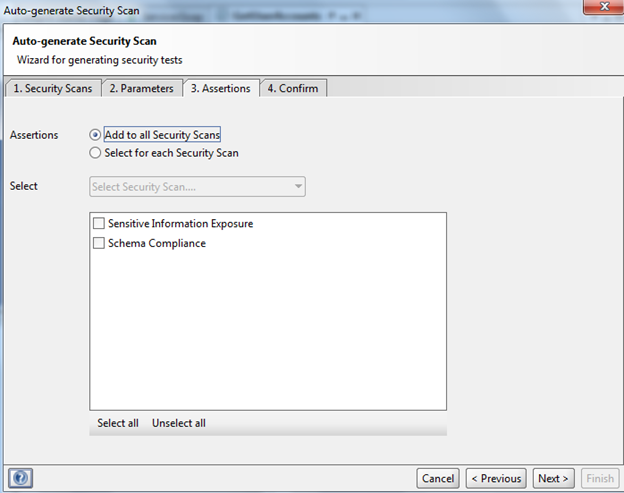
Img15: Assertions tab
That tab is most useful in grey box testing. By checking the sample requests, we can add some data or pattern which is sensitive. If in any test, SoapUI Pro finds the same value in response, it will generate an error to avoid the disclosure of sensitive information. In our case, choose select for each Security Scan option, and select Sensitive Information exposure.

Img16: options
Click on next to move to the confirmation tab, where all the options we selected are shown in a table.

Img17: Summary
Then, click on finish to open a new window to start an automated test.

Img18: Security test window
We've selected only the SQL Injection test for the GetUserDetails request as it appears in the security test screen. Click on the green arrow button in the top left corner to start an automated test.
After completing the test, the window will look like the image below.
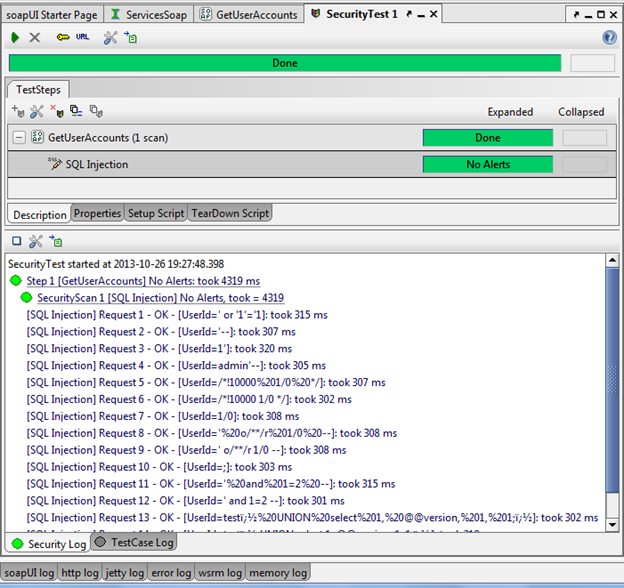
Img19: Security test results
As you can see from the above image, there's no alert triggered, as there's no sensitive information in any of the responses which come while using different payloads. Click any request to view the request and its response.
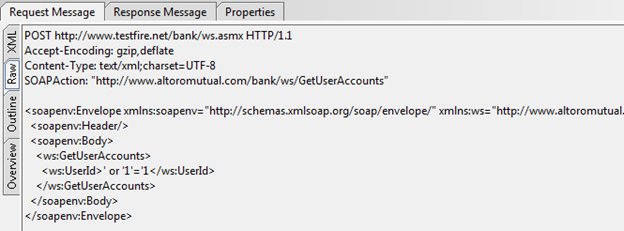
Img20: Sample Request

Img21: Sample Response
When the test is complete, you need a report. SoapUI provides a feature to create a report of the test, by clicking on the create a report for this item button, which is present at the top.

Img22: Report Generation option
Sometimes, you need the log to store as a proof of the test. SoapUI Pro also provides the option to store the log, by clicking on exports the log to a file button.

Img23: Save log option
Conclusion:
This is how SoapUI Pro allows us to automate a security test for different requests. There are other tools available in the market to provide automated web service testing. But SoapUI Pro is a specialized web service tool which can be used for functional testing, load testing, security testing and other different types of testing. This tool plays a vital role in testing web services.
Reference:
http://www.techrepublic.com/blog/software-engineer/how-to-test-web-services-with-soapui/
http://cdn.softwaretestinghelp.com/wp-content/qa/uploads/2006/12/Automated-Testing.png


