Cryptography Fundamentals, Part 4 – PKI
PKI
PKI (public key infrastructure) is a hybrid of symmetric and asymmetric encryption. The handshake uses asymmetric encryption to exchange the secret key used for symmetric encryption. Once the secret key is exchanged, the rest of the communication uses symmetric encryption. Better performance can be enjoyed with increased security. PKI is a hierarchical model which is comprised of the following components:
Download the Cryptography Fundamentals eBook (FREE)
- Certificate Authority (CA): Issues certificates for requests. It can be in-house or a trusted third party such as Verisign, or COMODO.
- Registration Authority (RA): Performs background checks on the requests received from end points to avoid issuing certificates to a bogus entity.
- Certificate Revocation List (CRL): A list of the certificates which are no longer trustworthy.
- End point entities: They make requests for certificates to prove their identities.
- Certificates Repository: The repository contains a list of issued certificates. End point entities can retrieve them to verify corresponding servers. For end users, it's usually located in the web browser.
How SSL/TLS works
SSL (Secure Socket Layer) is a secure communication protocol that provides privacy and reliability between two servers or applications. SSL version 3.0 is the current version used in the internet community. But because of recent attacks like POODLE on SSL 3.0, it is now advised to remove the usage of SSL 3.0 altogether and configure TLS for secure transmission of data. TLS (Transport Layer Security) is designed to provide a complete cryptographic security layer to the confidential information transmitting between servers.TLSis built onto two layers i.e. TLS record protocol and the Handshake protocol.
Now since we understand what SSL and TLS are at the very basic, now we will learn about how communication takes place between clients and servers over secure channels.
Let's use PayPal homepage as an example. In the below screenshot there's a green padlock icon located at the start of the URL bar. Clicking on it will show you the certificate details. HTTPS indicates that the connection is secured over SSL or TLS.
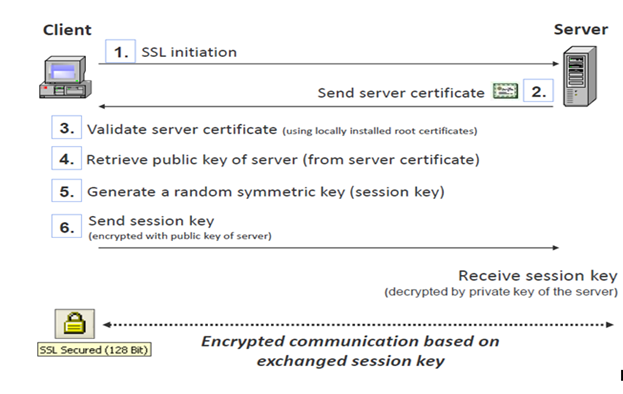
Here are the steps taken between a client and a server.
- The client makes a request over SSL.
- The server responds with a certificate.
- Local certificates are stored in the browser. The browser will validate the certificate with a local certificate. If the certificates aren't in the browser, certificate details are requested from the signing CA.
- After validating the server certificate, the browser retrieves a public key from it. The public key is stored in the certificate.
- The browser will generate a random session key, and encrypt the packet with the public key of the server and send it to it.
- The server receives the request, and decrypts the packet using its private key.
- Further communication will take place using that random session key.
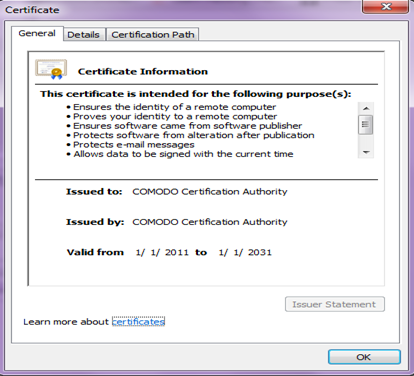
Certificate Inspection
Here's a sample certificate issued from COMODO.
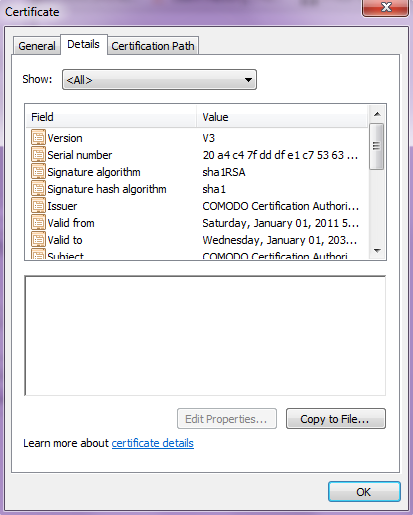
Certificate Parameters
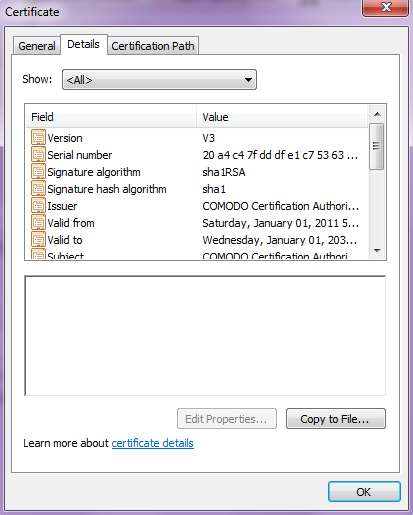
- Signature algorithm: It's used to sign the certificate.
- Issuer: The CA which has certified the certificate.
- Valid From and Valid To: The certificate's validity period.
-
Public key: The most important aspect. Since the certificate is public, it contains the public key.
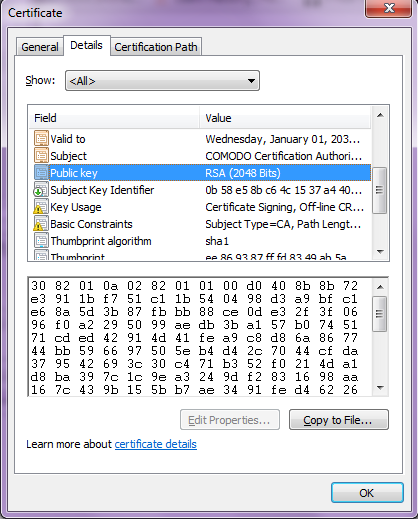
- The private key corresponding to the public key is only controlled by the client.
- Key usage determines the usage of the public key.
Certificate Creation
We'll learn how to create a certificate using open source tools GnuPG and Kleopatra.
"GnuPG is an OpenPGP standard which provides features like encryption and signing data, communication, provides a versatile key management system for all kinds of public key directories."
"Kleopatra is a certificate manager and a universal crypto GUI. It supports managing X.509 and OpenPGP certificates in the GpgSM keybox and retrieving certificates from LDAP servers."
Certificate Creation using GnuPG
After installing GnuPG , the first step is to learn how to create a certificate. Open GnuPG and Kleopatra. Here's Kleopatra's Certificate Administration screen. It shows all the certificates being created in GnuPG.
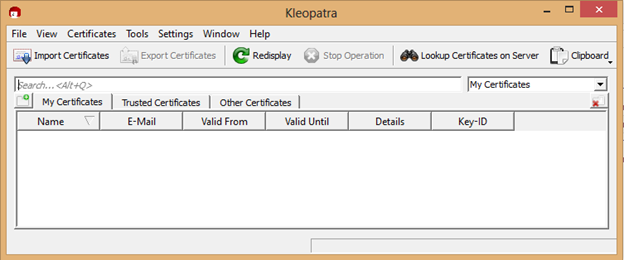
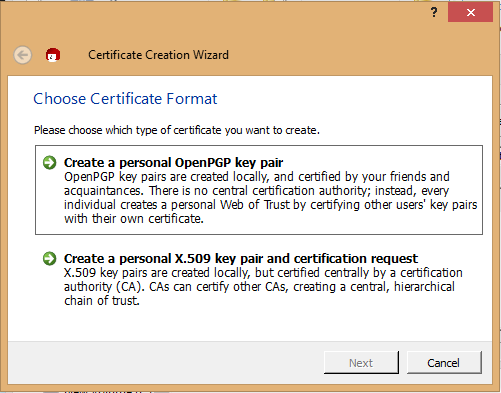
There are two types of certificates that can be created, X.509 and PGP. The difference is that in OpenPGP key pairs can be created locally and certified by anyone. In X.509, certificates needs to be certified by a Central Certification Authority (CA).
Create a OpenPGP certificate
-
Click on File > New Certificate
-
Select OpenPGP key pair.
-
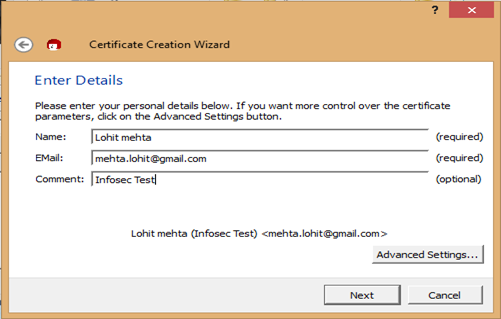
Enter your name and email address.
-
Click on advanced settings to select the functionality and the key strength. We selected 2048 bit RSA, for signing and encryption.
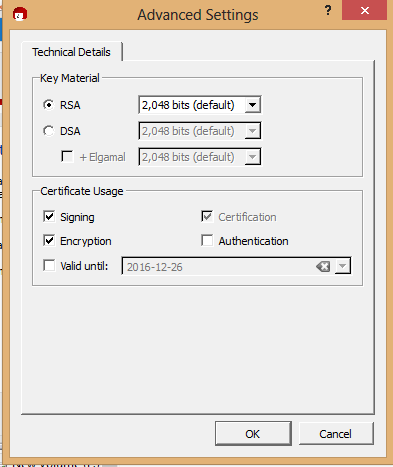
- Click on "OK".
-
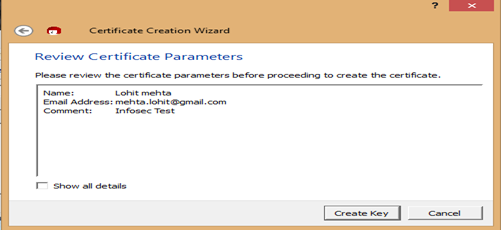
Confirm the details below, and click on "Create Key."
-
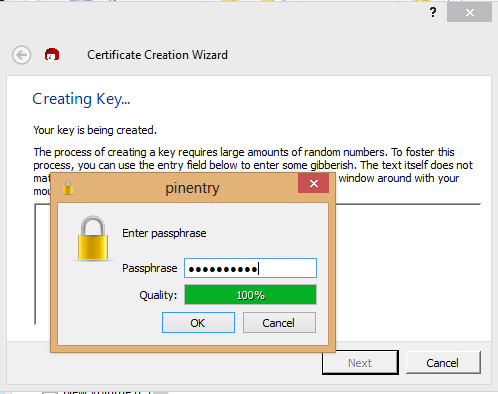
Enter a passphrase and click "OK". Quality measure indicates the strength of your passphrase.
-
If the passphrase is accepted and all the required details are entered, a key pair is created. A 40 digit fingerprint is generated. OpenPGP is displayed. This fingerprint identifies the certificate as well as the user.
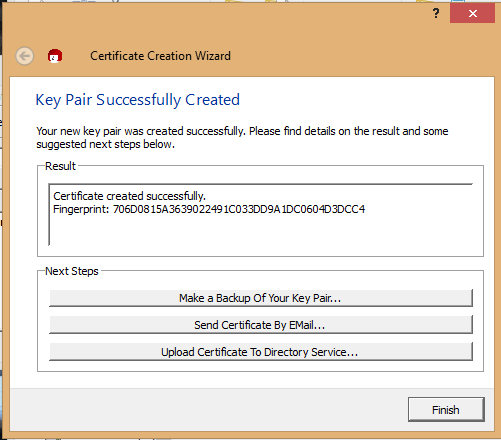
Next after creating a fingerprint, make a backup of the private certificate.
- Click on "Make a backup of your key pair".
-
Select the path where the public and private key pair should be exported.
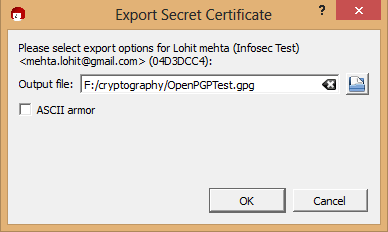
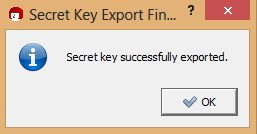
- Here's message to confirm that a secret key has been successfully exported.
Here's how to create a X.509 certificate. A X.509 certificate needs to be signed from a Certificate Authority. We'll use cacert.org, a non-commercial CA.
Creation of X.509 certificate
- Click on File > New certificate
- Click on X.509 certificate.
-
Enter the following details.
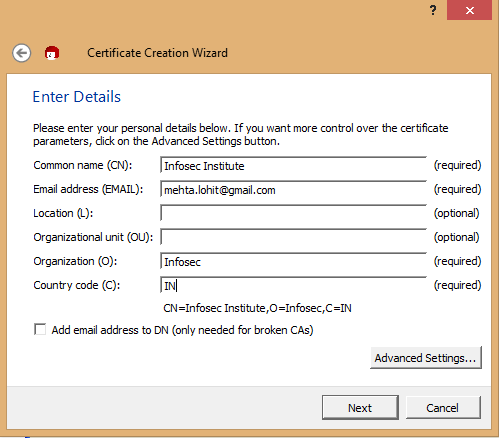
-
Click on next.
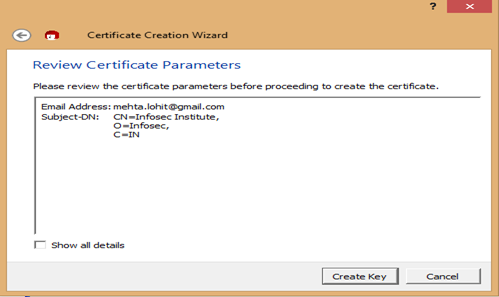
-
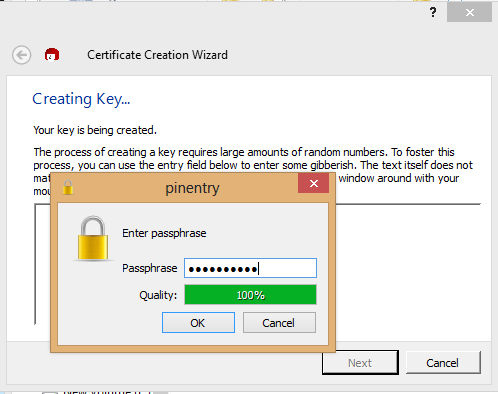
Enter a passphrase and click "OK". Quality measure indicates the strength of your passphrase.
-
If your passphrase is secure enough and all the required details are filled, you'll see this message.
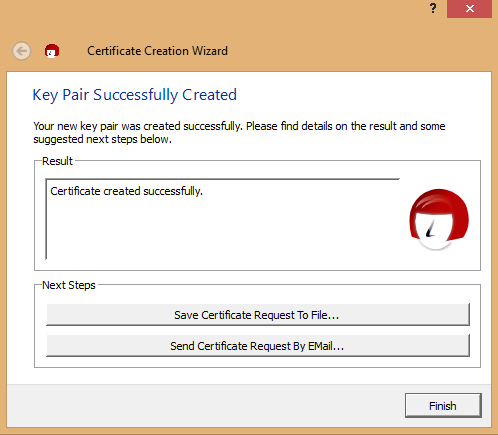
The request has to be sent to a CA by saving the key pair to a file in a p10 format or by sending the request directly in an email attachment.
To view the details of the certificate, double click on the certificates that are listed in Kleopatra.
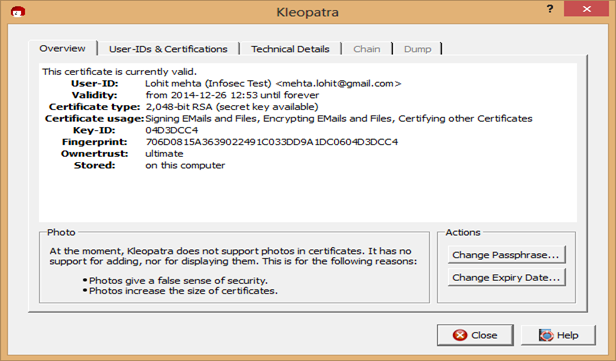
We can change the certificate's passphrase and the expiry date.


